A dehumidifier leaking from the bottom usually points to a misaligned or damaged water bucket, a loose drain-hose connection, a blocked gravity drain, an incorrectly fitted drain plug, melting frost, or an internal collection-tray problem. Start by switching the unit off, unplugging it, drying the floor, and identifying where the first fresh drop appears. Most external bucket and drainage problems can be checked without opening the cabinet.
This guide is primarily for portable dehumidifiers with a removable bucket, gravity-drain connection, or built-in pump. Whole-home systems use different condensate drainage arrangements and should be serviced according to their installation and manufacturer instructions.
Quick Answer
A dehumidifier leaking from the bottom most often has a cracked or misaligned bucket, a loose or blocked drain hose, an incorrectly fitted drain plug, an unlevel cabinet, or frost that is melting over the collection path. Unplug the appliance before checking the bucket, hose, filter, drain outlet, or user-accessible drain plug.
Key Takeaways
- Switch off and unplug the dehumidifier before touching the bucket, hose, filter, drain plug, or cabinet.
- Dry the appliance and floor first so you can see where fresh water appears.
- For gravity drainage, keep the hose short, straight, below the outlet, and free of loops or kinks.
- A bucket must sit squarely beneath the collection path and engage the bucket mechanism required by the model.
- If no drain hose is being used, check that the model’s continuous-drain cap or plug is installed correctly.
- Melting frost or residual condensate after shutdown or movement can cause a delayed leak.
- Stop using the unit if water reaches electrical parts, the cord becomes hot, the breaker trips, or the model is under recall.
At a Glance
| Time Required | Varies by cause; start with external bucket, drain, hose, and leveling checks before considering service |
| Difficulty | Easy for bucket and hose checks; professional service for internal leaks |
| Tools Needed | Towels, flashlight, level, clean water, soft drain brush or pipe cleaner, and replacement hose washer if required |
| Cost | Varies; cleaning or rerouting may require no new parts, while a hose, washer, bucket, pump, or professional repair adds cost |
Warning: Switch off and unplug the dehumidifier before removing the bucket, disconnecting a hose, cleaning the filter, or inspecting the cabinet. Do not touch a wet plug or outlet while standing in water. If water has entered an electrical compartment, leave the unit unplugged and arrange qualified service.
Why Is My Dehumidifier Leaking From the Bottom?
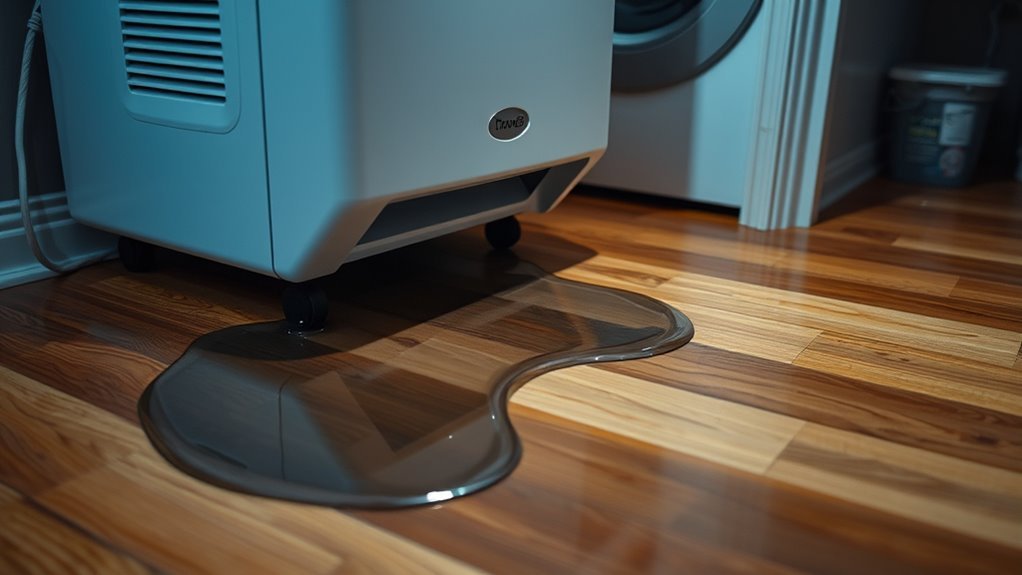
If your dehumidifier is leaking from the bottom, the water is usually escaping from the removable bucket, a gravity-drain connection, a pump hose, a drain port or plug, a frost-covered coil or collection tray, or an internal drainage component. The location and timing of the first fresh water often narrow the cause quickly.
| Where water appears | Likely cause | First check |
|---|---|---|
| Front or bucket side | Cracked, full, tilted, or misaligned bucket | Empty, inspect, and reinstall the bucket |
| Rear drain connection | Loose fitting, missing washer, damaged hose, or blocked outlet | Inspect the connector and hose slope |
| Rear drain port with no hose attached | Drain cap, plug, or bung loose, missing, or installed incorrectly on a model that requires one | Check the model’s continuous-drain setup instructions |
| Pump-hose connection | Loose pump tube, blocked line, disabled pump mode, or pump fault | Check the model’s pump instructions |
| Under the center of the cabinet | Overflowing internal tray, cracked pan, blocked internal channel, or melting frost | Unplug the unit and inspect only user-accessible parts |
| Only after shutdown | Ice thawing or water remaining in a sagging drain hose | Look for frost and correct the hose route |
| After moving the unit or removing the bucket | Residual condensate or water spilled into the cabinet during movement | Keep the unit upright and follow the manual’s shutdown and bucket-removal procedure |
Locate the Leak Before Changing Parts
- Switch off and unplug the dehumidifier.
- Empty the bucket and dry the bucket, cabinet, hose connection, drain-port area, and surrounding floor.
- Place dry paper towels beneath the front, center, and rear of the unit.
- Inspect the bucket, drain plug, and external hoses before reconnecting power.
- After everything is dry, run the unit briefly under close supervision only if no electrical part, plug, cord, or outlet became wet.
- Watch for the first paper towel to become damp. That location usually narrows the problem to the bucket, hose, pump, drain port, or internal drainage path.
Pro Tip: Photograph the hose routing and bucket position before removing anything. The picture makes it easier to restore the original setup and can help manufacturer support diagnose the leak.
Check the Water Tank and Float Switch
The removable water tank, also called the bucket, must sit flat beneath the condensate collection path. It must also engage any bucket-presence or full-bucket mechanism required by your model. A cracked, warped, overfilled, or incorrectly seated bucket can allow water to spill onto the floor.
Inspect the Tank for Cracks
Remove the bucket and inspect it under bright light. Drying it first makes hairline cracks easier to see. Pay particular attention to molded seams, corners, the handle mounts, the bottom edge, and the area around the float.
| Check | Action |
|---|---|
| Tank walls | Look for hairline cracks, whitening, bulges, or warping |
| Molded seams | Check for separation or slow seepage |
| Bottom edge | Look for chips, punctures, or abrasion |
| Handle mounts | Check for stress cracks caused by carrying a full bucket |
| Float area | Remove visible lint or mineral residue without forcing the mechanism |
| Damage found | Replace the bucket with the correct model-specific part |
A model-correct replacement bucket is more reliable than a temporary patch. Adhesives may not bond reliably to wet, stressed plastic, and a failed patch can release the water stored in the bucket.
Test the Bucket for a Slow Leak
A bucket can seep even when no crack is obvious. To separate a bucket problem from an appliance problem, test the bucket away from the dehumidifier.
- Remove the bucket, empty it, and dry the outside completely.
- Place it in a dry sink, shower tray, or tub on top of dry paper towels.
- Add clean water only to a normal operating level below any maximum-fill mark.
- Leave the bucket undisturbed and check the paper towel and molded seams for fresh moisture.
- If water appears beneath the isolated bucket, replace the bucket with the correct part before testing the dehumidifier again.
Test Float Switch Movement
Many dehumidifiers use a float or bucket switch to stop operation when the tank is full or removed. With the appliance unplugged, check only the parts that are clearly user-accessible. The float should move through its normal path without scraping, binding, or catching on debris.
- Remove lint, scale, or debris with a damp cloth.
- Do not bend the float arm or force a switch.
- Reinstall removable float parts exactly as shown in the owner’s manual.
- Slide the bucket fully into its guides until it sits squarely.
- If the manual describes a bucket-present or full-bucket indicator, confirm that it responds as the manufacturer specifies.
If the float is damaged, loose, or inaccessible without opening the cabinet, stop and contact the manufacturer or a qualified technician.
Fix a Clogged or Kinked Drain Hose
When continuous gravity drainage is in use, the hose must carry water away without a pump. That requires a clear route that remains below the drain outlet. A loose fitting, missing washer, upward loop, sag, clog, or submerged hose end can cause water to back up or escape around the connection.
If your main problem is that the bucket fills while little or no water reaches the hose, see the dedicated guide to why your dehumidifier is not draining through the hose. The checks below focus specifically on hose problems that can cause a floor leak.
Check the Hose for Kinks
| Check | What to look for | Action |
|---|---|---|
| Hose route | Sharp turns, loops, upward sections, or low sags | Create a continuous downward route |
| Connection | Loose threads, cross-threading, or a missing washer | Reconnect by hand and replace the washer if damaged |
| Hose surface | Cracks, splits, pinholes, or flattened areas | Replace the hose |
| Drain end | End sitting underwater or pressed against a blocked drain | Keep the outlet open and above standing water |
Use the hose diameter and connector type specified in the owner’s manual. Requirements vary by model, and unnecessary hose length can create additional low spots where water and debris collect.
Clear Hose Blockages
Switch off and unplug the appliance, then detach the hose. Flush it with clean water until water passes freely. For reachable residue, use a flexible, soft drain brush, bottle brush, or pipe cleaner that cannot puncture the hose.
Inspect only the user-accessible drain opening described by the manufacturer. Do not push wire, screwdrivers, drill bits, or other sharp tools into the appliance, and do not direct high-pressure air into internal passages.
Reseat Drain Hose Connections
A threaded garden-hose connection often relies on a rubber or plastic washer inside the female connector. The joint may leak even when it feels tight if the washer is missing, hardened, cracked, or folded.
- Unplug the dehumidifier and remove the hose.
- Inspect the connector threads and washer.
- Replace a worn washer with the correct size.
- Thread the connector on straight to avoid cross-threading.
- Tighten it securely by hand. Use a tool only if the model instructions permit it, and do not overtighten plastic threads.
- Route the hose continuously downward to an open drain.
Manufacturer guidance from GE Appliances and Frigidaire recommends checking the washer, hose connection, blockages, outlet position, and downward routing.
Check the Drain Cap or Plug When No Hose Is Used
Some dehumidifiers have a cap, plug, or bung that closes the continuous-drain outlet when a hose is not installed. If your model uses one, a loose, missing, or incorrectly seated plug can allow collected water to escape from the rear or base. TCL’s dehumidifier leak guidance lists an incompletely closed drain plug among the possible causes of water leakage.
With the appliance unplugged, inspect only the external plug or cap described in your manual. Reinstall it exactly as instructed. Do not improvise a replacement stopper that could fall into the drainage path or prevent the appliance from operating as designed.
Check a Built-In Drain Pump
A pump-equipped dehumidifier uses a smaller discharge tube and may push water upward to a sink or drain. Pump instructions, permitted lift height, hose length, and error codes vary by model.
- Confirm that the pump mode is switched on.
- Make sure the pump tube is fully inserted into the correct port.
- Check the tube for kinks, freezing, algae, or debris.
- Verify that the bucket is installed if your model requires it for pump operation.
- Do not exceed the hose length or vertical lift specified in the manual.
- Check the display for a pump or drainage error code.
If the pump hums without moving water, repeatedly displays an error, or leaks inside the cabinet, leave the unit unplugged and arrange service.
Keep the Unit Level and Bucket Aligned
Set the dehumidifier on a firm, flat, level surface. A tilted cabinet can shift the collection stream away from the bucket opening or allow water to spill over an edge.
Remove the bucket and clean its rim, splash guard, guides, and the matching surfaces inside the opening. Dust, lint, and mineral deposits can keep the tank from sliding fully into place. Reinstall the bucket without forcing it.
Most removable buckets depend on correct alignment beneath the condensate outlet rather than a watertight seal around the front of the cabinet. If the bucket is warped, no longer follows its guides, or fails to engage the mechanism required by the model, replace it with the correct part.
Note: Some models require the bucket to remain installed even when a gravity hose or pump is being used. Check the owner’s manual before operating the unit without its bucket.
Inspect the Base for Cracks
With the unit unplugged and dry, use a flashlight to inspect the exterior base, cabinet seams, corners, feet, and accessible reservoir edges. A cracked exterior base may be visible, but water at the center of the cabinet can also come from an internal tray or channel above it.
- Confirm that all feet or casters are present and stable.
- Check for warped plastic, impact marks, cracks, and previous repair material.
- Look for mineral trails that show where water has repeatedly flowed.
- Press a dry paper towel against exterior seams to locate slow seepage.
- Do not turn the unit upside down or remove the outer cabinet solely to search for the leak.
A cracked user-replaceable bucket should be replaced. A cracked internal collection pan, damaged refrigeration component, or leak behind the cabinet requires qualified service or replacement of the appliance.
Clean the Filter and Drain Tray
A dirty filter reduces airflow and may contribute to poor moisture removal or coil frosting. It is not normally the first direct cause of a floor leak, but cleaning it can help the unit operate and defrost correctly.
- Switch off and unplug the dehumidifier.
- Remove the filter according to the owner’s manual.
- Vacuum loose dust or wash the filter only when the manual permits washing.
- Allow a washable filter to dry completely before reinstalling it.
- Never operate the appliance without its filter unless the manufacturer specifically allows it.
Filter-cleaning intervals vary by model. Follow the owner’s manual or filter indicator, and inspect the filter sooner when the room is unusually dusty.
If the collection tray or drain channel is designed to be user-accessible, wipe away sludge, mineral scale, and debris with mild soap and water. Do not remove fixed covers or reach into electrical or refrigeration compartments. A hidden blockage or cracked internal tray should be handled by a qualified technician.
Stop Condensation and Ice Overflow
Frost can form on a compressor dehumidifier’s cold coil when room temperatures are low, airflow is restricted, or the defrost system is not working correctly. When heavy frost melts, water may overflow the catch tray or find a path through the base.
Operating limits vary by model. ENERGY STAR notes that frost can form on condensing coils when the air temperature drops below 65°F (18°C), while some dehumidifiers are specifically designed for lower-temperature spaces. Check the rating label and owner’s manual for your model’s approved operating range.
- Unplug the unit and allow all visible ice to melt naturally.
- Place towels around the base to collect thaw water.
- Clean the air filter and remove objects blocking the intake or exhaust.
- Confirm that the cabinet is level.
- Inspect the bucket and drain path after the ice has melted.
- If the room is outside the model’s approved temperature range, move the unit to an appropriate location before restarting it.
Do not chip ice from the coil with a knife, screwdriver, or other hard object. Puncturing refrigeration tubing can release refrigerant and permanently damage the appliance.
Check for a Recalled Dehumidifier
Before repairing an older or secondhand dehumidifier, find the brand, model number, serial number, and date code on its rating label. Search the U.S. Consumer Product Safety Commission dehumidifier recall page and the manufacturer’s support site.
CPSC currently warns that certain Gree-manufactured dehumidifiers covered by longstanding recalls can overheat, smoke, and catch fire. The agency reports more than 2,000 overheating incidents and about 450 fires associated with affected recalled units. A matching recalled unit should be switched off and unplugged rather than tested or repaired.
Warning: If your model is recalled, follow the recall instructions. Do not continue operating, testing, modifying, or repairing a unit that the recall directs consumers to stop using.
Test the Dehumidifier After the Fix
After correcting an external bucket, drain-plug, or hose problem, complete a controlled test:
- Dry the bucket, cabinet, connections, and floor.
- Place the unit on a level surface away from cords and electrical devices.
- Put dry paper towels under the front, center, and rear.
- Reinstall the bucket, drain plug, and hose exactly as required by the manual.
- Run the dehumidifier while remaining nearby.
- Check the bucket, hose connection, drain outlet, and paper towels every few minutes.
- Switch off and unplug the unit immediately if water reappears beneath the cabinet or near an electrical component.
Also inspect the receiving floor drain, sink, or sump. Water backing up from a blocked household drain can look like a dehumidifier leak even when the appliance itself is draining correctly.
When to Call for Dehumidifier Repair
Contact the manufacturer or a qualified appliance technician when basic external checks do not stop the leak. Use the warranty and service information for the exact model rather than applying a universal age or service-time rule.
Stop using the dehumidifier and seek service when:
- Water emerges from the center of the cabinet instead of the bucket, drain plug, or hose connection.
- The leak returns after the bucket, plug, washer, hose, slope, and filter have been checked.
- The internal pump fails, makes unusual noises, or repeatedly shows an error.
- The unit trips a breaker or ground-fault outlet.
- The cord, plug, or outlet becomes hot, discolored, wet, or damaged.
- You smell burning plastic or see smoke, sparks, or melted material.
- The coil remains heavily iced while the unit is being operated within its approved temperature range.
- The cabinet, internal tray, or refrigeration system appears damaged.
Do not open the cabinet unless the manufacturer identifies the repair as a user-serviceable procedure. Dehumidifiers contain electrical parts, a compressor, capacitors, and a sealed refrigeration circuit.
Should You Repair or Replace the Unit?
There is no guaranteed lifespan that applies to every dehumidifier. Base the decision on its condition, recall status, warranty, repair estimate, parts availability, and overall performance.
Replacement is generally more practical when the unit is recalled, electrically damaged, badly corroded, repeatedly leaking internally, missing essential parts, or when the repair estimate approaches the cost of a comparable replacement. A newer unit may also offer better energy efficiency or performance in lower-temperature spaces.
Sources
- Frigidaire: Dehumidifier Water Leaking Issues — bucket damage, level placement, hose washers, and frost-related leaks.
- GE Appliances: Dehumidifier Drain Hose Issues — hose connections, washers, drain cleaning, downward routing, and submerged outlets.
- Frigidaire: Dehumidifier Not Draining — hose sizing for applicable models, blockages, flushing, and gravity-drain setup.
- ENERGY STAR: Dehumidifiers — low-temperature frost, defrost guidance, drainage placement, and electrical safety.
- U.S. Consumer Product Safety Commission: Dehumidifier Recalls — recalled models, fire incidents, and stop-use instructions.
- TCL: Troubleshooting Guide Water Leak in a TCL Dehumidifier — drain plugs, bucket seating, hose problems, pumps, filters, leveling, and ice buildup.
- EcoAir: Why Is My Dehumidifier Leaking Water? — bucket leak testing, residual condensate, movement-related spills, float checks, and continuous drainage.
Frequently Asked Questions
How Do I Stop My Dehumidifier From Leaking?
Switch it off and unplug it. Dry the unit and floor, then inspect the bucket, float, drain plug, hose connection, washer, hose slope, pump tube, filter, and visible drain outlet. Replace cracked parts and clear external blockages. Arrange service if water continues to emerge from inside the cabinet.
Are Dehumidifiers Meant to Leak From the Bottom?
No. Condensate should enter the removable bucket, flow through an approved gravity hose, or leave through the pump tube. Water beneath the cabinet indicates a spill, poor hose or drain-plug connection, blocked drainage path, melting frost, damaged component, or internal fault.
Why Does My Dehumidifier Leak Only When a Hose Is Attached?
The hose may be loose, cross-threaded, cracked, blocked, routed uphill, or fitted without a good washer. The hose end may also be submerged in standing water. Disconnect the power, clean the line, inspect the washer, and restore a continuous downward route.
Why Does My Dehumidifier Leak After It Turns Off?
A delayed leak often comes from frost melting off the coil or water draining out of a sagging hose. Allow the unit to defrost while unplugged, clean the filter, check the approved room-temperature range, and remove dips or upward loops from the hose.
What Is the Lifespan of a Dehumidifier?
There is no guaranteed universal lifespan. Service life depends on the model, operating hours, room temperature, dust, corrosion, maintenance, and component quality. Replace the unit when it is recalled, electrically unsafe, repeatedly leaking internally, or uneconomical to repair.
Why Is My Dehumidifier Leaking Out the Bottom When the Bucket Is Empty?
The water may be bypassing the bucket because it is misaligned, a gravity hose or drain port is leaking, an internal channel is blocked, or ice is melting over the collection tray. Confirm that the bucket is correctly installed and inspect all external drainage parts before requesting service.
Why Does My Dehumidifier Leak After I Move It or Remove the Bucket?
Residual condensate may still be draining inside the appliance, or water may spill into the cabinet if the unit or bucket is moved before drainage is complete. Keep the dehumidifier upright, remove the bucket gently, and follow the shutdown and bucket-removal procedure in the owner’s manual.
Conclusion
If your dehumidifier is leaking from the bottom, unplug it and determine whether the water starts at the bucket, drain plug, gravity-hose connection, pump tube, or center of the cabinet. Correct bucket alignment, replace cracked parts or worn washers, secure any required drain plug, clear external drain blockages, and keep a gravity hose continuously sloped downward. If water reaches electrical components or continues to emerge from inside the cabinet, stop using the appliance and arrange professional service. Check the model number against current recall notices before repairing or continuing to operate an older unit.