Your dehumidifier usually isn’t draining through the hose because the line is kinked, clogged, or routed too high for gravity drainage. Check that the hose runs straight, slopes downward, and sits lower than the drain port. Tighten the connection and inspect washers for leaks. Flush out algae, sludge, or debris with clean water, and clear any ice or internal blockage. If water still won’t flow, the pump or drain part may be failing, as you’ll see next.
Why Is My Dehumidifier Not Draining?
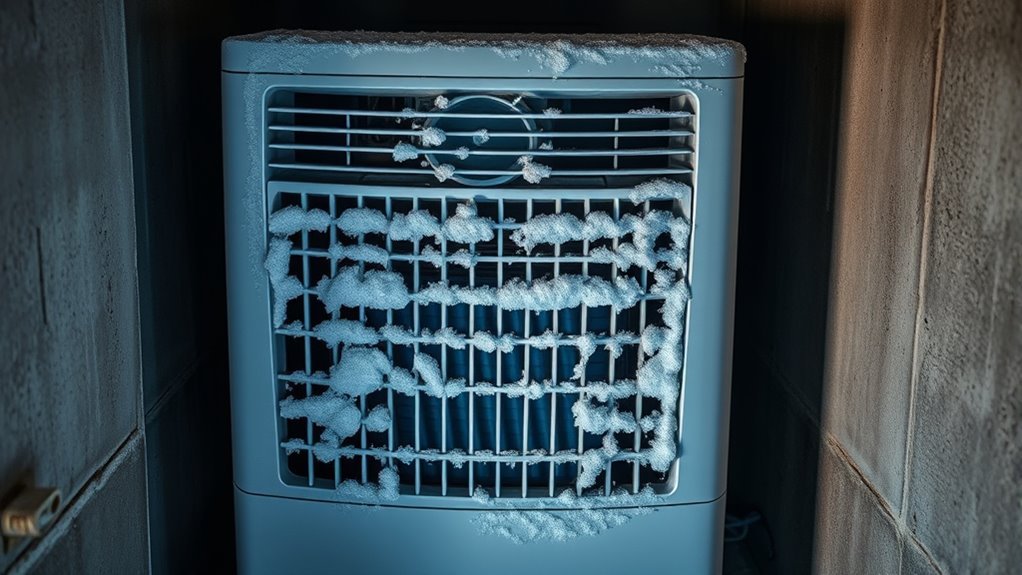
If your dehumidifier isn’t draining, start by checking the hose path and bucket setup: water often backs up into the bucket when the hose is kinked, loosely connected, blocked, or positioned so it doesn’t slope downward continuously. You need a clear drain hose path from the unit to the outlet, or gravity can’t move water out. Inspect the hose connection at both ends and make sure nothing can block the hose. Ice under the condenser coils can also obstruct the drain outlet, so a frozen coil area can stop flow even when the hose looks fine. You may still see water pooling if algae, slime, or debris narrows the passage inside the hose. A secure, downward run gives you reliable drainage and less manual emptying. If water keeps collecting, clean the line and verify the outlet isn’t obstructed. When the system can’t drain freely, the machine can’t work for you, and that limits your control over moisture.
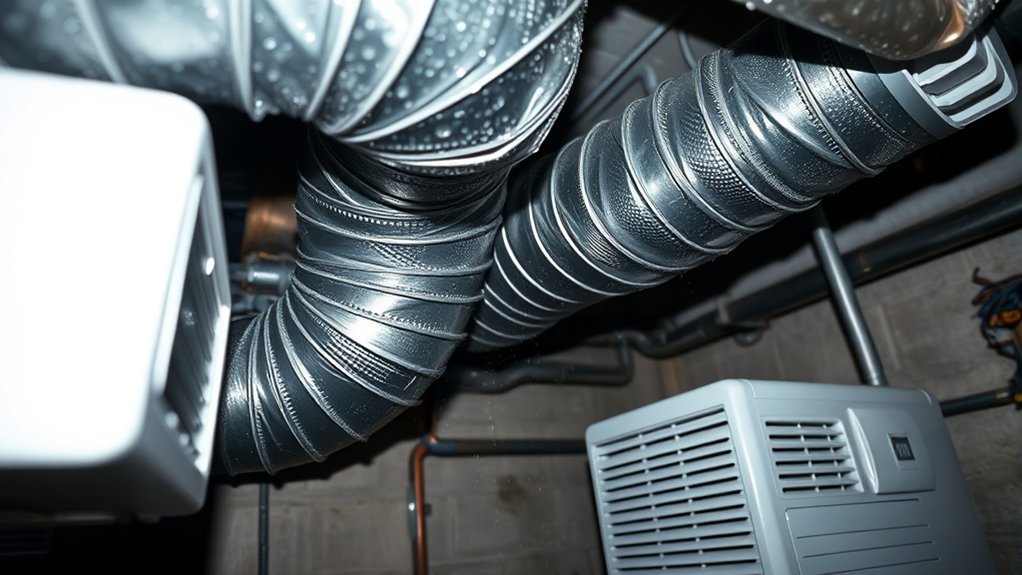
Check the Hose for Kinks and Clogs
Next, inspect the drain hose for any kinks, bends, or tight loops that can restrict flow and send water back into the bucket. Straighten the hose so it runs smoothly from the unit to the drain point. Even a small pinch can slow gravity flow and stop water from leaving the dehumidifier.
Then disconnect the hose and flush it with clean water to clear debris, algae, or slime buildup. If you find a stubborn clog, use a soft brush or compressed air to open the passage without damaging it. Reconnect both ends firmly so the hose stays sealed and the drain path stays continuous.
If drainage still feels weak, check whether your hose is too narrow. A 1/2-inch or larger hose usually moves water more freely and resists blockage better. Keep the line clean, open, and secure, and you’ll restore reliable drain performance without giving the machine control over your space.
Make Sure the Hose Sits Lower Than the Unit
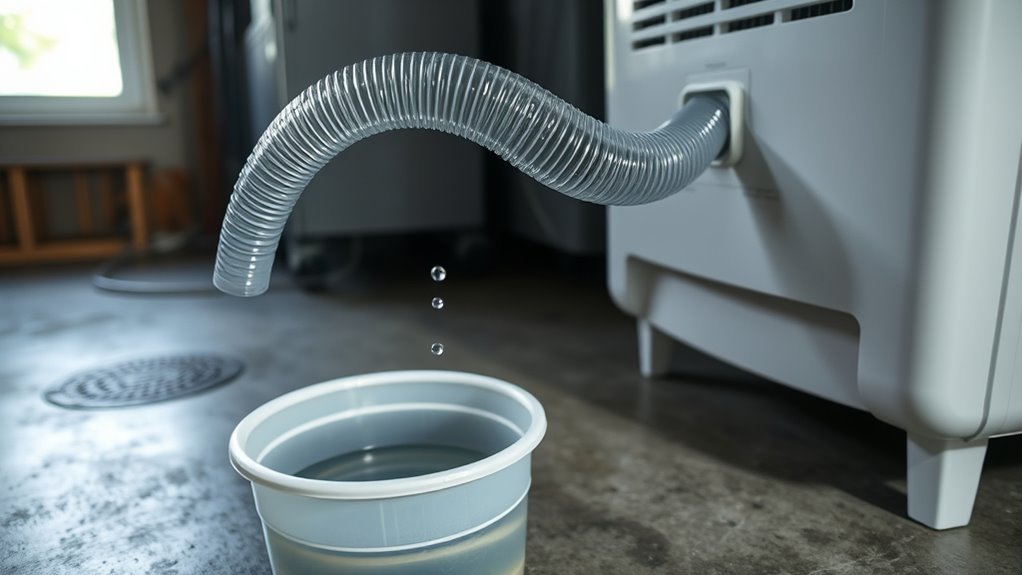
For gravity drainage to work, make sure the hose outlet sits lower than the dehumidifier’s drain port so water can flow downhill instead of backing up into the bucket. Set the hose with a steady drop of about 1-2 inches per foot; that slope helps the continuous drain move freely and reduces siphoning problems. Keep the hose flat, straight, and untwisted so gravity, not friction, does the work. Use a hose that’s at least 1/2 inch in diameter; a wider line gives water more room and lowers blockage risk. Then verify the hose connection is snug at the unit and stays aligned during operation. If the run rises even slightly, water can stall and your dehumidifier won’t empty as expected. You don’t need extra hardware to restore control—just give the water a clear path, a lower exit, and enough space to move. Inspect the setup regularly so you can keep the drain line working with minimal effort.
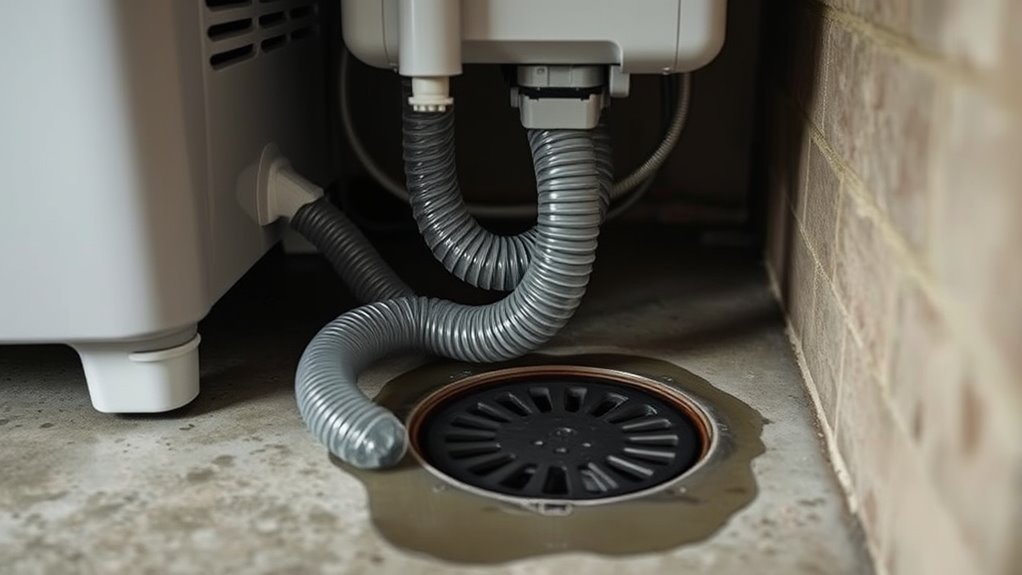
Stop Leaks at the Hose Connection
Even a small leak at the hose connection can stop proper draining, so check that the hose is seated firmly and free of kinks. You want a clean, direct path for water, not water from dripping around the joint. Inspect the hose connection for a washer; if it’s missing, cracked, or flattened, replace it before you run the unit again. Tighten the fitting gently until it’s snug. Don’t overtighten, because you can warp the threads or create gaps that leak. Keep the hose sloping downward so gravity pulls condensate away from the connection and reduces pooling. Run your hand along the hose and look for wear, pinholes, or splits near the end. If you find damage, cut back the end or replace the hose. Regular checks keep the drainage path reliable and help you stay free from avoidable water damage.
Clear Sludge, Algae, and Debris
Check the drain hose for sludge, algae, or debris that can block water flow. Flush the hose with clean water to clear soft buildup, and use a diluted Clorox solution if you spot algae or slime. If needed, use pipe cleaners or a Q-tip at the L-shaped nozzle to remove stubborn debris and keep the drain path open.
Spot Hose Blockages
A clogged hose can stop a dehumidifier from draining, so inspect it for sludge, algae, and debris that restrict water flow. Keep the hose connected and check for blockages at every bend, joint, and nozzle. You can free flow with these steps:
- Disconnect the hose and look through it.
- Use Q-tips or craft pipe cleaners to clear tight spots.
- Run clean water through the line to dislodge slime.
- Verify the hose slopes downward so gravity can help.
If buildup keeps returning, a Clorox-water rinse can reduce bacteria and slow future obstructions. Stay methodical and keep the path open; a clear hose gives you reliable drainage without relying on manual emptying.
Flush Out Sludge
If the hose is clear but drainage is still weak, flush out the line to remove sludge, algae, and debris that can restrict flow. Disconnect the hose, then flush the hose with clean water into a water bucket until the runoff looks clear. If buildup lingers, run a diluted Clorox water mix through it to disinfect and break up residue. Move a flexible brush or craft pipe cleaner through the tubing to free stubborn deposits without damaging the line. Check the L-shaped nozzle at the dehumidifier connection and clear any obstruction there. Repeat this service periodically so your system stays open, efficient, and ready to drain without drag. Regular maintenance keeps the path free and restores control over moisture removal.
Remove Algae Buildup
Algae, sludge, and debris can clog the drain hose and send water back into the dehumidifier bucket instead of out the line. You can stop algae buildup with a fast, practical cleanup:
- Disconnect the hose adapter and inspect the full hose length.
- Flush the hose with clean water to clear loose debris.
- Use a Clorox and water mix to kill bacteria and slow regrowth.
- Push a craft pipe cleaner through stubborn sections, then reattach the hose with a steady downward slope.
Keep the line draining freely so gravity can do the work. If the hose sits flat or traps water, algae returns faster. Repeat this routine whenever flow slows, and you’ll keep your dehumidifier draining cleanly and independently.
Look for Internal Drain Blockages
Check the hose and internal drain path for dust, dirt, mold, or ice that can block water flow and back up into the bucket. Clean the drain path with a flexible brush or pipe cleaners to clear tight clogs. If you still see buildup, flush the line with a Clorox water solution to break down sludge and restore drainage.
Check Hose Blockages
Drain hose clogs often come from algae, slime, or debris buildup inside the line, especially in humid conditions where organic growth is more likely. You should inspect the hose periodically for gunk buildup and weak flow. Use this quick check: 1. Disconnect the hose and look through it for visible blockage. 2. Flush it with clean water; if needed, use a diluted bleach solution to break down residue. 3. Work a pipe cleaner or Q-tip into the L-shaped nozzle and deeper sections to clear stubborn debris. 4. Reinstall the hose with a steady downward slope so gravity can move water out freely. If water still backs up, the hose itself may have an internal clog that needs another pass.
Clean Internal Drain Path
If the hose is clear but the dehumidifier still won’t drain, inspect the internal drain path for debris, mold, or sludge that may be blocking flow from the drain pan to the hose. You can restore control by checking the drain pan, fittings, and the internal drain for buildup or damage. Use a flexible brush to clear obstructions, then verify the drainage hose connection seats firmly and isn’t leaking. If you see slime or algae, flush the passage with clean water to open flow. For stubborn organic buildup, a small amount of Clorox water or peroxide can help kill bacteria and loosen residue. Keep every component clean and intact so water moves freely and your unit stays ready to work without constraints.
Flush Sludge Buildup
Flush sludge from the internal drain path by running clean water through the hose to clear debris, algae, and buildup that can block flow and cause the bucket to fill unexpectedly. If flow slows, you’re likely dealing with internal blockage, not a bad pump. Use these checks:
- Pour warm water through the hose and watch for steady exit.
- Add diluted Clorox water to kill bacteria and limit future sludge.
- Push craft pipe cleaners through reachable sections to break loose deposits.
- Inspect the drain path periodically so hidden clogs don’t trap water.
When you flush sludge, keep the bucket empty and monitor drainage after each step. If water still backs up, repeat the cleaning or inspect deeper internal passages. Clear channels restore control, prevent overflow, and keep your dehumidifier working without dependence on guesswork.
Check for a Failed Pump or Part
A failed pump can keep your dehumidifier from sending water through the drain hose, forcing it to fill the bucket instead. Check the pump first; if it can’t build pressure, drainage stops. Inspect the collection bucket path too.
| Check | What it means |
|---|---|
| Pump hums but no flow | Weak pressure or blockage |
| No pump sound | Electrical failure |
| Visible wear | Mechanical damage |
| Wet wiring | Short or corrosion |
| Clean hose, still no drain | Internal part may be faulty |
Look for cracked fittings, loose terminals, or burnt smells. A clogged internal component or hose can mimic pump failure, so clean every passage before you condemn the unit. If the pump tests defective, repair it or replace it to restore proper drainage. You deserve equipment that works without waiting on hidden faults.
Frequently Asked Questions
Why Does My Dehumidifier Not Drain Out the Hose?
Your dehumidifier won’t drain because gravity can’t help if the hose sits level, kinked, or clogged. Check for condensation issues, hose blockages, ice under coils, loose fittings, and use a clean, downward-sloping larger hose.
How to Make a Dehumidifier Drain Through a Hose?
You’ll free the flow by setting the hose downhill, clearing clogs, and securing a 1/2-inch hose. During dehumidifier maintenance and drainage troubleshooting, check leaks and add a P-trap if pressure’s blocking drainage.
Why Does My Dehumidifier Fill up With Water When the Hose Is Attached?
Your dehumidifier fills up because hose issues block gravity drainage, causing water accumulation in the bucket. Check for kinks, clogs, level hose placement, float switch trips, and coil ice; you’ll restore proper flow quickly.
Would a Dehumidifier Help With COPD?
Yes, a dehumidifier can help your COPD symptoms by cutting dampness, dust, and mold. You’ll breathe easier with indoor humidity near 30-50%. These dehumidifier benefits support clearer, calmer airways and better comfort.
Conclusion
If your dehumidifier still won’t drain, the problem is usually hiding in plain sight. You may have a kinked hose, a blocked line, a loose connection, or a hose that sits too high. But if you’ve cleared those issues and water still stops, the real fault may be deeper inside the unit. Don’t assume it’s fixed yet. One clogged passage or failed pump can leave you with a full tank again, just when you least expect it.