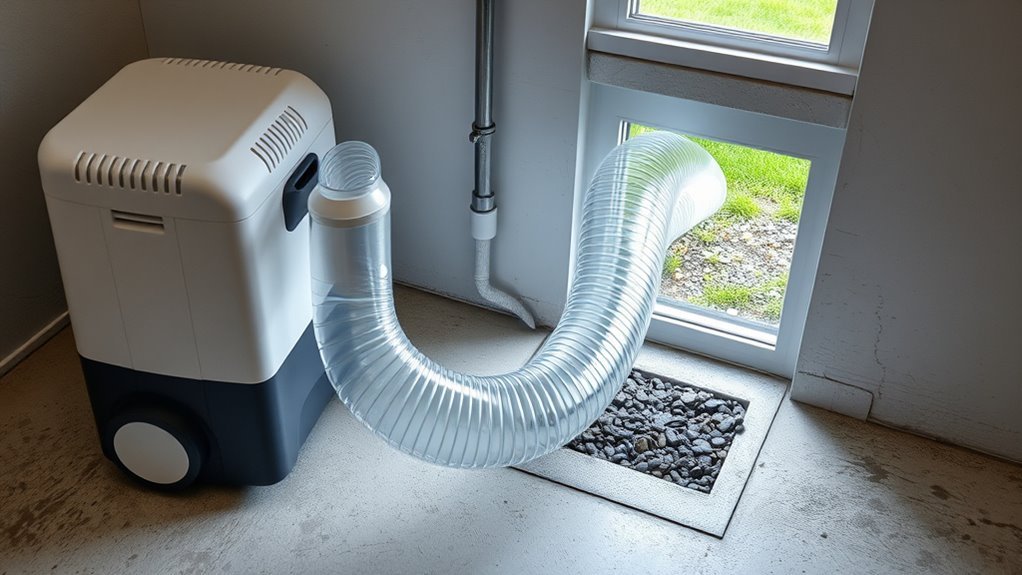
You can drain a dehumidifier outside with a gravity hose when the entire route stays below the drain outlet. If the hose must climb, cross a long distance, or reach a higher discharge point, use a built-in pump or a separate condensate pump that matches the required lift. The safest setup uses a stable, level unit, a compatible hose, an approved discharge location, and regular leak checks.
Last updated: August 19, 2026
Quick Answer
Attach the manufacturer-approved drain hose, keep a gravity line continuously downhill, and discharge where the water cannot damage the foundation, freeze on a walkway, or violate local rules. Use a condensate pump only when gravity cannot reach the outlet, and keep the hose end open to the air rather than submerged.
Key Takeaways
- Check the owner’s manual first because hose size, adapters, pump controls, and maximum lift vary by model.
- A gravity hose must stay below the dehumidifier outlet with no uphill loops, crushed areas, or submerged end.
- A pump is needed when the discharge point is higher than the unit or gravity cannot maintain flow.
- Route water away from the foundation, neighboring property, walkways, septic components, and places where it can freeze or erode soil.
- Inspect the setup during the first operating cycle and clean the hose periodically with a method approved by the manufacturer.
At a Glance
| Time Required | Varies by model and route; allow enough time to fit the hose correctly and observe a complete drain or pump cycle |
| Difficulty | Easy for gravity drainage; moderate when adding a pump |
| Tools Needed | Compatible drain hose, intact hose washer or adapter, stable platform if needed, hose supports, and a rated condensate pump for uphill drainage |
| Cost | No added cost if you already have the correct hose; more if the unit needs an adapter, supports, or a condensate pump |
How to Drain a Dehumidifier Outside
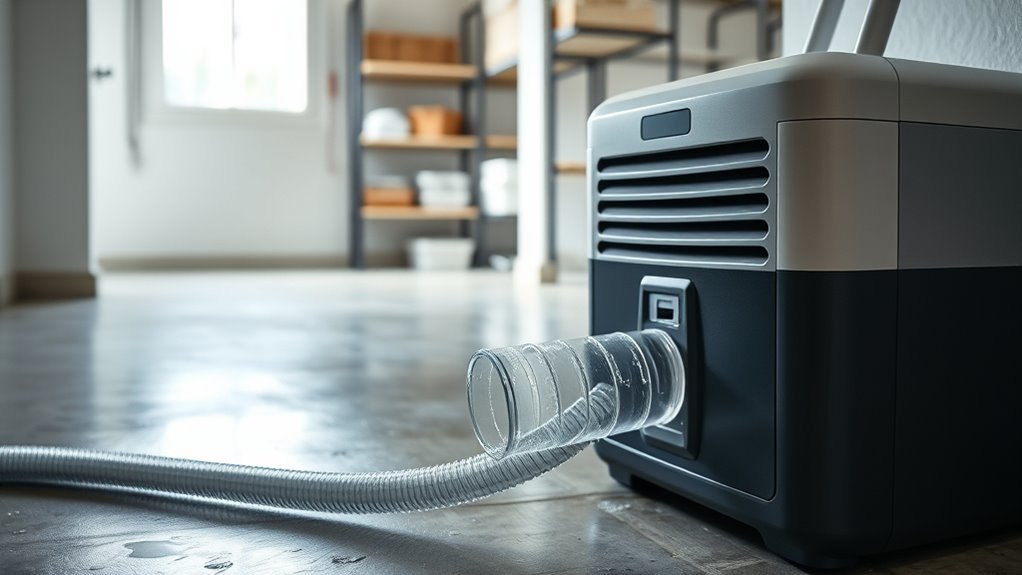
Start by reading the drain section of the owner’s manual. Some dehumidifiers accept a standard garden hose, while others use a smaller tube, a model-specific adapter, or a pump hose. For example, Frigidaire’s current guidance says the hose should be below the unit’s connection, as straight as possible, and free of kinks. Do not force a hose onto a fitting that does not match.
Choose the outdoor discharge point before moving the appliance. The water should soak into a suitable landscaped area or enter another approved receptor without flowing back toward the foundation. Keep it away from doors, stairs, public walkways, a neighbor’s property, septic system components, and any spot where winter freezing could create ice.
Warning: Do not place the dehumidifier where rain, splashing water, or a leaking hose can reach the plug, extension connection, or outlet. Keep the unit level on a stable surface, use the electrical connection required by the manual, and unplug it before adjusting the drain fitting.
Use these basic steps:
- Turn off and unplug the dehumidifier.
- Remove the drain cap or open the continuous-drain connection as the manual directs.
- Install the correct washer, adapter, hose, or tubing without cross-threading the fitting.
- Route the line downhill for gravity flow, or connect the approved pump system if the discharge point is higher.
- Secure the hose so it cannot shift, flatten, or create a trip hazard.
- Keep the outlet open to the air and above standing water.
- Run the unit and watch at least one drainage cycle for drips, backup, or slow flow.
Do not use a fixed platform height for every installation. The needed elevation depends on the drain-outlet position, hose route, and outdoor grade. Raise the unit only as much as needed to create continuous fall, and never use an unstable box, chair, or stack of loose blocks.
Choose Between Gravity and Pump Draining
Gravity drainage is the simplest method when the hose can remain lower than the dehumidifier outlet from start to finish. A pump is the better choice when the water must travel uphill, cross a long route with no steady fall, or reach a sink, standpipe, or outdoor point above the unit.
Recommended Products
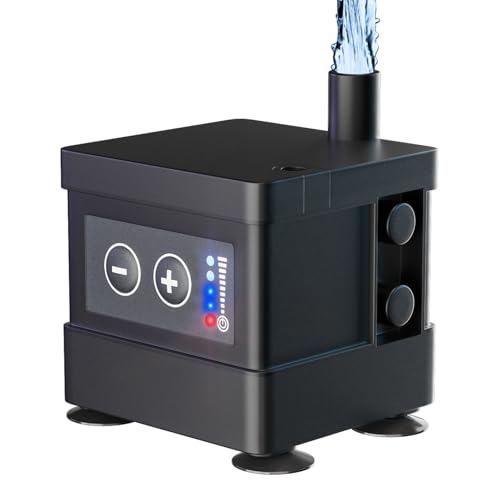
16 Ft Max.Drain Height – Max drainage height up to 16 ft, efficiently removing water from your dehumidifier, air conditioner, or HVAC system.It's very fit for basement usage.

Efficient 70 GPH Flow Rate: The condensate pump can handle up to 70 GPH, with a vertical lift of up to 16 feet. The condensate pump for hvac offers quick drainage and quiet operation, making it the ideal choice for removing condensate from AC units, furnaces, and dehumidifiers

AUTOMATIC CONDENSATE PUMP: features a vertical-type switch to reduce footprint and is designed to automatically remove condensate produced by boilers, furnaces, air conditioners and de-humidifiers
Gravity Drain Setup
Gravity drainage has no pump motor or float switch to maintain, but it depends on correct hose routing. The hose should be short enough to avoid unnecessary loops and supported so it cannot sag into a low pocket that holds water.
| Check | Target | Why It Matters |
|---|---|---|
| Outlet height | Higher than the full hose route | Allows gravity to move water |
| Hose path | Continuous fall with no upward loop | Prevents trapped water and backup |
| Connection | Correct fitting and intact washer | Reduces leaks at the unit |
| Hose end | Open, visible, and above standing water | Reduces backflow and makes inspection easier |
Clean the hose when flow slows or according to the manual. Frigidaire recommends periodically flushing debris from the line with clean water. Vinegar, bleach, drain chemicals, and algae tablets should be used only when the appliance or pump manufacturer specifically permits them, because chemicals can damage seals, react with other cleaners, or be discharged outdoors.
Pump Drain Setup
Use a built-in dehumidifier pump or an external condensate pump when the discharge point is higher than the appliance. Confirm the pump’s maximum vertical lift, maximum tubing length, outlet size, and safety-switch requirements before installation. These limits are model-specific. GE’s drainage guidance, for example, lists a 16-foot maximum vertical lift for certain pump-equipped models, while other pumps have different limits.
- Place the external pump below the dehumidifier drain outlet so condensate can enter its reservoir by gravity.
- Connect the inlet tubing and pump discharge tube using the fittings specified by the pump maker.
- Route the discharge tube without sharp bends, pinches, or unsupported sections.
- Install the supplied or specified check valve on the pump discharge if the manual requires it.
- Connect any high-water safety switch when the equipment supports one.
- Pour in the test amount of clean water stated in the pump manual and confirm that the float starts and stops the pump.
- Check every joint while the pump is operating.
Note: A check valve is common on pump discharge tubing because it limits water flowing back after the pump stops. Do not add an arbitrary check valve to a gravity hose unless the dehumidifier manufacturer or local plumbing design calls for one.
Choosing the Right Method
Choose gravity when the entire hose can run downhill and the outdoor outlet is close enough to inspect. Choose a pump when the route must rise, pass over an obstacle, or travel farther than gravity can handle. A pump adds flexibility, but it also adds electrical parts, noise, maintenance, and a possible failure point.
- Best for gravity: short, direct routes to a lower landscaped area or approved drain.
- Best for a built-in pump: a compatible dehumidifier that already includes the required pump hose and controls.
- Best for an external condensate pump: a gravity-drain model located below the final discharge point.
- Using a sump system: see how to connect a dehumidifier to a sump pump before choosing that route.
- Not suitable: a route that sends water toward the foundation, across a walkway, into a prohibited storm connection, or onto property you do not control.
Set Up a Gravity Drain Hose
A reliable gravity setup needs the correct fitting, a stable unit, continuous downward fall, and an outlet that remains open. Do not assume a standard garden hose fits every model. Verify the connection size and whether the drain bucket must remain installed for the unit to run.
Recommended Products

Multi-Purpose Hose, 6ft Cut-to-Fit:This 6-foot hose is designed for various applications, including dehumidifier drainage and gardening tasks. It can be easily cut to the desired length for flexible use. Please confirm the required length before purchase.

[Convenient] This drain hose automatically drains water from the dehumidifier to the drain for uninterrupted use.

MULTIFUNCTIONAL UNIVERSAL DRAIN HOSE: This drain hose has multiple uses, in addition to being suitable for dehumidifier drainage, it is also suitable for air conditioner drainage as well as being suitable for a variety of gardening tasks. Additionally our dehumidifier drain hose can be cut to your desired length to customize it for different situations.
Choose Hose Route
Plan the route before attaching the hose. The shortest safe route is usually the easiest to keep sloped and clean. Avoid doorways, sharp corners, hot surfaces, moving equipment, and places where people or pets can pull the line loose.
- Set the unit on a level floor or a stable platform rated for its filled weight.
- Measure the path from the drain outlet to the outdoor discharge point.
- Confirm that the full path remains lower than the drain fitting.
- Support the hose at intervals so it cannot sag or become pinched.
- Protect the wall opening with a smooth sleeve or grommet if the hose passes through one.
- Slope the exterior section away from the house and keep the end visible.
Test the route by operating the dehumidifier until water reaches the outlet. A slow start can be normal when the line is initially dry, but standing water in the bucket, leakage around the fitting, or repeated full-bucket shutdowns usually mean the connection or slope needs correction.
If the bucket still fills after you correct the hose route and connection, see why a dehumidifier may not drain through the hose for focused troubleshooting.
Keep Drain Lower
The hose outlet must stay lower than the dehumidifier drain fitting. No part of the gravity line should rise above the outlet, even briefly. A hose that dips down and then climbs can hold water, collect debris, and stop the weak gravity flow produced by a portable dehumidifier.
If the floor is nearly level, a small stable platform may create enough fall. Measure the actual route instead of relying on a fixed height, and keep the dehumidifier level and secure.
Pro Tip: Place a small level on the platform and pour a measured cup of clean water through the disconnected hose before final installation. This quick test can reveal a hidden uphill section, crushed spot, or low pocket.
Prevent Kinks and Leaks
Use a hose in good condition with an intact rubber washer where required. Thread garden-hose fittings by hand first to avoid cross-threading, then tighten only as directed by the manual. Excess force can crack a plastic drain neck.
- Replace brittle, flattened, or internally collapsed hose.
- Use wide-radius bends rather than sharp turns.
- Support the hose instead of stretching it tight.
- Keep the outlet above mud, mulch, leaves, snow, and standing water.
- Inspect the connection after the unit has run for several hours.
Set Up a Condensate Pump
Position an external pump below the dehumidifier outlet on a firm, level surface. Feed the dehumidifier’s gravity drain into the pump reservoir, then route the pump’s smaller discharge tubing to the approved outlet. Most condensate pumps use a float switch that starts the motor when the reservoir rises and stops it after the water level falls.
Match the pump to both vertical lift and total tubing run. “Maximum lift” is usually a shutoff or near-zero-flow limit, not the best working height. Choose a pump with operating capacity above your actual lift and follow its performance chart. For example, Little Giant’s VCMA-15 series lists a 15-foot shutoff lift, with safety-switch availability varying by model. Keep the intake and reservoir clean, test the float, and verify the check valve as the pump manual directs.
If the pump includes a high-water safety switch, connect it only as the equipment manuals direct. A properly connected safety circuit can stop the dehumidifier or signal an alarm if the pump cannot remove water.
Recommended Products

AUTOMATIC CONDENSATE PUMP: features a vertical-type switch to reduce footprint and is designed to automatically remove condensate produced by boilers, furnaces, air conditioners and de-humidifiers

Efficient 70 GPH Flow Rate: The condensate pump can handle up to 70 GPH, with a vertical lift of up to 16 feet. The condensate pump for hvac offers quick drainage and quiet operation, making it the ideal choice for removing condensate from AC units, furnaces, and dehumidifiers

◆【SMALL EXQUISITE DESIGN CONDENSATE PUMP】: Small wall-mounted Condensate drain pump,Suitable for A/C 1-3HP power,the flow rate & discharge head:24l/h & 33ft
Place the Unit and Hose Correctly
Keep the dehumidifier level so condensate reaches the internal tray and drain connection as designed. Maintain the air clearances listed in the manual and do not block the intake or exhaust while raising the unit.
- Use a rigid platform that cannot tip, soften, or absorb water.
- Keep the bucket installed if the model requires it for operation.
- Leave enough space to remove the filter and bucket for cleaning.
- Route the hose where it cannot be crushed by a door, appliance, or stored item.
- Secure the exterior end against wind and accidental movement without sealing it into the receptor.
Do not use loose bricks, overturned storage bins, or furniture as a stand. A dehumidifier contains a compressor and can vibrate, so an unstable base can lead to noise, leaks, or a fall.
Prevent Leaks, Backflow, and Clogs
For a gravity setup, maintain a clear downhill route and keep the hose end above standing water. GE advises pulling a hose out of a drain if its end touches water because that condition can stop drainage. For a pump setup, use the manufacturer-specified check valve and keep the discharge tube within the allowed lift and length.
If the hose discharges into a plumbing receptor, local code may require an indirect connection, air break, or air gap. The 2024 International Plumbing Code describes air gaps for indirect waste as at least twice the effective opening of the pipe, but the code adopted in your city may differ. A universal “2-inch air gap” should not replace local requirements.
- Inspect the hose monthly during heavy use and after moving the appliance.
- Flush loose debris with clean water when flow slows.
- Clean the dehumidifier’s drain channel as directed by its manual.
- Do not mix vinegar, bleach, or other cleaners.
- Do not add algae tablets unless the pump or appliance maker approves the product and the discharge location allows it.
- Replace a hose that remains slimy, cracked, or flattened after cleaning.
The best outdoor drain route is visible, continuously sloped, easy to clean, and far enough from the building that the discharged water cannot return to the foundation.
Reuse or Dispose of Dehumidifier Water Outdoors
Dehumidifier condensate is not drinking water. Dust, microorganisms, and metals from the coils or collection system may enter it. Do not use it for drinking, cooking, bathing, pet bowls, or washing food.
If local rules allow reuse, use fresh condensate only for low-risk purposes such as watering non-edible ornamental plants. Do not store it in an open container, spray it into the air, or use it on edible leaves, fruit, or root crops. Iowa State University Extension says dehumidifier water is fine for most houseplants but may cause metals to build up in soil over time.
Prevent erosion by spreading the flow over mulch or a gravel splash area rather than concentrating it on bare soil. The outlet should not saturate the foundation, cross a property line, enter a sanitary or storm system without approval, or create standing water for insects.
Fix Common Drainage Problems
| Problem | Likely Cause | Fix |
|---|---|---|
| Bucket fills with hose attached | Loose fitting, blocked drain channel, uphill hose, or submerged outlet | Reseat the washer and hose, clean the channel, restore continuous fall, and lift the end above water |
| Water leaks at the connection | Missing washer, damaged threads, wrong adapter, or overtightening | Unplug the unit, install the correct seal or adapter, and replace damaged parts |
| Gravity flow is slow | Long hose, sag, kink, slime, or too little fall | Shorten and support the hose, clean it, or raise the unit safely |
| Pump runs but no water exits | Lift exceeds rating, blocked tube, stuck check valve, or air leak | Reduce lift, clear the tube, inspect the valve, and retest with clean water |
| Pump does not start | No power, disabled pump mode, stuck float, or bucket not seated | Check power and controls, clean the float, and reinstall the bucket as the manual directs |
| Outdoor line freezes | Standing water in a sagging or exposed hose | Stop outdoor draining during freezing weather, empty the line, and use an approved indoor receptor or protected route |
After any repair, dry the floor, reconnect the line, and observe a complete drain or pump cycle. If water still leaks from inside the cabinet, the drain fitting is cracked, or the pump repeatedly trips its safety switch, stop using continuous drainage and arrange service.
Frequently Asked Questions
How do you get a dehumidifier to drain outside?
Attach the compatible drain hose, route it continuously downhill to an approved outdoor location, secure the line, and keep the end above standing water. Use a rated condensate pump when the outlet is higher than the dehumidifier or gravity cannot maintain the route.
Does a dehumidifier drain hose have to be lower than the unit?
For gravity drainage, yes. The hose must stay below the dehumidifier’s drain connection and continue downhill without uphill loops, kinks, or a submerged end. If the route must rise, use the unit’s built-in pump or a separate condensate pump rated for the required lift.
How do you drain a dehumidifier upward?
Use the unit’s built-in pump or an external condensate pump. Match the pump’s lift rating to the vertical rise, use the specified tubing and check valve, secure the route, and test the float switch before leaving the system unattended.
How long can a dehumidifier drain hose be?
There is no universal maximum length for a gravity hose. Keep it as short as practical while maintaining continuous downhill fall; GE advises cutting a gravity garden hose to the shortest length needed. Pump tubing limits are model-specific, so do not exceed the length or lift stated in the pump or dehumidifier manual.
Can the outdoor drain hose freeze?
Yes. Water left in a low spot can freeze, block the hose, and force condensate back into the bucket or onto the floor. EcoAir warns that exterior drainage can freeze and block when outdoor temperature falls below the dehumidifier’s operating conditions, so use an approved indoor receptor or a climate-appropriate protected route during freezing weather.
Can a dehumidifier drain into a gutter or downspout?
Only when local rules allow it and the connection cannot send water back toward the building. Do not make a sealed connection, create a cross-connection, overload a small gutter, or discharge where water will freeze or affect neighboring property.
Conclusion
A dehumidifier can drain outside reliably when the hose matches the unit, the route stays downhill, and the outlet is safe and legal. Use a pump for uphill drainage, keep the appliance level, and test one complete drain or pump cycle before leaving the system unattended. Recheck the hose after several hours of operation and after major weather changes so leaks, clogs, freezing, or erosion do not turn drainage into a new moisture problem.
Sources
- Frigidaire: Dehumidifier Not Draining — gravity-hose position, minimum hose diameter guidance, kink prevention, and periodic cleaning.
- GE Appliances: Dehumidifier Draining Options — gravity drainage, shortest practical garden-hose guidance, and model-specific pump lift.
- EcoAir: Installation Tips for the Continuous Drainage Hose — downhill routing, keeping the hose end out of standing water, blockage prevention, and exterior freezing risk.
- Little Giant: VCMA-15 Series Condensate Pump — current pump lift, check-valve, and safety-switch specifications.
- International Code Council: 2024 International Plumbing Code, Chapter 8 — indirect waste and air-gap principles.
- Iowa State University Extension: How to Care for Houseplants — dehumidifier-water reuse and long-term metal buildup in soil.