Want to make your robot vacuum last longer? Regular cleaning, careful battery use, and timely part replacement can prevent many common problems. A clogged filter, tangled brush, or dirty sensor may seem minor, but repeated strain can shorten the machine’s useful life. The best approach is to follow a simple routine based on how often you use your vacuum.
Quick Answer
To make a robot vacuum last longer, empty its dustbin regularly, clean the filter according to its manual, and remove tangled hair from the brushes. Keep sensors, wheels, and charging contacts clean. Protect the battery from extreme temperatures, clear obstacles before cleaning, and replace worn parts before they affect performance.
At a Glance
| Difficulty | Easy for routine cleaning |
| Tools Needed | Microfiber cloth, manufacturer-approved cleaning tool, small scissors, and compatible replacement parts when needed |
Empty the Dustbin and Clean the Filter
)
A clean dustbin and filter help your robot vacuum maintain suction and move air through the motor. When debris blocks the airflow, cleaning performance drops and the vacuum may need to work harder.
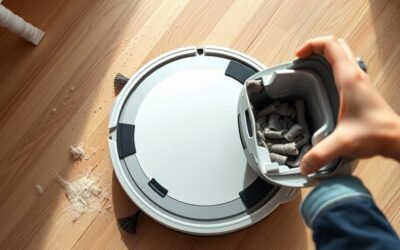
For robots without automatic emptying, empty the dustbin after every cleaning cycle. If your model has a self-emptying dock, inspect the onboard bin periodically and replace or empty the dock’s dust container when required.
Follow these steps to maintain the dust collection system:
- Turn off the robot before removing the dustbin.
- Release the dustbin and empty its contents into a trash container.
- Check the suction inlet for compacted dust, hair, or other obstructions.
- Remove the filter and clean it using the method approved for your model.
- Make sure every washed component is completely dry before reinstalling it.
- Reinsert the filter and dustbin until they lock securely into place.
Never assume every robot vacuum filter is washable. Some filters can be rinsed with clean water, while others must remain dry. For example, the iRobot Roomba Combo 10 Max maintenance schedule specifies weekly filter cleaning, twice-weekly cleaning in homes with pets, and no washing.
If your filter is washable, use clean water without soap unless the manufacturer says otherwise. Allow it to air-dry fully. Never reinstall a damp filter, because moisture can reach electrical components or encourage unpleasant odors.
Empty the dustbin after every cleaning cycle when needed, and clean the filter using the method approved for your model.
A monthly filter check alone may not be enough in a home with pets or heavy dust. Inspect the filter more frequently if you notice weaker suction, unusual odors, or visible buildup.
Replace the filter when cleaning no longer restores airflow or when the manufacturer’s replacement interval arrives.
Keep Brushes and Rollers Free of Hair
Hair wrapped around a robot vacuum’s main brush or side brush can increase friction and interfere with debris pickup. Regular inspection helps prevent excessive resistance and keeps the brushes turning properly.
Check the brushes at least weekly if you use the vacuum regularly. In homes with shedding pets or long hair, inspect them after demanding cleaning cycles.
To remove tangled debris:
- Turn off the robot and remove it from the charging dock.
- Unlock the brush cover according to the owner’s manual.
- Lift out the main brush and inspect both ends.
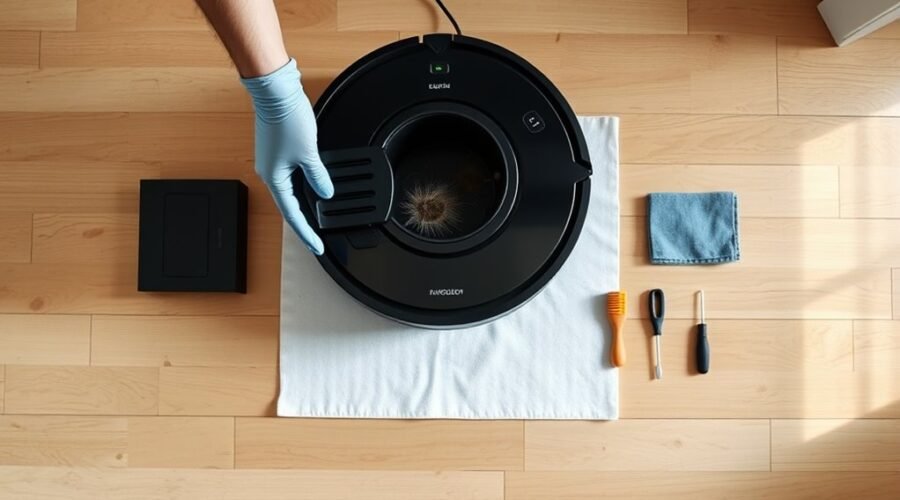
- Use the supplied cleaning tool to cut or pull away wrapped hair.
- Check the side brush, brush guard, and accessible axles for additional tangles.
- Reinstall the components and confirm they fit securely.
Warning: Keep your fingers away from sharp cutting tools. Never cut into rubber rollers, bristles, wires, or the brush housing. Do not operate the vacuum while removing tangled hair.
Pay special attention to the brush ends. Hair can collect around the bearings even when the main roller looks clean. This hidden buildup may cause squeaking, poor rotation, or extra resistance.
Some designs reduce the amount of manual cleaning needed. For example, HyperStream™ Detangling DuoBrush technology uses dual rollers designed to redirect hair and limit tangling.
However, even anti-tangle brushes need periodic checks. Remove any trapped material before it affects movement, and replace rollers that have cracked rubber, damaged bristles, or worn attachment points.
Wipe Sensors and Check the Wheels
Dirty sensors and obstructed wheels can cause navigation errors, repeated cleaning, and unnecessary mechanical strain. Keeping these components clean helps your robot move smoothly and detect obstacles more reliably.
Inspect the wheels weekly for trapped debris. Clean the accessible sensors with a soft, dry microfiber cloth, following your model’s maintenance schedule.
Clean Sensors Regularly
Robot vacuum sensors help the machine recognize walls, obstacles, floor edges, and charging stations. Dust or fingerprints on their surfaces can interfere with detection.
Depending on the model, you may find sensors on the underside, front bumper, sides, or raised navigation module.
Follow these steps for routine sensor care:
- Switch off the robot and place it on a clean, stable surface.
- Locate the sensors using the owner’s manual.
- Gently wipe accessible sensor surfaces with a dry microfiber cloth.
- Remove loose dust around the sensor openings without pushing debris inside.
- Inspect the camera window or navigation cover if your model includes one.
Avoid abrasive pads and harsh chemical cleaners. They may scratch or damage protective sensor surfaces.
Weekly inspection is useful in dusty homes, although some manufacturers specify monthly cleaning. Adjust the routine based on use and visible buildup.
Inspect Wheel Movement
The drive wheels and front caster wheel should rotate without excessive resistance. Hair, thread, and compacted dirt can become trapped around their axles and reduce movement.
With the robot switched off, inspect the wheels and remove accessible debris. Do not force a wheel or disassemble its motor housing unless the manufacturer provides instructions.
| Task | Action | Result |
|---|---|---|
| Inspect | Remove visible debris | Fewer obstructions |
| Wipe sensors | Use a dry cloth | Clearer sensor surfaces |
| Check wheels | Look for wrapped hair and threads | Reduced friction |
| Test rotation | Check for smooth movement | More reliable travel |
| Address resistance | Clean or replace as instructed | Less avoidable wear |
For dirt stuck to the wheel tread, use a slightly damp cloth when your manual permits it. Keep moisture away from wheel motors and electrical connections.
The Roborock maintenance guide recommends checking wheels for wrapped hair and cleaning charging contacts and sensors as part of regular upkeep.
If a wheel continues to stick, makes grinding noises, or fails to extend and retract normally, it may need repair or replacement.
Deep Clean Your Robot Vacuum Monthly
A monthly deep clean helps remove buildup that routine dustbin emptying may miss. It also gives you a chance to inspect the robot for damaged parts, loose fittings, and early signs of wear.
Before starting, turn off the vacuum, remove it from the dock, and disconnect the dock from power when cleaning its electrical contacts or removable parts.
Work through the underside, brushes, wheels, exterior, and charging system. Keep water away from components that the manufacturer does not identify as washable.
Clean Sensors Thoroughly
Monthly sensor maintenance should cover areas that are easy to overlook during weekly cleaning. These include underside cliff sensors, dock-location sensors, and obstacle-detection windows.
Cliff sensors help the robot recognize floor edges and drops. If dust covers them, the vacuum may hesitate, stop unexpectedly, or report a sensor error.
Inspect each accessible sensor for stubborn buildup. Gently wipe its surface with a clean, dry microfiber cloth.
If the robot uses camera-based navigation, clean the camera window without applying pressure to the lens assembly.
Also inspect the front bumper. Press it gently where permitted to check that it moves freely and returns to its normal position.
A clean sensor surface cannot fix every navigation problem. If the robot still moves unpredictably, inspect the wheels and brush assemblies before considering software troubleshooting.
Clear Wheels And Brushes
Monthly brush and wheel maintenance focuses on the areas where ordinary surface cleaning cannot reach. Removing hidden tangles can reduce friction and prevent debris from interfering with moving parts.
Take out removable brushes according to the manufacturer’s instructions. Inspect the brush ends, wheel openings, and accessible axles for compacted dust or thread.
| Component | Action | Result |
|---|---|---|
| Brushes | Remove tangles | Improved brush rotation |
| Wheels | Clear hair and dust | Smoother movement |
| Axles | Check accessible rotating parts | Lower friction |
| Bristles | Remove trapped debris | Better floor contact |
| Sensors | Wipe gently | More reliable detection |
Use only approved cleaning methods for removable parts. Some caster wheels can be removed and cleaned separately, while others require a different procedure.
After reassembly, check that the brush cover locks correctly and no parts remain loose.
Pro Tip: After a monthly deep clean, run a short cleaning cycle in an open area. Listen for unusual scraping or clicking, check that the wheels turn properly, and confirm the robot returns to its dock.
Wipe Down The Body
Cleaning the exterior removes dust and grime from the robot’s housing and helps reveal physical damage. Use a soft microfiber cloth slightly dampened with water when the manufacturer’s instructions allow it.
Avoid spraying liquid directly onto the vacuum. Strong cleaners, abrasive products, and excessive moisture can damage surfaces or enter openings.
During the wipe-down, inspect these areas:
- Top cover: Look for cracks, loose panels, or damaged buttons.
- Front bumper: Remove dust around its edges.
- Charging contacts: Wipe with a dry cloth after disconnecting power.
- Dustbin seals: Look for trapped debris or damaged edges.
- Underside: Check for missing screws, cracked covers, or unusual wear.
Do not forget the charging dock. Dust around charging contacts, dust collection ports, and the dock entrance can interfere with normal operation.
For self-emptying models, inspect the dust bag and air channel. For vacuum-mop models, clean the removable mop pads, washing tray, and water tanks according to their maintenance instructions.
Empty dirty water containers regularly and allow washable parts to dry properly. This helps limit residue buildup and unpleasant smells.
Protect the Battery From Heat and Deep Drains
Battery care affects how long a robot vacuum can clean before needing replacement parts. Lithium-ion batteries gradually lose capacity, but excessive heat and repeated deep discharge can increase wear.
Place the charging dock in a cool, dry area away from direct sunlight, radiators, and heating vents. Avoid storing the robot where temperatures change sharply.
A general storage range mentioned for battery care is 50°F to 80°F (10°C to 27°C). However, the operating and storage limits in your model’s manual should take priority.
For robots charged manually, avoiding repeated complete discharge is sensible. Recharging around 20–30% can help avoid deep drains, although you do not need to interrupt an automatic cleaning cycle just to maintain that percentage.
Most modern robot vacuums manage charging automatically. During regular use, it is generally better to let the machine return to its dock as designed.
According to Roborock’s charging guidance, regularly used robots can remain docked after charging. The charging system manages the battery rather than continuously forcing it to charge.
The eufy battery replacement guidance estimates a typical lithium-ion battery lifespan of 300–500 charging cycles. This does not mean every robot will fail at that point. Actual battery life depends on usage and battery condition.
Protect the battery from excessive heat and deep discharge, but allow the robot’s built-in charging system to manage normal daily use.
For extended storage, turn off the robot using the approved shutdown procedure. Some manufacturers recommend storing the battery at approximately 50% charge rather than leaving it completely empty.
Use the original charging equipment or a replacement specifically approved for your model. Do not substitute an incompatible power supply.
If the vacuum begins stopping early despite a full charge, check for restricted brushes, dirty contacts, and unusually demanding cleaning conditions before replacing the battery.
Use Manufacturer Parts and Accessories
Correct replacement parts help maintain airflow, brush movement, and reliable charging. A poorly fitting filter, brush, or battery can create performance problems or damage nearby components.
Choose genuine manufacturer parts or replacements that the manufacturer explicitly approves for your exact model.
Before purchasing an accessory, follow these steps:
- Identify the model number on the robot or in its documentation.
- Compare the replacement part number with the owner’s manual.
- Confirm that the accessory supports your exact model and version.
- Inspect the new part for damage before installation.
- Install it using the manufacturer’s instructions.
Filters need the correct shape and seal to control airflow. Brushes need proper dimensions and mounting points to rotate without rubbing against the housing.
Battery replacements require extra care because voltage, connectors, battery management systems, and physical size must match the device.
Aftermarket parts are not automatically unsuitable. However, unverified compatibility may cause poor fit or electrical problems. Warranty coverage for damage involving third-party components depends on the manufacturer’s terms and applicable law.
Using the correct parts also makes future maintenance easier because the components fit the machine’s intended design.
Clear the Floor Before Each Run
A clear floor reduces the chance of a robot vacuum getting trapped, dragging objects, or wrapping cables around its brushes. A brief inspection before cleaning can prevent unnecessary interruptions and possible damage.
Remove loose cables, small toys, clothing, and other items that the robot may not detect reliably.
Pay particular attention to the following obstacles:
- Charging cables: Can wrap around brushes or wheels.
- Loose rugs: May fold, shift, or trap the vacuum.
- Small toys: Can become lodged underneath the machine.
- Long cords and threads: May catch around rotating parts.
- Uneven thresholds: Can cause repeated attempts to climb an obstacle.
- Crowded furniture: May restrict access or create narrow trapping points.
Secure lightweight mats or remove them before cleaning. If the robot repeatedly gets stuck in one location, use its supported no-go zones or physical barriers where appropriate.
Keep the area around the dock accessible. The robot needs a clear route to return for charging and, on supported models, automatic dust emptying.
A more open cleaning path can reduce repeated collisions and unnecessary brush or wheel resistance. It also helps the machine finish its cleaning cycle with fewer interruptions.
Watch for Wear and Replace Parts on Time
Brushes, filters, mop pads, and batteries are consumable parts that gradually wear out. Cleaning them helps, but replacement becomes necessary when they no longer work properly.
Common warning signs include reduced pickup, unusual mechanical noise, worn brush bristles, torn filters, frayed mop pads, and shorter battery runtime.
The correct replacement schedule varies by model. For example, the eufy RoboVac maintenance schedule lists weekly rolling-brush cleaning, side-brush replacement every 3–6 months, and rolling-brush replacement every 6–12 months for the covered models.
The following table provides a practical maintenance reference. Use your specific model’s schedule whenever it differs.
| Component | Maintenance | Replacement Guidance |
|---|---|---|
| Dustbin | Empty after each use if not self-emptying | Replace if cracked or unable to seal |
| Filter | Inspect weekly; clean as directed | Often every 2–6 months, depending on model |
| Main brush | Check weekly for tangled hair | Commonly every 6–12 months |
| Side brush | Inspect for bends and tangles | Commonly every 3–6 months |
| Sensors and wheels | Inspect regularly; clean monthly or sooner | Replace damaged or malfunctioning parts as needed |
| Mop pads | Clean after use according to the model | Replace when worn or at the specified interval |
| Battery | Monitor runtime and charging behavior | Replace when degraded, if supported |
You do not need to replace a working component simply because it looks slightly dirty. However, a damaged filter, split brush roller, or badly worn wheel should not remain in use.
Check your robot’s maintenance reminders if its app provides them. These can help track operating hours and expected replacement intervals.
For battery or motor repairs, use manufacturer-approved service guidance. If the vacuum repeatedly reports the same error after routine cleaning, professional servicing may be more appropriate than further disassembly.
Key Takeaways
- Different robot vacuums have different filter-care rules. Washing a nonwashable filter can damage it.
- Hair often collects around brush ends and wheel axles, even when the visible surfaces look clean.
- A monthly inspection can reveal loose covers, damaged seals, and charging-contact problems before they become serious.
- Regularly used robot vacuums can generally stay on their charging docks when the manufacturer permits it.
- Replacement schedules are guides, not guarantees. The correct interval depends on the exact model and operating conditions.
Frequently Asked Questions
What’s the Average Lifespan of a Robot Vacuum?
A robot vacuum typically lasts four to six years, according to ECOVACS lifespan guidance. Premium models may exceed seven years with proper care, although this depends on the model and availability of replacement parts. Frequent use, heavy pet hair, and poor maintenance can shorten service life.
Should You Leave Your Robot Vacuum Plugged in All the Time?
Yes, you can generally leave a modern robot vacuum on its charging dock during regular use if the manufacturer recommends it. Built-in charging controls prevent normal overcharging. For extended storage, turn off the device and follow the battery storage instructions for your model.
What Can I Do With an Old Robot Vacuum?
You can donate, sell, repair, or repurpose an old robot vacuum if it remains safe and functional. It may also provide spare parts or components for suitable DIY projects. For disposal, follow EPA lithium-ion battery recycling guidance. Do not place lithium-ion batteries or devices containing them in ordinary household trash or recycling bins.
What Are the Most Common Problems With Robot Vacuums?
Common robot vacuum problems include weak suction, tangled brushes, dirty sensors, stuck wheels, charging failures, and declining battery runtime. Start by checking the dustbin, filter, brushes, and wheels. If the problem continues after cleaning, inspect the charging system and follow the model’s troubleshooting instructions.
Can You Wash a Robot Vacuum Filter?
You can wash a robot vacuum filter only when the manufacturer identifies it as washable. Some models require rinsing with clean water and complete air-drying, while others use filters that must never get wet. Always follow the instructions for your exact model.
How Do You Know When a Robot Vacuum Battery Needs Replacing?
A robot vacuum battery may need replacing when the machine consistently runs for much less time than before despite a full charge. Unexpected shutdowns and repeated charging errors can also indicate a problem. First rule out dirty contacts, blocked brushes, and other maintenance issues.
Conclusion
Making your robot vacuum last longer starts with consistent care rather than complicated repairs. Keep the dustbin, filter, brushes, wheels, and sensors clean, protect the battery, and replace worn parts using the correct model specifications.
Start by checking your vacuum’s current condition and setting a regular maintenance schedule. These small habits can help maintain cleaning performance, reduce preventable damage, and delay the need for a replacement machine.
Sources
- iRobot: Roomba Combo 10 Max Care Procedure Frequency: Filter cleaning, nonwashable filters, brush maintenance, and replacement intervals.
- Roborock: How to Maintain Your Robot Vacuum: Cleaning brushes, sensors, wheels, and charging contacts.
- Dreame: Robot Vacuum Collection: HyperStream Detangling DuoBrush design and function.
- eufy: RoboVac Replacement Parts and Maintenance: Cleaning and replacement schedules for filters, brushes, and other components.
- eufy: When to Replace a RoboVac Battery: Battery cycle estimates and signs of declining battery performance.
- Roborock: Charging Dock Guidance: Leaving regularly used robot vacuums docked and managing charging safely.
- ECOVACS: How Long Do Robot Vacuums Last?: Typical service life and factors affecting durability.
- US Environmental Protection Agency: Used Lithium-Ion Batteries: Safe battery disposal and recycling recommendations.