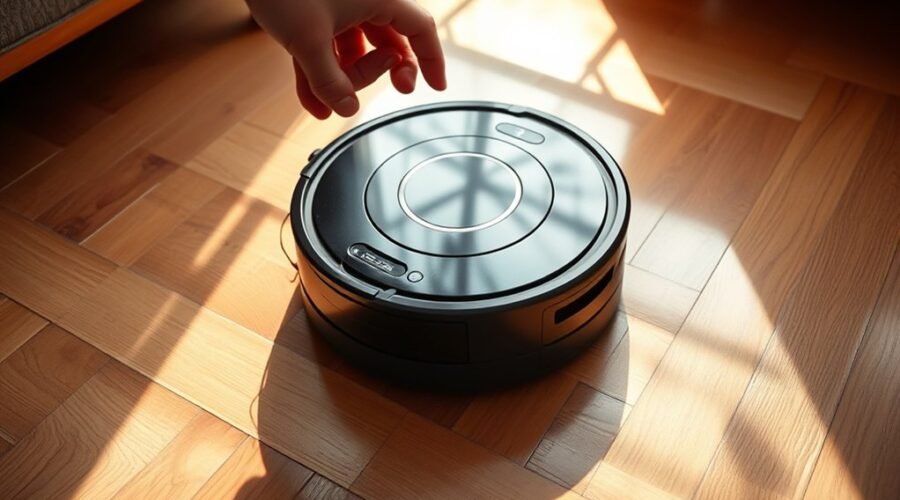
Is your robot vacuum battery draining fast, even after a full charge? The problem may come from a worn battery, dirty charging contacts, tangled brushes, or high suction settings. You can often find the cause without opening the battery pack or buying replacement parts. The key is to check charging, cleaning resistance, and actual runtime before deciding what needs repair.
Quick Answer
If your robot vacuum battery drains fast, first confirm that it reaches a full charge. Clean and align the charging contacts, remove tangled hair, clear clogged filters, and lower suction power. Then test runtime on hard floors. If battery life remains far below the manufacturer’s guidance, the battery may need replacement.
Key Takeaways
- A fast battery percentage drop does not always mean the battery is damaged. Charging problems and incorrect readings can produce similar symptoms.
- Carpets, maximum suction, repeated cleaning passes, and tangled wheels increase power consumption.
- Compare actual runtime under consistent conditions instead of relying only on the battery percentage shown in an app.
- Not every battery is user-replaceable. Follow your model’s instructions and stop using any battery that appears swollen, damaged, or unusually hot.
Robot Vacuum Battery Draining Fast? Check Battery Health First
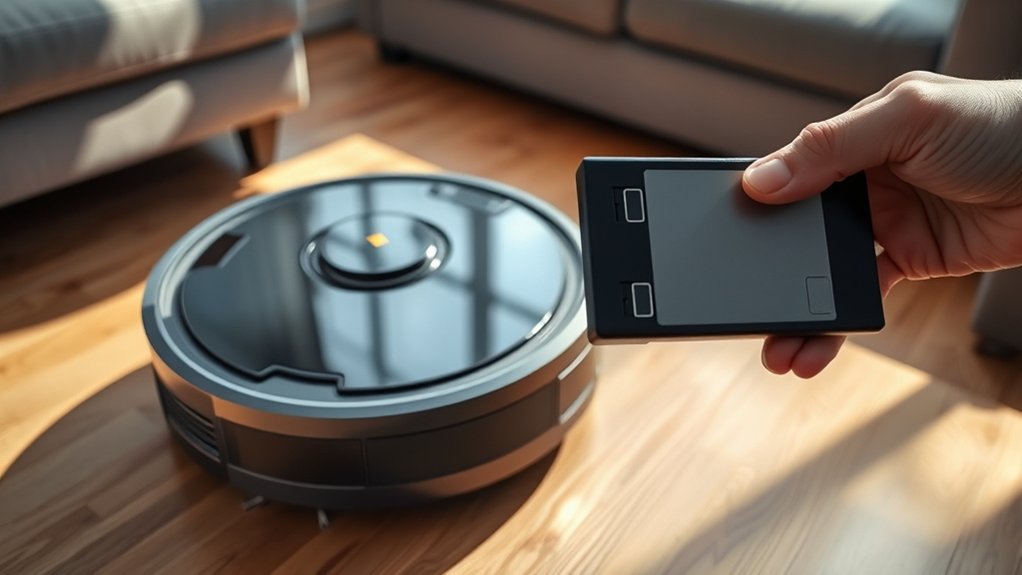
Start by checking whether your robot vacuum holds a charge and delivers normal runtime. A battery that reaches 100% but shuts down unusually early may have reduced capacity or another electrical problem.
You can identify several signs of battery wear without opening the robot or testing individual cells.
- Short runtime: The vacuum runs for much less time than it did when new, even under similar cleaning conditions.
- Sudden shutdown: The robot turns off before its battery indicator reaches a normal low-charge level.
- Rapid percentage changes: The display drops sharply, such as from 60% to nearly empty, during a cleaning run.
- Charging problems: The battery takes unusually long to recharge or never reaches its expected charge level.
- Unusual heat: The battery area becomes abnormally hot during charging or operation.
What Do Battery Cell Voltage and Internal Resistance Mean?
Some robot vacuums contain lithium-ion battery packs built with individual 18650 cells. In these packs, one weak cell can reduce the performance of the entire battery.
A technician may compare individual cell voltages, including readings around 4.1V on certain charged lithium-ion cells. However, the expected voltage depends on cell chemistry and charging conditions. A single voltage reading cannot prove that a battery is healthy.
Internal resistance also matters. As resistance increases, battery voltage can drop sharply when the vacuum motor draws power. The robot may then shut down despite showing a reasonable charge beforehand.
A controlled load test can reveal this problem by measuring how the battery performs while supplying current. Technicians may also inspect the battery management system, or BMS, which monitors battery operation and helps protect against unsafe conditions.
Warning: Do not open a sealed lithium-ion battery pack, separate its cells, or probe exposed battery connections without appropriate training and equipment. Short circuits and damaged cells can cause fires. Use external runtime checks first and leave internal electrical testing to a qualified repair technician.
If the battery appears normal from the outside, check the charging equipment before considering replacement.
Check the Dock, Charger, and Charging Contacts
A robot vacuum can appear fully parked on its dock without charging correctly. Dirty contacts, an unplugged charger, or poor docking alignment can leave the battery partly charged before the next cleaning session.
Check these parts in order:
- Check the power outlet. Confirm that the dock receives power and that its cable is securely connected.
- Inspect the charger. Look for damaged wires, bent connectors, loose plugs, or signs of overheating.
- Check docking alignment. Position the robot so its charging contacts meet the matching contacts on the base.
- Clean the contacts. Unplug the dock and clean the metal contact points using the method approved for your model.
- Confirm charging. Place the robot back on its dock and check the app or charging indicator.
For supported Roomba models, iRobot recommends unplugging the dock, waiting 60 seconds, and cleaning the contacts with a lightly dampened cloth or melamine foam. Its charging contact cleaning instructions also warn against abrasive materials.
Other models may require a soft, dry cloth. Follow your manufacturer’s instructions rather than applying liquid directly to the robot or dock.
Look closely for corrosion, damaged metal, or contacts that no longer spring into position. Cleaning cannot repair physically damaged contacts.
If the app displays a charging error, record its exact message. It can help separate a dock problem from a battery or internal charging fault.
Keep the charging station in a dry, level location away from direct sunlight and excessive heat. Consistent charging conditions help protect battery performance.
Clean Brushes, Wheels, and Filters to Reduce Battery Drain
Dirty moving parts make a robot vacuum work harder. Hair wrapped around brushes or wheels increases resistance, while blocked filters restrict airflow and reduce cleaning performance.
These problems can shorten runtime even when the battery is healthy.
Clean the Main Brush and Side Brushes
Turn off the robot before handling its moving parts. Remove the brushes according to the manufacturer’s instructions.
- Inspect the main roller for hair, thread, and tightly wrapped fibers.
- Remove debris from the brush ends and bearings.
- Check the side brush for trapped hair or bent bristles.
- Reinstall each part securely and confirm that it rotates freely.
For some Roomba models, the manufacturer’s brush and wheel care instructions specifically recommend inspecting brush bearings and removing wrapped hair.
Inspect the Wheels and Wheel Wells
A clogged wheel can increase motor load and make navigation less efficient. Inspect the drive wheels and front caster for hair, dust, or small objects.
Remove visible debris and check that the wheels move as intended. If a wheel remains stiff, makes unusual noises, or repeatedly sticks, it may need professional attention.
Clean the Filter and Dustbin
A full dustbin or blocked filter can restrict airflow. The vacuum may struggle to pick up debris and require additional cleaning passes.
Empty the dustbin and remove loose debris from the filter. Replace it if cleaning no longer restores airflow or if it is visibly damaged.
Filter washing rules vary by model. For example, iRobot states that filters on several Roomba e, i, and j models must not be washed. Follow its filter and dustbin maintenance instructions or the instructions for your own vacuum.
After servicing the brushes, wheels, and filter, run the robot again under the same conditions. An increase in runtime suggests that mechanical resistance or blocked airflow contributed to the problem.
Adjust Power Settings and Eco Mode
Maximum suction consumes more energy than lower-power cleaning. If the robot drains quickly on carpet or during deep cleaning, the selected suction mode may explain the shorter runtime.
Reducing power where strong suction is unnecessary can help the robot clean longer between charges.
How Much Can Eco Mode Improve Runtime?
Eco mode reduces motor power to conserve battery energy. It is generally suited to hard floors and lighter cleaning tasks.
On some models, Eco mode may increase cleaning time by up to 30%. The actual improvement depends on the robot, battery condition, floor surface, and cleaning settings.
To check whether Eco mode helps your vacuum:
- Fully charge the robot.
- Select Eco, Quiet, or the lowest available suction mode.
- Clean the same area used during your previous test.
- Compare the cleaning time and remaining battery percentage.
If runtime improves greatly at lower power, the battery may still be functioning normally. The previous settings may simply have demanded more energy.
Also check for available firmware updates. Software problems can affect navigation, power management, and how accurately the robot reports its battery level.
When Should You Use Lower or Higher Suction?
Choose suction power based on the floor and the amount of dirt. Running at maximum power for every cleaning session often wastes battery capacity.
- Hardwood, tile, and vinyl: Start with a low or moderate setting for everyday dust.
- Low-pile carpet: Use standard power first, increasing it when pickup is inadequate.
- Thick carpet: Higher suction may improve cleaning, but expect shorter battery life.
- Heavy debris or pet hair: Use stronger suction when needed, then return to a lower setting for routine cleaning.
Some Roomba models provide Quiet Clean, Detailed Clean, and Custom power settings. iRobot explains in its suction power guidance that quieter, lower-power operation can extend cleaning coverage before recharging.
Check whether your vacuum is set to repeat each cleaning pass. Extra passes increase total operating time and can make the battery appear to drain unusually quickly.
Test Battery Runtime and Load
A controlled runtime test is one of the best ways to distinguish an aging battery from excessive power consumption. Run the vacuum from a full charge on a consistent surface and record how long it operates.
Compare that result with the manufacturer’s expectations for your exact model.
Fully Charge Before Testing
Begin with a complete charge, not a battery that merely shows enough power to start cleaning. A partial charge can make a healthy battery appear weak.
Follow these steps:
- Charge the vacuum fully. Wait until the app or robot indicates a complete charge.
- Choose a consistent test area. Use a clear section of hard flooring where possible.
- Set a known suction level. Record the selected mode so you can repeat the test.
- Prevent automatic recharging during the test. For Roomba models, iRobot recommends unplugging and moving the Home Base® or Clean Base™ out of the way after charging.
- Start cleaning and record the time. Let the robot operate until it reports low battery or ends its mission.
- Repeat if necessary. Some robots finish a cleaning job before the battery becomes low, so another job may be needed.
Note any charging errors, unexpected shutdowns, or sudden battery percentage changes during the test.
A sharp drop under load can indicate weak capacity or high internal resistance. However, percentage readings alone are not enough to confirm a battery fault.
Run on Hard Floors and Compare Expected Runtime
Hard flooring provides a more consistent baseline than carpet. Carpet fibers increase resistance and may trigger stronger suction, which reduces runtime.
iRobot’s short battery runtime troubleshooting guide provides the following test expectations for Roomba model groups.
| Model group | Expected runtime | Diagnostic note |
|---|---|---|
| e series | At least 90 min | Hard-floor test baseline |
| 900 series | At least 75 min | Compare with model guidance |
| i/j/s/m series | At least 75 min | Settings and model affect runtime |
| 400–800 series | 60 min | Older-series test reference |
| Any model | Time to low battery | Compare with its exact specification |
These are the manufacturer’s troubleshooting figures for the listed groups, not universal guarantees for every configuration. Individual models can have different published runtimes.
If your vacuum consistently stops well before its expected time, despite full charging, clean components, and moderate suction, battery wear becomes more likely.
Does Returning to the Dock Early Mean the Battery Is Bad?
Not necessarily. Many robot vacuums automatically return to their dock when battery power becomes low, then resume cleaning after recharging.
For supported Roomba models, Recharge and Resume is a normal feature. A large cleaning area may require more than one charging session.
However, if the robot repeatedly returns after cleaning only a small area, compare its actual runtime with the expected figure. Also check whether obstacles, repeated routes, or navigation errors are wasting battery power.
Replace a Worn-Out Battery
If cleaning and charging checks do not improve runtime, the battery may be nearing the end of its useful life. Lithium-ion batteries gradually lose capacity through charging cycles, heat exposure, and normal aging.
Robot vacuum batteries are often described as lasting around 2–5 years, although actual lifespan varies by model and usage. Some batteries may show noticeable capacity loss after roughly 300 to 500 charge cycles, while others are designed for different cycle lives.
For Roomba owners, iRobot’s battery maintenance guidance says a properly maintained battery should last at least 2–3 years before replacement becomes necessary.
Signs That Battery Replacement May Be Necessary
- Runtime remains much shorter than expected after a full charge.
- The robot repeatedly shuts down while showing substantial battery power.
- The battery no longer holds a charge reliably.
- Charging is inconsistent even after the dock and contacts have been checked.
- The battery pack shows swelling, physical damage, or abnormal heat.
Choose a replacement battery specifically approved for your robot vacuum model. Matching the physical shape alone does not guarantee electrical compatibility.
Some robot batteries can be replaced by users according to the manufacturer’s instructions. Others require qualified service personnel.
Note: If the vacuum is still under warranty, contact the manufacturer before replacing the battery. If the battery is swollen, leaking, damaged, or unusually hot, stop using and charging it. Seek manufacturer or qualified professional guidance rather than attempting a home repair.
How Should You Dispose of an Old Robot Vacuum Battery?
Do not throw lithium-ion batteries into ordinary household trash or mixed recycling bins. Damaged batteries can cause fires during handling and transport.
The US Environmental Protection Agency’s lithium-ion battery guidance recommends specialized battery recycling or suitable household hazardous waste collection facilities.
For safely removed, undamaged batteries, protect exposed terminals from contact with metal during storage and transport. Follow local recycling requirements and any additional instructions from the receiving facility.
After fitting an approved replacement, fully charge the vacuum and repeat the runtime test. If performance is still poor, the problem may involve the charging circuit, motor, or another internal component rather than the battery.
Frequently Asked Questions
Why Does My Robot Vacuum Battery Run Out So Quickly?
Your robot vacuum battery may run out quickly because of high suction settings, clogged filters, tangled brushes, carpet resistance, poor charging, or battery wear. Extreme temperatures can also affect performance. Start by confirming a full charge, cleaning the moving parts, and comparing runtime under consistent conditions.
How Long Should a Robot Vacuum Battery Last?
A robot vacuum battery commonly lasts around 2–5 years before replacement, depending on the model, usage, and battery chemistry. Some manufacturers give shorter model-specific expectations. Keeping brushes clean, maintaining charging contacts, and avoiding excessive heat can help preserve battery capacity.
How to Check if Battery Is Draining Fast?
Fully charge the robot, run it on hard floors using a consistent suction setting, and record the time until low battery. Compare the result with the manufacturer’s runtime guidance. A sudden percentage drop, such as from 60% to 0%, may indicate a weak battery or inaccurate reporting, especially if the robot shuts down early.
Why Does My Roomba Run Out of Battery So Quickly?
A Roomba can lose battery power quickly because of dirty charging contacts, clogged brushes, thick carpet, high suction, or an aging battery. Some models also return to recharge during normal cleaning. If the robot repeatedly shuts down well before its expected runtime, perform a controlled battery test and consider professional service.
Should You Leave a Robot Vacuum on Its Charging Dock?
Most modern robot vacuums are designed to remain on their charging docks between cleaning sessions. Follow your manufacturer’s guidance for normal charging and longer storage periods. For example, iRobot recommends keeping supported Roomba models docked when not in use and using the appropriate storage mode during extended breaks.
Conclusion
A robot vacuum battery draining fast does not always mean the battery needs replacing. Dirty contacts, tangled brushes, clogged filters, and high suction settings can all shorten runtime.
Start with charging and maintenance checks, then measure how long the robot operates on a full charge. If battery performance remains poor under normal conditions, use an approved replacement or have the vacuum inspected by a qualified technician.
Sources
- iRobot: How to Clean Charging Contacts: Charging contact cleaning methods, alignment, and damaged contacts.
- iRobot: Battery Maintenance Tips: Battery lifespan, charging practices, temperature, and storage guidance.
- iRobot: Roomba Essential Care and Maintenance: Brush cleaning, wheel maintenance, and removing debris.
- iRobot: Bin and Filter Care: Filter maintenance, dustbin cleaning, and washing restrictions.
- iRobot: Roomba Suction and Cleaning Settings: Effects of suction power and cleaning preferences on battery runtime.
- iRobot: Short Battery Runtime: Hard-floor testing procedure and series-specific runtime expectations.
- iRobot: Recharge and Resume: Normal automatic charging and cleaning continuation.
- US Environmental Protection Agency: Lithium-Ion Batteries: Battery safety, handling precautions, and disposal recommendations.