A squeaking robot vacuum usually points to a mechanical fault rather than a software issue. The first checks should focus on the brush roll, side brushes, and wheel assemblies, where hair, debris, or wear often create friction. Loose fittings and uneven contact can also produce intermittent noise. A quick test across different floor surfaces may narrow the source, but one component is often overlooked at the start.
Why Your Robot Vacuum Squeaks
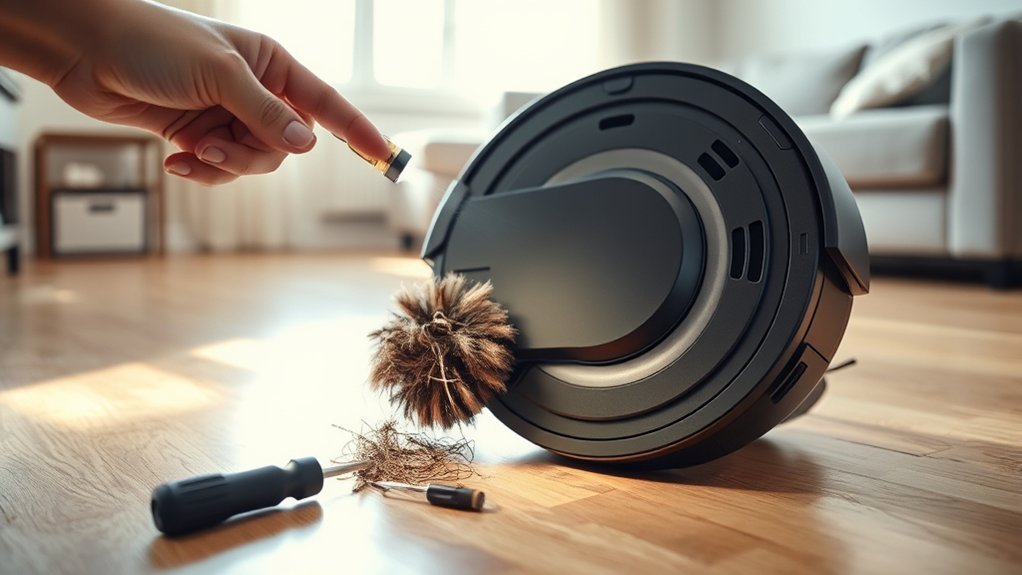
A robot vacuum often squeaks when friction develops in moving parts, most commonly at the rolling brush guard where debris causes misalignment or resistance. Such squeaking noises usually indicate a mechanical fault rather than random sound.
Swivel wheels can also generate noise, especially on tile grout, where contact becomes uneven and the wheel assembly may bind. If the sound persists, worn wheel components should be suspected, since age-related degradation can amplify resistance and reduce mobility.
Regular maintenance improves autonomy by preventing buildup on brushes and wheels, which lowers friction and delays wear. Listening for changes in pitch, frequency, or duration helps detect obstruction early, before performance declines.
A tight, rhythmic squeak often points to a localized issue; a rougher knocking pattern may indicate wheel irritation. In either case, prompt inspection supports efficient operation and preserves the machine’s ability to move freely.
Check the Brush Roll First
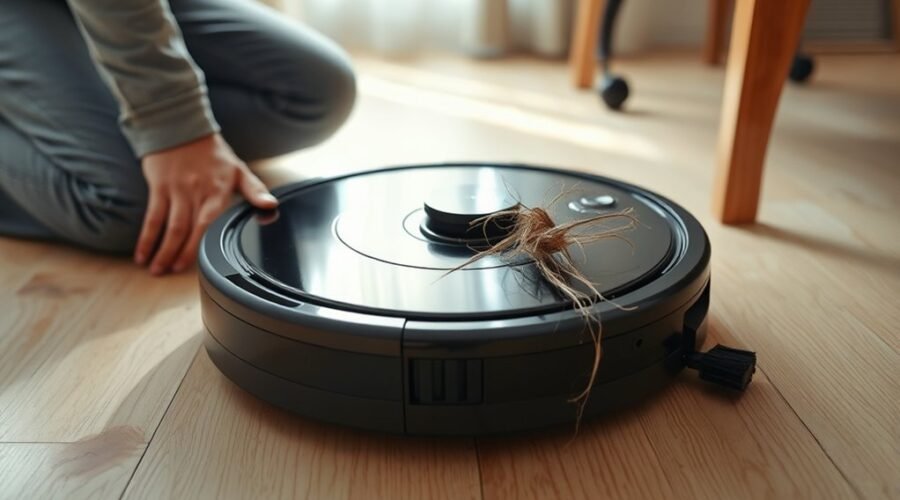
The brush roll is a primary source of squeaking noise, especially when hair, string, or debris creates friction.
It should be removed from its housing and inspected for blockages, worn edges, or other damage.
Proper seating and alignment should also be verified before reassembly.
Brush Roll Obstructions
Brush roll obstructions are a common source of squeaking in robot vacuums, especially when hair, string, or other debris becomes tangled and increases friction.
The brush roll should be inspected for obstructions that alter rotation, raise wear, and produce audible drag. A systematic cleaning routine helps restore free movement and reduces noise before damage escalates.
If the brush roll hesitates, binds, or sounds dry, the cause is often trapped material around the bearings or bristles. Manufacturers commonly advise monthly cleaning to maintain performance and limit squeaking.
For users seeking reliable, liberated operation, regular attention to this component supports quieter, more efficient navigation.
Persistent noise after cleaning may indicate deeper mechanical resistance, but the brush roll remains the first diagnostic point.
Remove And Inspect
Removing the brush roll should be the first diagnostic step when a robot vacuum emits squeaking, since hair and debris trapped around the roll commonly create friction and noise.
The brush should then be removed, and each section should be inspected for wrapped fibers, compacted dust, or lodged fragments. Any obstruction can resist rotation and produce a high-pitched sound.
The bristles should also be examined for wear; frayed or bent ends can scrape surfaces and reduce cleaning efficiency.
After inspection, the brush must be cleaned thoroughly and reinstalled in the correct orientation. Fasteners should be checked for secure engagement, because misalignment can also trigger squeaking during operation.
Weekly maintenance helps preserve performance and supports a quieter, more liberated cleaning routine.
Inspect the Side Brushes
A quick inspection of the side brushes can identify a common source of squeaking noise. Technicians should inspect side brushes for misalignment, frayed bristles, and trapped hair or debris that restricts rotation.
Any obstruction can generate rubbing, vibration, and intermittent squeaking during cleaning cycles. Loose mounting points should also be checked, since an unsecured brush can shift under load and create added friction.
If the brush hubs are cracked, bent, or excessively worn, replacement is the correct corrective action. Worn side brushes lose their profile, reducing contact control and increasing noise.
Cleaning should be routine, not reactive, so movement stays free and performance remains stable. A small amount of preventive care preserves quiet operation and keeps the machine working as intended.
When the side brushes are intact, properly attached, and free of buildup, the vacuum can move with less resistance and fewer audible complaints.
Look for Debris in the Wheels
The wheels should be inspected for hair tangles, dust, and other debris that may create friction and trigger squeaking.
Any material lodged around the axles or within the wheel housing should be cleared to restore unobstructed movement.
Each wheel should then be tested for smooth rolling to confirm that no obstruction remains.
Inspect Wheel Hair Tangles
Inspect the robot vacuum’s wheels for hair tangles and debris, since buildup around the wheel axles can create friction and produce squeaking during operation. A close inspect of both wheels should reveal hair tangles wrapped near the tread or housing. When present, they restrict rotation and amplify noise, limiting the machine’s freedom to move cleanly.
- Use tweezers or a small brush to lift trapped fibers.
- Confirm the wheels spin freely after cleaning.
- Recheck the wheel area regularly to prevent recurring squeaks.
This diagnostic step is essential because even minor obstructions can sustain audible friction and reduce performance.
Clearing hair tangles supports quieter travel, better traction, and less strain on the drive system, helping the vacuum operate with greater independence.
Clear Debris From Axles
Clear debris from the wheel axles by checking for hair, dirt, and other buildup that can interfere with rotation and produce squeaking during operation.
A technician should inspect the wheel axles regularly, since hidden residue often triggers squeaking noises and slows movement. If obstruction is present, use a soft brush or tweezers to clear debris without forcing components out of alignment.
Attention should stay on the axle channel and wheel hub, where compacted lint may restrict motion and generate friction. When the path is clean, the wheels should remain unobstructed and responsive.
If needed, apply a silicone-based lubricant sparingly to the wheel axles to reduce friction. Routine cleaning supports peak performance, preserves independence from avoidable breakdowns, and extends service life.
Test Rolling Wheel Movement
Rolling the wheels by hand can quickly reveal debris or hair trapped in the wheel path. A technician should rotate each wheel slowly and confirm that the rolling wheels move with minimal resistance.
Any grinding, stiffness, or uneven travel suggests obstruction in the wheel housing or along the axle. Dust buildup around the joints can intensify friction and produce squeaking noises during motion.
- Inspect both sides of each wheel for wrapped hair or compacted lint.
- Check for free rotation; resistance points to hidden blockage or wear.
- Apply cleaning tips by clearing the housing before considering lubricant.
If the sound remains after cleaning, a suitable lubricant may reduce friction at the joints.
Check the Swivel Wheel for Knocking
A knocking sound from the swivel wheel often points to debris, hair, or uneven contact with tile grout or other irregular surfaces, all of which can create friction or impact during movement.
The swivel wheel should be inspected for trapped strands, compacted dust, or residue that interferes with rotation. If the wheel tracks poorly, light lubrication may reduce resistance and help quiet knocking noises.
Inspect the swivel wheel for trapped debris, and lubricate lightly if it tracks poorly or knocks during movement.
The assembly should also be checked for secure seating, since a wheel that shifts under load can rattle during turns. Surface type matters: repeated contact with grout lines, thresholds, or rough flooring can amplify impact sounds even when the vacuum is otherwise functional.
When cleaning does not restore smooth travel, wear on the swivel wheel should be suspected. Flattened edges, cracking, or rough bearings indicate damage and justify replacement.
Regular maintenance keeps the wheel free, responsive, and aligned, supporting quieter operation and a more liberated cleaning routine.
Tighten Loose Parts and Screws
Loose fittings can also produce squeaking or rattling, especially after the swivel wheel has been ruled out as the source. On robot vacuums, loose screws on the chassis, dustbin latch, or brush housing often amplify vibration into noise.
A systematic inspection should follow: check every visible fastener, confirm the dustbin seats firmly, and verify that attachments lock without play. If a screw cannot be reached by hand, use a screwdriver to restore proper tension.
Periodic tightening matters because normal motion gradually loosens components, allowing contact points to shift and squeal. The rolling brush guard should be examined for alignment, since a skewed guard can rub during operation and create a sharp squeak. A snug fit across all parts supports quieter, more controlled movement.
- Inspect fasteners after routine use.
- Tighten hidden hardware with the correct driver.
- Confirm the brush housing and guard sit flush.
Test the Vacuum on Different Floors
A hard floor test should be performed first, since hardwood and tile can amplify squeaking caused by reduced cushioning and higher surface friction.
Carpet versus tile comparisons can show whether the noise changes with floor texture, wheel loading, or brush contact.
If the squeak appears only on one surface, the condition may indicate wheel misalignment or debris in a moving component.
Hard Floor Test
Testing the robot vacuum on hard floors can help isolate the source of a squeaking noise, because tile, laminate, and hardwood often amplify mechanical sounds more than carpet. On these hard floors, loose debris, a misaligned wheel, or a dry cleaning brush may produce a sharper tone, revealing which mechanical components are under strain.
- Check whether the squeak appears at startup, during turns, or while docking.
- Compare sound levels across tile, laminate, and hardwood for pattern changes.
- Inspect wheels and the cleaning brush if the noise persists on every surface.
A consistent squeak on hard floors suggests a component issue rather than normal surface variation. If the sound becomes clearer on rigid flooring, the vacuum may need cleaning, tightening, or part replacement to restore quiet operation.
Carpet Versus Tile
When the robot vacuum is run on both carpet and tile, the surface change can help pinpoint the source of the squeak. On carpet, higher friction and Carpet Boost may raise noise levels; if the sound increases, the issue may be fiber drag rather than failure. On tile, squeaking often points to swivel wheel or debris in the side wheels. Compare each pass and note persistence across surfaces.
| Surface | Diagnostic clue |
|---|---|
| Carpet | friction or boost-related squeak |
| Tile | wheel or debris noise |
| Both | deeper mechanical fault |
| Alternate runs | isolate surface effect |
| Repeat tests | confirm maintenance needs |
This simple shift in terrain supports precise diagnosis and lets the machine move without unnecessary constraint.
Try Single Sweep and Mopping Modes
Switching the robot vacuum to single sweep mode can isolate the squeaking source by removing interference from other cleaning functions, making it easier to observe the brush guard, wheels, and nearby moving parts.
Single sweep mode helps isolate squeaks by reducing interference, making brush guard and wheel movement easier to inspect.
In single sweep mode, the robot follows a simpler motion path, which can expose whether the squeaking noise begins during brush rotation or wheel travel. Mopping mode provides a contrasting test because the drive system operates differently, helping separate brush-driven friction from chassis-related contact.
This controlled comparison supports faster diagnosis and more independent troubleshooting.
- Watch the rolling brush guard for scraping, flex, or uneven contact.
- Compare sound behavior in single sweep mode and mopping mode.
- If the squeaking persists in both, suspect deeper mechanical wear or alignment faults.
Recording when the noise appears can clarify whether the fault is intermittent or constant, allowing a more precise repair decision.
Clean or Replace Worn Filters
A clogged or worn filter can restrict airflow, forcing the motor to work harder and sometimes producing squeaking during operation.
Diagnostic checks should begin with the filters, since dirt buildup raises strain and can lift the noise level. If the unit is used regularly, inspect these parts every few weeks and replace or clean them about every 2–3 months.
Washable filters should be rinsed gently, then air-dried completely before reinstallation; moisture left in place may aggravate squeaking. OEM filters are preferred because correct fit preserves airflow and efficiency, giving the machine room to operate freely.
If the vacuum is already noisy, remove debris from the brush path and clean the brush as well, since obstruction can compound airflow loss. A fresh, properly seated filter usually restores normal intake and lowers motor load without further intervention.
Contact Robot Vacuum Support
If the robot vacuum continues to squeak after basic cleaning and filter checks, customer support should be contacted for model-specific troubleshooting.
At this stage, the noise may reflect a bearing fault, brush issue, or sensor interference that requires manufacturer guidance. Many brands, including Eufy, provide 24/7 live chat, enabling rapid contact and direct diagnosis without waiting.
The noise may signal a bearing fault, brush issue, or sensor interference requiring manufacturer guidance.
Email support is useful when the squeaking is intermittent; a written report can include the exact noise pattern, operating mode, and prior fixes. Clear records help customer support isolate the fault faster and reduce unnecessary back-and-forth.
If the problem persists, warranty service details should be requested; repairs or replacements may be covered at no cost.
- Document when the noise starts and stops.
- List every troubleshooting step already completed.
- Ask whether warranty coverage applies to the unit.
Frequently Asked Questions
Why Is My Robot Vacuum Making a Squeaking Sound?
It is usually caused by debris in the brush or wheel assembly, worn bearings, or rubbing plastic. Inspect for squeaking causes, apply maintenance tips, and perform noise reduction through cleaning, lubrication, or part replacement.
What’s the Average Lifespan of a Robot Vacuum?
Typically, a robot vacuum lasts 5–7 years, but what limits longevity? Robot vacuum maintenance, a disciplined cleaning schedule, and timely battery replacement can extend service life beyond 7 years, preserving autonomy with minimal dependency.
Why Is My Roomba Making a Squeaking Noise?
Squeaking usually signals friction: debris in brushes, a misaligned brush guard, or a dirty swivel wheel. Roomba maintenance tips, Common noise causes, Troubleshooting steps: clean, inspect, lubricate axles, then replace worn parts if noise persists.
My Roborock Is Making a Weird Noise. What Could Be Causing This and How Can I Fix It?
It is usually debris, not a major fault. The Roborock may have suction issues, wheel problems, or brush maintenance needs. Inspect brushes, guards, and swivel wheel, clear tangles, lubricate joints, then retest.
Conclusion
A squeaking robot vacuum usually points first to the brush roll, side brushes, or wheel assemblies. Debris, misalignment, or worn parts can act like grit in a hinge, producing repeated noise during operation. Testing on different floor types and modes helps isolate the source, while cleaning filters and checking fasteners can eliminate secondary causes. If the squeak persists after inspection, the motor or internal drive components may require professional support or replacement.