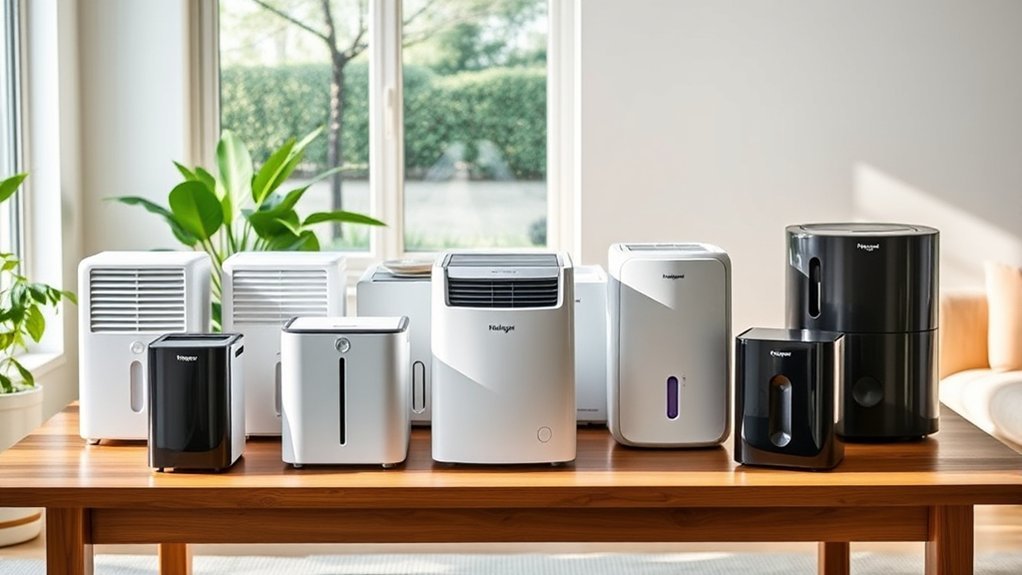
An air conditioner can lower the temperature without removing enough moisture. The most common causes are a thermostat fan set to ON, restricted airflow, a dirty or frozen evaporator coil, a blocked condensate drain, incorrect refrigerant charge, leaking ducts, excessive indoor moisture, or an oversized system that shuts off too quickly.
Quick Answer
If your AC cools but does not dehumidify, measure the indoor humidity, set the thermostat fan to AUTO, inspect the filter, and check for standing water or a blocked drain. Persistent humidity, ice, hissing, weak airflow, or frequent short cycles requires professional HVAC diagnosis.
Key Takeaways
- Confirm the problem with a separate hygrometer instead of relying only on how the room feels.
- Use the thermostat’s AUTO fan setting during normal cooling so off-cycle airflow does not return moisture from a wet coil to the room.
- A dirty filter, frozen coil, blocked drain, refrigerant problem, or leaking duct system can reduce moisture control.
- An oversized AC may reach the temperature setting before running long enough to remove the moisture load.
- Do not open refrigerant lines or electrical panels. Call a qualified technician when basic checks do not solve the problem.
At a Glance
| Time Required | 15 to 30 minutes for basic checks; longer if humidity must be monitored through several cooling cycles |
| Difficulty | Easy for thermostat, filter, humidity, and visible-drain checks; advanced diagnosis requires a technician |
| Tools Needed | Hygrometer, flashlight, correct replacement filter, towels, and the equipment manual |
| Cost | Basic checks may cost nothing beyond a filter or hygrometer; service and repair costs depend on the diagnosis |
Why Is My AC Not Dehumidifying?
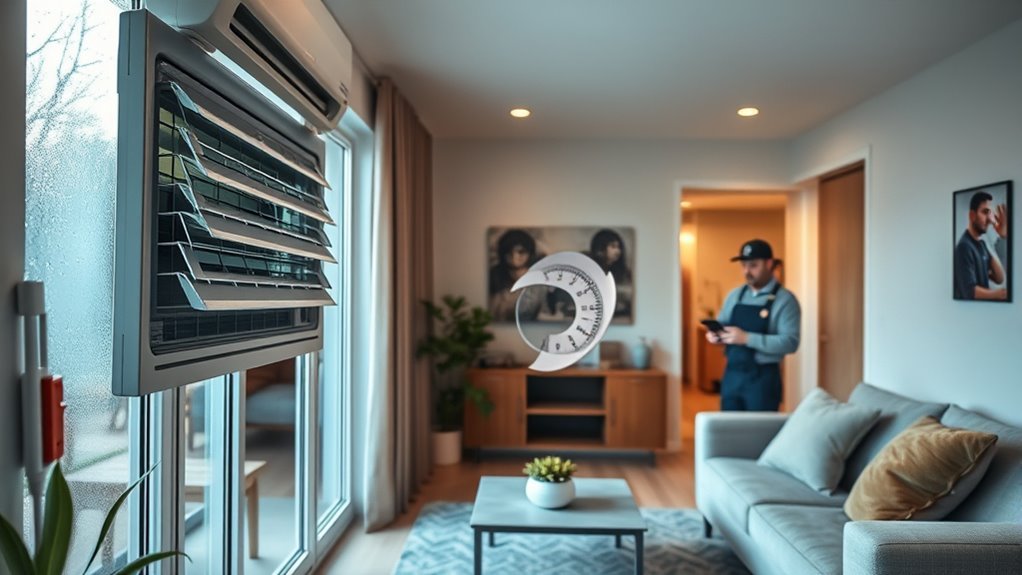
An air conditioner removes moisture when warm indoor air passes over a cold evaporator coil. Water vapor condenses on the coil, falls into a drain pan, and leaves through a condensate line or pump. Anything that reduces coil cooling, airflow, drainage, or operating time can weaken that process.
Start by measuring the relative humidity with a separate hygrometer. The U.S. Environmental Protection Agency recommends keeping indoor relative humidity below 60%, ideally between 30% and 50%. A reading that remains above 60% during normal cooling deserves attention, especially if you also see condensation, smell musty odors, or find damp surfaces. See the EPA indoor-air guidance for more information.
Note: Humidity changes throughout the day. Compare readings during several cooling cycles, and place the hygrometer away from supply vents, bathrooms, kitchens, windows, and direct sunlight.
Troubleshoot an AC That Is Not Removing Humidity
Work through these checks in order. Stop if you find ice, exposed wiring, a refrigerant-line problem, overflowing water, or anything that requires opening a sealed or powered part of the system.
- Measure the humidity. Confirm that relative humidity is consistently high rather than relying only on a clammy feeling.
- Check the thermostat. Confirm that the system is in COOL mode and the fan is set to AUTO.
- Inspect the filter. Replace or clean it if it is visibly dirty or overdue according to the manufacturer’s instructions.
- Look for ice. Check accessible refrigerant tubing and the indoor unit for frost or ice.
- Check drainage. Look for standing water, a full drain pan, a stopped condensate pump, or water around the air handler.
- Reduce moisture sources. Close windows, run bathroom and kitchen exhaust fans, and verify that the clothes dryer vents outdoors.
- Observe system operation. Note weak airflow, unusually short cycles, hissing, warm supply air, water leaks, or rooms that stay humid.
- Call a technician. Arrange service if humidity remains high after the safe checks above.
Warning: Turn the system off before reaching into an accessible equipment cabinet. Do not remove electrical covers, touch a capacitor, connect refrigerant gauges, cut refrigerant tubing, or add refrigerant. Refrigerant service should be performed by an appropriately trained and EPA-certified technician.
Check the Thermostat Fan Setting
Check the thermostat fan setting before changing equipment or scheduling a repair. For normal cooling and humidity removal, AUTO is usually the correct setting unless your installer has configured a different control strategy.
Fan Set to Auto
When the fan is set to AUTO, the indoor blower normally runs with the cooling cycle and stops after the thermostat ends the call for cooling. This allows water on the evaporator coil and in the pan to continue draining without a constant stream of room air passing over the wet surfaces.
AUTO does not fix every humidity problem, but it removes one common cause and costs nothing to test. After changing the setting, allow the system to complete several normal cycles before comparing humidity readings.
On Mode Raises Humidity
With the fan set to ON, the blower continues moving air after the compressor stops. That airflow can re-evaporate part of the water left on the coil or in the drain pan and carry the moisture back into the rooms. Research published through the Florida Solar Energy Center found higher indoor humidity with continuous fan operation than with automatic fan cycling.
Continuous fan operation can still be useful in limited situations, such as temporarily helping a frozen coil thaw after cooling has been switched off. It should not be used as a substitute for diagnosing the airflow or refrigerant problem that caused the ice.
Pro Tip: Write down the humidity before changing the fan from ON to AUTO, then check it at the same time of day after several cooling cycles. This gives you a more useful comparison than checking immediately.
Inspect Dirty Coils and Clogged Filters
A dirty filter restricts airflow through the system. A dirty evaporator coil interferes with heat transfer. Either problem can reduce cooling performance, alter coil temperature, increase energy use, and contribute to poor humidity control.
| Issue | Possible Effect | Recommended Action |
|---|---|---|
| Dirty evaporator coil | Reduced heat transfer, longer operation, or coil icing | Arrange professional inspection and cleaning |
| Clogged filter | Restricted airflow and possible freezing | Install the correct clean filter |
| Dirty blower or airflow fault | Weak or uneven airflow | Have airflow and blower operation tested |
ENERGY STAR recommends inspecting, cleaning, or changing central HVAC filters monthly. The replacement interval still depends on the filter, equipment, household dust, pets, smoke, renovation work, and manufacturer instructions. A thick high-efficiency filter is not automatically better if the system was not designed for its airflow resistance.
Do not spray household chemicals onto an installed evaporator coil. Coil access, cleaning methods, condensate protection, and chemical compatibility vary by equipment. A technician can clean the coil without damaging its fins, coatings, wiring, or drain system.
Recommended Products

Professional-strength, self-rinsing on condensate-producing coils; helps keep equipment at optimum performance levels
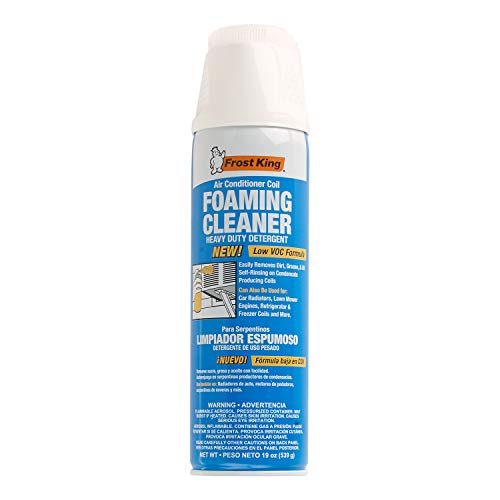
Heavy-duty foam dissolves stains, removes grease & oil, and loosens dirt

Evap foam will liquefy dirt, grease, oil, and other residues quickly and easily
Check for a Frozen Evaporator Coil
Ice on the indoor coil or refrigerant tubing is not normal. Common causes include restricted airflow, a dirty coil, a blower problem, low refrigerant charge, or operation in unsuitable conditions.
If you find ice, switch cooling to OFF. You may set the fan to ON temporarily to move room-temperature air across the coil, provided there is no water near electrical parts and the equipment manual allows it. Do not chip, scrape, or heat the ice with an open flame or high-temperature tool. Arrange service to identify the cause before returning the system to normal cooling.
Check the Condensate Drain
The evaporator can remove moisture only if the collected water has a clear path out of the equipment. A blocked drain line, dirty pan, failed condensate pump, incorrectly installed trap, or kinked hose may leave water in or around the air handler.
Look for these signs:
- Water around the indoor unit or furnace
- A full auxiliary drain pan
- A condensate pump that does not run
- Water dripping from an emergency drain outlet
- A float switch that repeatedly shuts the system down
- Musty odors near the air handler
- Visible algae or debris in accessible clear tubing
You may empty an accessible condensate-pump reservoir or clear an exterior drain termination only when the manufacturer permits it and no electrical parts are exposed. Shut off power before handling equipment components. Call a technician if the pan overflows, the blockage returns, the drain is concealed, or you are unsure how the trap and vent should be configured.
Recommended Products

CHECK BEFORE YOU BUY: EZVAC's universal base is designed to fit multiple HVAC sizes. The custom black elbow ONLY fits a 1-inch opening and is ribbed for easy grip. Please make sure your drain line has a 1-inch opening before ordering
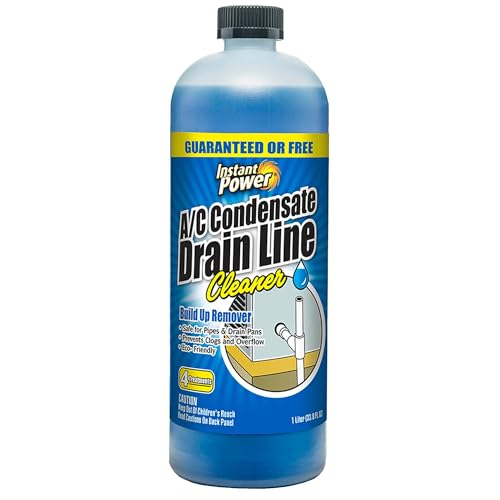
CLEARS CLOGGED DRAIN LINES - Instant Power AC condensate drain line cleaner removes buildup of sludge and debris that block your air conditioner’s drain line

HEAVY DUTY FORMULA - Our Heavy duty formula will break down and reduce build up in a condenser drain line, drip pan, pump reservoir and p-trap that cause clogging and backflow problems.
Look for Refrigerant Leaks
Too little refrigerant can reduce cooling capacity, lower coil temperature unevenly, cause icing, and weaken moisture removal. Because the refrigerant circuit is sealed, a low charge often indicates a leak or an installation problem rather than normal consumption.
Possible warning signs include:
- Ice on the evaporator or refrigerant line
- Hissing or bubbling sounds
- Long operation with weak cooling
- Supply air that is warmer than normal
- A sudden increase in electricity use
- Oil residue around a refrigerant connection
These symptoms do not prove that refrigerant is low. Restricted airflow, a dirty coil, a faulty expansion device, sensor errors, and compressor problems can look similar. A technician must measure system temperatures, pressures, airflow, and manufacturer charging data before confirming the diagnosis.
Do not buy a recharge kit or attempt to top off a residential system. The EPA restricts refrigerant sales and service, prohibits intentional venting of most refrigerants, and requires certification for work that can open or disturb the refrigerant circuit. See the EPA Section 608 guidance.
Check for Duct Leaks or an Oversized AC
Leaking ducts and incorrect equipment sizing can both leave a home cool but humid. Duct problems may pull warm, damp air from an attic, crawlspace, basement, garage, or wall cavity. Oversized equipment may satisfy the thermostat before completing a long enough moisture-removal cycle.
Duct Leak Signs
ENERGY STAR estimates that 20% to 30% of the air moving through the duct system in a typical house can be lost through leaks, holes, and poorly connected ducts. The actual loss in your home may be lower or higher.
Common signs include:
- Rooms that are difficult to cool or feel more humid than others
- High cooling bills without a clear weather-related reason
- Dust entering through supply registers
- Whistling or rattling near duct connections
- Visible loose, crushed, disconnected, or kinked ducts
- Return ducts located in a humid attic or crawlspace
Accessible seams may be sealed with approved duct mastic or metal-backed HVAC tape. Do not use cloth “duct tape” as a permanent duct-sealing material. Hidden leakage is better assessed with pressure testing or airflow measurements by an HVAC or home-performance professional.
Oversized Unit Symptoms
An oversized single-stage AC may cool the home quickly and shut off before removing enough latent moisture. This can leave the temperature low while the air still feels clammy.
Possible symptoms include:
- Cooling cycles that frequently last only a few minutes
- Rapid temperature changes followed by long off periods
- High humidity despite a low thermostat setting
- Uneven temperatures between rooms
- Frequent starts and stops
- Noise or strong bursts of airflow from oversized duct equipment
Short cycles can also result from thermostat location, control faults, blocked airflow, frozen coils, electrical problems, or zoning errors. Cycle length alone does not prove that the unit is oversized.
Proper System Sizing
Do not replace equipment based only on the home’s floor area or the capacity of the old unit. Ask the contractor for an ACCA Manual J heating and cooling load calculation and equipment selection based on manufacturer performance data.
A proper calculation considers insulation, windows, orientation, air leakage, ventilation, occupants, ducts, local weather, and both sensible and moisture loads. ENERGY STAR recommends Manual J verification when choosing correctly sized residential equipment.
Multi-stage, variable-speed, and variable-capacity systems can run at lower output for longer periods, which may improve comfort and moisture removal compared with a basic system that repeatedly switches between full capacity and off. Controls and airflow must still be properly configured.
Check for Indoor and Outdoor Moisture Sources
The AC may be operating correctly while the home gains moisture faster than the system can remove it. Check for sources that are independent of the cooling equipment.
- Open windows or doors during humid weather
- Bathroom fans that do not vent outdoors
- Cooking without a working range hood
- A clothes dryer venting indoors or through a damaged duct
- Plumbing, roof, window, or foundation leaks
- A damp basement or unsealed crawlspace
- Wet carpet, drywall, insulation, or stored materials
- Large aquariums or frequent indoor clothes drying
- Excess outdoor air from a ventilation system that is not balanced or controlled
Use exhaust fans while bathing and cooking, but make sure they discharge outdoors. Repair water leaks promptly and dry wet materials as soon as possible. Do not open windows for “ventilation” when outdoor air is hot and humid because this can add moisture rather than remove it.
A cold room is not always a dry room. Temperature control and moisture control are related, but the home’s cooling load and humidity load do not always rise and fall together.
Check Airflow and Equipment Setup
Airflow that is too low can freeze the coil, while airflow that is too high may reduce the time the air spends in contact with the cold coil. Correct airflow depends on the equipment, duct system, climate, thermostat, and manufacturer settings.
Do not change blower taps, dip switches, control-board settings, or variable-speed programming without the installation instructions and proper test instruments. A technician can check static pressure, blower airflow, duct restrictions, coil temperature, drain performance, and dehumidification settings.
Some thermostats and air handlers support features such as:
- Lower blower speed during a dehumidification call
- Cooling below the normal temperature setting by a limited amount
- Longer low-capacity operation
- Whole-house dehumidifier control
- Ventilation control during humid outdoor conditions
These features must be compatible with the installed equipment. An incorrect setting can cause freezing, comfort problems, noise, or excessive energy use.
When to Use a Separate Dehumidifier
A separate dehumidifier can help when the home has a high moisture load but little need for cooling. This often happens during mild rainy weather, in basements, or in efficient homes that reach the temperature setting quickly.
A portable unit may be suitable for one room or a basement. A whole-house dehumidifier may be more appropriate when humidity affects several rooms or when the equipment must work with a central duct system. Size and install it according to the manufacturer’s instructions, provide reliable drainage, and maintain its filter and collection system.
A dehumidifier should not be used to hide a roof leak, plumbing leak, wet crawlspace, disconnected duct, or malfunctioning AC. Fix the moisture source first.
Recommended Products

Upgrade High Efficient Dehumidification: Dehumidifier utilize semi conductor condensation technology, ensuring quiet operation while effectively extracting moisture from the air. This advanced feature helps keep humidity levels below 45%

【Ideal for Large Homes & Basements (Up to 5,000 Sq. Ft)】The Waykar 80 pint dehumidifier efficiently removes up to 80 pints of moisture per day in high-humidity conditions (95°F, 90% RH). In warmer, damp spaces like basements (86°F, 80% RH), it removes 62 pints/day. This dehumidifier for basement is perfect for large areas such as basements, bathrooms, bedrooms, and living rooms. Customize your space by adjusting the humidity level from 30% to 80%, creating a drier and healthier environment

120-Pint/Day Dehumidifier for Large Spaces Up to 6,000 Sq. Ft.: This powerful dehumidifier for basement removes 120 pints/day in humid conditions (95℉, 90% RH) and 90 pints/day in warm, damp environments (86℉, 80% RH). Ideal for spaces up to 6,000 sq. ft., including offices, bedrooms, kitchens, living rooms, garages, and RVs. The ENERGY STAR certified dehumidifier maintains humidity between 30%–80%, providing a wider range than most models, which typically range from 40%–80%.
When to Call an HVAC Technician
Arrange professional service when you notice any of the following:
- Ice on the evaporator coil or refrigerant tubing
- Hissing, bubbling, burning, or electrical odors
- Water overflowing from the air handler or emergency pan
- A condensate blockage that returns after cleaning
- Weak airflow after installing a clean, correct filter
- Humidity that remains above 60% during normal cooling
- Very short or irregular cooling cycles
- Warm supply air or poor cooling
- A suspected refrigerant leak
- A tripped breaker that trips again after one reset
- Visible mold inside HVAC equipment or extensive mold elsewhere
Before the appointment, record the thermostat temperature, fan setting, indoor humidity, outdoor weather, filter condition, cycle length, affected rooms, noises, odors, water, and any error codes. This information can help the technician reproduce the problem.
Prevent Humidity Problems From Returning
Routine maintenance helps the AC remove moisture without wasting energy or damaging components.
- Inspect the HVAC filter monthly and replace or clean it when needed.
- Keep return grilles and supply registers open and unobstructed.
- Use the thermostat fan’s AUTO setting during normal cooling.
- Keep condensate pans and drain lines clean and flowing.
- Schedule professional cooling maintenance before the hot season.
- Repair duct leaks, plumbing leaks, roof leaks, and wet building materials.
- Use bathroom and kitchen exhaust fans that vent outdoors.
- Monitor humidity with a hygrometer instead of guessing.
- Ask for a Manual J calculation before replacing or resizing equipment.
- Consider dedicated dehumidification when the moisture load regularly exceeds the cooling load.
ENERGY STAR recommends that professional maintenance include evaporator and condenser coil cleaning, refrigerant-charge assessment, drain inspection, control checks, and airflow testing. Review the full ENERGY STAR HVAC maintenance checklist.
Frequently Asked Questions
Why is my AC not removing humidity?
Common causes include a thermostat fan set to ON, a clogged filter, a dirty or frozen evaporator coil, a blocked condensate drain, incorrect refrigerant charge, leaking ducts, excessive outdoor-air infiltration, high indoor moisture production, improper blower setup, or oversized equipment.
Should you use a dehumidifier if you have COPD?
A dehumidifier may help when measured humidity is high because hot, humid conditions and mold can worsen breathing for some people with COPD. It is not automatically right for everyone, and air that becomes too dry may irritate the airways. Measure the humidity, keep the unit clean, and discuss symptom-specific concerns with your healthcare professional. The American Lung Association lists high humidity as a possible COPD trigger.
Can AC cause sinus issues?
Air conditioning does not directly cause every sinus problem, but overly dry air can irritate the nose and sinuses. Excess moisture can also support mold and dust mites. Keep indoor humidity in a moderate range, maintain clean filters and equipment, and seek medical advice for severe, recurring, or persistent symptoms.
What is the three-minute rule for air conditioners?
Many air conditioners include a compressor-protection delay of about three minutes after shutdown or a power interruption. The control allows refrigerant pressures to stabilize before the compressor restarts. The exact delay varies, and modern equipment usually manages it automatically. Follow the instructions in your thermostat and AC manual rather than repeatedly switching the system off and on.
What humidity level should an air-conditioned home have?
The EPA recommends keeping indoor relative humidity below 60%, ideally between 30% and 50%. Many homes are comfortable around 40% to 50% during warm weather, but the best level depends on climate, condensation risk, building construction, and individual health needs.
Will lowering the thermostat remove more humidity?
It may make a properly operating system run longer and remove more moisture, but it can also make the home uncomfortably cold and waste energy. It will not correct a dirty filter, blocked drain, refrigerant problem, duct leak, control fault, or oversized system.
Can a clogged AC drain make the house humid?
Yes. A blockage can leave water in the pan, stop a condensate pump, trigger a safety switch, cause leakage, and interfere with normal moisture disposal. Shut the system off if water is overflowing or approaching electrical components, then arrange repair.
Conclusion
If your AC cools but leaves the air sticky, confirm the humidity first and start with the safest checks: set the fan to AUTO, install a clean filter, look for ice, inspect visible drainage, close humid-air entry points, and reduce indoor moisture sources.
Call a qualified technician when humidity stays high, the coil freezes, water overflows, airflow remains weak, the system short-cycles, or refrigerant trouble is suspected. A complete diagnosis may include airflow testing, coil and drain inspection, duct-leak assessment, refrigerant measurements, control checks, and an ACCA Manual J load calculation.
Sources
- U.S. Environmental Protection Agency: Care for Your Air — recommended indoor humidity range and moisture control.
- ENERGY STAR HVAC Maintenance Checklist — filters, coils, airflow, refrigerant charge, and condensate drainage.
- ENERGY STAR Duct Sealing — typical duct losses and signs of poorly performing ducts.
- ENERGY STAR Room Air Conditioners — proper sizing and reduced humidity removal from oversized equipment.
- EPA Section 608 — refrigerant handling, technician certification, recovery, and venting requirements.
- American Lung Association: Preventing COPD Flare-Ups — humidity, weather, mold, and other respiratory triggers.