Layered wall decor can make a room feel taller when you use the wall vertically instead of spreading everything wide and low. The goal is simple: start with one strong focal piece, build upward with smaller art or objects, keep spacing consistent, and choose hanging hardware that matches both the item weight and wall type.
Quick Answer
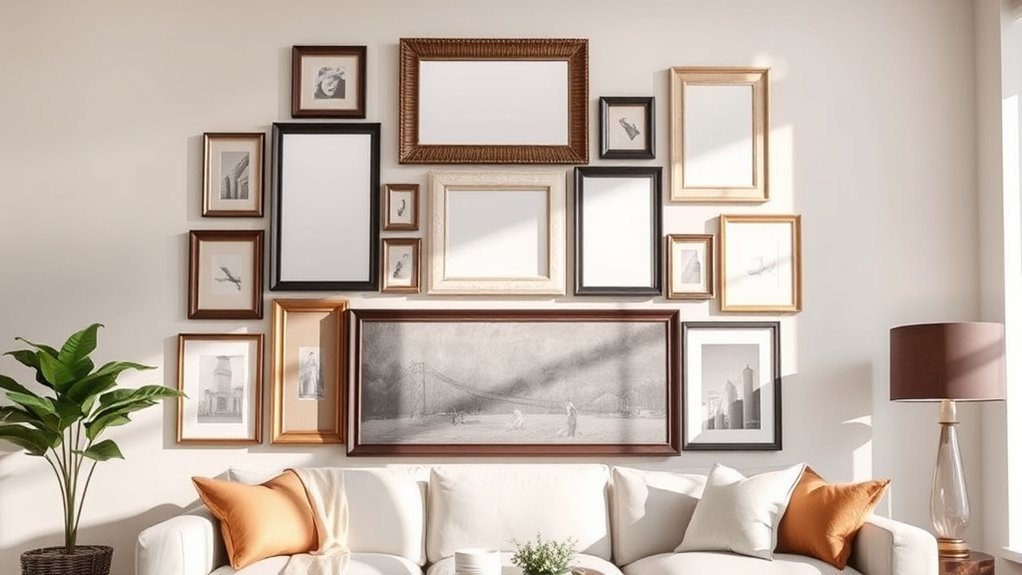
To add visual height with layered wall decor, hang a main statement piece around eye level, then layer smaller frames, mirrors, shelves, or sculptural pieces above and around it. Use vertical shapes, consistent spacing, and safe hardware so the arrangement draws the eye upward without looking crowded.
Key Takeaways
- Use one large statement piece to anchor the wall, then build the layered arrangement upward.
- Treat 57-60 inches to the center of the main artwork as a starting point, not a strict rule.
- Keep spacing tight and intentional: about 2-4 inches for gallery-style groupings or 3-6 inches for larger pieces.
- Add vertical lines with tall mirrors, narrow frames, wall shelves, hanging textiles, or slim sculptural pieces.
- Before drilling or hanging anything heavy, weigh the item and choose hardware rated for your wall type.
At a Glance
| Time Required | 1-3 hours for planning and hanging, depending on the number of pieces |
| Difficulty | Easy to moderate |
| Tools Needed | Tape measure, pencil, painter’s tape, level, hammer or drill, stud finder, picture hooks, anchors, and a stable step ladder |
| Cost | $0-$40 if using existing decor and basic hardware; more if buying new art, frames, mirrors, or shelves |
Start With a Focal Point: Choosing the Right Statement Piece
Every strong layered wall starts with one piece that sets the direction. This could be a large canvas, framed print, mirror, textile, sculptural wall object, or oversized photograph. Choose something tall, bold, or visually weighty enough to anchor the arrangement.
A common starting point is to hang the center of the main artwork about 57-60 inches from the floor. That range works well because it keeps the focal point near average eye level, but it should be adjusted for the room. If the art hangs above a sofa, console, bed, or mantel, place the bottom of the frame closer to the furniture so the art feels connected instead of floating too high. For more guidance, Better Homes & Gardens explains the common 57-inch art-hanging guideline.
To add visual height, favor statement pieces with upward movement: portrait-oriented art, tall mirrors, botanical prints, vertical abstracts, long woven hangings, or architectural shapes. A wide horizontal piece can still work, but it usually needs taller accents around it to keep the eye moving upward.
Pro Tip: If your ceiling feels low, choose one piece that is taller than it is wide. A vertical rectangle, arched mirror, or narrow framed print creates height faster than several small square pieces scattered across the wall.
Measure Your Wall Space: Finding the Perfect Layout
Before you hang anything, measure the wall and plan the arrangement as a single composition. Layered wall decor looks best when the pieces feel connected, not randomly placed.
Assess Wall Dimensions Accurately
Use a tape measure to record the full wall height and width. Then note anything that affects placement, such as windows, doors, trim, outlets, sconces, vents, moldings, built-ins, and furniture height. These details decide how high the arrangement can climb and where the visual center should sit.
For a wall above furniture, measure from the top of the furniture to the ceiling or molding. That open area is your true decorating zone. Leave enough breathing room above and below the arrangement so the wall does not feel crammed.
Visualize Art Placement Options
Lay the pieces on the floor first, using the same width you measured on the wall. Start with the largest piece, then test smaller frames, mirrors, shelves, and accents around it. Once the floor layout works, use painter’s tape on the wall to outline the overall shape before making holes.
A vertical layout usually works best when the tallest or boldest piece sits slightly below the top third of the arrangement, with smaller pieces stepping upward around it. This creates movement without making the display top-heavy.
| Wall Area | Best Visual-Height Move | Placement Tip |
|---|---|---|
| Small wall | One tall piece plus one small accent | Keep spacing tight so the grouping reads as one unit |
| Medium wall | Statement art with 3-5 supporting pieces | Build upward and slightly outward from the anchor |
| Large wall | Vertical gallery wall, mirror, or shelf stack | Use larger pieces so the arrangement does not look scattered |
Plan for Balance and Scale
Scale matters as much as height. A few tiny frames on a large wall can make the wall feel emptier, not taller. Use at least one medium or large piece to give the arrangement weight, then layer smaller pieces above, beside, or slightly below it.
- Use 57-60 inches to the center of the main piece as a starting point.
- For tight gallery walls, keep pieces about 2-4 inches apart.
- For larger frames or mixed objects, use 3-6 inches so each item has room to breathe.
- Keep the top edge of the arrangement intentional; staggered heights look better than a random skyline.
- Repeat at least one element, such as frame color, wood tone, mat color, subject matter, or metal finish.
Essential Tools for Layering Wall Decor Successfully
The right tools help your wall look polished and keep heavier pieces secure. Gather everything before you start so you are not guessing while holding a frame against the wall.
Essential Tools Checklist
- Tape measure: Measures wall space, furniture clearance, and center height.
- Pencil: Marks light, erasable placement points.
- Painter’s tape: Outlines frames and tests layout without wall damage.
- Level: Keeps frames, shelves, and mirrors straight.
- Stud finder: Helps locate studs for heavier decor.
- Hammer or drill: Installs hooks, screws, anchors, or shelf hardware.
- Picture hooks, D-rings, wire, anchors, or cleats: Match the hardware to the frame and wall type.
- Stable step ladder: Gives safe reach for taller layouts.
Measuring Equipment Importance
Measuring is what separates an intentional layered wall from a wall full of patch holes. Mark the centerline of your main piece first, then measure out from that point. For gallery walls, measure the full grouping as one large shape rather than treating every frame as separate.
If you are hanging above furniture, check both the wall and the furniture width. A good rule of thumb is to keep the arrangement narrower than the furniture beneath it, unless you are intentionally creating a full-wall installation.
Hanging Hardware Options
Hardware should be chosen by item weight, wall type, and frame style. Adhesive strips, nails, hooks, anchors, toggle bolts, French cleats, and shelf brackets all solve different problems. Before choosing, weigh the item and check the package rating for the exact product you plan to use.
For no-drill hanging, Command recommends following product instructions carefully, using approved surfaces, waiting after painting, and avoiding valuable or irreplaceable items with adhesive strips. Their picture hanging strip guide also explains proper application and removal.
Choosing Art and Decor That Complements Your Layered Wall Decor

To make layered wall decor feel taller, choose pieces that guide the eye upward. Look for vertical lines, portrait shapes, arched tops, botanical stems, tall figures, stacked shelves, hanging planters, slim sconces, and mirrors that reflect light.
Mixing sizes makes the wall more interesting, but the pieces still need a connection. Repeat one or two design elements so the arrangement feels curated. For example, you might mix frame sizes while keeping all frames black, or combine wood, brass, and linen while staying within warm neutral tones.
- For calm rooms: Use soft colors, simple frames, and fewer pieces.
- For bold rooms: Mix larger artwork, sculptural objects, and stronger contrast.
- For small rooms: Add mirrors, light mats, and slim vertical pieces to avoid heaviness.
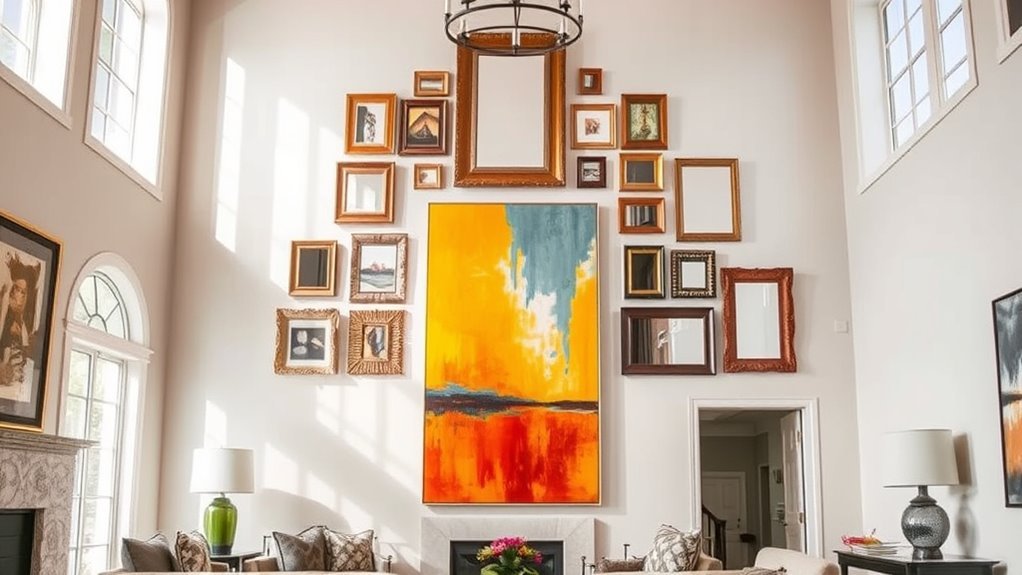
- For tall walls: Use oversized art or a stacked arrangement so the wall does not feel empty above eye level.
Note: Layered does not mean cluttered. A wall can feel layered with only three pieces if the sizes, textures, and heights are chosen carefully.
Experiment With Layering Heights and Arrangements
Layering works best when the arrangement has movement. Instead of lining everything up along one horizontal row, vary the top and bottom edges. This creates a subtle stair-step effect that makes the wall feel taller.
Try one of these layout styles:
- Vertical stack: Place one larger piece low, then stack one or two smaller pieces above it.
- Off-center climb: Anchor the arrangement with a large piece, then let smaller pieces rise to one side.
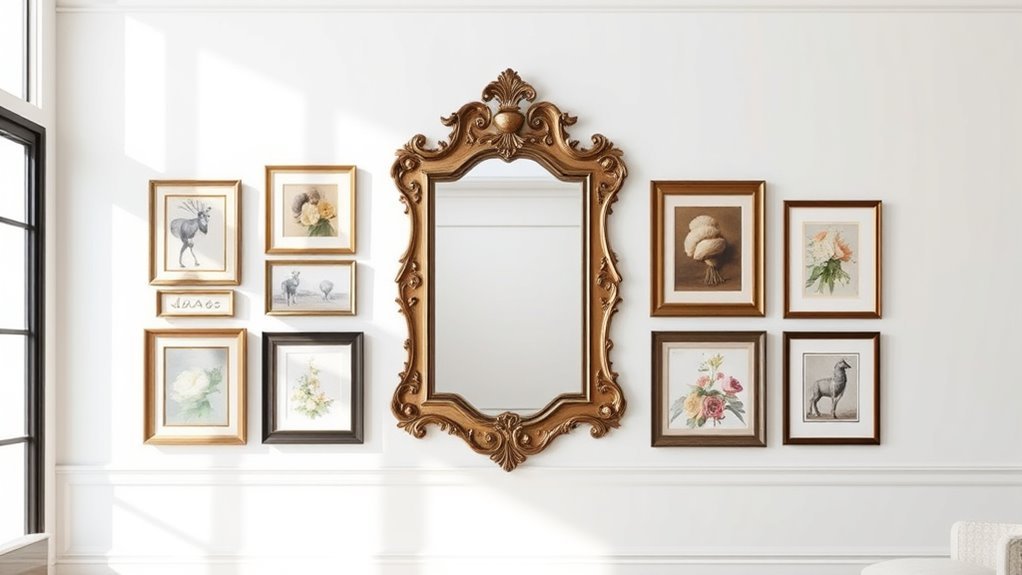
- Mirror-plus-art pairing: Use a tall mirror as the vertical element, then layer framed art beside it.
- Shelf layer: Hang a narrow shelf above or beside art and style it with a small frame, vase, or trailing plant.
- Textile layer: Add a woven wall hanging or fabric piece to soften hard frames and create length.
Keep checking the arrangement from across the room. If your eye stops in one low, heavy area, add a taller element or move a small piece upward. If the top feels too busy, remove one piece and let the focal point breathe.
Add Textures and Materials for Enhanced Visual Interest
Texture gives layered wall decor depth. When every piece is a flat framed print, the wall can feel stiff. Mixing materials makes the arrangement feel more collected and dimensional.
Good texture combinations include framed art with a wood shelf, a metal mirror with woven baskets, a canvas beside ceramic wall art, or a photograph paired with a small hanging plant. The key is contrast: smooth beside rough, matte beside reflective, soft beside structured.
| Texture Type | Best Use | Visual Effect |
|---|---|---|
| Wood | Frames, ledges, carved pieces | Adds warmth and natural structure |
| Metal | Mirrors, sconces, slim frames | Adds contrast and polish |
| Textile | Woven hangings, fabric art, macrame | Softens the wall and adds movement |
| Glass or mirror | Tall mirrors, reflective frames | Bounces light and expands the room visually |
| Greenery | Trailing plants, wall planters | Adds height, life, and organic shape |
Hanging Tips for Lightweight and Heavy Decor
Safe hanging starts with the weight of the item and the type of wall. Drywall, plaster, brick, tile, concrete, and wood all need different hardware. Do not rely on guesswork for mirrors, shelves, ceramic pieces, or anything heavy enough to injure someone if it falls.
Warning: Before drilling, check for wiring, plumbing, or ductwork behind the wall. For heavy, valuable, or overhead items, use studs or properly rated anchors, and hire a professional if you are unsure.
| Item Type | Common Hanging Option | Important Check |
|---|---|---|
| Small lightweight frame | Small nail, picture hook, or adhesive strip | Confirm wall surface and product weight rating |
| Medium framed art | Picture hook, D-rings, wall anchor, or wire hanger | Use hardware rated above the actual item weight |
| Large mirror or heavy frame | Studs, heavy-duty anchors, cleat, or toggle bolts | Find studs first; use anchors only when appropriate |
| Wall shelf | Shelf brackets into studs or rated anchors | Account for the shelf weight plus decor placed on it |
For drywall anchors, Lowe’s explains that different anchors support different weights and that studs are the best option for strong support when available. It also notes that manufacturers may recommend using only 25% of a product’s total rated capacity, so always check the hardware packaging and wall conditions before hanging. Read their drywall anchor guide for more detail.
If you need a ladder or step ladder for a tall arrangement, place it on a flat, stable surface and avoid leaning far to the side while holding art. OSHA’s ladder standard explains that ladders must be capable of supporting intended loads and should be used in safe condition; you can review the OSHA ladder requirements for general ladder safety principles.
Evaluating Visual Balance: Tips for Adjusting Your Art Arrangement
Once everything is taped or lightly marked, step back and check the full arrangement. Good layered wall decor should feel like one composition with a clear focal point, not a group of unrelated pieces.
Assessing Art Heights
Start with the main piece. If it feels too high, the whole wall may feel disconnected from the room. If it feels too low, the wall may not gain much visual height. Adjust the anchor piece first, then move the supporting pieces around it.
- Keep the main artwork near eye level unless furniture or ceiling height calls for adjustment.
- Use smaller pieces above the anchor to draw the eye up.
- Leave enough blank space near the ceiling so the display does not feel squeezed.
- For art above furniture, keep the grouping visually connected to the furniture below.
Balancing Visual Weight
Visual weight comes from size, color, contrast, thickness, frame style, and texture. A small black frame can feel heavier than a larger pale print. A mirror can feel heavier than a canvas because it reflects movement and light.
If one side feels too heavy, balance it with height rather than matching it exactly. For example, a dark frame on the left can be balanced by two lighter vertical pieces on the right. The result feels layered, not overly symmetrical.
Creating Harmonious Groupings
Harmony does not require everything to match. It means the pieces share enough in common to belong together. Repeat one or two elements across the wall: black frames, brass details, botanical subjects, warm wood, neutral mats, or similar linework.
For a relaxed layered look, odd-number groupings often feel natural. Try three, five, or seven main pieces, then adjust based on the wall size. The 3-5-7 idea is a flexible styling shortcut, not a strict rule.
Put on the Finishing Touches to Elevate Your Decor
After the wall is hung, style the surrounding area so the vertical effect continues. A tall floor lamp, slim plant, high curtain rod, or vertical bookcase can reinforce the height you created on the wall.
Lighting also matters. If the wall looks flat at night, add a picture light, sconce, or nearby lamp to create shadows and depth. Even a small shift in lighting can make layered textures stand out.
Finally, edit. Remove anything that looks forced, crooked, too tiny, or too far from the main grouping. Empty space is part of the design because it lets each layer stand out.
What Makes a Good Statement Piece?
A good statement piece is the visual anchor of the wall. It does not have to be expensive, but it should be strong enough to guide the rest of the arrangement.
- Scale: It should be large enough for the wall or furniture below it.
- Shape: Vertical or arched shapes are especially useful for adding height.
- Contrast: A strong color, bold line, reflective surface, or unique texture helps it stand out.
- Connection: It should relate to the room through color, subject, material, or mood.
- Placement: It should sit where the eye naturally lands when entering the room.
If your statement piece is quiet, such as a soft abstract or neutral textile, make it larger. If it is bold, such as a bright print or ornate mirror, give it more breathing room so it does not overwhelm the wall.
Troubleshooting Common Layered Wall Decor Problems
If the wall still feels off, use the problem to guide the fix.
- The wall looks too short: Add one taller vertical element, such as a mirror, narrow frame, or hanging textile.
- The arrangement feels cluttered: Remove the smallest or busiest piece and increase spacing slightly.
- The art feels too high: Lower the main piece first, then rebuild the smaller pieces around it.
- The wall feels empty: Use larger frames, wider mats, or a stronger anchor piece instead of adding many tiny items.
- The pieces do not feel connected: Repeat a color, frame finish, shape, or theme across the grouping.
- Frames keep shifting: Add frame bumpers, use two hooks for wider pieces, or switch to more stable hanging hardware.
Frequently Asked Questions
How do I add height to decor?
Use vertical pieces, taller groupings, and upward movement. Tall mirrors, portrait-style artwork, stacked shelves, floor lamps, high curtain rods, and trailing plants all help pull the eye upward. On walls, start with a larger anchor piece and layer smaller accents above or beside it.
What is the 3-5-7 rule in decorating interior design?
The 3-5-7 rule is a styling shortcut based on odd-number groupings. Instead of using pairs, you arrange decor in groups of three, five, or seven pieces to create a more natural rhythm. For layered wall decor, it can help you avoid a stiff, overly symmetrical layout.
What is the 70/30 rule in art?
For wall decor, the 70/30 rule is best used as a loose balance idea: let one dominant piece or visual theme carry most of the arrangement, then use smaller accents for support. It is not a strict fine-art rule, but it can help prevent a layered wall from feeling scattered.
How do I add height to a wall?
Add height to a wall with tall art, vertical gallery arrangements, arched mirrors, slim shelves, vertical stripes, sconces, hanging plants, or floor-to-ceiling elements nearby. Keep the main artwork near eye level, then extend the arrangement upward with smaller pieces.
How far apart should layered wall decor be?
For most gallery-style groupings, keep pieces about 2-4 inches apart. For larger frames, shelves, mirrors, or mixed objects, 3-6 inches often looks better. The most important rule is consistency: uneven spacing makes the wall look accidental.
Can renters create layered wall decor without nails?
Yes, renters can use adhesive picture strips, removable hooks, leaning art, picture ledges, tension rods, or lightweight hanging rails. Always check the product’s weight rating, approved surfaces, and removal instructions before using adhesive products on painted walls.
Conclusion
Layered wall decor adds visual height when every piece has a purpose. Start with one strong focal point, plan the layout before hanging, use vertical shapes, mix textures with restraint, and choose hardware that suits the weight and wall type. When the spacing, scale, and safety details are right, your wall becomes more than decoration—it becomes a taller, more intentional focal point for the whole room.
Sources
- Better Homes & Gardens: How to Hang Pictures and Paintings Securely on Any Wall Surface — supports art height, leveling, and basic hanging guidance.
- Command: How to Use Command Picture Hanging Strips — supports adhesive strip application, surface, and removal cautions.
- Command: Product Weight Limits Guide — supports product-specific weight ratings for hooks and picture hanging strips.
- Lowe’s: How to Install Drywall Anchors — supports wall anchor selection, stud guidance, and drilling cautions.
- OSHA: 1926.1053 Ladders — supports general ladder load and safe-use considerations.