If you want to dehumidify a crawl space, start by stopping moisture at its source. A dehumidifier can maintain dry air, but it cannot overcome active leaks, standing water, bare soil vapor, open vents, or a loose crawl space door. Fix the water first, seal the crawl space correctly, then choose a crawl-space-rated dehumidifier that matches the size, temperature, and moisture load of the space.
Quick Answer
To dehumidify a crawl space, remove standing water, fix leaks and drainage problems, seal the soil with a continuous vapor barrier, close vents only as part of a sealed and code-compliant crawl space, install a properly sized dehumidifier with continuous drainage, and monitor humidity with a hygrometer.
Key Takeaways
- Fix bulk water first: leaks, poor grading, clogged gutters, wet soil, and standing water will overwhelm a dehumidifier.
- A sealed vapor barrier should cover exposed soil and be sealed at seams, walls, piers, and pipe penetrations.
- Closed vents work best when the crawl space is also sealed, insulated, and mechanically managed according to local code.
- Aim to keep crawl space relative humidity below 60%, with many homes performing best around 45% to 55%.
- Use a crawl-space-rated dehumidifier with a humidistat, low-temperature protection, service access, and continuous drainage.
At a Glance
| Time Required | 1 day for inspection and basic setup; several days to a few weeks if drainage, encapsulation, mold cleanup, or electrical work is needed. |
| Difficulty | Moderate DIY for inspection, sealing small gaps, and setting a unit; professional help is best for standing water, electrical work, structural damage, extensive mold, or radon mitigation. |
| Tools Needed | Hygrometer, flashlight, gloves, respirator or mask when needed, vapor barrier, seam tape or approved sealant, utility knife, drainage hose, raised pad, and crawl-space-rated dehumidifier. |
| Cost | Low for monitoring and minor sealing; moderate to high for a crawl-space dehumidifier, sump pump, encapsulation, electrical upgrades, mold remediation, or drainage repairs. |
What Causes Crawl Space Humidity
Crawl space humidity usually starts with moisture from the ground. Bare soil releases water vapor into the air, and that moisture can collect under floor framing, insulation, ducts, and subfloor materials. The U.S. Environmental Protection Agency recommends keeping indoor relative humidity below 60%, ideally between 30% and 50% when possible, because high humidity can support mold growth.
Open vents, foundation cracks, plumbing leaks, roof runoff, poor grading, and weak drainage can all add moisture. In humid climates, outdoor air that enters through vents can cool against crawl space surfaces and condense. The stack effect can then pull damp crawl space air upward into the living area, which may cause musty odors, higher indoor humidity, and poorer air quality.
Inspect Before You Run a Dehumidifier
Do a full moisture inspection before buying or running a unit. A dehumidifier works best after you reduce the load it has to handle.
- Check for standing water: look after heavy rain and inspect low spots, foundation edges, and sump areas.
- Look for plumbing leaks: inspect supply lines, drain lines, condensate drains, and wet stains under bathrooms, kitchens, and laundry rooms.
- Inspect exterior drainage: confirm gutters are clear, downspouts discharge away from the foundation, and soil slopes away from the house.
- Measure humidity: place a hygrometer in the crawl space and record readings over several days.
- Check for damage: look for mold, soft wood, rusted fasteners, pest activity, falling insulation, and damaged ductwork.
Warning: Do not place or plug in a dehumidifier where there is standing water, exposed wiring, sewage contamination, or unsafe access. Call a qualified professional for electrical hazards, major mold growth, structural rot, fuel-burning appliances, or repeated flooding.
Fix Leaks and Standing Water First
Before you run a dehumidifier, fix any leaks and remove standing water. Excess water can push humidity up fast and make the unit run nonstop without solving the real problem.
A crawl space dehumidifier should maintain dry conditions; it should not be the first line of defense against active water intrusion.
- Fix leaks: tighten fittings, replace damaged lines, repair condensate drains, and confirm the repair stays dry.
- Remove standing water: pump out pooled water and dry the area before installing equipment.
- Improve drainage: clean gutters, extend downspouts, regrade soil away from the foundation, and consider a sump pump where pooling repeats.
- Address seepage: if water enters through foundation walls or the crawl space floor, ask a drainage or waterproofing professional whether perimeter drainage, a sump basin, or foundation repairs are needed.
Check the crawl space again after the next heavy rain. If water returns, fix that problem before relying on a dehumidifier.
Seal the Crawl Space Vapor Barrier
You need to cover exposed soil, walls, and piers with a sealed vapor barrier to slow ground moisture before it enters the air. The Building America Solution Center recommends a continuous ground cover, at least 6-mil polyethylene, with seams overlapped and sealed and the material lapped up walls and piers.
Seal Barrier Overlaps
Seal every overlap in the crawl space vapor barrier so moisture cannot move through open seams. Lap seams by 6 to 12 inches, press them flat, and seal them with tape or sealant made for polyethylene or crawl space liners. Do not rely on loose-laid plastic because it shifts, tears, and leaves vapor paths open.
Cover Ground and Walls
Cover the crawl space floor completely, then extend the barrier up walls and piers. Seal around pipes, posts, columns, and other penetrations. Mechanically fasten the liner where needed so it stays tight over time.
| Area | Action | Result |
|---|---|---|
| Ground | Cover all exposed soil | Slows evaporation from soil |
| Walls | Lap liner up and fasten | Reduces vapor entry at edges |
| Joints | Overlap and seal seams | Limits moisture infiltration |
| Pipes and piers | Cut neatly and seal around them | Closes small vapor leaks |
Stop Moisture at the Source
A sealed vapor barrier stops a major source of humidity before the dehumidifier has to handle it. Inspect the barrier during routine maintenance and repair tears, loose tape, punctures, and open seams quickly. Add extra liner or a durable walkway in high-traffic service paths so technicians do not damage the barrier.
Pro Tip: Place a simple digital hygrometer in the crawl space before and after sealing. The trend tells you whether the moisture load is dropping or whether water is still entering somewhere.
Close Off Crawl Space Vents
Closing crawl space vents can reduce humid outdoor air, but it should be done as part of a complete closed crawl space strategy. The crawl space should have water managed, a sealed ground cover, sealed access points, proper insulation, and a mechanical drying or conditioning method. The Building America Solution Center describes unvented crawl spaces as air-sealed, insulated, and conditioned spaces that reduce the chance of condensation from humid air entering through vents.
Use rigid vent covers, masonry, foam board with compatible sealant, or another durable method approved for your crawl space. Do not stuff vents with cardboard, pillows, fiberglass batts, or loose plastic. Those materials leak air, absorb moisture, invite pests, and fail quickly.
Check local code before converting a vented crawl space to an unvented crawl space. The International Residential Code section on unvented crawl spaces includes requirements for vapor retarders, insulation, and approved ways to provide air exchange or conditioned air, but your local adopted code controls the final requirements.
Why Sealed Doors Keep Moisture Out
A sealed crawl space door keeps humid outside air, pests, wind-driven rain, and soil splash from entering. Even a small gap around the access door can undo the gains from a vapor barrier and dehumidifier.
Sealed Door Benefits
Use a rigid, weather-resistant door that fits the opening tightly. Marine-grade or other waterproof materials work better than decorative wood panels that swell, rot, or leave gaps. A tight access door helps stabilize humidity, protects insulation, and reduces the runtime of the dehumidifier.
Air Leaks and Humidity
Stop air leaks at the door and frame if you want lasting humidity control.
- Custom-fit the door so it closes squarely and latches tightly.
- Add weatherstripping around the frame.
- Seal framing joints and cracks near the opening.
- Keep the door protected from roof runoff and soil contact when possible.
Proper Door Insulation
Insulate the access door when the crawl space is part of a closed and insulated system. Check the edges for a continuous seal, and do not block required inspection gaps for termites where local rules require them.
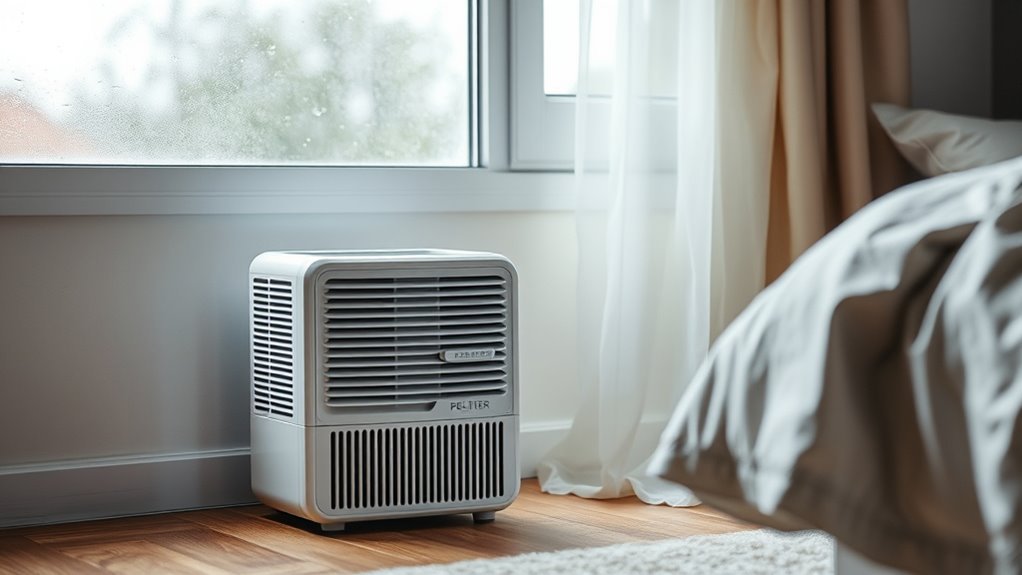
How to Choose a Crawl Space Dehumidifier
Choosing the right crawl space dehumidifier starts with size, moisture load, temperature, drainage, and service access. ENERGY STAR explains that dehumidifier capacity depends on both the size of the space and how damp the space is before dehumidification, and that an undersized unit can be a problem.
Use this as a starting point, then check the manufacturer’s crawl-space sizing chart for the exact model:
| Feature | What to choose |
|---|---|
| Capacity | Sized for crawl space square footage, dampness level, ceiling height, and leakage. For portable units, ENERGY STAR lists higher pint-per-day needs as humidity and space size increase. |
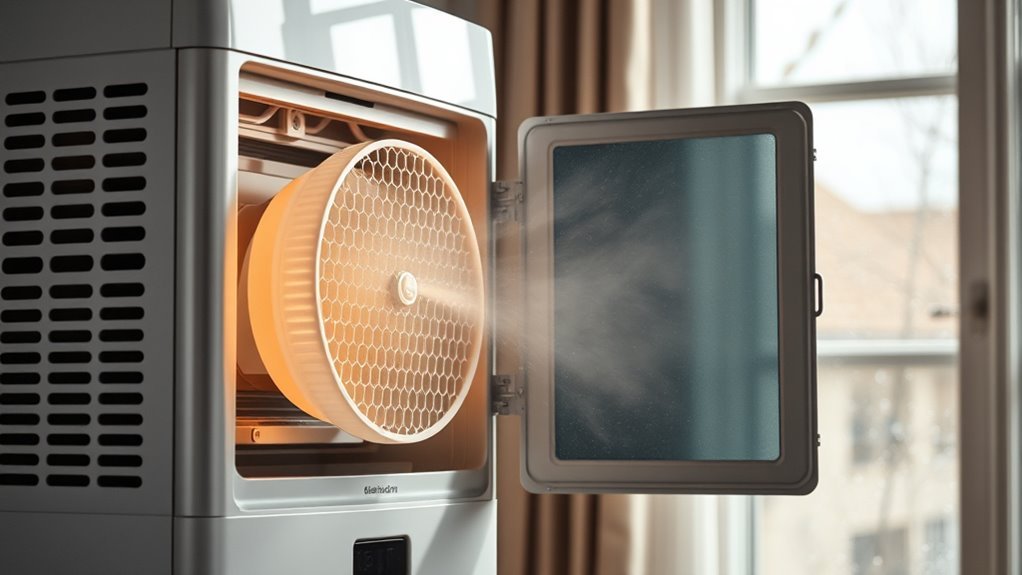
| Temperature rating | Choose a unit rated for the lowest crawl space temperature. Look for auto-defrost or low-temperature operation if the space gets cool. |
| Drainage | Use gravity drain when possible; use a condensate pump if the drain line must rise or run far. |
| Control | Choose a built-in humidistat or external controller so the unit runs only when needed. |
| Efficiency | Look for ENERGY STAR-certified models when appropriate and compare water removal per energy used. |
| Maintenance access | Make sure you can reach filters, drain fittings, controls, and service panels without crawling over the vapor barrier. |
Aim for steady control below 60% relative humidity. Many sealed crawl spaces perform well when the dehumidifier is set around 45% to 55%, but avoid over-drying the space below the manufacturer’s recommended range.
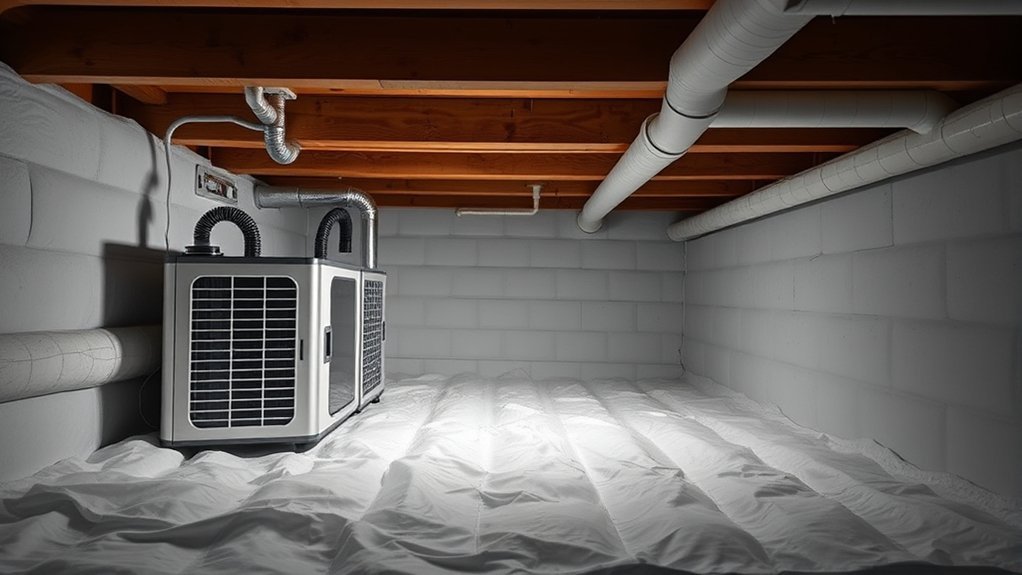
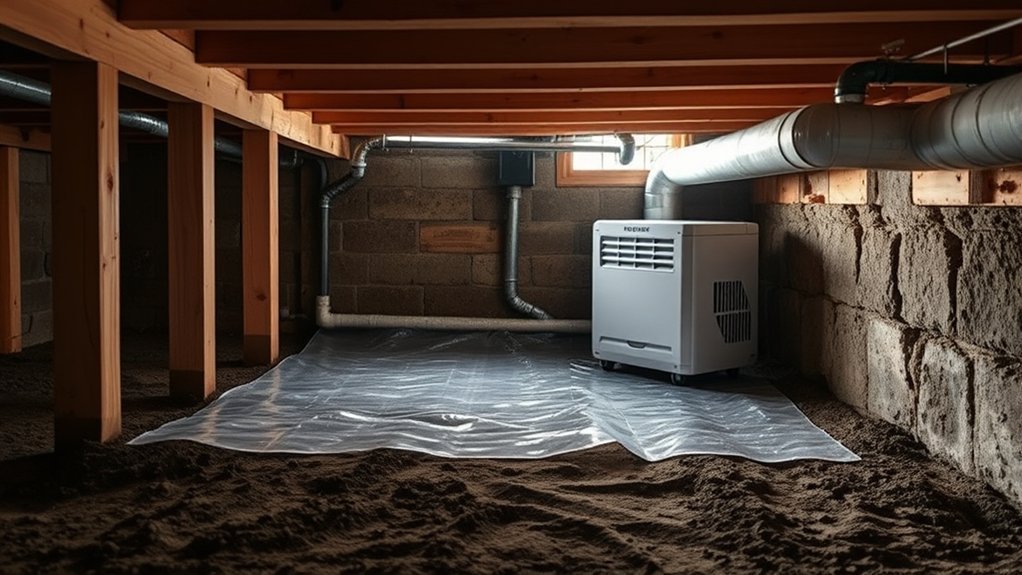
Install the Dehumidifier the Right Way
Install the dehumidifier on a level raised pad in a location with strong airflow and service access. The center of the crawl space often works well, but the best location is the one that allows air to circulate, drain water safely, and keep the unit accessible.
- Set the unit level: place it on blocks, a pad, or a manufacturer-approved hanging kit.
- Protect power: use a proper outlet and follow electrical code. A GFCI-protected circuit is commonly required in damp locations.
- Route drainage: slope the hose continuously to a sump basin, floor drain, condensate pump, or approved exterior discharge point.
- Keep airflow open: maintain manufacturer-required clearance around the intake and discharge.
- Set the humidistat: start around 50% RH, then adjust based on measured crawl space conditions.
- Verify operation: check that the fan runs, the compressor cycles, water drains, and the hose does not kink or clog.
Do not drain water onto the crawl space soil or into a spot where it can flow back toward the foundation.
Why Encapsulation Helps a Dehumidifier Work Better
Encapsulation gives your dehumidifier a much easier job because it blocks much of the moisture coming from soil and outside air. A continuous vapor barrier, sealed vents, sealed door, insulated walls where required, and controlled drying system all work together.
In an encapsulated crawl space, soil moisture evaporates less, temperature swings shrink, and the air stays more stable. That usually means fewer runtime cycles, lower energy waste, and better protection for framing, insulation, ducts, and indoor air quality.
Closed crawl spaces also need safety planning. The ENERGY STAR closed crawl spaces reference highlights moisture management, pest control, combustion safety, fire safety, radon control, and thermal insulation as part of good design. If the crawl space contains fuel-burning appliances, ask an HVAC professional to verify combustion air and carbon monoxide safety before sealing the space.
Note: Test for radon when sealing or encapsulating a crawl space, especially in radon-prone areas. The EPA recommends radon-resistant techniques because radon can affect indoor air quality and may need mitigation.
When a Crawl Space Dehumidifier Won’t Help
A crawl space dehumidifier will not help much if the space is still open to outdoor air, has major leaks, or floods after rain. In those cases, the unit fights a losing battle and may run longer, use more power, and still leave the crawl space damp.
Fix the root causes first:
- Seal vents, gaps, and penetrations as part of a closed crawl space plan.
- Stop standing water, plumbing leaks, and foundation seepage.
- Install a sealed vapor barrier over exposed soil.
- Improve drainage around the home.
- Address mold, rot, pests, radon, and combustion safety before encapsulation.
A dehumidifier can lower humidity, but it cannot correct active water intrusion, repeated flooding, or constant outdoor air exchange.
Monitor and Maintain the System
After installation, keep the system working with simple checks.
- Weekly at first: check the hygrometer, drain hose, and unit operation until humidity stabilizes.
- Monthly: clean or replace filters according to the manufacturer’s instructions.
- After storms: inspect for standing water, wet soil, new stains, or drain backups.
- Seasonally: inspect the vapor barrier seams, door seal, vent covers, insulation, and sump pump.
- Annually: test the condensate pump, clean the drain line, and review the humidity trend.
Crawl Space Dehumidifier Troubleshooting
| Problem | Likely cause | Fix |
|---|---|---|
| Humidity stays high | Open vents, unsealed vapor barrier, leaks, undersized unit, or poor airflow | Seal the crawl space, fix water entry, check sizing, and improve air circulation. |
| Unit runs nonstop | Moisture load is too high or setpoint is too low | Raise the setpoint slightly, check for leaks, and confirm the unit is properly sized. |
| Water pools near unit | Clogged, kinked, or improperly sloped drain hose | Clean the hose, correct the slope, or use a condensate pump. |
| Unit freezes or shuts off | Crawl space is too cold for the model | Use a low-temperature-rated model and check insulation and air sealing. |
| Musty smell remains | Mold, damp debris, pest waste, or wet insulation remains | Remove contaminated materials safely and call a remediation professional if growth is extensive. |
Frequently Asked Questions
How do you get rid of high humidity in a crawl space?
Remove standing water, fix leaks, improve exterior drainage, seal exposed soil with a vapor barrier, close vents as part of a proper closed crawl space system, seal the access door, and install a crawl-space-rated dehumidifier with continuous drainage. Monitor the space with a hygrometer and keep RH below 60%.
Should you use a dehumidifier if you have COPD?
A dehumidifier may help reduce dampness, mold, and dust mite conditions in a humid home, but it is not medical treatment. People with COPD should ask their clinician about the best indoor humidity range for their symptoms and should avoid mold exposure and overly dry air.
Can I put a dehumidifier in my crawl space without encapsulation?
Yes, but performance is usually weaker if the crawl space has bare soil, open vents, air leaks, or water intrusion. A dehumidifier works best after the ground is covered, seams are sealed, vents and doors are controlled, and drainage problems are fixed.
What takes moisture out of a crawl space?
Drainage repairs, sump pumps, vapor barriers, air sealing, closed vents, sealed access doors, insulation, and dehumidifiers all help remove or control moisture. The best result usually comes from combining source control with mechanical dehumidification.
What humidity should a crawl space be?
Keep relative humidity below 60% as an upper limit. Many sealed crawl spaces are managed around 45% to 55%, depending on climate, equipment, and building conditions. Use a hygrometer instead of guessing.
Should crawl space vents be open or closed?
In many humid climates, closed crawl spaces perform better than wall-vented crawl spaces, but vents should be closed only as part of a sealed, insulated, and mechanically managed crawl space that meets local code. Do not simply block vents while leaving soil, leaks, and drainage problems untreated.
Conclusion
To dehumidify your crawl space, do the work in the right order: fix leaks and standing water, control exterior drainage, seal ground moisture with a continuous vapor barrier, close vents and doors correctly, and install a properly sized dehumidifier with reliable drainage. When the crawl space is sealed and monitored, the dehumidifier can maintain stable humidity instead of fighting constant moisture intrusion.
Sources
- U.S. EPA Mold Course, Chapter 2 — backs humidity targets, mold risk, and crawl space moisture concerns.
- Building America Solution Center: Capillary Break at Crawlspace Floors — backs vapor barrier thickness, seam sealing, wall lap, and pipe sealing guidance.
- Building America Solution Center: Unvented, Insulated Crawlspaces — backs closed crawl space and condensation-control guidance.
- ENERGY STAR Dehumidifiers — backs dehumidifier capacity and buying considerations.
- ENERGY STAR / Advanced Energy: Quick Reference on Closed Crawl Spaces — backs closed crawl space design considerations including moisture, radon, combustion safety, pest control, and insulation.
- U.S. EPA Radon-Resistant Construction Basics — backs radon awareness when sealing crawl spaces.