
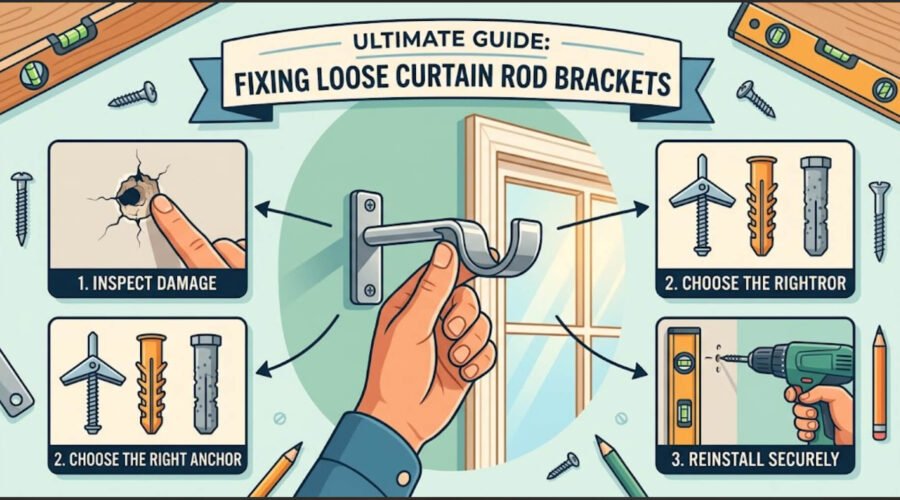
Quick Answer: To fix a loose curtain rod bracket, remove the curtain rod and bracket first. Check whether the screw holes are stripped, the wall anchor has failed, or the bracket is bent. If the old holes are damaged, move the bracket slightly, drill new holes, install stronger anchors or screw into a stud, and reattach the bracket level and tight. Do not overtighten the screws, because that can damage the wall or anchor.
A loose curtain rod bracket almost always comes down to one thing: the wall can no longer hold the screws properly. The fix depends on your wall type, curtain weight, and the condition of the old holes. This guide shows you how to inspect the problem, choose the right anchor, reinstall the bracket, and stop the rod from sagging again.
Key Takeaways
- Do not keep tightening screws in stripped holes. That usually makes the damage worse.
- Use a stud whenever the bracket position allows it.
- For drywall without a stud, choose a wall anchor rated higher than the total load of the rod and curtains.
- Move new holes at least a few inches away from damaged holes when possible.
- Check the bracket with a level before rehanging the curtain rod.
Identifying Common Issues With Curtain Rod Brackets
When a curtain rod bracket loosens, the problem comes from one of four places: weak anchors, stripped screw holes, heavy curtains, or a damaged bracket. Drywall screws alone often do not hold well because the threads can tear through the drywall over time. A proper wall anchor spreads the load and gives the screw more support.
Wall material matters. Drywall, plaster, wood trim, concrete, and brick all need different fasteners. Before you reinstall the bracket, check whether you can hit a wall stud. A screw driven into a stud gives stronger support than a basic drywall anchor.
Essential Tools for Fixing Curtain Rod Brackets
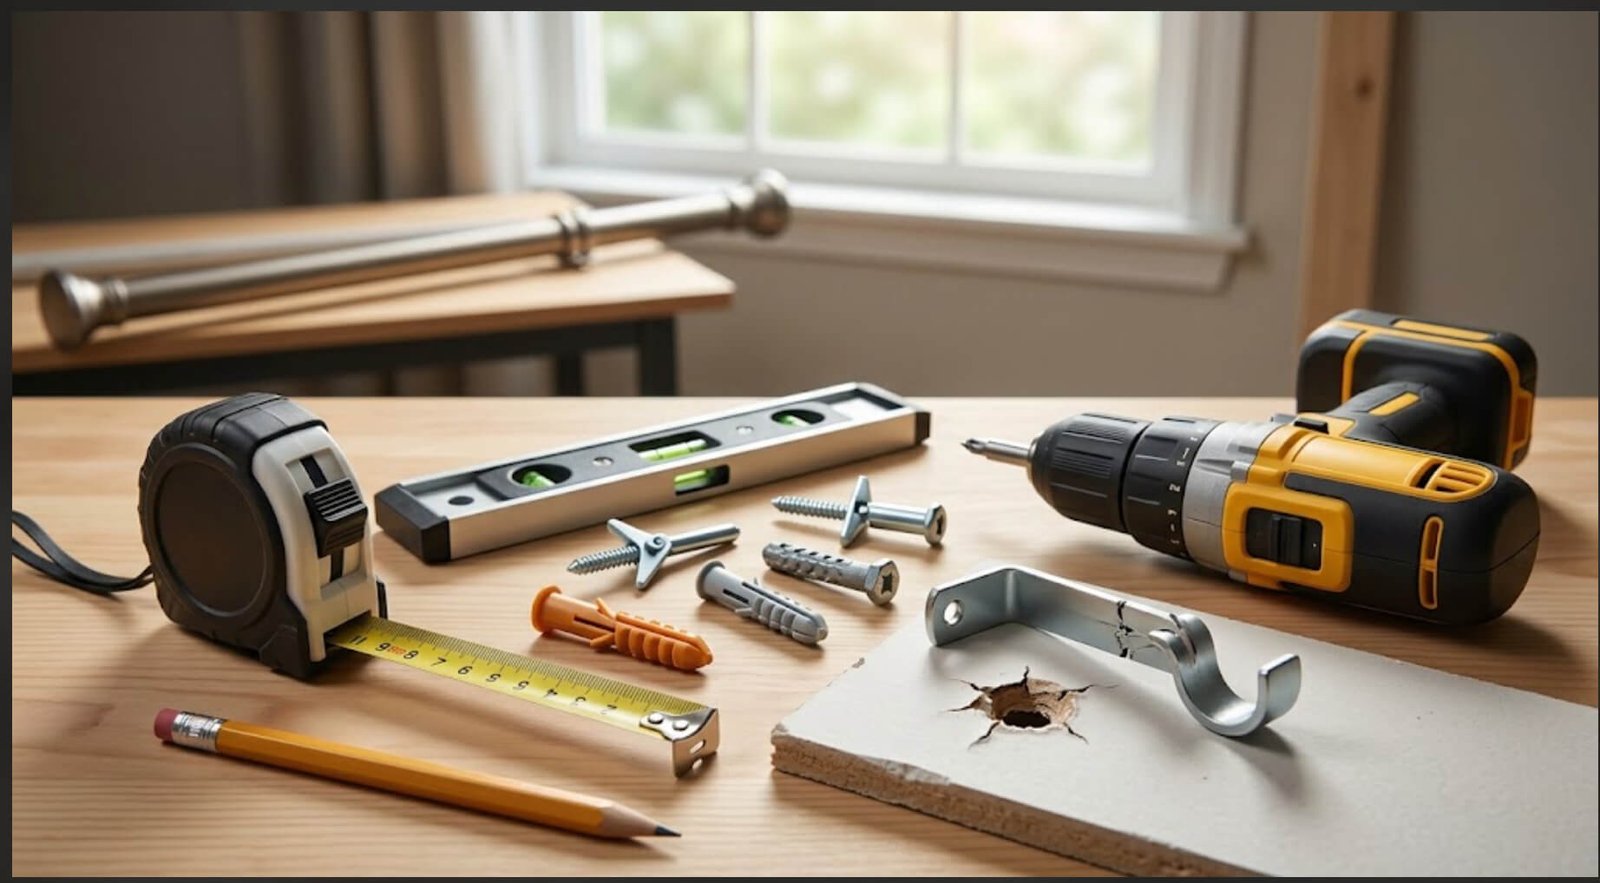
Gather your tools before you remove the bracket. This keeps the repair clean and helps you avoid making extra holes in the wall.
- Measuring tape
- Pencil
- Level
- Screwdriver
- Power drill
- Drill bits that match your anchor instructions
- Stud finder
- New screws
- Wall anchors suited to your wall type
- Spackle or patching compound for damaged drywall
Important: Always follow the anchor package instructions for pilot-hole size and weight rating. The wrong drill bit can make the anchor loose before you even hang the rod.
Recommended Products

FIVE ESSENTIAL SIZES FOR MULTIPLE PROJECTS: This dry wall anchors and screws kit comes with five of the most widely used sizes: #6 1", #7 1", #6 1-1/5", #8 1-3/5", and #8 2-2/5". It works for all types of hanging installation needs, and pairs great with a drywall repair kit, whether you’re mounting shelves, fixing curtain rods, or hanging bathroom living room wall decor.

PREMIUM NYLON MATERIALS PLUS GLASS FIBER – Made of high-quality hard nylon plastic mixed with highly robust glass fibers, these self drilling wall anchors are super hard, durable, anti-aging and wear resistant. They can hold objects with maximum weight of 75lbs and provide strong and sturdy grip into the wall, and the anchor will not damage the dry wall. 70 premium galvanized Phillips screws ensures reliable installation and hanging.

Heavy-Duty Metal Structure Design: These curtain rod brackets are crafted from premium thickened iron metal with enhanced hardness and sturdiness. Solid integrated metal construction delivers excellent load-bearing capacity, not easy to bend or break, ensuring long-lasting durability for indoor and outdoor use.
Remove the Curtain Rod and Bracket
Start by sliding the curtains off the rod. Set the curtains and rod aside so you can see both brackets clearly. Use a screwdriver or drill driver to remove the screws from the loose bracket. Hold the bracket with one hand while you loosen the screws so it does not tear more wall material away.
Assess Bracket Condition
Check the bracket before you reuse it. A bent bracket can pull unevenly against the wall and loosen again after repair.
- Look for bends, cracks, or broken screw holes in the bracket.
- Check whether the bracket plate sits flat against the wall.
- Inspect the screws for stripped heads or worn threads.
- Replace the bracket if it no longer holds the rod firmly.
- Use hardware that matches the weight of your curtain rod and curtains.
Inspect Wall Material
After the bracket comes off, inspect the wall around the old holes. If the holes look enlarged, crumbly, or powdery, the old anchor has likely failed. If the wall feels soft around the bracket area, patch the damage before reinstalling the bracket. If the damage goes beyond a few enlarged screw holes — a chunk of drywall paper or gypsum has actually broken away — patch it fully and let the repair cure before drilling anything nearby. Anchoring into the edge of a fresh patch or crumbled material won’t hold, regardless of which anchor you pick.
Use a stud finder to check for a stud near the bracket position. If you can mount the bracket into a stud without making the rod uneven, that’s typically the strongest repair. If no stud is available, choose an anchor suited to the wall material.
Remove Old Hardware
Remove failed anchors, loose screws, and broken wall material from the old mounting area. Do not force a new anchor into a damaged hole. A new anchor needs firm wall material around it to hold properly.
- Pull out loose plastic anchors with pliers.
- Back out old screws slowly to avoid enlarging the hole.
- Cut or push in broken hollow-wall anchors only when removal would cause more damage.
- Patch damaged drywall before drilling near the same area.
- Keep reusable brackets and screws in a safe place while you work.
Inspect the Wall and Bracket Conditions
A good repair starts with the real cause. Use this table to match the problem to the right fix.
| Problem You See | Likely Cause | Best Fix |
|---|---|---|
| Screw spins but will not tighten | Stripped hole or failed anchor | Move the bracket slightly and install a new anchor, or patch the hole first. |
| Bracket pulls away from drywall | Anchor is too weak for the load | Use a stronger anchor, such as a toggle bolt or molly bolt, or mount into a stud. |
| Wall crumbles around the hole | Damaged drywall or old plaster | Patch the area and drill fresh holes after the repair cures. |
| Rod sags in the middle | Rod span is too long or curtains are heavy | Add a center support bracket and check the rod weight rating. |
| Bracket loosens after a few weeks | Overloaded bracket, poor anchor fit, or screws backing out from daily cyclic tugging even when the anchor is fine | Upgrade the anchor, check curtain weight, avoid pulling curtains roughly, or add a dab of removable thread-locking compound to the screws. |
Preparing the Wall for New Brackets
Clean the mounting area before drilling new holes. Remove dust, loose drywall paper, and broken anchor pieces. If the wall surface is damaged, fill the old holes with patching compound and let it dry according to the product label.
Do not install a new anchor into a loose or crumbling hole. Repair the wall first, or move the bracket to solid material.
Mark the new bracket location with a pencil. Use a level to keep both brackets even. If you move one bracket, measure the opposite side too so the curtain rod still sits straight.
Recommended Products

Durable spackle allows you to patch and prime in one step, completing projects quickly

Drywall repair kit can be used for repairing interior or exterior surfaces like drywall, plaster, wood, brick and stone

DryDex is a latex polymer spackle for repairing interior or exterior surfaces like drywall, plaster, wood, brick and stone
Selecting the Best Wall Anchors for Curtain Rods
Choose the anchor based on the wall material and the combined weight of the curtain rod, curtains, and hardware. Pick an anchor rated higher than the total load, then follow the manufacturer’s installation instructions.
| Wall Type | Best Support Option | Use This When |
|---|---|---|
| Wood stud behind drywall | Wood screws into the stud | You can align the bracket with a stud without making the rod crooked. |
| Drywall with no stud | Toggle bolt or molly bolt | The curtains are medium to heavy, or the bracket gets frequent pulling. |
| Light-duty drywall setup | Rated drywall anchor | The curtains are light and the anchor rating clearly exceeds the load. |
| Plaster wall | Stud screw, toggle bolt, or plaster-suitable anchor | The wall is older, brittle, or not safe for basic plastic anchors. |
| Brick, concrete, or masonry | Masonry anchor and masonry bit | The bracket mounts into a hard solid wall rather than drywall or plaster. |
As a rough benchmark, a small 1/8-inch toggle bolt is commonly rated around 50 lbs in standard 1/2-inch drywall, and capacity climbs quickly with a larger bolt diameter or a thicker wall, according to Hunker. Exact ratings vary by brand and product, so check the number printed on your anchor’s own packaging against the combined weight of your rod, curtains, and hardware before you buy.
Safety note: If you feel resistance from metal, wiring, or plumbing while drilling, stop. Move the hole or ask a qualified handyman or contractor to inspect the wall.
Recommended Products

MULTIPLE SIZE OPTIONS – This heavy duty toggle bolt assortment includes 3 sizes (1/8 in, 3/16 in, 1/4 in) to help you choose the appropriate size for drywall anchor applications based on wall type and intended use. Suitable for selected hanging projects such as hanging pictures, curtain rods, and plants when used correctly. Please refer to the size chart and installation guidance before use.

LOCKING BUCKLE DESIGN – Curtain rod bracket features a plastic buckle to hold the rod firmly in place without wobbling. NOTE: curtain rod hooks fit 1 INCH diameter rods only; the anchors provided are not for drywall.

Anchor and screw Kit Includes: 25 Pcs Zinc Metal Drywall Anchors, 25 pcs #8 x 1-1/4'' Phillips Screws
Drilling New Holes to Fix a Loose Curtain Rod Bracket
If the old holes are stripped, drill new holes in solid wall material. Place the new holes at least a few inches away from the damaged holes when the bracket design allows it. Use a level before drilling so the rod does not hang crooked.
New holes only help if the surrounding wall is solid and the anchor fits tightly.
- Hold the bracket in the new position.
- Mark each screw hole with a pencil.
- Check the marks with a level.
- Drill pilot holes using the bit size listed on the anchor package.
- Insert the anchors fully and keep them flush with the wall.
- Reattach the bracket with new screws.
- Tighten the screws until the bracket is snug, but do not overtighten.
How to Reattach the Bracket Like a Pro
Reattach the bracket slowly and check alignment as you work. A bracket that is slightly crooked can put uneven pressure on the screws and make the repair fail sooner.
Tools and Materials Needed
You’ll use the same items gathered in the Essential Tools list earlier in this guide — there’s nothing extra to buy for reinstallation itself.
Step-by-Step Reinstallation Process
Once the new holes are drilled and the anchors are seated (see the drilling steps above), finish the reinstall with this final check:
- Attach the bracket. Drive the screws until the bracket sits flat against the wall — snug, not overtightened.
- Confirm alignment. Check that it still lines up with the other bracket before you move on.
- Check for movement. Pull the bracket gently outward and downward — the same direction curtains pull — by hand. It should not wobble or shift.
- Repeat on the other side if needed. A loose bracket on one side can stress the opposite bracket, so check both even if only one originally failed.
Hanging the Curtain Rod and Checking Alignment
After the bracket feels secure, place the curtain rod back onto the brackets. Use a level across the rod before you load the curtains fully.
A straight rod looks better and reduces uneven pressure on one bracket.
- Measure the distance from the window frame to each bracket.
- Use 3 to 6 inches of overhang as a minimum when space is tight.
- Use 8 to 12 inches if you want more room for curtain stack-back and have enough wall space.
- Slide the curtains open and closed to check for smooth movement.
- Add a center support bracket if the rod sags in the middle.
Preventing Future Issues With Proper Maintenance
Check your curtain rod brackets every few months, especially if you use heavy curtains or open and close them daily. Tighten screws only until they are snug. If you overtighten them, you can damage the wall, strip the hole, or weaken the anchor.
Not every loose bracket means the anchor failed. Curtains that get opened and closed daily put a small, repeated tug on the mounting screws, and over months that cyclic motion can work an otherwise good screw loose even in a stud or a sound anchor. If you’ve confirmed the wall and anchor are fine but the screws keep backing out anyway, a small dab of removable thread-locking compound on the screw threads before you drive it back in can stop the cycle without any extra drilling.
Do not overload the rod. Follow the curtain rod and anchor weight ratings. For wide windows, heavy drapes, or double rods, add a center support bracket to spread the load.
Troubleshooting After Repair
| After Repair Problem | What It Means | What To Do Next |
|---|---|---|
| The bracket still moves | The anchor may not be seated or the wall may be damaged. | Remove it, inspect the hole, patch if needed, and use a stronger anchor. |
| The rod is not level | The bracket holes were marked unevenly. | Remove one bracket, remeasure, and drill new level holes. |
| The curtains drag or pull hard | The rod may sit too low or too close to the wall. | Adjust bracket height or use brackets with a longer projection. |
| The wall cracks around the bracket | The wall material may be weak or brittle. | Stop using the bracket until the wall is patched or inspected. |
Frequently Asked Questions
How to Tighten Curtain Rod Brackets?
Remove the curtain rod first so the bracket is not under load. Tighten the screws until the bracket sits flat against the wall. If the screws spin without gripping, the holes are stripped and need new anchors, new holes, or a wall repair.
Why Does My Curtain Rod Bracket Keep Coming Loose?
It keeps coming loose because the anchor is too weak, the screw holes are stripped, the curtains are too heavy, or the bracket is not mounted into solid material — sometimes more than one of these at once. Fix the wall support first instead of tightening the same screws again.
Can I Fix a Loose Curtain Rod Bracket Without Drilling New Holes?
Sometimes. If the bracket is loose because the screws were not fully tightened, you can tighten them. If the holes are stripped or the anchor failed, you’ll generally need new anchors, fresh holes, or a patched wall.
What Is the Best Anchor for Heavy Curtains?
In most cases, the best support is a screw driven into a wall stud. If no stud is available, use a properly rated toggle bolt or molly bolt that matches your wall type and exceeds the combined weight of the curtain rod and curtains.
Should I Add a Center Support Bracket?
Add a center support bracket if the rod is long, the curtains are heavy, or the rod sags in the middle. A center bracket spreads the weight and reduces stress on the side brackets.
How Far Should a Curtain Rod Extend Past the Window?
Use 3 to 6 inches beyond the window frame as a minimum when space is limited. If you have enough wall space and want the curtains to clear more glass, 8 to 12 inches can work better — This Old House recommends a similar range for most standard windows.
How to Fix Tension Rod That Won’t Tighten?
A tension rod is different from a mounted curtain rod bracket. Clean the wall contact points, extend the rod until it grips firmly, and add rubber pads for better friction. If the internal spring no longer holds tension, replace the rod.
Sources Used
Conclusion
A loose curtain rod bracket is straightforward to fix once you know why it failed. Remove the bracket, check the wall, choose the right anchor, and reinstall it with fresh holes if the old ones are stripped.
After the rod is back up, test the curtains by opening and closing them a few times. If the bracket stays firm and the rod stays level, the repair is ready for daily use.








[…] How to Fix a Loose Curtain Rod Bracket: Step-by-Step Guide […]