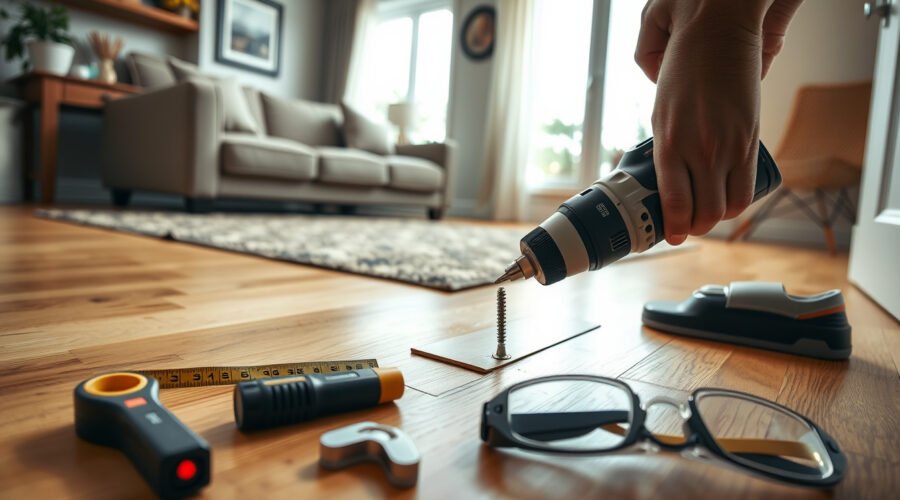
A squeaky living room floor usually means two parts of the floor system are moving and rubbing together. The fix may be as simple as adding a specialty screw from above, but the best repair depends on whether the noise comes from loose floorboards, a gap between the subfloor and joist, seasonal wood movement, or a structural problem below the floor.
Quick Answer
To fix a squeaky floor, first locate the squeak and the nearest joist. For a small above-floor repair, drill a pilot hole and drive a specialty scored screw into the joist, then fill the hole. If you can access the floor from below, use shims, construction adhesive, or blocking to stop movement.
Key Takeaways
- Most squeaks happen because wood, subflooring, joists, or fasteners move and rub together.
- Do not drill until you know the flooring type, joist location, and whether utilities or radiant heat may be under the floor.
- Above-floor screw repairs work well for many hardwood and carpeted floors, but floating laminate, tile, and radiant-heat floors need extra caution.
- If you can access the floor from below, shims, adhesive, and blocking often fix squeaks with less visible damage.
- Stable indoor humidity helps prevent seasonal movement that can make wood floors gap, cup, or squeak.
At a Glance
| Time Required | 20 minutes to 2 hours for a typical localized squeak |
| Difficulty | Easy to moderate, depending on floor access and flooring type |
| Tools Needed | Stud finder, drill, small drill bits, measuring tape, pencil, specialty squeak screws, wax stick or wood filler, plastic scraper, flashlight, safety glasses |
| Cost | About $10–$50 for most DIY supplies; more if structural repair or professional help is needed |
Understanding the Causes of Squeaky Floors
Understanding the cause of a squeaky floor helps you choose the right repair instead of guessing. Squeaks often come from movement: a finished floor rubbing against the subfloor, a subfloor moving on a joist, a loose nail or screw rubbing in its hole, or two boards rubbing together.
Wood also reacts to moisture. The USDA Forest Products Laboratory explains that wood moisture content changes with relative humidity and temperature, and wood can swell or shrink as moisture changes. That seasonal movement can open small gaps, loosen fasteners, and create the friction you hear as a squeak.
Other common causes include uneven joists, missing adhesive under the subfloor, old nails that no longer hold tightly, water-damaged panels, or flooring that was installed without enough room for natural expansion and contraction.
Note: A squeak is not always a structural emergency. But a squeak with sagging, a soft or spongy feel, cracked joists, water stains, mold, termite damage, or a sudden change in floor level should be inspected before you attempt a cosmetic repair.
Before You Start: Check Safety and Floor Type
Before drilling or driving screws, confirm what is under and above the floor. A quick repair can become expensive if you hit a pipe, wire, radiant heat line, or damage a flooring material that should not be fastened from above.
Warning: Do not drill into tile, stone, floating laminate, floating vinyl plank, or any floor with radiant heat unless you know the system layout and the manufacturer allows it. If you are unsure, stop and use an underside repair or call a flooring professional.
- Hardwood floors: Specialty scored screws, trim-head screws, or finish nails may work when driven into a joist and hidden with filler.
- Carpeted floors: Use a squeak-repair kit made for carpet so the screw can pass through the carpet without snagging the fibers.
- Floating laminate or vinyl plank: Do not screw through the floating surface. Lift the flooring if possible and repair the subfloor, or repair from below.
- Tile or stone: Squeaks may point to subfloor movement. Avoid drilling through the tile; inspect from below or hire a pro.
- Radiant-heat floors: Do not drill unless you have the exact heat-line layout and the system manufacturer confirms it is safe.
Tools and Materials Needed for the Repair
To tackle annoying squeaks, gather the tools that fit your repair path. You may not need everything on this list, but it helps to have the basics ready before you start testing the floor.
- Stud finder or magnetic joist finder
- Painter’s tape or pencil for marking squeak and joist locations
- Measuring tape
- Cordless drill and small pilot-hole bits
- Specialty scored squeak screws, trim-head screws, or wood screws sized for your floor assembly
- Wax stick, color-matched wood filler, or putty for visible holes
- Plastic scraper and soft cloth
- Flashlight or headlamp if working from below
- Wood shims, construction adhesive, and short screws for underside repairs
- Safety glasses and a dust mask if drilling overhead or working in a crawlspace
Finding Floor Joists: A Simple Guide
For an above-floor screw repair, the screw must bite into a joist. If it only grabs the finished flooring or subfloor, the squeak may come back.
- Find the loudest spot. Walk slowly over the squeaky area and mark the spot where the sound is strongest.
- Use a stud finder. Run the stud finder across the floor and mark the edges of the joist. Follow the tool’s directions because flooring thickness can affect readings.
- Use sound as a backup. Tap the floor lightly. A solid sound often suggests framing underneath, while a hollow sound may indicate a space between joists.
- Measure likely joist spacing. Many homes use joists spaced 16 inches on center, but 12, 19.2, and 24 inches also exist. Once you find one joist, measure to locate the next likely joist and confirm before drilling.
- Confirm with a tiny pilot hole only if safe. If the flooring type allows it and you have ruled out utilities or radiant heat, drill a small pilot hole where the repair will be hidden or filled.
Pro Tip: Mark both sides of the joist with painter’s tape. Aim for the center of the joist, not the edge, so the screw has the best chance of pulling the loose floor tight.
Try Quick No-Drill Fixes First
If the squeak is minor and seems to come from two finished boards rubbing together, try a low-risk fix before driving screws.
- For small gaps between hardwood boards: Work a small amount of powdered graphite into the squeaky seam, then step on the area to help it settle. Wipe away all residue.
- For seasonal dryness: Check indoor humidity with a hygrometer. The National Wood Flooring Association recommends keeping wood-floor homes between 60–80°F and 30–50% relative humidity year-round.
- For sound control only: A thick area rug may muffle the squeak, but it will not fix loose boards, fasteners, or subfloor movement.
Fix Squeaky Floors by Securing the Subfloor With Special Screws
Tackling squeaky floors from above works best when the squeak is caused by a loose board or loose subfloor over a joist. Specialty scored screws are made to snap off below the finished surface so the small hole can be filled afterward.
Above-Floor Repair for Hardwood
- Locate and mark the joist. Use the steps above to mark the center of the joist nearest the squeak.
- Choose the right screw length. The screw must reach the joist without being so long that it risks hidden materials below. When in doubt, use the screw kit’s recommended length.
- Drill a pilot hole. Use a bit slightly smaller than the screw shank. This helps prevent splitting and gives you better control.
- Drive the screw into the joist. Drive slowly until the floor pulls snug. Do not overtighten, which can strip the hole or leave a depression.
- Test the floor. Step on the spot again. If the squeak remains, the screw may have missed the joist or the noise may be coming from a nearby gap.
- Add more fasteners only where needed. For a longer loose run, add screws along the same joist only where the floor moves. Spacing around 12–16 inches can work for some loose sections, but follow the screw kit directions and avoid unnecessary holes.
Above-Floor Repair for Carpet
For carpet, use a screw kit made for squeaky floors under carpet. These kits usually include a guide that parts the carpet fibers and helps the screw break below the carpet backing.
- Find and mark the joist with tape.
- Push the kit’s guide through the carpet at the joist mark.
- Drive the screw through the guide into the joist.
- Use the kit tool to snap the screw head below the surface.
- Brush the carpet fibers back into place and test the repair.
Fix Squeaky Floors From Below
If you can access the floor from an unfinished basement or crawlspace, repair from below first. It often fixes the squeak without visible holes in the finished floor.
- Have a helper walk above. Watch from below while someone steps on the squeaky spot. Look for movement between the subfloor and joist.
- Fill small gaps with shims. Apply construction adhesive to a thin wood shim and slide it gently into the gap between the joist and subfloor. Do not force it; forcing a shim can raise the floor or create a hump.
- Add adhesive along the seam. If the subfloor is slightly separated from the joist, a bead of construction adhesive can reduce movement after it cures.
- Add blocking for larger movement. Screw a short 1×4 or 2×4 block tight against the joist and underside of the subfloor. Use screws short enough that they will not poke through the finished floor.
- Retest after curing. Step on the floor again after the adhesive has cured according to the label.
Note: If you see water damage, mold, insect damage, cracked framing, or a joist that looks bowed or split, stop the DIY repair. A squeak may be a symptom of a larger floor-system problem.
Fill Screw Holes for a Clean Finish
After securing the subfloor or finished flooring with special screws, address the small visible holes left behind. A careful color match makes the repair much less noticeable.
- Choose a wax stick or wood filler that matches the main color of your flooring, not the darkest grain line.
- Soften wax slightly with hand warmth if needed; do not overheat it on the floor.
- Press the wax or filler firmly into the hole so it is packed evenly.
- Scrape away excess with a plastic scraper held nearly flat to the floor.
- Buff lightly with a soft cloth once the repair is level.
For glossy or very dark floors, test the filler in a hidden spot first. Some fillers dry lighter or duller than expected.
Troubleshooting: If the Squeak Comes Back
| What You Notice | Likely Fix |
| The screw spins and does not tighten | You likely missed the joist or stripped the hole. Move slightly along the joist centerline and try a new pilot hole. |
| The squeak moved a few inches away | The loose section may be longer than expected. Recheck movement and add fasteners only where the floor flexes. |
| The floor still moves from below | Use adhesive-backed shims or add blocking between the joist and subfloor. |
| The squeak changes with the seasons | Check indoor humidity and keep conditions stable. Seasonal gaps may open and close as wood moisture changes. |
| The floor feels soft, sloped, or bouncy | Call a professional before adding more screws. This may be a structural or moisture problem. |
Tips for Preventing Future Squeaks
To keep your floors quiet and squeak-free, focus on moisture control, proper support, and routine care.
- Control humidity. The EPA recommends keeping indoor humidity below 60% and ideally between 30% and 50% to reduce moisture problems. That range also aligns with NWFA guidance for wood floors.
- Clean spills quickly. The NWFA maintenance guidance recommends cleaning spills immediately with a dry or slightly damp cloth and avoiding wet mops or steam mops, which can damage wood and finishes over time.
- Use floor protectors. Felt pads under furniture reduce surface scratches and friction.
- Watch high-traffic areas. If a repaired spot starts to move again, address it early before the fastener hole enlarges.
- Use rugs for sound control. Rugs can soften footfall noise, but they do not repair loose subflooring or framing.
- Hire properly for major work. During new flooring or remodeling, proper subfloor fastening, joist support, and acclimation help prevent future movement.
When to Call a Professional
Some squeaks are simple DIY repairs. Others need a flooring contractor, carpenter, or structural professional. Call for help if you notice any of these signs:
- The floor feels soft, spongy, bouncy, or uneven.
- The squeak appeared after a leak, flood, or plumbing issue.
- You see mold, rot, termite damage, or cracked joists from below.
- The floor is tile, stone, or radiant heated and you cannot safely access the subfloor.
- The squeak returns after multiple fastener repairs.
- Large gaps do not close during more humid months.
For wood-floor installation and repair standards, the National Wood Flooring Association technical guidelines are a useful industry reference.
Frequently Asked Questions
How do I repair squeaking noise in flooring?
Find the exact squeak, identify the nearest joist, and stop the movement causing the sound. For hardwood or carpet, that may mean driving a specialty screw into the joist. If you can access the floor from below, shims, construction adhesive, or blocking may fix the gap without visible holes.
How do professionals fix squeaky floors?
Professionals usually diagnose the source first. They may fasten loose flooring, add screws through the subfloor, use shims and adhesive from below, install blocking, repair damaged joists, or lift flooring to correct a subfloor problem. The method depends on access, flooring type, and whether the floor system is structurally sound.
How can I fix creaky floors DIY?
Start with the safest repair. Try powdered graphite for minor board-to-board rubbing, adjust humidity if the squeak is seasonal, or drive a specialty screw into a joist for a loose board. If you can reach the floor from below, gently shim the subfloor-to-joist gap or add blocking.
Can I fix a squeaky floor without drilling?
Sometimes. If the sound comes from boards rubbing together, powdered graphite may help. If you have access from below, you can often use shims, construction adhesive, or blocking without drilling through the finished surface. If the floor is loose over a joist, though, a fastener may be needed.
Are squeaky floors dangerous?
Most squeaky floors are annoying rather than dangerous. However, squeaks with sagging, bounce, water damage, rot, mold, insect damage, cracked joists, or sudden unevenness can point to a bigger problem. In those cases, inspect from below or call a professional before making a surface repair.
Will a rug stop a squeaky floor?
A rug may muffle the sound, but it will not fix the cause. If the squeak comes from loose boards, a loose subfloor, or a gap over a joist, the floor still needs to be tightened, shimmed, or supported.
Conclusion
Now that you know how to track the noise, find the joists, and choose the right repair, your living room can feel quiet and solid again. Start with the least invasive fix, avoid drilling when the flooring type or hidden utilities are uncertain, and use from-below repairs whenever you have access. With stable humidity, proper maintenance, and a careful repair, you can silence most squeaks and help prevent them from coming back.
Sources
- USDA Forest Products Laboratory, Wood Handbook Chapter 4 — supports wood moisture movement, swelling, shrinkage, and dimensional stability.
- U.S. Environmental Protection Agency, A Brief Guide to Mold, Moisture and Your Home — supports indoor humidity and moisture-control guidance.
- National Wood Flooring Association, Problem Prevention — supports wood-floor moisture management and recommended humidity/temperature range.
- National Wood Flooring Association, Maintenance — supports wood-floor cleaning, spill control, and wet/steam mop cautions.
- National Wood Flooring Association, Technical Guidelines — supports use of industry-accepted wood-floor standards and publications.