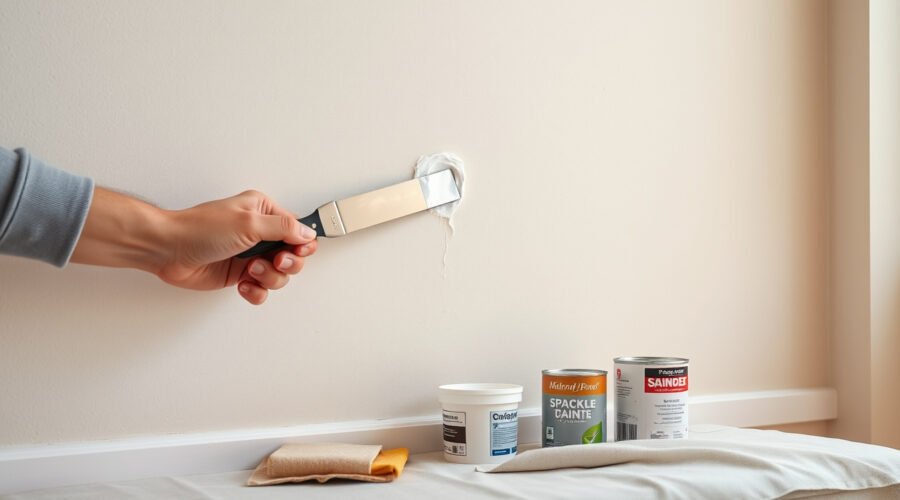
Patching nail holes in your living room walls is a simple DIY repair when you use the right filler, let it dry fully, sand lightly, and touch up the paint carefully. The goal is not just to fill the hole. It is to make the repair sit flush with the wall so it does not show once the light hits it.
Quick Answer
To patch nail holes in living room walls, remove the nail, clean away dust and loose paint, slightly overfill the hole with spackling compound, scrape it flush with a putty knife, let it dry, sand lightly, then prime if needed and blend the area with matching touch-up paint.
Key Takeaways
- Use lightweight spackle or a drywall repair compound for small nail holes in drywall.
- Clean the surface first so the filler bonds well.
- Slightly overfill tiny holes, then scrape or sand them flush after drying.
- Match both the paint color and the paint sheen for the least visible touch-up.
- Use extra caution if your home was built before 1978 because old paint may contain lead.
At a Glance
| Time Required | About 20–60 minutes of active work, plus drying time based on the product and hole depth |
| Difficulty | Easy beginner DIY project |
| Tools Needed | Putty knife, spackling compound, sanding sponge, damp cloth, small paintbrush, touch-up paint, drop cloth, and eye/dust protection |
| Cost | Usually $5–$20 if you already have matching paint; more if you need new paint or a repair kit |
Why You Should Care About Patching Nail Holes
Tiny nail holes may not seem like a big deal, but they can make a clean living room wall look unfinished. Filling them creates a smoother surface for touch-up paint and helps your wall look cared for, especially after moving art, shelves, mirrors, or curtain hardware.
A good patch also prevents the common “shiny dot” problem. That happens when filler, sanding marks, or mismatched paint catches the light differently than the surrounding wall. Taking a few extra minutes to prep, sand lightly, and match the paint finish is what makes the repair disappear.
Must-Have Supplies for Effective Nail Hole Repair
You do not need a big drywall kit for ordinary nail holes. For small holes left by picture hangers or finish nails, a few basic supplies are enough.
| Supply | Purpose | Helpful Tip |
|---|---|---|
| Lightweight spackling compound | Fills small drywall holes and minor dents | Keep the lid sealed so it does not dry out |
| Putty knife or all-in-one repair tool | Applies and smooths filler | Wipe the blade clean between passes |
| Fine sanding sponge or foam sanding block | Levels dried filler | Use light pressure so you do not scuff a wide area |
| Damp cloth or paper towel | Removes dust before filling and painting | Let the wall dry before applying spackle |
| Touch-up paint and small brush | Blends the patched area into the wall | Use the same color, brand, and sheen when possible |
Pro Tip: If you still have the original wall paint, stir it well before touching up. Paint can separate in storage, and unstirred paint may dry slightly off-color.
Recommended Products

Durable spackle allows you to patch and prime in one step, completing projects quickly

DryDex is a latex polymer spackle for repairing interior or exterior surfaces like drywall, plaster, wood, brick and stone

Drywall repair kit can be used for repairing interior or exterior surfaces like drywall, plaster, wood, brick and stone
Before You Start: Safety and Surface Prep
Place a drop cloth under the repair area, especially if you are sanding or working over carpet. Put on eye protection and a dust mask for sanding. Keep kids and pets away from the repair area until the dust is cleaned up and the paint is dry.
Warning: If your home was built before 1978, the wall may have layers of lead-based paint. The EPA says pre-1978 homes are more likely to contain lead-based paint, and sanding or scraping can create hazardous dust. If you are unsure, use lead-safe DIY practices or contact a certified lead professional before disturbing old paint.
For best adhesion, the patch area should be clean, dry, and free of loose paint, dust, oil, and debris. DAP gives the same basic surface-prep guidance for spackling: clean, dry, and free of loose material before application.
Removing Nails: A Step-by-Step Guide
Start by taking down wall art, shelves, or decorations so you can reach the nail hole clearly. Work slowly so you do not tear the drywall paper around the hole.
Nail Extraction Techniques
If the nail is sticking out, grip it with your fingers or pliers and pull straight out. If it is stubborn, place a thin scrap of cardboard or a putty knife behind the hammer claw to protect the wall, then gently rock the nail out.
If the nail is flush with the wall, use needle-nose pliers to grip the head. Avoid gouging around the hole. A small, clean nail hole is much easier to hide than a torn patch of drywall paper.
Preparing the Repair Area
After the nail is removed, check the hole. Brush away crumbs, loose paint, or raised drywall paper. Wipe the area with a slightly damp cloth, then let it dry before adding spackle.
| Step | Action |
|---|---|
| 1. Remove hardware | Pull the nail or hook out carefully without widening the hole. |
| 2. Clean the surface | Wipe dust and loose material away with a damp cloth. |
| 3. Let it dry | Spackle sticks better to a dry wall surface. |
Techniques for Nail Hole Spackle Application
For most living room nail holes, spackle is the easiest filler because it is made for small wall repairs and sands smoothly once dry. Products such as DAP DryDex Spackling are designed to fill holes and cracks in drywall, plaster, wood, brick, and stone, and the product changes color when the repair is ready to sand and paint.
Essential Spackling Techniques
Load a small amount of spackle onto the edge of your putty knife. Press it into the nail hole so the filler reaches the back of the opening. For a tiny nail hole, slightly overfill the spot, then scrape across it with the putty knife so the repair is nearly flush with the wall.
Use two light passes instead of one heavy smear. The first pass fills the hole. The second pass removes excess filler and smooths the surface.
Even Application Methods
Hold the putty knife at a slight angle and pull it across the repair. Wipe the blade clean, then make one more pass in the opposite direction. This helps prevent a raised ridge around the hole.
If the hole is deeper than a normal nail hole, do not pack in a thick blob all at once. Apply the filler in layers and let each layer dry before adding the next. DAP recommends layering spackling for repairs deeper than 1/8 inch.
Blending and Finishing Tips
Before the spackle dries, use the putty knife or a damp paper towel to feather the edges. Keep the repair area small. The more wall you cover with filler, the more sanding and paint blending you will need later.
Note: Large wall-anchor holes, dents, or torn drywall paper may need a second coat, a drywall patch, or joint compound instead of a one-step nail-hole repair.
How to Use the All-in-One Repair Tool Effectively
An all-in-one repair tool can be handy because it usually combines filler, an applicator, and a small smoothing edge. Squeeze a small amount of filler directly into the nail hole, then use the built-in edge to scrape the surface smooth.
The key is control. Apply just enough to fill the hole and leave a slight crown for sanding. If the tool leaves a ridge, wipe the edge clean and skim over the spot again before it dries.
Recommended Products

MAKES REPAIRS 3X FASTER than traditional vinyl spackling

MAKES REPAIRS 3X FASTER than traditional vinyl spackling

All-in-One Repair Solution:BONCART Wall Mending Agent combines patching and priming in one step, eliminating multiple product purchases. Perfect for both DIY enthusiasts and contractors to save time on drywall repairs.
Achieving a Smooth Finish After Spackling
Let the spackle dry completely before sanding. Dry time depends on the product, the hole depth, humidity, and how thickly you applied the filler. Some dry-time indicator spackles change color when they are ready to sand, but you should still follow the label directions.
Once dry, use a fine sanding sponge or foam sanding block. Sand with light pressure in small circular motions until the patch feels flush. Run your fingertips over the area. If you can feel a bump, you may see it after painting.
After sanding, wipe the area with a clean, slightly damp cloth. Let it dry before primer or paint. NIOSH notes that drywall sanding can create irritating dust, so keep sanding minimal and clean the dust thoroughly.
Tips for Color Matching and Painting Over Repairs
Touch-up paint works best when it matches the original paint color, brand, product line, and sheen. A flat or matte wall is usually easier to touch up than satin, semi-gloss, or glossy paint because shinier finishes reflect light and can reveal the new patch.
If you have the original paint, stir it well and test a small hidden spot first. If you do not have the paint, take a small paint chip or a sample from a hidden area to a paint store for matching.
For the cleanest result, use a small art brush only on the repaired spot, then lightly feather the edges. If the patch absorbs paint differently or flashes dull, apply a small amount of primer first, let it dry, and then touch up with wall paint.
Spackle vs. Joint Compound vs. Wood Filler vs. Caulk
Choosing the right material helps the repair last and blend in properly.
| Material | Best For | Avoid Using It For |
|---|---|---|
| Lightweight spackle | Small nail holes and tiny dents in painted drywall | Large holes that need mesh, tape, or drywall backing |
| Joint compound | Larger drywall patches, seams, and skim repairs | Quick tiny repairs when fast-drying spackle is easier |
| Wood filler | Nail holes in wood trim, baseboards, and molding | Ordinary drywall nail holes |
| Caulk | Flexible gaps around trim, corners, and joints | Flat wall holes that need sanding smooth |
Recommended Products

EFFORTLESS REPAIRS: Fill holes, cracks, and dents in one easy application, saving time and effort on your DIY projects
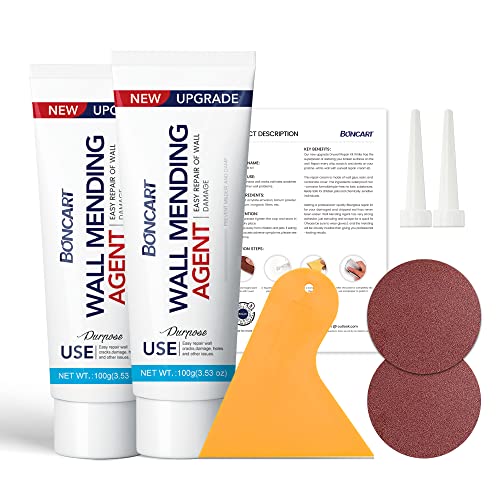
The drywall repair kit includes 2x Wall mending agent (100g), 2x Nozzle Extender, 1x Scrapers, and 2x Sandpaper.

Complete Repair Kit: Contains 1 pieces repair putty(8.5oz), 2 inch wall repair patches(2pcs), 4 inch wall repair patches(1pcs), 2 pieces of sandpaper, and 4 plastic scrapers.
Common Mistakes and How to Fix Them
| Problem | Likely Cause | Fix |
|---|---|---|
| Patch still shows after paint | Raised filler, rough sanding, or mismatched sheen | Sand lightly, wipe clean, prime if needed, and repaint with matching sheen |
| Paint looks darker or lighter | Old paint faded, paint was not stirred, or match is imperfect | Stir paint well, feather the edges, or repaint the full wall section for a perfect match |
| Filler shrinks into the hole | Hole was deep or underfilled | Apply a second thin coat after the first coat dries |
| Area feels fuzzy | Drywall paper was torn or oversanded | Seal torn paper with primer, then apply a thin coat of compound and sand gently |
Frequently Asked Questions
What are common mistakes when patching walls?
The most common mistakes are skipping surface prep, using too much filler, sanding before the spackle is dry, oversanding the surrounding paint, and touching up with the wrong paint sheen. Clean first, use thin layers, let everything dry, and keep the repair area as small as possible.
Is it better to fill nail holes with caulk or wood filler?
For nail holes in drywall, spackle is usually better than caulk or wood filler because it dries hard, sands smooth, and accepts paint well. Use wood filler for nail holes in wood trim. Use caulk for flexible gaps around trim, not for flat wall holes that need sanding.
Do I need primer over a small nail-hole patch?
For a tiny patch, you may be able to touch up directly with matching paint. Use primer if the patched spot flashes dull, absorbs paint unevenly, or is larger than a small nail hole. Primer helps create a more even surface before paint.
How long should spackle dry before sanding?
Dry time depends on the product, hole depth, room temperature, and humidity. Always follow the product label. Dry-time indicator spackles can help because they change color when the repair is ready to sand and paint.
Can I patch nail holes in a rental?
Usually yes, but check your lease first. Many landlords expect small nail holes to be patched before move-out, but some rentals have specific rules about paint touch-ups. If you do touch up paint, use the exact wall color and sheen if available.
Conclusion
Patching nail holes in living room walls is quick when you keep the process simple: remove the nail carefully, clean the area, fill the hole with the right compound, let it dry, sand lightly, and touch up with matching paint. The final paint match is what makes the repair look professional, so take your time with sheen, feathering, and cleanup.
Sources
- DAP DryDex Dry Time Indicator Spackling — product use, sanding, painting, and layered-repair guidance.
- U.S. EPA: Protect Your Family from Sources of Lead — pre-1978 lead-paint safety background.
- U.S. EPA: Lead Renovation, Repair and Painting Program — lead-safe renovation and contractor requirements.
- NIOSH/CDC: Control of Drywall Sanding Dust Exposures — sanding-dust hazard and dust-control guidance.