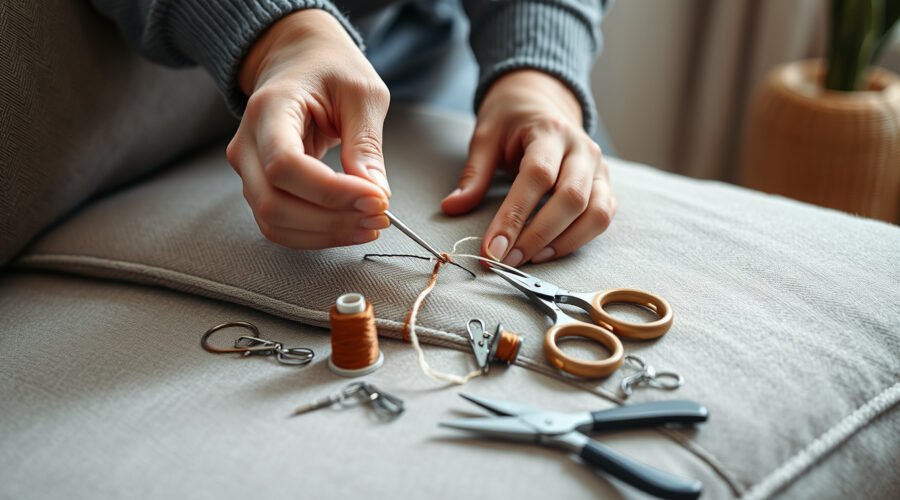
A torn upholstery seam is usually repairable when the fabric is still strong, the original seam allowance is present, and the two seam edges can meet without force. The safest DIY repair is to clean the area, align the old seam, and close the gap with a ladder stitch using a curved upholstery needle and strong matching thread. Stop and call a professional if the fabric is brittle, missing, cracked, peeling, or under heavy structural tension.
Quick Answer
To repair a torn seam on upholstery, vacuum the area, line up the seam edges, thread a curved upholstery needle with strong matching thread, and close the gap with a ladder stitch through the original stitch holes when possible. Tie off the thread inside the seam. Use glue or seam sealant only after checking the care tag and testing in a hidden spot.
Key Takeaways
- A ladder stitch, also called a slip stitch or invisible stitch, is the best hand stitch for most visible upholstery seam gaps.
- Use heavy-duty upholstery thread, but do not pull it so tight that the fabric puckers or the old seam holes tear wider.
- Stitch through existing holes whenever possible; this helps the repair blend in and avoids weakening the fabric with extra punctures.
- Do not use glue, water, solvent, or fabric protector until you check the upholstery care tag and test in a hidden area.
- Call a professional for antique, silk, brittle, leather, vinyl, missing-fabric, or large structural tears.
At a Glance
| Time Required | 20 to 45 minutes for a small seam split; longer if the seam allowance is frayed |
| Difficulty | Easy to moderate, depending on fabric thickness and access to the seam |
| Tools Needed | Curved upholstery needle, heavy-duty upholstery thread, scissors, thimble, needle-nose pliers, clips, and optional liquid seam sealant |
| Cost | Usually low if you already own scissors and basic hand-sewing tools; current supply prices vary by retailer |
Can You Repair This Upholstery Seam Yourself?
Before you thread a needle, decide whether the seam is a safe DIY repair. The best candidate is a clean seam split where the stitching failed but the upholstery fabric did not tear away from the seam line.
| What You See | Best Next Step |
|---|---|
| Popped stitches, both seam edges intact | DIY ladder stitch repair |
| Light fraying on hidden seam allowance | Test seam sealant, then stitch carefully |
| Fabric edge is weak, stretched, or tearing around holes | Use a hidden backing patch or call a professional |
| Missing fabric, brittle textile, cracked leather, or peeling vinyl | Skip DIY stitching and get professional repair |
How to Identify Common Upholstery Damage Before Repairing
Before you sew, inspect the damage closely. A simple seam split is different from a torn fabric panel, cracked vinyl, or upholstery that is pulling apart because the cushion foam or frame has shifted.
Look for these common signs of upholstery damage:
- Open seam gaps: The stitches have popped, but both fabric edges are still present. This is the best candidate for a DIY seam repair.
- Frayed edges: The seam allowance is unraveling. You may need a few reinforcing stitches or a small amount of seam sealant after testing.
- Weak or brittle fabric: If the fabric tears when lightly handled, stitching may make the damage worse.
- Missing fabric: A ladder stitch cannot replace missing material. This usually needs a patch or professional upholstery work.
- High-stress damage: Seat cushions, armrests, recliner footrests, and seams near zippers often reopen if the repair is not reinforced.
Warning: Do not force a needle through brittle, antique, silk, leather, or vinyl upholstery. If the material cracks, flakes, or tears around the needle hole, stop and call an upholstery professional.
Before You Start: Check the Fabric and Care Tag
Find the upholstery care tag before using water, glue, fabric protector, or stain cleaner near the repair. Many upholstered pieces use cleaning codes such as W, S, W-S, SW, or X. These codes tell you whether water-based cleaning, solvent cleaning, both, or vacuum-only care is safest.
For seam repair, this matters because moisture, adhesive, or protector spray can leave rings, stiff spots, discoloration, or weakened fibers on the wrong fabric. If there is no tag, test any product in a hidden area and let it dry fully before using it near the torn seam.
Note: This guide is for fabric seam splits where the original seam edges still meet. It is not a full reupholstery method for collapsed cushions, broken frames, missing fabric, or large torn panels.
Essential Supplies for Upholstery Repair
Once you’ve assessed the damage to your upholstery, gather the right tools before you begin. Good tools make the repair neater, stronger, and easier on your hands.
- Heavy-duty upholstery thread: Choose a color that blends with the fabric. Polyester, nylon, or bonded upholstery thread is commonly used for durable furniture seams.
- Curved upholstery needle: Helpful when the seam is on a cushion, armrest, or tight spot where a straight needle is hard to angle.
- Straight needle: Useful if the seam is flat and easy to access.
- Thimble: Protects your finger when pushing the needle through thick fabric.
- Needle-nose pliers: Help pull the needle through dense upholstery without bending it.
- Small scissors or thread snips: Use these to cut thread cleanly. Avoid cutting the upholstery fabric.
- Clips or pins: Hold the seam edges together while you work. Clips are safer for delicate fabrics because they do not add holes.
- Flexible fabric glue: Useful only for securing a hidden patch or stabilizing a larger tear; it should not replace stitching on a stressed seam.
- Liquid seam sealant: Optional for frayed woven edges. Use sparingly and only after testing in a hidden area.
Recommended Products

Perfect Heavy Duty Sewing Kit: This fully-packed sewing kit contains all the necessary tools to sew for most of your sewing needs. You will get: 25* Hand Sewing Needles, 12* Upholstery Thread, 1* Inch Ruler, 1* Scissors, 1* Thimble, 3* Awl Tool, 2* Seam Ripper, 1* Threader.

Leather Repair Kit: Leather sewing needles, leather craft sewing threads(30 m / color), Awl, Sewing thimble, Ruler. Rich tools can meet your different needs, very suitable for beginner and traveler.

COMPLETE SEWING KIT: This heavy duty sewing kit includes 8 pcs curved needle, 9 pcs sewing needles, 9 pcs large eye sewing needle, 8 pcs upholstery thread, 2 pcs sewing awl, sewing thimble, scissors, 2 pcs finger cots, the sewing kit is suitable for leather craft lovers and leather craft beginners and professionals
Upholstery Repair: Step-by-Step Guide to Re-Stitching a Torn Seam
Repairing a torn seam on upholstery works best when you take your time and keep the stitches even. The method below uses a ladder stitch, sometimes called an invisible stitch, slip stitch, or mattress stitch.
- Clean the seam area. Vacuum loose dust and grit from the seam so dirt does not get trapped inside the repair. Do not wet-clean the area unless the care tag allows it.
- Trim only loose threads. Cut dangling thread tails, but do not trim the fabric edge or seam allowance unless it is clearly loose and unraveling.
- Line up the original seam edges. Gently bring both sides together. If the fabric no longer reaches, do not pull hard; the seam may need a patch or professional repair.
- Thread the needle. Use a single strand for a less bulky repair or a doubled strand for a high-stress seam. Knot the end securely.
- Hide the starting knot. Insert the needle from inside the seam so the knot sits between the fabric layers, not on the visible surface.
- Start the ladder stitch. Take a small stitch through one folded seam edge, then cross to the opposite folded edge and take another small stitch. Use the old stitch holes when they are still visible.
- Keep stitches evenly spaced. Aim for small, even bites of fabric about 1/8 to 1/4 inch apart, depending on the fabric thickness and the old stitch spacing.
- Tighten gradually. After every few stitches, pull the thread just enough to close the gap. Do not yank; tight stitches can pucker the fabric or tear old holes wider.
- Reinforce the ends. Add two or three small backstitches at each end of the repaired seam, especially on seat cushions or armrests.
- Tie off inside the seam. Make a small knot close to the seam, pass the needle into the seam channel, bring it out an inch away, and trim the thread tail so it disappears inside.
- Check the repair. Press lightly along the seam. If it gaps, add a few more stitches. If it puckers, the thread tension is too tight.
Pro Tip: Match the old stitch path instead of creating a new one. Stitching through existing holes helps the repair blend in and reduces extra stress on the upholstery fabric.
Recommended Products

THICK WAXED THREAD: sturdy upholstery thread, 0.55mm thick and 22 yards per spool. Made from high-quality 100% polyester, ensuring excellent durability

★ The industrial thread and needle Best Selling Upholstery Repair Kit for Carpets, Canvas, Upholstery, Coats, Tents, Mattresses, Furs and Leather.

Package Includes: This leather repair kit includes 1pcs 32 yards sewing waxed thread and 7 pcs different shapes leather hand sewing needles, upholstery needles and threads very great for canvas, leather, carpets, sails, sacks, etc.
How to Reinforce a Frayed or High-Stress Seam
If the torn seam is on a seat cushion, recliner, ottoman, or armrest, it may need more support than a basic ladder stitch. Reinforcement is especially important when the seam allowance is frayed or the old holes are stretched.
- For light fraying: Apply a tiny amount of liquid seam sealant to the hidden seam allowance after testing. Let it dry before stitching if the product directions require it.
- For weak seam allowance: Place a small piece of matching or lightweight backing fabric inside the seam and stitch through the stronger layers.
- For stress points: Add a few backstitches at both ends of the repaired area so the seam does not unzip again.
- For repeated seam failure: Check whether the cushion is overstuffed, the foam has shifted, or the fabric is too weak to hold thread.
Textile light damage is cumulative and irreversible, so protecting repaired upholstery from harsh sunlight helps preserve both the fabric and the new stitching.
Recommended Products

Seal up to 60 ft of seams on tents, tarps and awnings with this water-based seam sealant; cures in 2 hours at room temperature

Permanent Repairs – Seal seams and fix holes in tents, tarps, awnings, rainflies, and gear like Thermarest sleeping pads with a flexible, waterproof adhesive.

Seal up to 24 ft of seams with 1.5 oz of this durable, clear adhesive that bonds permanently to silicone-treated (silynylon) tents
Troubleshooting Common Upholstery Seam Repair Problems
If the repair does not look right, the problem is usually tension, thread choice, or weakened fabric. Use these fixes before cutting out the whole repair.
- The seam puckers: The stitches are too tight. Loosen the last few stitches or redo that section with gentler tension.
- The thread keeps snapping: The thread may be too light, old, or rubbing against a sharp edge inside the seam. Switch to stronger upholstery thread and check for staples or rough frame parts.
- The needle is hard to pull through: Use a thimble and needle-nose pliers. If the fabric is leather, vinyl, or extremely dense, stop before you create visible holes.
- The seam opens again: The area is under too much stress. Reinforce both ends with backstitches or consider a hidden patch.
- The fabric edge keeps unraveling: Stabilize the hidden edge with a tested seam sealant or backing patch before closing the seam.
- The repair is too visible: Use a closer thread color, smaller stitches, and the original stitch holes whenever possible.
How to Make Your Repair Last Longer
To help your upholstery repair last, reduce strain on the seam and protect the surrounding fabric. A good repair should close the gap securely, but it should not make the seam stiff, puckered, or overloaded with thread.
- Use upholstery thread that suits the fabric weight.
- Keep the ladder stitch small, even, and relaxed.
- Reinforce the beginning and end of the torn area with extra stitches.
- Use seam sealant only on hidden fraying edges and only after testing.
- Avoid sitting directly on the repaired seam for the first day if glue or sealant was used nearby.
- Check the seam after a week of use and add stitches if you see early gaps.
Maintain Your Upholstery After Repair
Maintaining your upholstery after a repair is essential for preserving both appearance and durability. Check seams regularly for loose stitches, fraying, or gaps, especially on cushions and armrests.
Vacuum upholstery with a soft brush attachment to remove grit that can abrade fibers. Rotate loose cushions periodically so one seam does not take all the pressure. Keep furniture out of strong direct sunlight when possible, because light and ultraviolet exposure can fade, weaken, and age textile fibers over time.
If you want to use a fabric protector spray, read the care tag first and test the spray in a hidden spot. Let the test area dry completely before treating a larger area. Do not use water-based cleaners, solvent cleaners, or protector sprays on upholstery marked with a care code that does not allow them.
When to Call a Professional Upholsterer
Some seam damage is not a good DIY project. Call a professional upholsterer if:
- The fabric tears when you gently handle it.
- The furniture is antique, high-value, silk, or historically important.
- The upholstery is leather or vinyl and the surface is cracked or peeling.
- The seam has missing fabric or a large hole beside it.
- The cushion foam, spring support, or frame is causing the seam to pull apart.
- The tear is in a highly visible spot and you need an invisible finish.
Frequently Asked Questions
How do you repair a ripped seam in upholstery?
Clean the area, line up the two seam edges, thread a curved upholstery needle with strong matching thread, and close the opening with a ladder stitch. Work through the original stitch holes when possible, tighten the thread gradually, and hide the final knot inside the seam.
What stitch is best for fixing a torn upholstery seam?
A ladder stitch is usually best for a visible upholstery seam because it pulls the two folded edges together while hiding most of the thread. For the ends of the tear, add a few small backstitches to keep the seam from reopening.
Can I use fabric glue instead of sewing a ripped upholstery seam?
Fabric glue can help stabilize a hidden patch or frayed edge, but it should not replace stitching on a seam that gets regular pressure. Glue alone can dry stiff, show through fabric, attract dirt, or fail when the cushion flexes.
How do I repair torn upholstery on a sofa?
For a sofa seam split, use a curved needle, matching upholstery thread, and a ladder stitch. If the tear is on a seat cushion or armrest, reinforce both ends of the repair with extra stitches because those areas take more stress.
What kind of thread should I use for upholstery seam repair?
Use heavy-duty upholstery thread that matches the fabric color and weight. Polyester, nylon, or bonded upholstery thread is a common choice for durable seams, but fragile or antique fabric may need a lighter, more compatible thread to avoid tearing the textile.
Can I repair leather or vinyl upholstery with this method?
Be careful. Leather and vinyl show needle holes, and cracked or peeling material may tear farther when stitched. Small seam openings may be repairable with the right needle and thread, but visible leather or vinyl damage is often better handled by a professional.
Conclusion
A torn upholstery seam is usually fixable when the fabric is still strong and the two seam edges can meet. Use a curved needle, heavy-duty matching thread, and a careful ladder stitch to close the gap without puckering the fabric. For the longest-lasting repair, keep stitches relaxed, reinforce stress points, protect the fabric from harsh sunlight, and avoid cleaners or sprays that do not match the upholstery care tag.
Sources
- Canadian Conservation Institute – Stitches Used in Textile Conservation – supports guidance on choosing thread, stabilizing weak or frayed areas, and consulting a conservator when unsure.
- Canadian Conservation Institute – Caring for Textiles and Costumes – supports fabric vulnerability, handling, physical-force damage, and textile preservation guidance.
- Canadian Conservation Institute – Agent of Deterioration: Light, Ultraviolet and Infrared – supports the advice about light, UV exposure, fading, and fiber weakening.
- Room & Board – Fabric & Upholstery Care and Cleaning – supports care-code guidance for W, S, SW, and related upholstery cleaning instructions.
- J A Milton Upholstery – Slip Stitching or Ladder Stitch – supports the use of slip stitch or ladder stitch for invisible upholstered seams.
- Family Handyman – Upholstery Repair: How to Sew a Ripped Seam – supports the practical ladder-stitch process for ripped upholstery seams.