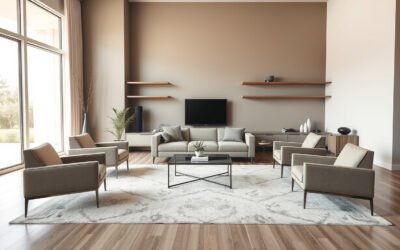
Buying a sofa that blocks a doorway or ordering a dining table that traps chairs against the wall is an expensive way to learn that a room looks bigger than it measures. A floor plan in interior design solves those spatial conflicts on paper or screen before you lift heavy furniture, order custom pieces, or start a remodel. By mapping your room’s exact boundaries, fixed features, and walkways to scale, you can test how a space will look and function in daily life.
Quick Answer
A floor plan in interior design is a scaled, overhead diagram—commonly drawn at 1/4 inch = 1 foot in the U.S. or 1:50 in metric—that shows walls, doors, windows, built-ins, furniture, and walkways. Designers and homeowners use it to verify room proportions, clearances, natural light, and traffic flow before buying furnishings or remodeling.
Key Takeaways
- Use a true scale: Draw simple graph-paper layouts at 1 square = 1 foot, or use the U.S. residential standard of 1/4 inch = 1 foot (1:48) so every piece fits in real life.
- Match format to project stage: Start with a 2D plan to verify dimensions and door swings, then switch to 3D views to judge ceiling height, vertical scale, and finishes.
- Protect key clearances: Aim for 30–36 inches on primary walkways, 14–18 inches between a sofa and coffee table, 36 inches behind dining chairs, and 42–48 inches in kitchen work aisles.
- Separate decor from code work: A furniture plan guides layout and shopping, but structural, plumbing, gas, and electrical changes require licensed professionals and permit-ready drawings.
What Is a Floor Plan and Why Is It Important in Interior Design?

A floor plan is an orthographic projection—a flat view looking straight down from an imaginary horizontal cut about four feet above the floor. In interior design, it acts as the bridge between an inspiration board and a livable room. Instead of guessing whether an L-shaped sectional will pinch a hallway or whether a king bed will block a closet door, you test those relationships to scale first.
A well-drawn plan answers five practical questions before you spend money:
- Will the room function well? You can see whether seating, storage, prep zones, and walkways support your household’s daily routines.
- Does the furniture actually fit? Scaled furniture footprints prevent costly return fees and restocking charges on oversized pieces.
- Is the traffic flow comfortable? Tracing paths from doorway to doorway reveals pinch points, awkward detours, and blocked openings.
- Where does natural light work best? Window orientation helps you place desks, reading chairs, dining tables, and indoor plants while avoiding screen glare.
- Can everyone navigate the space safely? Checking door widths, turning radii, and step-free routes ensures the room works for guests, children, and mobility devices.
The best floor plan is not simply the one that fits the most furniture. It is the one that makes the room easier to live in.
What Does a Floor Plan Include?
A complete interior design floor plan includes the structural shell of the room, fixed architectural features, movable furnishings, circulation paths, and measurement callouts. The level of detail depends on whether you are rearranging a living room, ordering custom cabinetry, or coordinating a renovation with a contractor.
| Floor Plan Element | How It Appears on the Plan | Why It Matters |
|---|---|---|
| Walls and room dimensions | Thick solid lines for exterior walls, thinner lines for interior partitions, and dashed lines for half-walls or overhead beams. | Establishes the real usable footprint and prevents scale mistakes. |
| Doors, windows, and swing arcs | Gaps in walls with quarter-circle arcs for hinged doors, peaked lines for bifolds, and three parallel lines for windows. | Shows daylight entry, sightlines, and where open doors could hit furniture or rugs. |
| Built-ins and fixed fixtures | Scaled outlines with labels such as REF (refrigerator), DW (dishwasher), W/D (washer/dryer), and CL (closet). | Marks cabinets, fireplaces, stairs, plumbing fixtures, radiators, and appliances you cannot easily move. |
| Furniture layout | Top-down shapes drawn to exact width and depth for sofas, beds, tables, chairs, and rugs. | Tests scale, seating distance, storage capacity, and visual balance. |
| Traffic flow and clearances | Open corridors and dimension arrows between furniture edges, walls, and doorways. | Keeps paths clear between entries, seating zones, closets, work areas, and outdoor exits. |
| Legend, scale, and notes | North arrow, scale bar (such as 1/4" = 1'-0"), room labels, and height callouts like AFF (above finished floor). | Clarifies sunlight direction, drawing proportions, outlets, switches, and material notes. |
Note: A decorating floor plan is not the same as a permit-ready construction drawing. If your project involves load-bearing walls, plumbing, gas lines, or electrical wiring, have your plans reviewed and stamped by a licensed architect, structural engineer, or contractor in your jurisdiction.
What Are the Main Types of Floor Plans?
Interior design projects rely on three primary floor plan formats: 2D plans, 3D plans, and interactive digital plans. Each format solves a different stage of the design process, and most successful projects start in 2D to lock in measurements before moving to 3D to check room volume and style.
| Floor Plan Type | Best For | What to Check |
|---|---|---|
| 2D floor plan | Exact room measurements, wall lengths, door swings, window placement, and walkway widths. | Drawing scale accuracy, fixed obstacles, and furniture clearances. |
| 3D floor plan | Visualizing ceiling height, room volume, surface finishes, furniture height, and lighting feel. | Whether tall bookcases, upper cabinets, drapery, and lighting feel balanced together. |
| Interactive floor plan | Testing multiple layouts quickly and walking family members, clients, or contractors through options. | Whether 3D catalog items match the exact dimensions of the real pieces you plan to buy. |
Recommended Products
![Punch! ViaCAD 2D v12 [Mac Download]](https://m.media-amazon.com/images/I/51ybTKQYzvL._SL500_.jpg)
Perfect for all types of 2D CAD projects, including architectural, mechanical, electrical, furniture, and DIY drawings and plans

2D Floor Plans
A 2D floor plan is a flat, black-and-white or color-coded technical drawing viewed straight from above. Because it strips away perspective distortion, it is the most reliable format for checking wall lengths, doorway clearances, rug sizes, and spacing between furniture pieces.
3D Floor Plans
A 3D floor plan adds wall height, perspective, textures, and shadowing—often rendered as an angled “dollhouse” view with the ceiling removed. It helps you spot vertical mistakes a flat plan hides, such as a tall armoire overwhelming an 8-foot ceiling or a high-back sofa blocking a picture window.
Interactive Floor Plans
An interactive floor plan lets you drag walls, swap furniture models, change flooring, and switch between overhead 2D views and first-person 3D walkthroughs in real time. Browser-based tools like HomeByMe let homeowners build 2D floor plans and furnish them in 3D with brand-name catalog items, while SketchUp supports professional 3D interior modeling, detailed construction drawing sets, and millions of real-world product models through 3D Warehouse.
Floor Plan vs. Layout vs. House Plan: What Is the Difference?
A floor plan is the scaled drawing of a level’s physical structure, a furniture layout is how you arrange movable items inside that space, and a house plan is the full architectural blueprint set required to build a home. Knowing which drawing you need saves time and prevents miscommunication with designers or builders.
- Floor plan: The scaled overhead diagram of a single room, story, or building showing walls, doors, windows, stairs, and fixed fixtures.
- Furniture layout (space plan): The functional arrangement of movable furniture, rugs, and activity zones overlaid onto a floor plan. It also describes overall room concepts such as open-concept layouts (combined kitchen, dining, and living spaces with few interior walls), closed or traditional layouts (separate rooms framed by walls and doors for privacy and sound control), and split-level layouts (staggered floor levels connected by short flights of stairs).
- House plan: A complete architectural drawing package for new construction or major additions. Alongside floor plans, it includes exterior elevations, cross-sections, foundation plans, roof framing plans, and mechanical/electrical sheets.
- Site plan: An overhead property drawing showing the building footprint in relation to lot lines, zoning setbacks, driveways, walkways, drainage, and landscaping.
- Reflected ceiling plan (RCP): A flat view of the ceiling drawn as if reflected in a mirror on the floor, used by interior designers and electricians to map recessed cans, pendants, ceiling fans, beams, and HVAC vents.
For decorating or refurnishing a room, a scaled floor plan with a furniture layout is all you need. For structural remodels or additions, you will need a wider architectural plan set.
Choosing the Right Floor Plan: Key Elements to Consider
Evaluating a floor plan comes down to seven practical factors that control how comfortable a room feels day after day. Before you commit to a furniture layout or renovation plan, test it against these essentials:
- Flow and circulation: People should be able to walk from entryways to seating or adjoining rooms along intuitive, unobstructed paths without cutting through conversation areas or work zones.
- Daily functionality: Match the layout to how your household actually lives—such as durable, wipeable seating and toy storage in a family room, or sound buffering between a home office and a bedroom.
- Natural light and orientation: South- and west-facing windows bring strong afternoon warmth and potential TV glare, while north-facing rooms cast cool, even light and east-facing rooms brighten early in the morning.
- Focal points: Anchor the primary seating group around one dominant feature—a fireplace, picture window, architectural built-in, or media wall—rather than letting multiple features compete.
- Storage capacity: Build closed cabinets, closets, entry drop zones, and bookcases into the plan early so everyday items have a home before you add accent pieces.
- Accessibility and safety: Check door widths, threshold heights, turning space, and step-free paths if children, older adults, or wheelchair users use the home.
- Future flexibility: Choose adaptable layouts where a dining room can double as a study or a guest room can transition into a nursery or home office without moving walls.
Pro Tip: Draw dashed lines between every doorway on your draft plan to map natural desire paths first. Keep large pieces like sectionals and dining tables completely outside those travel lanes so the room feels effortless to walk through.
Recommended Products

Multiple Package Issues: Multiple package may not arrive at the same time. If you have any questions about the tracking numbers or the tracking state of the sectional sleeper sofa we will help you

Cloud-Like Comfort: Featuring 3D cutting technology, the memory foam sofa is filled with 30D elastic foam, providing excellent support and resilience for a more comfortable seating experience. Experience cloud-like comfort the moment you sit down

3 Packages Shipping - The modular sectional sofa is delivered in 3 separate boxes and may arrive at different times. If you have any questions or need help with your cloud couch, please feel free to reach out to us.
How Do You Create a Functional Floor Plan?

You create a functional floor plan in seven steps: measure the room’s fixed shell, draw it to a consistent scale, map activity zones, place anchor furniture first, verify walkway clearances, compare two or three layout options, and tape the winners out on the real floor. Working in this exact sequence prevents you from falling in love with a layout that fails in real life.
At a Glance
| Time Required | 1–3 hours for one room; longer for a full home or remodel |
| Difficulty | Beginner for furniture planning; professional help recommended for construction changes |
| Tools Needed | 25-foot tape measure or laser measurer, 1/4-inch graph paper or floor plan software, pencil, architectural scale or ruler, painter’s tape, and furniture dimensions |
| Cost | Free if hand-drawn or built in a free 2D/3D web planner; paid software or professional drafting varies by project scope |
1. Measure the Room
Measure the full length of each wall from corner to corner at baseboard level, then measure a second time at waist height to catch bowed drywall or thick trim. Next, record the exact width and wall distance of every door, window (including frame trim and sill height), built-in bookcase, fireplace hearth, radiator, stair run, structural column, floor vent, electrical outlet, and light switch. Finally, measure floor-to-ceiling height—most residential rooms sit at 8 or 9 feet—so you know whether tall bookcases, bunk beds, canopy beds, or pendant lights will fit.
2. Create a Scaled Outline
Transfer your measurements onto graph paper or into a digital planner using a fixed scale. On standard 4-squares-per-inch graph paper, letting one square equal one foot matches the U.S. architectural standard of 1/4 inch = 1 foot (1:48 ratio), where a 12-foot wall is 3 inches long on the page. For detailed kitchen or bath plans, designers often double the size to 1/2 inch = 1 foot (1:24); in metric countries, standard residential plans use 1:50 (2 cm = 1 meter). Draw wall thickness, door swing arcs, window breaks, and immobile fixtures before placing any furniture.
3. Define Zones
Group the room into functional zones based on what happens there. A family living room might combine a main conversation zone, a media viewing zone, a quiet reading corner by a window, and a concealed storage zone. A primary bedroom might separate sleeping, dressing, and a compact desk nook. Zoning keeps furniture grouped with purpose instead of scattered around the perimeter.
4. Place the Largest Furniture First
Position the anchor piece in each zone first: the sofa or sectional in a living room, the bed in a bedroom, the dining table in a dining room, or the island in a kitchen. Orient the anchor piece toward the room’s focal point and away from direct door swings. Once the largest item fits comfortably, build outward with secondary pieces like accent chairs, nightstands, side tables, credenzas, and area rugs.
5. Check Clearances and Traffic Flow
Measure every gap between furniture edges, walls, and door swings to make sure people can move without turning sideways. For tight secondary paths between two furniture pieces, about 24 inches can work in a pinch, while 30 inches is much more comfortable. For main walkways through a room, aim for 30 to 36 inches (or 42 inches in high-traffic family zones), and keep 14 to 18 inches between a sofa and coffee table so you can reach a glass without bumping your shins.
When planning for wheelchair access or aging in place, use official accessibility standards rather than rule-of-thumb decorating numbers. The U.S. Access Board’s ADA accessible route standards require a continuous clear width of at least 36 inches along accessible routes, narrowing to 32 inches minimum only at short pinch points such as doorways for a maximum run depth of 24 inches along the travel path (plus a 60-by-60-inch wheelchair turning space).
Warning: Never demolish walls, widen doorways, relocate plumbing drains, move gas lines, or rewire circuits based solely on a decorative floor plan. Structural and mechanical changes must comply with local building codes, pass inspection, and be reviewed by licensed professionals.
| Layout Check | Recommended Clearance | Why It Matters |
|---|---|---|
| Door swings | Full 90-degree arc plus 36 in. approach | Doors should swing open freely without hitting furniture, thick rug edges, or appliances. |
| Chair pullout space | 32–36 in. to sit; 44–48 in. to walk behind | Dining chairs, desk chairs, and barstools need room for people to slide back and stand up. |
| Drawer and cabinet clearance | 36 in. in front of dressers and deep drawers | Storage only works when someone can stand comfortably in front of a fully extended drawer or oven door. |
| Accessible route needs | 36 in. continuous path; 32 in. at doors; 60 in. turn | Ensures wheelchairs, walkers, and strollers can pass through doorways and turn around safely. |
6. Test Two or Three Alternatives
Never settle on the first layout that fits on the page. Sketch or duplicate at least three distinct options: one that maximizes open floor space, one that prioritizes extra seating or storage, and one that floats furniture away from the walls to tighten the conversation circle. Comparing options side by side makes trade-offs obvious before you spend a dime.
7. Review the Plan in Real Life
Before ordering large furniture, use low-tack painter’s tape (or flattened cardboard boxes) to mark the exact width and depth of your planned sofa, bed, rug, or dining table right on the floor. Walk through the room, swing every door open, pull out a chair, and sit at eye level to verify sightlines and scale.
| Tip | Details |
|---|---|
| Measure Your Space | Record wall lengths, window sill heights, outlets, and trim at scale before shopping for furniture. |
| Consider Traffic Flow | Keep 30–36 inch main paths open and verify door swings, drawer pullouts, and dining chair space. |
| Use Design Software | Test dimensions in a 2D plan first, then switch to 3D views to evaluate furniture height and finishes. |
Inspiring Floor Plan Examples for Every Room in Your Home
Every room in a home has different ergonomic priorities and clearance rules. As you compare floor plan options room by room, anchor each layout around the room’s core activity and the minimum spacing needed to use fixtures comfortably.
Living Room
Build your living room floor plan around a central conversation group where facing seats sit 3.5 to 8 feet (42 to 96 inches) apart and every seat is within 14 to 18 inches of a coffee table or side table. Route the main 36-inch traffic path behind the sofa rather than between the sofa and the fireplace or TV, and choose an area rug large enough for at least the front legs of all major seating pieces to rest on it (leaving 12 to 18 inches of bare floor around the room’s perimeter).
Kitchen
Whether you choose an L-shaped, U-shaped, galley, or island layout, group your cooking, cleanup, prep, and cold-storage zones so household traffic never cuts directly through the active cooking area. According to the NKBA Kitchen Planning Guidelines, the three legs of a traditional work triangle (sink, cooktop, and refrigerator) should total no more than 26 feet, with each individual leg measuring between 4 and 9 feet. Leave at least 42 inches of width in work aisles for one cook, 48 inches for multiple cooks, 36 inches for general walkways, and at least 21 inches of standing clearance beside an open dishwasher.
Bathroom
Bathroom floor plans are governed by existing plumbing stacks (especially the 3- or 4-inch toilet drain), door swings, and strict fixture clearances. Under International Residential Code (IRC) Section R307, legal minimums require at least 15 inches from the centerline of a toilet or sink to any sidewall or vanity (and 30 inches center-to-center between adjacent fixtures), 21 inches of clear space in front of toilets, sinks, and tubs, and a minimum 30-by-30-inch interior shower compartment. For everyday comfort, the NKBA Bathroom Planning Guidelines recommend expanding those targets to 18 inches from the toilet centerline to a wall, 30 inches of clear floor space in front of all fixtures, 36 inches center-to-center for double vanities, and at least a 36-by-36-inch shower.
Bedroom
Place the bed first—usually centered on the main solid wall opposite or diagonal to the entry door—before adding nightstands and dressers. Standard mattress footprints vary widely (a Queen measures 60 by 80 inches, while a King measures 76 by 80 inches), so verify that your layout leaves 30 to 36 inches of walkway space on both sides of the bed (or at least 24 inches in compact rooms) and 36 inches in front of dressers and swing closet doors.
Outdoor Space
Treat patios, decks, and balconies as exterior rooms with defined dining, lounging, and cooking zones. Keep a clear 36-to-48-inch path from the exterior door to steps and yard access, check whether patio doors swing inward or outward, and position grills at least several feet away from siding, railings, overheads, and dining chairs.
Common Floor Plan Mistakes to Avoid
Even a careful sketch can fail if you overlook three-dimensional obstacles or real-world tolerances. Watch out for these seven common floor plan mistakes before finalizing your layout:
- Measuring only once or ignoring trim: Baseboards, window casings, and radiator covers eat up 1 to 4 inches of wall space that can stop a dresser or bookcase from fitting into an alcove.
- Ignoring door and drawer swing arcs: Entry doors, closet bifolds, refrigerator doors, oven doors, and deep dresser drawers need full clearance to open without colliding.
- Pushing every piece against the wall: Lining furniture around the perimeter often leaves a “waiting room” gap in the center; pulling seating inward onto an area rug creates a more natural conversation zone.
- Forgetting vertical wall features: Thermostats, light switches, outlets, return air grilles, and low window sills can clash with headboards, tall cabinets, and artwork if you only measure the floor.
- Underestimating storage needs: A minimalist floor plan quickly becomes cluttered in daily life if there is no dedicated spot for coats, shoes, mail, cords, or kids’ gear.
- Buying out-of-scale furniture: A deep 44-inch showroom sectional or a 10-person dining table looks proportional under 20-foot retail ceilings but can overwhelm a 12-by-14-foot residential room.
- Planning only for current habits: Leaving zero flexibility for a home workspace, guests, pets, or step-free mobility can force an expensive redesign within a few years.
Choosing the Best Floor Plan Tool for Your Project
The right floor plan tool depends on your project’s complexity and how comfortable you are with digital drafting. A quick living room refresh only takes graph paper and a ruler, whereas a whole-room remodel benefits from 2D/3D software that checks measurements and sightlines automatically.
- Graph paper and scaled paper cutouts: Best for fast, zero-cost furniture rearranging, rug sizing, and testing two or three room layouts in under an hour.
- Consumer 2D/3D home design planners: Best for full-room makeovers where you want to drag and drop real-brand furniture, test wall colors and flooring, and view 3D renderings before buying.
- Professional CAD/3D software or an interior designer: Best when your project involves custom millwork, kitchen or bath remodeling, accessibility compliance, or permit drawings.
| Project | Best Planning Method |
|---|---|
| Rearranging one room | Hand sketch on 1/4-inch graph paper (1 square = 1 foot) or a simple 2D online room planner. |
| Full room redesign | 2D floor plan first to lock in clearances, followed by a 3D planner (such as HomeByMe) to test height, finishes, and scale. |
| Remodel with construction work | Concept plan in 2D/3D software (such as SketchUp), verified and converted into permit drawings by licensed professionals. |
Recommended Products



Related Guides
Frequently Asked Questions
What does a floor plan include?
A floor plan includes scaled room dimensions, exterior and interior walls, doors with swing arcs, windows, built-in cabinetry, plumbing and heating fixtures, furniture footprints, walkway clearances, and a scale or directional legend. More detailed renovation plans also mark electrical outlets, lighting switches, appliance models, and material notes.
Are layout and floor plan the same?
No, a floor plan and a layout are not the same thing. A floor plan is the scaled overhead drawing of the physical room and its fixed architectural features. A layout (or space plan) is the arrangement of movable furniture, activity zones, and traffic paths drawn on top of that floor plan.
Are floor plan and house plan the same?
No, a floor plan is just one sheet inside a broader house plan. While a floor plan shows the overhead layout of a single room or story, a complete house plan is a construction blueprint package that adds exterior elevations, foundation plans, roof plans, cross-sections, and structural details.
What are three types of floor plans?
The three main floor plan formats in interior design are 2D floor plans (flat overhead drawings for exact measurements), 3D floor plans (angled renderings showing height, volume, and finishes), and interactive digital floor plans (live software models you can edit and walk through virtually). Terms like open-concept, closed, and split-level describe home layout styles rather than drawing formats.
What is the best scale for a floor plan?
The standard U.S. residential scale is 1/4 inch = 1 foot (a 1:48 ratio), which matches standard 4-squares-per-inch graph paper when one square equals one foot. For detailed kitchen and bath layouts, designers often use 1/2 inch = 1 foot (1:24), while metric floor plans typically use 1:50 (2 centimeters = 1 meter).
Can I make a floor plan without software?
Yes, you can draw an accurate floor plan by hand using a tape measure, a pencil, a ruler, and 1/4-inch graph paper. Cut out scaled paper rectangles for your sofa, bed, and tables so you can slide them around the drawing before switches to digital software for 3D views.
Does a floor plan have to be to scale?
Yes, a floor plan must be drawn to scale to be useful for interior design. Without consistent proportions, a rough sketch can make a crowded walkway or an oversized sofa look like it fits when it will actually block doors or traffic in the real room.
How do you read symbols on a floor plan?
Read a floor plan by starting with the compass arrow and scale bar, then tracing the walls: thick solid lines mark exterior walls, gaps with quarter-circle arcs show hinged doors and their swing direction, and breaks with three parallel lines indicate windows. Parallel rectangles with an arrow labeled UP show stairs, while abbreviations like DW, REF, and CL mark the dishwasher, refrigerator, and closets.
Conclusion
A well-measured floor plan in interior design takes the guesswork out of decorating and remodeling by proving what fits before you buy. Grab a tape measure, draw your room’s fixed shell at 1/4 inch = 1 foot, place your anchor furniture with 30-to-36-inch walkways, and test your favorite layout on the real floor with painter’s tape before placing your order.
Sources
- U.S. Access Board – Guide to ADA Accessibility Standards: Accessible Routes: Supports 36-inch continuous accessible route width and 32-inch doorway clearance (for a maximum 24-inch depth).
- HomeByMe: Supports 2D floor planning and 3D brand-catalog home visualization software features.
- SketchUp Interior Design Software: Supports 3D interior design modeling, construction drawing sets, and 3D Warehouse model library references.
- National Kitchen & Bath Association (NKBA) – Kitchen Planning Guidelines: Supports 42-to-48-inch kitchen work aisles, 36-inch walkways, 26-foot work triangle limits, and seating/dishwasher clearances.
- International Code Council – 2021 International Residential Code (IRC) Section R307: Supports minimum code clearances for toilets, sinks (15-inch centerline, 21-inch front space), and showers (30-by-30-inch minimum).
- National Kitchen & Bath Association (NKBA) – Bathroom Planning Guidelines: Supports recommended comfort clearances for bathrooms (18-inch toilet centerline, 30-inch front clearance, 36-inch double vanity spacing, and 36-by-36-inch showers).
- Schema.org FAQPage: Reference for FAQ structured data specification.