A grow tent can turn into a greenhouse fog if you let moisture build up unchecked. You need to keep humidity in the right range for each growth stage, or you’ll invite mold, weak growth, and stressed roots. With better airflow, smarter watering, and the right dehumidifier size, you can bring conditions back under control, but the quickest fix isn’t always the most obvious one.
Why Grow Tent Humidity Causes Problems
High humidity in a grow tent creates a favorable environment for fungal diseases like powdery mildew and Botrytis, and it also raises the risk of root rot by keeping the root zone too wet and low in oxygen. You need to control humidity because high humidity also attracts pests like spider mites, aphids, and whiteflies, which spread fast in dense canopies. When moisture levels stay elevated, your plants can’t transpire efficiently, so nutrient uptake drops and growth slows. That stress weakens plant health and opens the door to bacterial infections such as leaf spot and blight. You should watch the tent, the medium, and the leaves for early warning signs. Keeping conditions balanced protects roots, preserves airflow through the canopy, and helps your crop stay resilient. In practice, stable humidity gives you cleaner growth, stronger metabolism, and fewer outbreaks that can steal your yield and your control.
Ideal Grow Tent Humidity by Growth Stage
Your target humidity should change as your plants move through each growth stage. In humidity in grow tents, you need stage-specific humidity control to support plant health and healthy growth. Use these ideal humidity levels:
| Stage | RH Target |
|---|---|
| Seeding | 65-75% |
| Vegetative stage | 50-70% |
| Early flowering stage | 40-50% |
| Late flowering stage | 30-40% |
During seeding, higher moisture levels help roots establish. In the vegetative stage, keep humidity in the midrange to maintain humidity without inviting mold. As you enter the flowering stage, lower RH to prevent mold and bud rot. In late flower, drier air protects flowers and improves final quality. Check readings often, then adjust promptly; small shifts matter. When you monitor and fine-tune moisture levels, you protect plant health, reduce stress, and support higher yields.
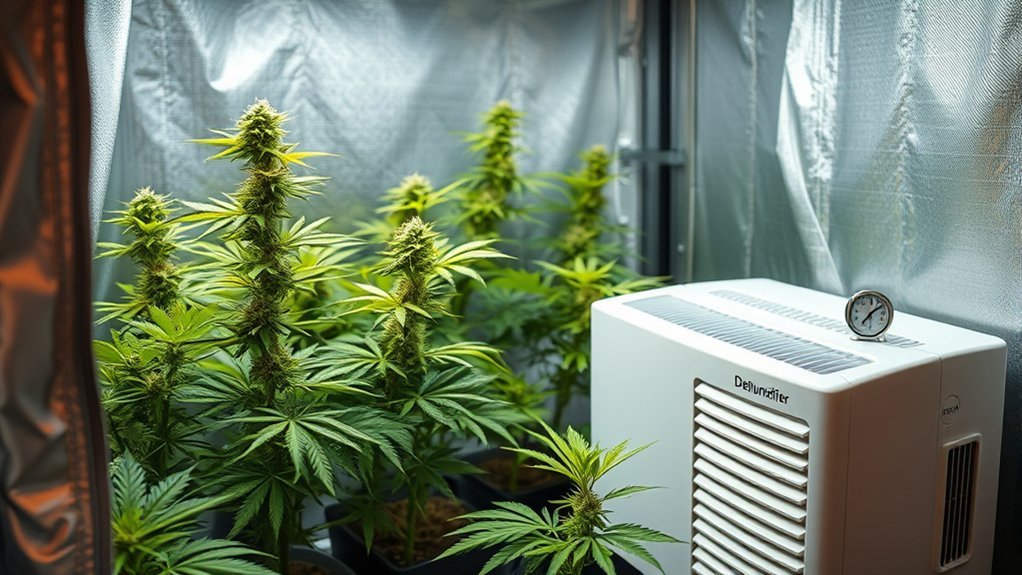
How to Lower Humidity in a Grow Tent
Once you’ve set the right RH for each growth stage, the next step is keeping it from climbing too high. To lower humidity in your grow tent, first improve ventilation with inline fans and a balanced ventilation system. Keep air moving across the canopy so moisture doesn’t linger. Use dehumidifiers when room moisture stays high, and place them outside the tent if possible to avoid extra heat inside. Tighten watering practices: water only when the medium needs it, and don’t leave runoff sitting. Prune dense foliage and space plants so airflow reaches every leaf. Then monitor humidity with a hygrometer, checking day and night because peaks often happen after lights out. Holding steady humidity levels helps prevent mold and mildew, root rot, and pest pressure. With consistent airflow, disciplined watering, and active control, you keep the grow tent stable and protect plant vigor.

Choose the Right Dehumidifier Size
You’ll want to match the dehumidifier’s pint rating to your tent size, using volume and expected moisture load to guide the choice. If your grow space sits in a humid room, step up capacity so the unit can keep up with the extra load. Balance that capacity against your budget, and check the manufacturer’s specs to confirm it’ll handle your setup efficiently.
Match Pints To Tent
Choosing the right dehumidifier size starts with tent volume and ambient humidity: a 20–30 pint unit usually suits tents up to 4×4 feet, while 50+ pints is a better fit for 5×5 feet and larger. Match your dehumidifier to tent size so humidity control stays steady and moisture removal stays efficient. In a high-humidity environment, target a unit that can pull at least 30 liters daily if you need stronger performance. Watch your readings: 70% RH demands more capacity than 50% RH. Keep ideal humidity near 40-50% RH during flower. Smart placement matters too. Set the dehumidifier near the exhaust fan, or in the lung room, to improve air circulation and boost efficiency. Tune settings as conditions change, and your plants stay freer to thrive.
Consider Room Humidity Load
Room size and humidity load should drive your dehumidifier choice, because a larger tent and a wetter room can overwhelm a unit that’s too small. You need to size the dehumidifier to your cubic footage and the moisture produced by transpiration. In a 5×5 tent, expect 50 pints or more per day in humid conditions. If ambient humidity stays above 60%, the room adds pressure on your target humidity, so you need extra capacity. Higher plant density raises the load, especially during fast growth. Check relative humidity often and adjust to keep the tent on track. When your dehumidifier can effectively manage outside moisture and plant output, you protect healthier plants and maintain stable conditions without wasting effort.
Balance Capacity And Budget
Once you know the tent’s humidity load, pick a dehumidifier that can actually keep up without overspending. For a 2×2 to 5×5 tent, a compact unit with 20-30 pint capacity usually handles humidity levels well. If your grow space runs larger, step up to 50+ pints so the dehumidifier doesn’t fall behind. Match capacity to the lung room too; a 12×12 room often needs about 30L/day. Budget-friendly doesn’t mean weak—compressor models often deliver better energy efficiency and steadier control. Use a hygrometer to monitor humidity, then adjust until you hold 40-50% for ideal plant health.
- Size the dehumidifier to the tent.
- Verify room capacity.
- Choose efficiency over gimmicks.
- Monitor humidity constantly.
Lower Grow Tent Humidity Without a Dehumidifier
You can lower grow tent humidity without a dehumidifier by improving airflow and reducing excess moisture at the source. To lower humidity, install exhaust fans at the top of the tent so humid air exits quickly. Use inline fans to boost air exchange and improve ventilation, helping reduce humidity levels while stabilizing temperature. Space plants so leaves don’t trap stagnant air; tighter canopies hold moisture longer. Prune foliage, especially lower leaves, to promote airflow around stems and soil. Water only when the top 1-2 inches of medium feel dry, because overwatering drives humidity spikes and weak roots. Keep saucers empty and clean spills fast. If you run multiple plants, stagger pots so each one gets moving air. These simple controls give you more autonomy over the grow environment and let you manage moisture without extra hardware. Done consistently, they keep conditions drier, steadier, and far less inviting to mold.
Improve Grow Tent Ventilation Fast
Start by mounting an exhaust fan at the top of your grow tent so it pulls out moist air efficiently, ideally cycling the air every 1-3 minutes. Add intake openings near the bottom to draw in fresh, dry air and keep negative pressure moving airflow through the tent. Then use oscillating fans inside to boost circulation, break up stagnant pockets, and cut humidity buildup fast.
Exhaust Fan Setup
A properly placed exhaust fan is one of the fastest ways to lower humidity in a grow tent: mount it near the top to pull out hot, moist air, and size it for a full air exchange every 1 to 3 minutes. This setup improves ventilation and keeps humidity levels in range for stronger plant growth.
- Add a carbon filter to the exhaust fan to cut odors and trap mold spores.
- Put intake holes low so cool air enters and supports negative pressure.
- Check airflow with a monitor, then adjust fan speed as conditions shift.
- Match settings to plant growth stages so you don’t overdrive the tent.
You’ll get cleaner air, steadier control, and more freedom from guesswork.
Boost Air Circulation
Boosting air circulation inside the tent helps pull heat and moisture away from leaves before humidity can build up. To boost air circulation, mount an exhaust fan near the top and let it draw warm, wet air out. Pair it with inline fans to create negative pressure, so fresh air enters low and keeps airflow in your grow steady. Add oscillating fans at canopy level to prevent stagnant air and spread moisture evenly. Keep vents open for proper ventilation, especially in crowded tents. This is an effective way to increase airflow and reduce humidity levels without slowing growth. Use digital hygrometers to monitor temperature and humidity in real time, then adjust fan speed or placement as needed. Clear circulation gives your crop freedom from damp stress.
Fix Watering and Runoff Problems
Dial in your watering schedule to keep humidity under control. You need to water only when the top 1-2 inches of soil are dry, so you prevent overwatering and keep moisture from pushing humidity above ideal humidity. Choose fabric pots; they improve drainage and let airflow reach the root zone, which helps stop waterlogged media. Watch runoff closely. If water pools in the tent, stagnant water will drive humidity up fast and weaken plant health. Use a drip irrigation system if you want precise watering and less excess moisture in the space. In seed starting trays, check moisture levels often, because small containers dry differently and can be overwatered easily.
Water only when the top soil dries, and keep runoff from raising humidity.
- Test soil before watering.
- Elevate pots to improve drainage.
- Remove pooled runoff immediately.
- Match irrigation to plant stage.
When you control water input and runoff, you protect your grow from unnecessary humidity and keep conditions stable.
Reduce Heat, Spacing, and Dense Growth
If your grow tent is still too humid, reduce heat and improve airflow around the plants. Keep lights-on temperatures near 75-85°F, because warmer air holds more moisture. Use inline fans to raise air exchange, push out humid air, and pull in drier air for steadier humidity levels.
| Action | Effect |
|---|---|
| Increase plant spacing | Opens paths for airflow |
| Prune foliage | Limits dense growth and moisture buildup |
| Run inline fans | Improves ventilation and heat removal |
| Avoid overwatering | Prevents wet media from raising humidity |
Give each plant enough plant spacing so leaves don’t crowd the canopy. Tight canopies trap damp air and slow ventilation. Trim excess pruning foliage regularly, especially inside the lower growth, where moisture lingers. Also, avoid overwatering; saturated soil adds vapor that can lift humidity levels fast. When you manage heat, spacing, and canopy density together, you create cleaner airflow and support ideal growth without giving humidity a place to settle.
Monitor Grow Tent Humidity So It Stays Low
Keep a reliable hygrometer in your grow tent and check it often so humidity stays in the right range for each growth stage: 65-75% for seedlings, 50-70% for vegetative growth, and 40-50% for flowering. When you monitor humidity levels, pair each reading with temperature, because warmer air can hold more moisture. Keep temps near 75-85°F to reduce humidity pressure.
- Watch the hygrometer daily in your grow tent.
- Water only when the top 1-2 inches of soil are dry to prevent overwatering.
- Run oscillating fans and exhaust to improve air circulation.
- Inspect leaves and walls for mold or mildew, then act fast.
Consistent checks give you control, not guesswork. If humidity climbs, adjust watering, airflow, and temperature together. That disciplined routine keeps your crop free from stagnant moisture and supports healthier growth.
Frequently Asked Questions
How Do I Make My Grow Tent Less Humid?
You can cut humidity by improving ventilation techniques, boosting air circulation, removing moisture traps, and balancing temperature. Check water sources, soil moisture, and environmental factors in your grow tent setup to protect plant health with better humidity control.
What Naturally Soaks up Moisture?
Moisture clings like chains; you can break them with silica gel, baking soda, activated charcoal, sea salt, rice grains, clay pellets, garden lime, diatomaceous earth, coffee grounds, and minimal essential oils.
Should I Put a Dehumidifier in a Grow Tent?
Yes—putting a dehumidifier in your grow tent can boost plant health through moisture control. You’ll hit ideal humidity, improve air circulation, and reduce pests. Use humidity monitoring, ventilation techniques, and a smart grow tent setup.
What Happens if the Humidity Is Too High in a Grow Tent?
Too much humidity turns your tent into a damp cave: Fungal growth, root rot, and pest attraction surge, while nutrient uptake drops and plant stress rises. Improve air circulation, maintain ideal levels, and keep environmental control tight.
Conclusion
By managing humidity, you keep your grow tent healthy and productive. Use a properly sized dehumidifier, boost exhaust and oscillating airflow, and avoid overwatering or excess runoff. Thin crowded plants and space them well so air can move freely, and keep checking your hygrometer to catch spikes early. When you stay on top of these basics, you prevent mold, support stronger growth, and keep your setup running like clockwork.