If your attic feels damp, smells musty, or shows signs of condensation, you’re likely dealing with trapped moisture from air leaks, poor ventilation, or insulation gaps. You can’t fix that with a dehumidifier alone. You need to identify the source, control airflow, and then size and place equipment correctly to keep humidity in the safe range. The details matter, and the next step is where most attic fixes succeed or fail.
How Attic Moisture Builds Up
Attic moisture builds up when warm, humid air from your living space rises into the attic and condenses on colder surfaces, such as the roof deck, especially during colder months. You add more moisture in the attic through cooking, showering, laundry, and appliance use, because these activities release vapor that travels upward. If your home has poor ventilation, that moisture can stay trapped instead of escaping, and high humidity can push attic conditions above the recommended 35% to 50% range. You also lose control when attic insulation is thin, damaged, or poorly installed, because it can let heat escape and create colder surfaces for condensation. Roof leaks compound the problem by introducing external water directly into the space. To regain control, you need to limit indoor moisture sources, improve air exchange, and verify that attic insulation supports stable temperatures. When you understand these pathways, you can disrupt the cycle before it spreads.
Spot the Signs of Attic Moisture
You can spot attic moisture by checking for frost or ice on roofing nails, rust on fasteners, and dark stains on roof boards. Look for visible moisture on the sheathing, since it often points to poor ventilation or humidity control. If you see drip marks on the floor or insulation, you’ve got active infiltration and need to act quickly.
Visible Moisture Clues
A damp attic usually leaves visible clues before major damage sets in. You can spot visible moisture on roof sheathing, roofing nails, or insulation, and each sign points to active attic moisture. Look for frost or ice buildup on nails; it means condensation is forming as humidity levels rise. Rust on fasteners also shows prolonged exposure and can signal ventilation problems you need to correct. Dark stains on roof boards often indicate water damage and mold growth, so don’t ignore them. Check for drip marks on the attic floor or insulation, because they reveal excess moisture that’s already moving through the space. When you see these clues, act fast to dehumidify, improve airflow, and protect the attic’s structure.
Hidden Attic Damage
Hidden attic damage often starts with subtle moisture signs that can worsen before you notice any leaks. In your attic, check roofing nails for frost, ice, or rust; these point to condensation and long-term moisture exposure. Look for dark stains on roof boards, visible moisture on sheathing, and drip marks on attic floors, because each signal can undermine insulation and wood strength. If you spot these clues, act fast to control humidity before mold gains ground. Regular inspections let you catch problems early and protect your home from structural damage and health hazards. A dehumidifier for attic spaces can help stabilize conditions, but you still need to fix ventilation, air leaks, and insulation gaps so you stay in control and keep your attic dry.
Fix Air Leaks and Ventilation Problems
Start by sealing air leaks that let warm, moist indoor air reach the attic, especially around light fixtures, fans, outlets, chimneys, and plumbing penetrations. You’ll cut air leakage at the source, and that reduces moisture issues before they spread. Use caulk, spray foam, or gaskets where each opening meets framing, and verify that attic access hatches close tightly. Next, improve ventilation so trapped moisture can escape. Install or clear soffit, ridge, gable, or exhaust vents to keep air moving without creating short-circuiting. In moisture-prone ceilings and walls, add vapor barriers to slow infiltration from living spaces. Then inspect the system regularly: check fans, vents, and ducts for blockages, damage, or poor operation. Finally, monitor humidity levels with a hygrometer and keep them between 35% and 50%. That steady control helps you protect the attic, preserve building materials, and keep your home free from hidden dampness.

Choose the Right Attic Dehumidifier
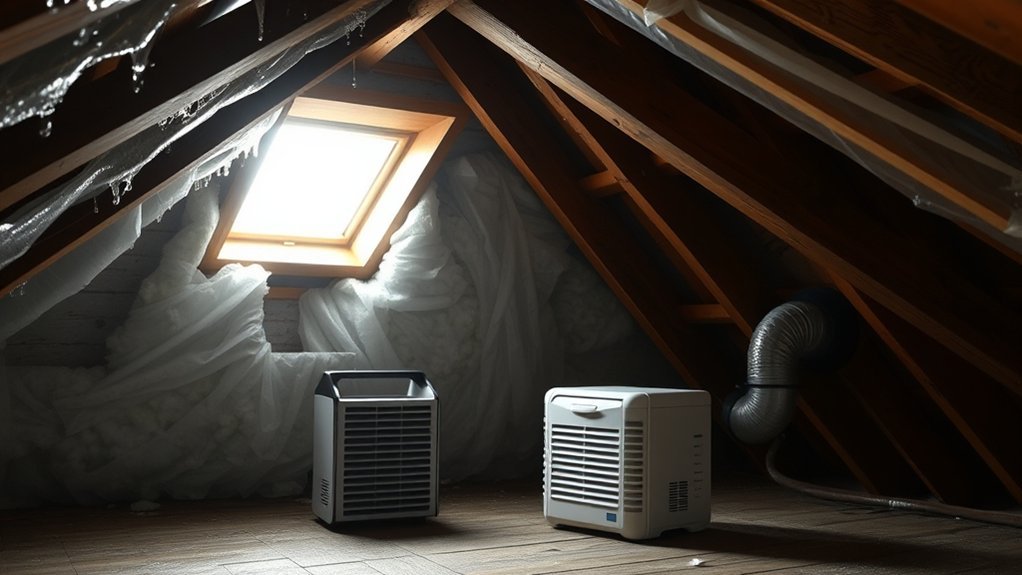
Choose an attic dehumidifier sized for about 25 to 75 pints per day, with higher capacity for hotter, more humid spaces. You’ll want a model with an automatic humidity sensor and a continuous drain so it can regulate moisture without manual intervention. Place it near the attic center for airflow, and make sure it’s designed for your attic type, especially if the space is encapsulated.
Sizing The Dehumidifier
To size your attic dehumidifier correctly, match its capacity to the space and moisture load, with most attics needing a unit rated around 25 to 75 pints per day. You should choose the higher end if your attic runs damp, poorly ventilated, or sits under a roof with frequent condensation. A correctly sized dehumidifier works faster, cycles less, and gives you steadier control. Use a model with an automatic humidity sensor so it can respond to changing conditions without constant adjustment. Pick a larger tank if you won’t use continuous drainage, because it reduces interruptions. Place the unit centrally, away from walls and storage, so air can move freely. This setup helps you reclaim a dry, healthier attic with less effort.
Humidity Sensor Features
A reliable humidity sensor makes an attic dehumidifier far more effective by switching the unit on when moisture rises above a set threshold, usually around 35% to 50%. You should choose a model with adjustable humidity settings so you can set your desired humidity level without guesswork. Built-in hygrometers give you real-time humidity readings, letting you verify performance and keep conditions stable. Many units also include automatic shut-off, which stops operation before the tank overflows and protects your space. If you want uninterrupted control, select an attic dehumidifier with continuous drain capability, so you don’t have to empty the reservoir manually. These features let you maintain dry, dependable attic conditions with less effort and more freedom.
Placement And Drainage
Place the dehumidifier centrally in the attic so it can pull moisture evenly from the space without walls, insulation, or stored items blocking airflow. This placement improves extraction and keeps humidity control stable. Choose a dehumidifier with a continuous drainage feature so it runs without interruption when attic humidity climbs. Route drainage hoses to an existing drain or outside, and secure every connection to stop leaks and water buildup. If you can’t use continuous drainage, pick a larger tank, but remember it’ll need checking. Pair that setup with an automatic humidity sensor so the unit cycles only when needed and holds the attic near 35% to 50% humidity. That gives you precise control with less labor and more freedom.
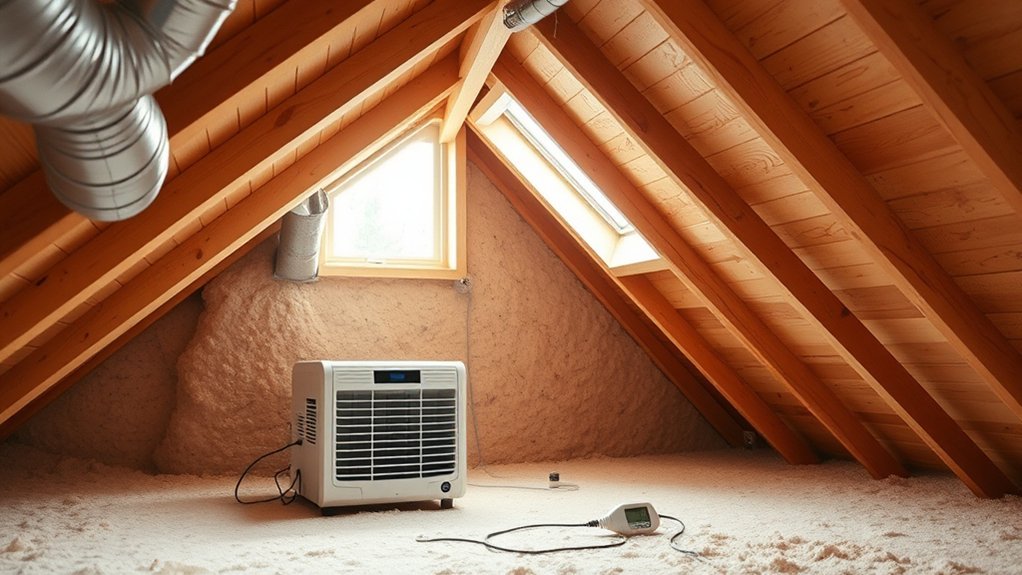
Install Your Attic Dehumidifier the Right Way
Start by mounting your attic dehumidifier in a centrally located spot with clear space around it so air can circulate efficiently and the unit can dry the attic evenly. Keep it off the attic roof, away from walls, joists, and stored items, so it can pull in moist air from every side. Choose a dehumidifier rated for 25 to 75 pints per day, matched to your attic size and humidity levels. Install a model with an automatic humidity sensor so it cycles only when needed, and use a continuous drain line if you want hands-off operation.
- Secure the unit on a stable, level base.
- Route the drain hose downhill without kinks.
- Verify power access and cord safety.
- Check humidity levels with a hydrometer regularly.
This setup helps you control moisture precisely, reduce energy waste, and protect the attic’s structure without constant intervention.
Set Safe Humidity Targets
Once your attic dehumidifier is installed, the next step is to keep the space within a safe moisture range. Target 35% to 50% relative humidity, and treat any humidity value above 50% as a warning that excess moisture may be present. Use a hydrometer to check conditions often, because indoor air changes with weather, roof leaks, and seasonal shifts. In winter, you may need a lower setting; in summer, you may need more active dehumidifier use to stay within range. Don’t guess—measure, then control. If your attic has hot or mixed humid climate exposure, adjust your control strategy sooner, not later. Pair the dehumidifier with proper ventilation so the attic can breathe without drifting into dampness. Keeping humidity in this band helps you protect materials, reduce mold risk, and preserve a clean, stable attic environment.
Keep Attic Humidity Under Control Long Term
To keep attic humidity under control long term, install a dehumidifier sized for about 25 to 75 pints of moisture removal per day and make sure it has an automatic humidity sensor so it can cycle efficiently without constant adjustment. Track humidity levels with a hydrometer and hold them between 35% and 50% to limit mold and damage.
- Improve attic ventilation with a small exhaust fan or vapor diffusion vent.
- Seal air leaks around penetrations, seams, and access hatches.
- Upgrade insulation so warm, moist air can’t enter from below.
- Schedule routine maintenance for the dehumidifier and attic ventilation system.
Check the unit’s drain, filter, and sensor regularly, and verify airflow after every season. When you keep these systems balanced, you protect your space, reduce waste, and maintain a dry attic that supports durable, self-directed home care year-round.
Frequently Asked Questions
How Do I Get Rid of Humidity in My Attic?
You’ll cut attic humidity by improving attic ventilation, sealing leaks, upgrading insulation types, and boosting air circulation. Add a correctly sized dehumidifier, monitor with a hygrometer, and keep continuous drainage for reliable moisture control.
Should You Use a Dehumidifier if You Have COPD?
Yes, you should use a dehumidifier for COPD management if it keeps Humidity levels between 35% and 50%. You’ll improve Air quality, reduce mold, and support Respiratory health with a sensor-controlled, well-maintained unit.
Should You Dehumidify an Attic?
Yes—if your attic traps moisture, you should dehumidify it. To stay ahead of the game, you’ll improve attic ventilation, stop moisture sources, protect insulation impact, and gain health benefits by keeping humidity controlled.
Can a Dehumidifier Help With Snoring?
Yes, a dehumidifier can help with snoring by lowering bedroom humidity, which may reduce snoring causes like mold and dust mites. You’ll often improve sleep quality and respiratory health, though it won’t fix every cause.
Conclusion
When you seal air leaks, restore ventilation, and install the right dehumidifier, your attic stops behaving like a swamp in the sky. You’ll keep humidity in the 35% to 50% range, protect insulation, and reduce mold risk fast. Check the hygrometer regularly, use continuous drainage if you can, and inspect the space often. Do that, and you’ll keep your attic dry, stable, and far safer through every season.