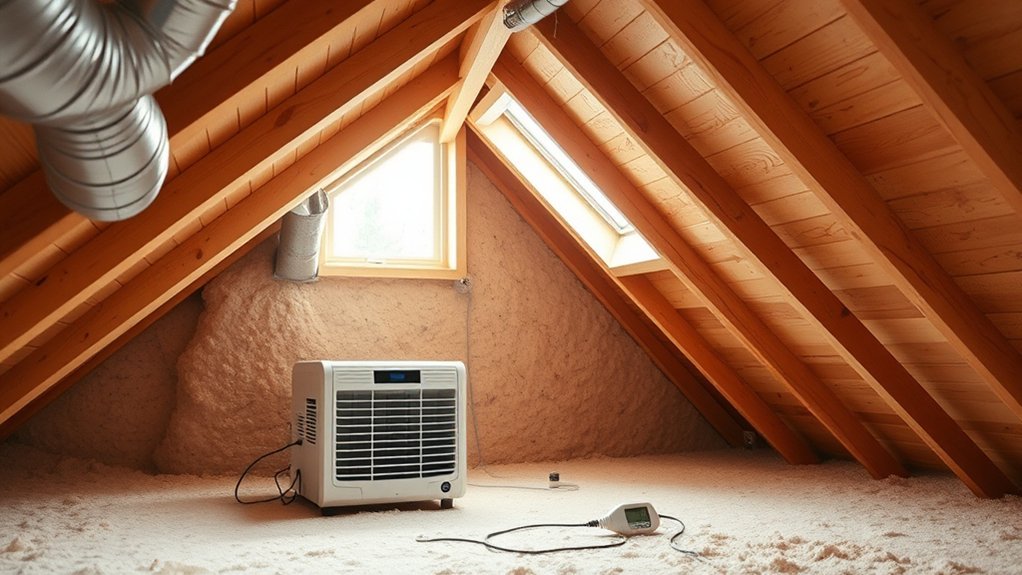
An attic dehumidifier can help, but whether you should use one depends first on the type of attic you have. In a sealed or encapsulated attic, a properly sized dehumidifier can be an effective way to control persistent humidity. In a vented attic, however, the unit may waste energy trying to dry outdoor air and can mask the real problem. Before buying one, repair roof leaks, seal air leaks from the living space, vent bathroom, kitchen, and dryer exhaust outdoors, clear blocked ventilation, and inspect wet or damaged insulation.
Last updated: August 19, 2026
Quick Answer
Use an attic dehumidifier only after you identify the moisture source and determine whether the attic is vented or sealed. A sealed or encapsulated attic may benefit from humidistat-controlled dehumidification. In a vented attic, fix roof leaks, ceiling air leaks, exhaust ducts, insulation, and ventilation first because outdoor air can keep replacing the air the dehumidifier is trying to dry.
Key Takeaways
- For a sealed or conditioned attic, 30% to 50% relative humidity is a useful starting range. Do not treat that as a universal pass/fail number for a vented attic.
- A dehumidifier works best after you fix roof leaks, air leaks, blocked vents, wet insulation, and moist exhaust ducts.
- Vented attics and sealed or encapsulated attics need different humidity-control strategies.
- Use a hygrometer together with visible moisture clues and weather conditions instead of relying on one humidity reading.
- Call a professional for wet insulation, rotted or moldy framing, unsafe wiring, possible asbestos-containing vermiculite, major ventilation problems, or extensive mold.
At a Glance
| Time Required | A basic inspection may be completed in one visit, but air sealing, roof repair, duct correction, mold work, or ventilation changes can extend the project considerably. |
| Difficulty | Moderate for inspection and simple air sealing; professional help recommended for roof leaks, mold, wiring, ducts, and major ventilation problems |
| Tools Needed | Hygrometer, flashlight, gloves, eye protection, dust mask or respirator, caulk, spray foam, weatherstripping, drain hose, and a grounded outlet |
| Cost | Low for monitoring and small sealing materials; moderate to high for a dehumidifier, dedicated drainage, HVAC work, roof repairs, or professional remediation |
Should You Use an Attic Dehumidifier?
The fastest way to decide is to identify whether the attic is open to outdoor ventilation, sealed inside the building enclosure, or actively receiving water or moist exhaust. A dehumidifier is most useful when it is drying a reasonably enclosed space after the underlying moisture sources have been corrected.
| Attic Type or Problem | Best First Move |
| Vented attic | Seal the ceiling plane, fix leaks and exhaust ducts, and restore proper intake and exhaust ventilation. A portable dehumidifier may run excessively because outdoor air continues to enter. |
| Sealed or encapsulated attic | After confirming the enclosure is properly sealed, consider a dedicated dehumidifier, HVAC conditioning strategy, or whole-home humidity-control system. |
| Active roof leak, wet insulation, or exhaust dumping into attic | Correct the water or moisture source first. A dehumidifier can help with drying afterward, but it should not be treated as the repair. |
Recommended Products

Semiconductor dehumidifiers use thermoelectric cooling to remove moisture from the air. They create a drier, more comfortable environment by reducing humidity and improving air quality.
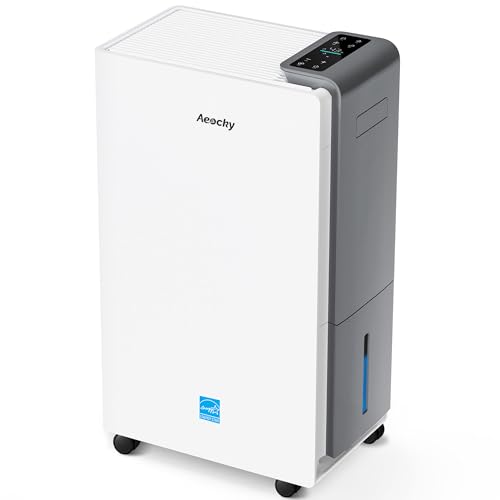
【ENERGY STAR 25 ≠ ENERGY STAR Most Efficient 2025】Don't fall for competitors' word games. With only 2.6% of ENERGY STAR models earning "Most Efficient 2025" title, these options are exceptionally rare on the market. RHEA-001 is one of the few to truly hold this top-tier certification. Many brands use misleading phrases like "Energy Star Efficient 25" or "Energy Star 25" to imply a standard they haven't met. Choosing them is a risk.With AEOCKY, you get verified performance and the peace of mind of authentic, top-tier efficiency.

[Commercial Grade Dehumidifier] This Airzentti crawl space dehumidifier with large capacity removes moisture from basement, attic, large room and small rooms efficiently up to 155 pints per day under nearly saturated condition (70 PPD in AHAM), with 220 CFM airflow, it is ideal for space up to 7,500 square feet.
How Attic Moisture Builds Up
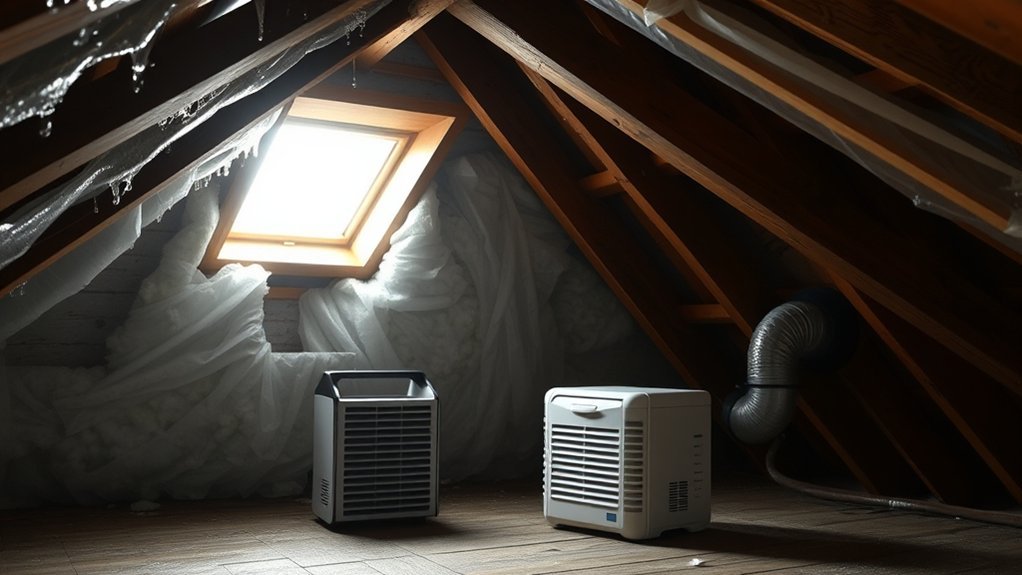
Attic moisture often builds up when warm, humid indoor air leaks through ceiling gaps and reaches colder attic surfaces, such as roof sheathing, rafters, and roofing nails. When a surface is cold enough for the surrounding air to reach its dew point, water vapor can become frost, droplets, stains, or wet insulation.
Common moisture sources include cooking, showering, laundry, humidifiers, plumbing leaks, roof leaks, and appliances that are not vented outdoors. Bathroom fans, kitchen fans, and clothes dryers should not exhaust into the attic. They should discharge outside the home so they do not dump warm, damp air into the roof space.
Attic insulation also matters. Thin, compressed, damaged, or poorly installed insulation can increase heat movement through the ceiling assembly. Blocked soffit vents can also interfere with the intended ventilation path in a vented attic.
Note: A dehumidifier removes moisture from air, but it does not repair the roof, seal ceiling leaks, unblock vents, or reroute exhaust ducts. If the source remains, the attic can keep getting wet.
Spot the Signs of Attic Moisture
You can spot attic moisture by checking for frost or ice on roofing nails, rust on fasteners, dark stains on roof boards, damp insulation, musty odors, and drip marks on the attic floor. These signs may point to air leaks, ventilation problems, roof leaks, or improperly terminated exhaust ductwork.
Visible Moisture Clues
A damp attic usually leaves visible clues before major damage sets in. Look for visible moisture on roof sheathing, rafters, roofing nails, ductwork, and insulation. Frost or ice on nails during cold weather can indicate that warm, moist indoor air is reaching cold attic surfaces. Rust on fasteners suggests repeated moisture exposure. Dark staining on roof boards may indicate a roof leak, condensation, or mold growth.
Also check insulation near ceiling penetrations. Dirty insulation can be evidence of air moving through it. Wet, flattened, or matted insulation may point to a roof leak, condensation, or an exhaust duct problem. If you see active dripping on insulation or drywall below, identify the moisture source promptly.
Hidden Attic Damage
Hidden attic damage often starts around small gaps: recessed lights, plumbing pipes, electrical wires, chimney chases, attic hatches, dropped soffits, and bath fan penetrations. These bypasses can let humid indoor air enter the attic even when the ceiling looks finished from below.
Check behind stored items, around duct connections, near roof valleys, and along the underside of the roof deck. If you find soft wood, moldy framing, wet insulation, or a persistent musty smell, stop treating the attic as a simple dehumidifier project. Find the water source and consider professional help.
Warning: Do not disturb vermiculite insulation unless it has been tested for asbestos. Do not walk on ceiling drywall or loose insulation. Step only on joists, truss chords, or secured walking boards, and keep electrical cords and drain hoses away from water.
Fix Air Leaks and Ventilation Problems
Start by sealing air leaks that let warm, moist indoor air reach the attic. Focus on the largest bypasses first: attic hatches, dropped soffits, plumbing penetrations, wiring holes, recessed lights, duct chases, chimney gaps, kneewalls, and open wall tops. Use the right material for each gap. Caulk works for small cracks, spray foam works for many larger gaps, and metal flashing with high-temperature sealant is needed around appropriate hot flues and chimneys.
Next, confirm that a vented attic’s ventilation path is open. Clear blocked soffit vents, check ridge or gable vents, and make sure insulation is not covering the intended intake path. Intake and exhaust ventilation should work with an air-sealed ceiling rather than substitute for one.
Do not rely on a powered attic fan as a shortcut. If the ceiling below the attic is leaky, an attic fan can pull conditioned indoor air into the attic, increasing energy use. Air sealing and a properly designed ventilation path should come first.
Know Whether Your Attic Is Vented or Sealed
A vented attic usually has insulation on the attic floor and outdoor air moving through soffit, ridge, gable, or roof vents. The attic is intentionally coupled to the exterior, so its relative humidity can move with outdoor temperature and moisture conditions. Do not expect a portable dehumidifier to hold a vented attic at the same RH as an indoor room while vents remain open.
For a vented attic, prioritize stopping indoor air leaks, fixing roof leaks, routing exhaust ducts outdoors, keeping the ceiling plane well insulated, and maintaining the intended ventilation path. Persistent frost, condensation, wet insulation, or an attic that repeatedly becomes wetter than weather conditions would explain deserves further investigation.
A sealed or encapsulated attic usually has insulation and an air-control layer along the roofline with little or no traditional attic venting. Because this space is inside or closely coupled to the building enclosure, a dehumidifier, HVAC supply strategy, or whole-home humidity-control system may be appropriate. Sizing, drainage, air sealing, and HVAC balance should be checked carefully.
Inspect the Attic Before Buying a Dehumidifier
Before you buy equipment, inspect the attic in this order:
- Look for roof leaks. Check around chimneys, roof valleys, skylights, plumbing boots, vents, and staining on the underside of the roof deck.
- Check exhaust ducts. Confirm that bathroom fans, kitchen fans, and clothes dryers vent outdoors rather than into the attic.
- Find air bypasses. Look around recessed lights, pipes, wires, chases, attic stairs, and open wall cavities.
- Check insulation. Look for wet, compressed, missing, or dirty insulation. Make sure insulation is not blocking the intended soffit ventilation path.
- Check ventilation. In a vented attic, confirm that intake and exhaust vents are open and not painted shut, clogged, crushed, or buried.
- Measure humidity. Put a hygrometer in the attic and record readings at different times of day and during different weather conditions. Compare the readings with visible moisture clues instead of relying on one number alone.
Pro Tip: If attic humidity or condensation repeatedly increases after showers, laundry, or cooking, investigate ceiling air leaks and exhaust ducts. If stains or active moisture appear after rain, inspect the roof, flashing, penetrations, and drainage system.
Choose the Right Attic Dehumidifier
Choose an attic dehumidifier only after the attic has been inspected and obvious moisture sources have been corrected. Look for a model with a built-in humidistat, automatic shutoff where applicable, continuous drain capability, an accessible filter, an operating-temperature range suitable for the attic, and enough moisture-removal capacity for the size and dampness of the enclosed space.
Recommended Products

【The Undisputed Champion — Industry-Leading Dehumidifier Brand】Choose AEOCKY, getting double market validation. According to data independently verified by Stackline, a leading third-party data analytics company, AEOCKY was an industry‑leading dehumidifier brand on Amazon U.S. in 2025. Meanwhile, it stands as a technology-leading rotary desiccant dehumidifier brand on Amazon. This isn’t just an appliance—it’s a complete humidity-control solution for small spaces. Skip low-performance alternatives and trust a brand recognized by the market.
Sizing the Dehumidifier
Dehumidifier capacity is usually measured in pints per 24 hours. The capacity you need depends on the size of the space and how damp it is. ENERGY STAR advises that, for portable dehumidifiers, it is generally better to oversize than undersize.
However, ordinary portable-dehumidifier sizing charts assume you are drying an enclosed space. Do not apply a room-size chart blindly to a vented attic that continuously exchanges air with outdoors. A sealed or encapsulated attic, large moisture load, or ducted installation may need professional sizing.
| Attic Condition | What to Consider |
| Slightly damp or musty enclosed attic | A portable unit may work after leaks and air bypasses are corrected. Size it according to the manufacturer’s coverage and moisture-removal guidance. |
| Very damp, frequent condensation, or large enclosed attic | Investigate the moisture source first, then consider a higher-capacity, whole-home, or ducted dehumidifier with professional sizing. |
| Sealed or encapsulated attic | A dedicated dehumidifier can make sense, but sizing, drainage, enclosure integrity, and HVAC balance should be checked carefully. |
| Vented attic with humid outdoor air | Fix air leaks, roof leaks, exhaust problems, and the ventilation system first. An ordinary portable dehumidifier may run excessively while humid outdoor air keeps entering. |
Humidity Sensor Features
A reliable humidity sensor makes a dehumidifier far more useful. Choose a unit with adjustable humidity settings so it cycles according to a target instead of running blindly. A built-in humidistat can switch the dehumidifier on and off as conditions change.
Use a separate hygrometer to verify the reading. Built-in sensors can be affected by placement, nearby heat, restricted airflow, or dust. Place the separate sensor away from the dehumidifier discharge so it measures the attic rather than only the recently dried air leaving the machine.
Placement and Drainage
Place the dehumidifier where air can move freely around it according to the manufacturer’s clearance instructions. Keep it away from loose insulation and heavy dust, and do not place it where condensate could leak or drain toward electrical wiring.
For long-term control, use continuous drainage when the manufacturer supports it. Route the hose to an appropriate drain, condensate pump, or approved discharge point. Secure connections, avoid kinks, and keep water-handling components away from electrical cords and junction boxes. If gravity drainage is not possible, use a compatible pump arrangement installed according to the equipment instructions.
Install Your Attic Dehumidifier the Right Way
Start by placing the attic dehumidifier on a stable, level base with the clearances required by the manufacturer. Use a properly grounded outlet and follow all electrical instructions supplied with the equipment. Do not route drainage where a leak could reach electrical circuits or devices.
- Set the humidity target before leaving the unit unattended.
- Confirm that the attic temperature stays within the unit’s rated operating range.
- Use a continuous drain line when possible.
- Check the bucket shutoff if you are not using a drain hose.
- Clean or replace the filter on the manufacturer’s schedule.
- Inspect the drain hose for algae, kinks, freezing, or leaks.
- Recheck attic conditions with a separate hygrometer.
If the attic gets cold, read the dehumidifier manual carefully. ENERGY STAR notes that refrigerant dehumidifiers can experience coil frosting when the surrounding temperature falls below about 65°F. If your attic regularly drops below that level, choose equipment specifically rated for lower-temperature operation rather than assuming a standard room dehumidifier will work properly.
Recommended Products

Tackle Whole-Home Humidity on Your Terms: Three modes — Auto, Continuous, and Manual — give you precise control over moisture removal to match the exact needs of your space

Specially Designed for Crawl Spaces— The AIUSEVO commercial dehumidifier features a high-performance compressor and a powerful 265 CFM airflow, removes up to 125 pint/d(at 95°F, 90% RH). Covers up to 6500 sq. ft. It can keep humidity at an ideal level and prevent excessive moisture from damaging your personal belongings. With compact dimensions of 19.3" x 17.8" x 17.5" , it fits between floor joists and in low-clearance crawl spaces. Ideal for Garage,warehouses, offices, factories, shops
Set Humidity Targets for the Attic Type
For a sealed or conditioned attic, the EPA and ENERGY STAR general building guidance of roughly 30% to 50% relative humidity is a practical starting point. The exact level needed to prevent condensation still depends on temperature, climate, roof construction, and the temperature of vulnerable surfaces.
During colder weather, lower humidity may be needed to keep cold roof sheathing, fasteners, or other surfaces above the local dew-point risk. Do not chase a specific percentage while ignoring visible frost or condensation.
For a vented attic, avoid treating 30% to 50% as a universal requirement. A vented attic is coupled to outdoor air, and its relative humidity can rise or fall as outdoor moisture and attic temperature change. In hot-humid climates, outdoor air entering the attic can itself contribute to high moisture conditions around cold ductwork or equipment.
Use the hygrometer as one diagnostic tool. Persistent condensation, frost, wet insulation, moldy odor, soft wood, or an attic that stays unusually wet after weather conditions change is more meaningful than one isolated RH reading.
A humidity reading is a clue, not a diagnosis. First identify whether the attic is vented or sealed, then determine where the moisture is coming from and why the assembly is not drying.
When to Call a Professional
Call a professional before continuing if you find any of these problems:
- Wet or damp insulation that suggests a roof leak or major condensation problem.
- Moldy, soft, or rotted rafters, sheathing, joists, or trusses.
- Bathroom, kitchen, or dryer vents exhausting into the attic.
- Little or no intended ventilation in an attic designed to be vented.
- Knob-and-tube wiring or other unsafe electrical conditions.
- Possible asbestos-containing vermiculite insulation.
- Mold covering more than about 10 square feet, extensive water damage, or a mold problem you cannot safely access or clean.
- Recurring moisture after air sealing, roof repair, exhaust correction, or ventilation work.
A roofer can investigate flashing and roof leaks. An insulation or home-performance contractor can diagnose ceiling air leakage and insulation defects. An HVAC contractor can evaluate humidity control in a sealed attic or size a ducted or whole-home dehumidifier. An experienced mold-remediation professional may be appropriate for larger or complex mold problems.
Keep Attic Humidity Under Control Long Term
To keep attic humidity under control long term, combine monitoring, maintenance, and source control. A dehumidifier can be part of the plan in the right attic, but it should work alongside good air sealing, proper exhaust ducting, dry insulation, and an attic design that manages outdoor and indoor moisture correctly.
- Check attic humidity with a hygrometer seasonally and during problem weather.
- Inspect roof sheathing, nails, vents, ducts, and insulation after heavy rain and during cold snaps.
- Clean dehumidifier filters and confirm that the humidistat operates correctly.
- Flush or inspect the drain hose so it does not clog.
- Keep soffit, ridge, gable, and roof vents clear where they are part of a vented attic design.
- Make sure bath fans, kitchen fans, and dryer ducts continue to vent outdoors.
- Reseal attic hatches and penetrations if weatherstripping, caulk, or foam fails.
When the roof, air barrier, insulation, exhaust system, ventilation strategy, and humidity control all work together, the attic has a much better chance of staying dry without forcing a dehumidifier to compensate for an unresolved building problem.
Frequently Asked Questions
How do I get rid of humidity in my attic?
Start by identifying the moisture source. Repair roof leaks, vent bathroom, kitchen, and dryer exhaust outdoors, seal ceiling air leaks, inspect wet insulation, and confirm that a vented attic has an open ventilation path. Then monitor conditions with a hygrometer. If a sealed attic remains too humid after those problems are corrected, a properly sized dehumidifier may help.
Should you dehumidify an attic?
Sometimes. Dehumidification makes the most sense in a sealed or encapsulated attic after leaks and unwanted air movement have been corrected. In a vented attic, source control and proper attic design usually come first because outdoor air continues to enter through the vents.
Can I use a dehumidifier in a vented attic?
A dehumidifier can physically remove moisture from a vented attic, but it may run excessively because the vents keep admitting outdoor air. Before relying on one, seal air leaks from the home, fix roof or exhaust problems, and make sure the attic’s intended ventilation system is working correctly.
What humidity should an attic be?
For a sealed or conditioned attic, roughly 30% to 50% RH is a useful starting range. A vented attic does not have one universal target because its temperature and moisture conditions are influenced by outdoor air. In either attic type, persistent frost, condensation, wet materials, or musty odors require investigation even if the humidity number appears acceptable.
Can I leave an attic dehumidifier running all the time?
A suitable model can remain powered so its humidistat cycles the unit as needed, provided the manufacturer allows operation at the attic’s temperature, the electrical setup is safe, and drainage is reliable. If the machine runs continuously without reaching its target, investigate ongoing moisture entry, air leakage, sizing, or whether the attic is too open to outdoor air.
What type of dehumidifier works in a cold attic?
Choose a unit whose manufacturer-rated operating-temperature range covers the temperatures your attic actually reaches. ENERGY STAR notes that refrigerant dehumidifiers can develop frost on their coils below about 65°F, so a colder attic may require equipment specifically designed for lower-temperature operation.
Conclusion
An attic dehumidifier is most effective when it solves the right problem. First identify whether the attic is vented or sealed, repair water leaks, stop humid indoor air from leaking upward, route exhaust outdoors, and correct insulation or ventilation defects. Then use dehumidification where the attic is enclosed enough for humidity control to work. Monitor the result with a hygrometer, but also watch the roof deck, insulation, ducts, and fasteners for real signs of moisture. That approach controls the cause instead of simply drying the symptom.
Sources
- U.S. EPA: A Brief Guide to Mold, Moisture and Your Home — indoor humidity guidance, moisture control, condensation response, and mold prevention.
- CDC: Mold — health concerns associated with dampness and mold and the importance of correcting moisture problems.
- ENERGY STAR: Attic Air Sealing Project — attic air-leak locations, sealing materials, safety considerations, and attic bypass guidance.
- ENERGY STAR: Dehumidifiers — capacity, humidistats, drainage, placement, operating temperature, and electrical safety.
- ENERGY STAR: Seal and Insulate — air sealing and insulation as part of whole-home moisture and energy management.
- Building Science Corporation: Understanding Attic Ventilation — vented versus unvented attic design, air barriers, moisture movement, climate effects, and attic ventilation strategy.
- U.S. EPA: Mold Cleanup in Your Home — mold cleanup guidance and the approximately 10-square-foot benchmark for more extensive remediation guidance.