A robot vacuum dustbin latch often fails from wear, debris, or a weak spring. The repair begins with power removal, dustbin extraction, and a close inspection of the latch clip and spring seat. A small screwdriver and a suitable replacement spring are usually enough to restore proper engagement. The key is in the alignment, because one small misstep can leave the bin unsecured and the fault unresolved.
Why the Dustbin Latch Keeps Opening
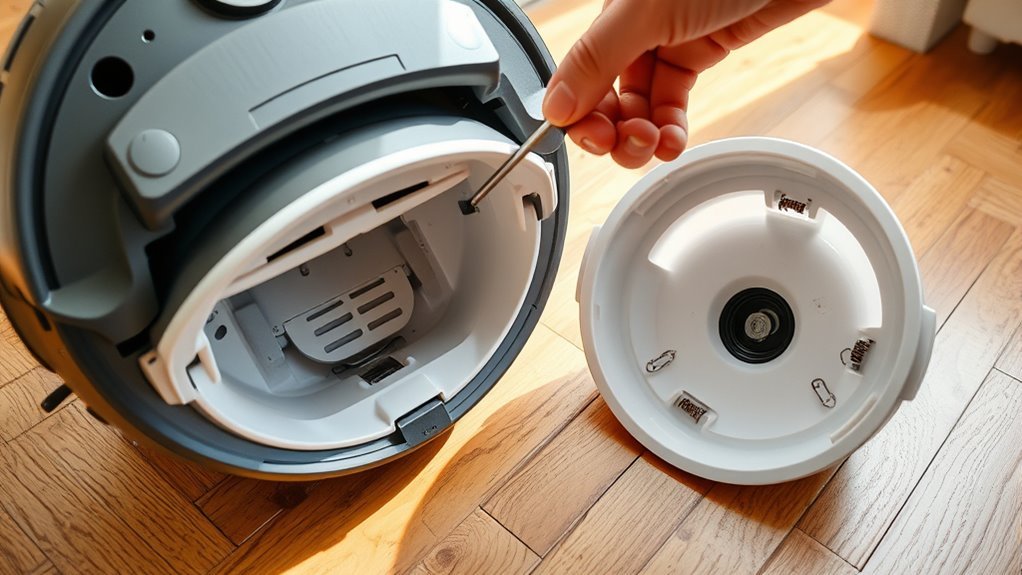
The dustbin latch on a robot vacuum often opens unexpectedly when the latch spring fails, loosens, or breaks, particularly after the unit tips over.
In the latch mechanism, the spring function is to keep the clip biased closed, so any loss of tension reduces retention immediately. When the spring is missing or damaged, the latch no longer resists vibration, impact, or accidental contact, and the bin can release without warning.
Many users report that the original spring is easily lost during prior repairs, leaving the assembly dependent on tape or other temporary restraints. Such workarounds may hold the door shut briefly, but they do not restore normal mechanical action.
Some users substitute a small spring from a pen or flashlight, which can restore proper closure if positioned correctly.
The critical issue is not the bin itself but the weakened return force that frees the latch from dependable control.
Gather a Small Screwdriver and Spare Spring
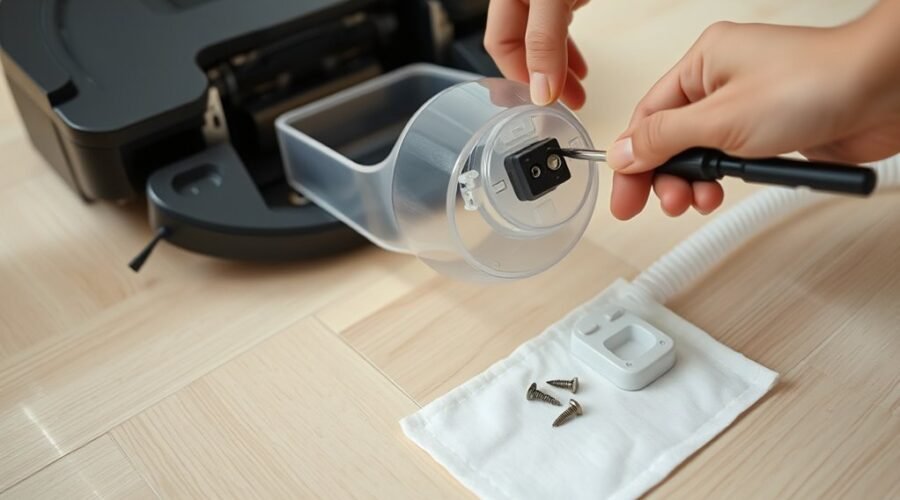
Before opening the latch assembly, a small screwdriver that matches the vacuum’s fasteners should be gathered so the mechanism can be accessed without stripping screws or damaging the housing. Different screwdriver types, such as Phillips or flathead, should be compared against the screw heads before work begins.
A spare spring should also be prepared in advance, because a worn latch often depends on a small tension element that can lose force, fracture, or deform. When selecting a replacement, spring materials from common household sources, including pens or flashlights, may provide suitable donors if the length and diameter align with the original part.
The original spring should be inspected for wear, corrosion, or distortion to determine the needed size and tension. A manual or trusted online diagram can clarify how the spring sits in the mechanism, while bright lighting and a clean workspace help keep the repair controlled, orderly, and free from lost parts.
Remove the Dustbin and Latch Clip
Power should be turned off and the robot vacuum disconnected from its charger before any removal begins.
With the unit isolated, the dustbin can be located on the top or side housing and drawn out with a controlled pull. This step of dustbin maintenance frees the compartment for service and restores access to the locking assembly without strain.
The latch clip, often identified by a colored or raised section, should then be engaged deliberately. A light press or pull releases the clip from its seat; excessive force is unnecessary and risks deformation of the surrounding frame.
Once free, the clip may be set aside for orderly handling. Attention to latch materials matters here, because brittle plastic or fatigued metal responds differently under pressure.
The method is simple: remove, release, and preserve the components so the mechanism can later be examined and the machine returned to independent operation.
Check the Latch for Damage or Debris
A careful inspection of the latch mechanism should reveal any visible cracks, bends, or breaks that could compromise secure closure.
The dustbin should be removed so the latch area can be examined directly for misalignment with the vacuum body. Any debris, lint, or compacted dust trapped around the catch may block full engagement and should be cleared with a dry, nonabrasive tool.
The latch should then be tested by hand, engaging and disengaging it to verify smooth travel without sticking, resistance, or interruption. If motion feels stiff, dirt buildup is a likely cause; limited lubrication may help only if recommended for the latch materials.
Damaged components should not be forced, since precision depends on intact geometry and clean contact surfaces.
These maintenance tips, applied methodically, preserve reliable closure and support the user’s freedom from avoidable malfunction.
Fit the Spring Over the Raised X
The orange clip should be removed carefully so the spring can be positioned without damaging the clip or the housing.
With the latch exposed, spring alignment becomes the central task: one end must rest over the raised “X” to anchor the mechanism and restore controlled movement.
During spring installation, a small screwdriver may be used to guide the coil into place, but only with light pressure so the metal is not bent or overextended.
- Confirm the spring sits squarely on the raised X.
- Keep the coil snug, not stretched or compressed.
- Recheck that the clip and housing remain intact.
Precision here preserves the user’s freedom from recurring latch faults.
Once the spring is seated, the dustbin can be opened and closed to verify smooth action and secure engagement.
Any binding, slipping, or excessive resistance indicates the spring requires immediate repositioning before further use.
Put the Latch Back Together
With all components clean and the spring seated over the raised X, the orange clip can be aligned with the dustbin and pressed back into place. The clip should be positioned squarely so the spring remains centered and the latch assembly tips remain mechanically sound.
Gentle, even pressure is sufficient; excessive force risks cracking the clip or distorting the housing. A secure snap indicates that the parts have engaged correctly and the latch is ready for continued use.
If the fit feels tight, the spring tension may be adjusted by stretching it slightly, then reseating it to restore a snug interface. This method supports maintenance best practices by preserving the latch geometry and reducing premature wear.
The restored assembly should sit flush, with no visible debris or misalignment, allowing the user to reclaim reliable function through careful, disciplined repair.
Test the Robot Vacuum Latch
After reassembly, the dustbin should be seated fully in its compartment and the latch checked under normal operating conditions to confirm secure closure. The technician then evaluates latch alignment through a brief cleaning cycle, observing whether the bin remains locked without shifting. This step supports reliable vacuum maintenance and helps preserve user autonomy by preventing avoidable interruptions.
Reassemble the dustbin fully, then verify latch security during a short cycle to ensure stable, uninterrupted operation.
- Gently shake the unit while the dustbin is installed; rattling suggests incomplete engagement.
- Open and close the latch several times by hand to verify smooth motion without sticking or resistance.
- Inspect the mechanism for wear, cracks, or debris that could prevent proper closure.
If the latch fails to engage consistently, the dustbin should be removed and the latch area cleaned before retesting. Any persistent looseness or interference indicates a remaining fault in the closure path and should be addressed before regular operation resumes.
Adjust the Spring Tension
With the dustbin removed and the latch clip exposed, the spring can be inspected and, if necessary, slightly stretched to restore tension.
The spring must then be seated over the raised “x” inside the clip so that it remains correctly aligned during reassembly. Proper placement is essential, since incorrect positioning can prevent the latch from closing securely.
Stretching the Spring
To increase latch tension, the spring should be carefully stretched to add slight length and improve its grip on the dustbin mechanism. Different spring types respond differently, so tension adjustments must remain controlled and measured.
With pliers or fingertips, the spring is pulled only enough to raise resistance without causing permanent deformation or loss of elasticity.
- Stretch incrementally, then stop and reassess.
- Verify the latch still releases without binding.
- Replace a loose spring with a smaller or stronger one if needed.
After each adjustment, test the latch closure. It should click firmly into place and hold the dustbin shut with no excessive force. This method preserves function while restoring reliable retention and practical freedom from repeated failures.
Proper Spring Placement
Proper spring placement begins by confirming that the original spring is intact or has been replaced with a suitable substitute, such as one salvaged from a pen or flashlight.
The orange clip should then be removed carefully, since it anchors the spring within the latch assembly and resists careless force. The spring is set over the raised x inside the clip, where its position governs tension mechanics and supports consistent closure.
Once seated, the clip is reattached firmly, with no slack or misalignment. This contact preserves spring durability and prevents unexpected release.
After reassembly, the dustbin should be opened and closed several times. The latch must move freely, remain secure, and avoid popping open.
Proper placement restores controlled function and practical autonomy.
Fix a Loose Latch Without Tape
Remove the dustbin carefully to expose the latch assembly, then inspect the spring for damage or displacement, since loose latches often result from impact when the vacuum tips over.
The repair depends on restoring tension without tape, using exact alignment and measured handling. These latch maintenance tips support practical troubleshooting techniques and preserve the dustbin’s mechanical freedom.
- Check whether the spring is bent, missing, or seated off the raised “x” in the clip.
- If the original spring is unusable, select a small substitute spring from a pen or flashlight.
- Refit the spring securely, then reassemble the dustbin and test the latch repeatedly.
A correctly placed spring should return the latch to firm engagement and release with controlled resistance.
If the mechanism still feels unstable, the assembly should be reopened and the spring repositioned rather than forced. Precision in placement is the decisive factor.
Prevent Future Dustbin Latch Failures
Regular inspection and cleaning of the dustbin latch mechanism help prevent debris accumulation that can restrict movement and weaken engagement over time.
This preventive maintenance should include removing dust from hinges, springs, and locking surfaces with a soft brush or dry cloth, then verifying that the latch closes with uniform resistance.
The vacuum should be stored upright to reduce tipping impacts that can deform or fracture the latch.
Store the vacuum upright to prevent tipping impacts that can deform or fracture the latch.
During dustbin emptying, controlled handling is essential; excessive force can dislodge internal components and shorten service life.
A light application of silicone lubricant on moving contact points may reduce friction and limit wear, provided no residue enters sensors or filters.
Where repeated failures occur, latch upgrades or a protective cover can improve impact resistance and preserve function.
Such measures support durable operation, reduce avoidable repairs, and allow the machine to remain an autonomous tool rather than a fragile dependency.
Frequently Asked Questions
What Are the Most Common Problems With Robot Vacuums?
Common robot vacuum issues include dustbin latch failure, spring damage, debris buildup, battery degradation, and app or Wi‑Fi disconnects; effective robot vacuum maintenance and troubleshooting tips usually restore secure closure, runtime, and scheduling autonomy.
My Robot Vacuum Isn’t Emptying the Bin. What Can I Do?
Check the bin first: a blocked outlet, dirty sensors, or stiff latch may be halting emptying. Then perform dustbin maintenance, clear debris, and, if needed, proceed to latch replacement—restoring reliable, independent operation.
My Dyson Canister Won’t Latch. What Can I Do to Fix It?
He should inspect the latch for debris or damage, then check the spring during dustbin maintenance. If missing, perform latch replacement, positioning a new spring over the orange clip’s raised x, reassembling gently, and testing secure closure.
What Is the Average Lifespan of a Robot Vacuum?
A robot vacuum typically lasts 5 to 10 years, like a steady machine crossing tiled horizons. Proper robot maintenance, especially brush and filter care, improves vacuum longevity; batteries usually require replacement after 2 to 3 years.
Conclusion
To summarize, a robot vacuum dustbin latch can usually be restored by isolating the fault, cleaning the clip, and correctly seating a replacement spring over the raised X. A careful test cycle confirms whether retention is secure before reassembly is finalized. Proper tension adjustment improves reliability without tape or improvised fixes. Significantly, studies of household robots suggest that mechanical latch issues account for a meaningful share of maintenance visits, underscoring the value of regular inspection and lubrication.