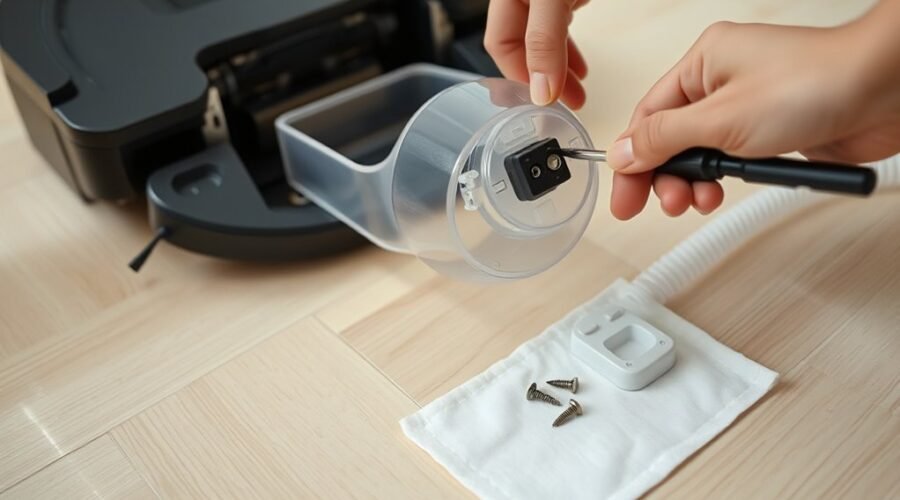
A robot vacuum dustbin latch repair begins by finding out why the bin will not stay shut. A loose bin can spill dirt or interrupt cleaning. The cause may be trapped dust, poor alignment, a cracked catch, or a weak spring. First, check whether the bin door or the entire bin comes loose.
Quick Answer
To fix a robot vacuum dustbin latch, switch off the robot and remove the bin. Clear dust from the catch and its matching slot, then check for cracks and reinstall the bin until it locks. If the latch still slips, replace the damaged clip or bin with a model-compatible part. Only open a spring-loaded latch when your model supports that repair.
At a Glance
| Difficulty | Easy for cleaning and reseating; model-dependent for spring or clip repair |
| Tools Needed | Soft brush, dry microfiber cloth, good lighting; small screwdriver and matching spring only if the repair is supported |
Robot Vacuum Dustbin Latch Repair: Common Causes
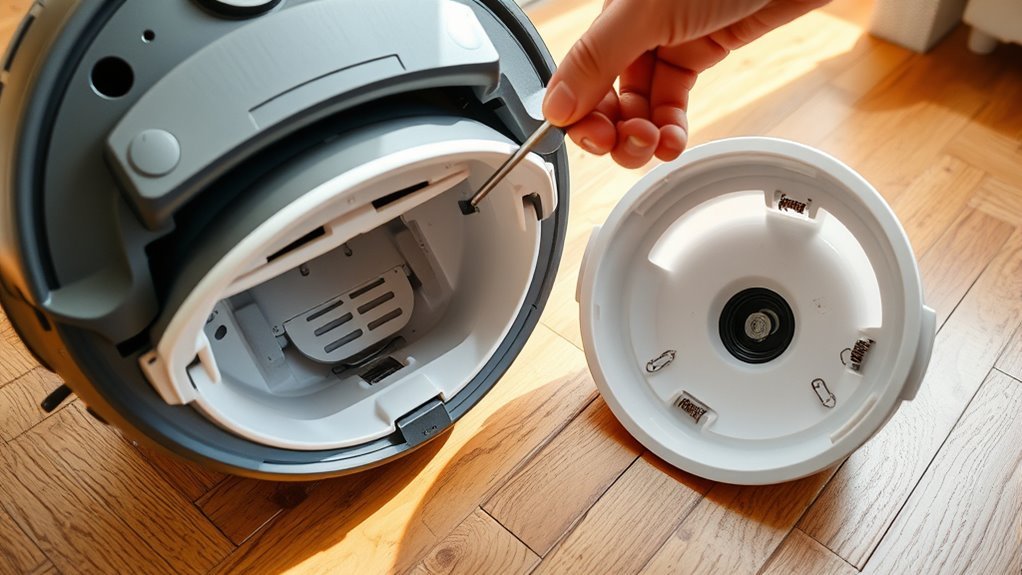
A loose latch often means the catch is blocked, the dustbin is not fully installed, or a part has worn out. A spring can also lose its return force, but not every robot vacuum uses the same spring-and-clip design.
First, identify which part fails. If the dustbin stays inside the robot but its emptying door swings open, inspect the door latch and hinge. If the entire bin slides out, inspect the bin-release catch and the matching slot in the robot body. A loose hinge pin, broken tab, or bent spring may be a different problem from a dirty latch.
A short fall or impact can damage plastic catches. Dust packed into a slot can stop an otherwise good latch from reaching its locked position. These are also the first issues covered by manufacturer troubleshooting for a dustbin that falls off.
Gather the Tools Before Opening the Latch
For the first checks, you need a soft brush, a dry microfiber cloth, and enough light to see inside the catch. Keep a small container nearby if you will remove any permitted fasteners.
A small Phillips or flathead screwdriver may help with a serviceable latch assembly. Match the tip to the screw head. Do not assume you need to remove the clip or buy a spring before you know what failed.
- Use the model’s parts diagram to check whether the latch can be opened separately.
- If a spring is replaceable, use one with the correct shape, size, and working tension.
- Inspect the old spring for rust, bending, a break, or a missing end before selecting a replacement.
Warning: Switch off the vacuum before handling the bin or latch. Do not pry apart sealed or unsupported assemblies, force brittle plastic tabs, or operate the robot with an unsecured dustbin. Check warranty and service instructions before dismantling any spring-loaded mechanism.
Remove the Dustbin Without Damaging the Latch
Remove the dustbin using its normal release control before touching the latch mechanism. The position of this control changes by model, so do not pull on the bin until it has been released.
- Stop the cleaning cycle, switch off the robot as its manual directs, and take it off the charging dock.
- Open the top cover or locate the bin release on the side or rear of the robot.
- Press the release button or tabs and pull the bin straight out without twisting it.
- Empty the bin over a trash can and place it on a clean, well-lit surface.
For example, one official dustbin installation procedure uses a release button and a closing click. Other designs, such as those in this two-fingerhold removal guide, use a different catch arrangement.
Remove a separate latch clip only if the manual shows that it is user-serviceable. If it is held by tiny plastic pivots rather than screws, pulling it loose can break the mounting points.
Check the Latch for Damage or Debris
Clean the catch and its receiving slot before assuming a spring has failed. Even a small clump of lint can stop the latch from reaching its full travel.
- Latch sticks or moves slowly: Brush away dust from the button, pivot, and surrounding gap.
- Latch moves but will not hold: Look for a cracked hook, worn edge, or misaligned receiving slot.
- Door opens but bin stays seated: Inspect the door hinge, seal, and small closing catch.
- Entire bin comes loose: Check the outer bin tabs and the matching locking points inside the robot.
Press and release the latch several times while the bin is out. It should move smoothly and return to its resting position. Use a dry brush or cloth on the locking surfaces; do not push debris deeper into the mechanism.
Inspect the filter and door seal as well. A filter or seal fitted out of place can stop the door from closing fully. If you see a broken tab or hinge, cleaning alone will not restore its grip.
Fit a Spring Only Where the Latch Design Allows
If your latch has a removable spring and the model’s service instructions confirm its location, you may be able to refit it. The orange clip and raised “X” described in some vacuum repairs are not universal robot-vacuum parts.
- Check the service diagram and note how the original spring sits between the clip and its housing.
- Look for a raised locating post, cup, or other seat specified for your model.
- If the original spring is intact, guide it back into the confirmed seat using light pressure.
- Check that it stays centered and does not catch on the clip as the latch moves.
Some latch designs have a raised X that locates a coil. Only place a spring over that shape if your actual mechanism has it and the model diagram confirms that placement. Never copy the position from a different vacuum.
A spring taken from a pen or flashlight might look similar, but its force and dimensions may be wrong. A poorly matched substitute can bind the latch or break a fragile clip. Use the correct replacement where one is available.
Put the Latch Back Together
Reassemble only after the catch is clean and any supported spring repair is complete. The clip should sit flush, and the button should move freely without scraping or slipping.
- Align the latch or clip with its original guide points.
- Seat any spring in the confirmed position, keeping fingers clear of pinching parts.
- Press both sides evenly until the retaining tabs engage, or reinstall the original fasteners as directed.
- Open and close the empty bin door by hand before returning the bin to the robot.
If a clip needs unusual force, stop. Recheck the spring position, hinge pins, and edges instead of forcing a snap. Do not stretch a spring to compensate for parts that no longer fit.
Test the Robot Vacuum Latch
A successful robot vacuum dustbin latch repair should hold through repeated opening and closing, followed by a short cleaning run. Test the mechanism by hand first, while the robot is switched off.
- Close the bin door and listen or feel for its normal engagement.
- Reinsert the dustbin and check that it sits level with the surrounding housing.
- Apply a light hand pull without pressing the release button. The bin should stay in place.
- Open and close the release several times, then run a short cleaning cycle and check for movement or an error.
A firm click is useful, but the real test is whether the bin stays locked and releases only when you press the correct control.
If the latch releases during the test, stop the robot and repeat the inspection. Rattling, a door gap, or a bin-not-installed warning means the fault is not yet solved.
How to Handle a Weak Latch Spring
A spring that is cracked, permanently bent, or no longer pushing the clip back should be replaced with a matching part. First, rule out poor seating; an intact spring in the wrong position may behave like a weak one.
Should You Stretch the Spring?
Stretching is not a dependable repair for a worn latch spring. It may change the spring’s length without restoring the correct force, and overstretching can leave it permanently deformed.
Spring engineering guidance explains why stretching does not necessarily make a spring stronger. If the latch only closes after you pull the coil longer, a properly specified replacement is the better fix.
How Do You Check Proper Spring Placement?
Compare the installed spring with the model’s diagram. Make sure each end rests in its intended seat and that the coil is neither trapped under a tab nor leaning against the housing.
Where an orange clip, raised X, or round spring cup is actually present, confirm that those features belong to your model before using them as guides. Reattach the clip gently and check that the button returns on its own.
Fix a Loose Dustbin Latch Without Tape
Tape may hold a loose dustbin temporarily, but it cannot replace the locking force of an intact catch. It may also leave adhesive residue or make normal bin removal harder.
If cleaning, realignment, and an approved spring refit do not work, check whether the separate latch clip or the whole dustbin is sold as a compatible replacement. For some models, the manufacturer provides instructions for replacing the complete dustbin, which slides in and clicks into place.
Note: If the catch on the robot body is broken, replacing the removable bin alone may not help. If a repair requires opening the robot’s main housing, seek the manufacturer’s service guidance or professional repair.
Choose a part listed for your exact model. A dustbin that looks the same may still have a different latch shape, sensor contact, or air seal.
Prevent Future Dustbin Latch Failures
Keeping the latch clean and handling the bin gently can reduce repeat failures. Empty the bin before it becomes tightly packed, and use the release button instead of pulling against the catch.
- Brush dust from the locking surfaces when you empty or inspect the bin.
- Close the door with even pressure and check that no debris sits on the seal.
- Keep the robot on a stable, level dock and avoid dropping or tipping the bin during emptying.
- Check the hinge and clip for cracks after an impact.
- Use lubricant only if the manufacturer approves it for that latch. Avoid silicone spray near filters, sensors, and electrical contacts.
Gentle handling and a clean catch help prevent the small tabs and spring seats from wearing out early.
If the door or bin repeatedly pops open after cleaning, replace the failed component rather than adding tape or forcing the mechanism shut.
Key Takeaways
- A loose dustbin door and a bin that falls out involve different latches.
- Inspect hinges, filter placement, and locking slots before replacing any parts.
- An orange clip or raised X is a model-specific feature, not a standard repair location.
- Do not stretch a tired spring or rely on tape as a permanent fix.
- Persistent looseness may call for a new dustbin or service to the robot-side catch.
Frequently Asked Questions
What Are the Most Common Problems With Robot Vacuums?
Common problems include clogged brushes, dirty filters or sensors, a loose dustbin, reduced battery runtime, and app or Wi-Fi connection issues. For a bin that will not stay attached, check the latch and its receiving slot before treating it as a software issue.
My Robot Vacuum Isn’t Emptying the Bin. What Can I Do?
First, check for a full bin, blocked outlet, dirty sensors, or a bin that has not clicked into place. If the vacuum has an auto-empty dock, inspect its suction path and bag too. A dustbin detection error is not automatically a broken latch; manufacturer guidance for an undetected bin starts with fit and filter checks.
My Dyson Canister Won’t Latch. What Can I Do to Fix It?
Check the canister rim, door seal, and closing catch for trapped dirt or a broken tab. Clean them gently, allow damp parts to dry, and refit the canister until it clicks. Dyson’s bin removal and refitting guidance is model-specific. Do not assume it has an orange clip or raised X.
What Is the Average Lifespan of a Robot Vacuum?
A robot vacuum often lasts several years, depending on its design, workload, and maintenance. A 2026 manufacturer lifespan guide gives about 4 to 6 years, with battery performance often declining after 2 to 4 years. Regular brush, filter, and bin care can help it keep cleaning well.
Conclusion
Start a robot vacuum dustbin latch repair with cleaning and proper bin alignment, not spring adjustments. If the catch, hinge, or spring is damaged, use an approved matching part. Only return the robot to regular cleaning once the bin locks and stays secure.
Sources
- eufy support: Causes and checks for a dustbin that falls off.
- ECOVACS dustbin guide: Bin removal, cleaning, and correct reinsertion.
- Roborock support: Two-fingerhold dustbin release and cleaning procedure.
- TEVEMA spring guidance: Why stretching does not reliably increase spring strength.
- iRobot replacement-bin instructions: Installing a new dustbin.
- iRobot bin-detection guidance: Checks when the robot does not detect the bin.
- Dyson troubleshooting: Canister cleaning and refitting.
- Dyson robot-vacuum lifespan guide: Estimated overall life and battery performance.