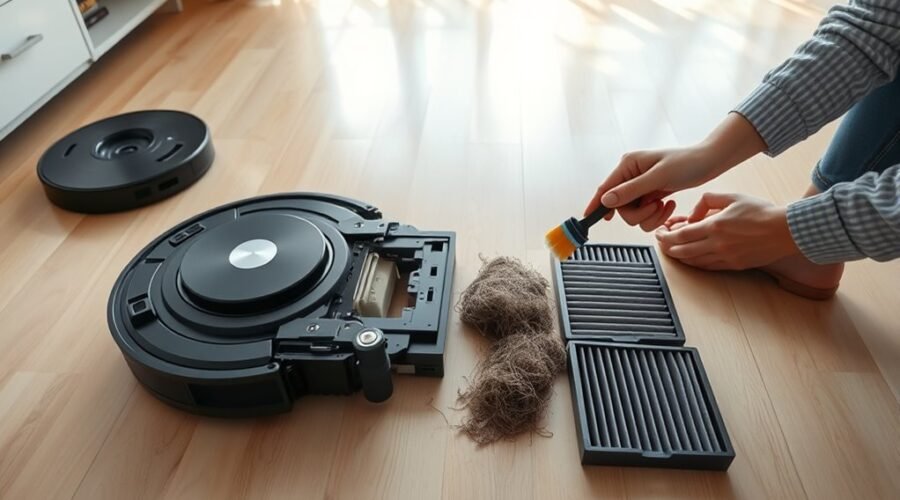
A clogged robot vacuum air path often shows up as weak suction, unusual noise, or debris left behind after a run. The issue usually begins with a full dustbin, a dirty filter, or hair trapped in the brushes and suction channel. A proper fix starts with a full shutdown and a systematic inspection of each airflow point. The next steps reveal where the blockage is hiding and how to clear it before more damage occurs.
Signs Your Robot Vacuum Is Clogged
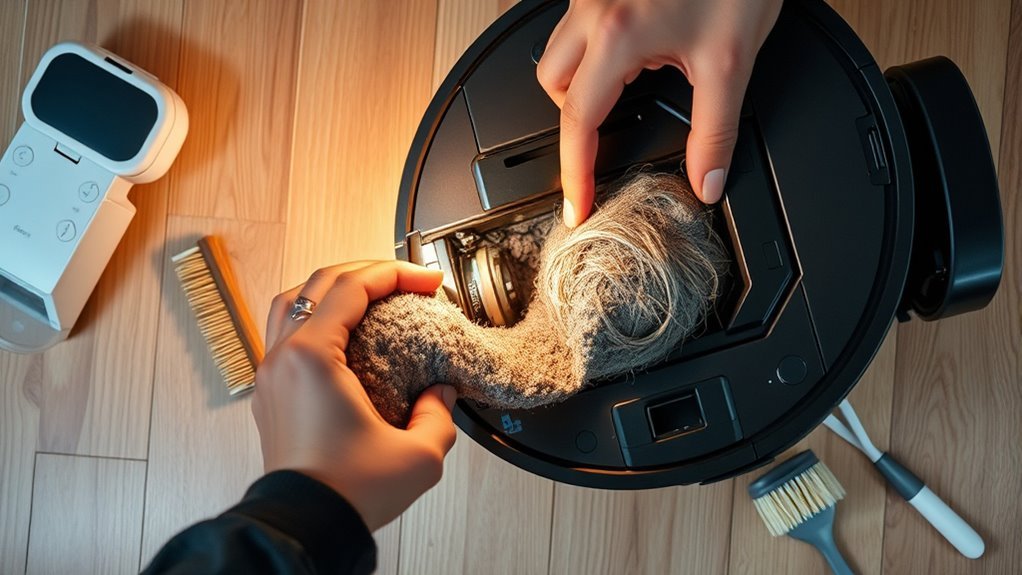
A clogged robot vacuum often reveals itself through reduced suction, which is usually the first noticeable sign of restricted airflow. When debris blocking the intake or a clogged filter limits passage, the unit may reduce suction power and leave dirt behind.
Poor cleaning performance is another indicator, especially if crumbs or dust remain after a full cycle. A red clean button light can point to an obstruction that requires attention. Frequent pauses or the robot stops during operation may also indicate a blockage in the air path.
Unusual sounds, including whirring or grinding, suggest that internal components are struggling against trapped material. These symptoms should be treated as diagnostic signals, not minor inconveniences. Identifying them early helps preserve airflow and restore effective cleaning without unnecessary delay.
Power Off And Empty The Dustbin
The robot vacuum should be powered off before any dustbin service is performed to prevent accidental activation and guarantee safe handling.
The dustbin should then be removed according to the manufacturer’s release mechanism and emptied completely into a trash receptacle.
If debris remains, the bin should be rinsed with clean water, air-dried fully, and reinstalled to preserve suction efficiency.
Power Down Safely
Start by powering down the robot vacuum completely to prevent accidental activation during maintenance. This step in the maintenance routine should be treated as nonnegotiable safety protocol.
Next, remove the vacuum from its dock so all components are accessible without strain. Open the dustbin compartment, lift out the dustbin carefully, and empty the dustbin into a trash receptacle. This prevents debris from shifting back into the air path and block airflow.
After disposal, inspect the dustbin for trapped material, then clean the sensors and interior surfaces with a damp microfiber cloth if residue remains.
The operator should power down safely before proceeding further, preserving control, reducing risk, and maintaining a clear path for liberated, efficient cleaning performance.
Empty Bin Thoroughly
With the unit powered off, the dustbin compartment should be opened and the bin removed carefully so loosened debris cannot fall back into the vacuum body.
The empty bin should then be cleared completely, and the dustbin inspected for packed dust, hair, or compacted residue that can restrict airflow and cause clogging.
Any remaining material should be tapped out, then the container rinsed with clean water to remove debris and odor sources.
After washing, it must air dry fully before reinstatement; moisture left inside can impair suction and damage internal components.
Once dry, the dustbin should be reinstalled securely until it clicks.
This step belongs in a regular maintenance schedule and helps guarantee ideal airflow, stable cleaning performance, and peak operation.
Clean The Filter And Dustbin
A clogged robot vacuum often loses suction at the filter and dustbin before any deeper blockage appears. To restore airflow, clean the filter and dustbin as part of a maintenance guide that supports regular cleaning.
The dustbin should be emptied after each use, then inspected for debris buildup and wiped clean so dust does not restrict intake or create odors.
The filter should be removed and rinsed under clean water every 2–3 months, then left to dry for 24 hours before reinsertion. If the filter is damaged, worn, or no longer preserves effective suction, replace the filter at once.
Keeping a spare filter on hand reduces downtime and helps the machine remain available for immediate service. This routine helps prevent clogs, protects suction power, and keeps the system efficient without unnecessary interruption.
Remove Hair From Brushes And Suction Ports
The brushes should be inspected regularly for tangled hair and debris, since buildup can restrict rotation and reduce suction efficiency.
Hair should be cut away from the main and side brushes with scissors or a cleaning tool, taking care not to damage the bristles or bearings.
The suction ports should then be checked and cleared with a soft brush or tweezers to remove any trapped obstruction.
Brush Hair Removal
Inspect the main brushes and side brushes regularly, since tangled hair can reduce suction and cleaning efficiency. Effective brush care requires steady maintenance: use scissors or a specialized tool to remove hair without harming bristles or the motor. Keep clean brushes and monitor suction ports for pet hair buildup, because blockages can limit airflow and weaken peak performance.
| Action | Result |
|---|---|
| Remove hair from brushes | Restores cleaning efficiency |
| Clear suction ports | Prevents blockages |
| Recheck monthly | Supports peak performance |
For homes with pets, inspect more often, as hair accumulates quickly. After each cleaning, reattach components securely so the robot continues operating freely and without interruption. Such disciplined upkeep preserves suction power, protects internal parts, and supports dependable, liberation-minded automation.
Suction Port Cleaning
Clearing the suction port begins with removing the brushes and checking both them and the airflow openings for hair, dust, and other debris that can reduce suction power.
Next, clean the brushes by cutting away tangled material with scissors or tweezers, then set them aside.
Inspect suction ports for any blockage and remove debris with a soft brush or dry cloth. If needed, pass a thin, flexible tool, such as a pipe cleaner, through the openings to clear embedded residue without forcing it deeper into the clogged air path.
This maintenance restores airflow, improves cleaning efficiency, and helps the vacuum reach peak performance.
After service, reattach the brushes and confirm they spin freely so the system remains ready for continued, liberated operation.
Tangled Debris Inspection
A thorough check of the main brushes and side brushes should be performed for tangled hair, threads, and other debris that can limit rotation and reduce suction efficiency. This inspection exposes tangled brushes before they degrade suction power or cause debris buildup.
Use scissors or tweezers to remove hair strands from the main brushes and side brushes, and verify that each assembly spins freely for peak performance. Check the suction ports for blockages, since restricted airflow can weaken cleaning results.
- Inspect brush axles and end caps for wrapped fibers.
- Clear suction ports and channels after every cleaning routine.
- Use a brush cleaning tool to simplify removal and maintain control.
Consistent inspection supports a cleaner, freer machine and prevents clogs from returning.
Clear Blockages In The Suction Path
Power down the robot vacuum and remove the dustbin before beginning maintenance to eliminate any risk of accidental activation. The technician should inspect the dustbin, remove the dust, and clear the filter so airflow can recover. Next, check the air duct and the pathway for blockages; examine the air duct closely for packed debris, hair, or compacted lint. Use a soft brush or tweezers to dislodge obstructions without damaging seals or tubing.
| Component | Action | Result |
|---|---|---|
| Dustbin | Inspect and empty | Free airflow |
| Air duct | Examine and clear | Open suction path |
| Brush roll | Clean the brush roll | Restore ideal performance |
The brush roll must also be checked for wrapped hair, then cleaned thoroughly to prevent renewed blockage. After blockages in the suction route are removed, securely reassemble parts so each fitting seats correctly. This disciplined method helps restore ideal performance and preserves the user’s ability to maintain a machine that works without interference.
Test Suction And Prevent Future Clogs
Once the suction path has been reassembled, the technician should test the robot vacuum’s suction to confirm that airflow has returned to normal and that no residual restriction remains. A short run across a clean floor will reveal whether the unit can test suction effectively and move debris without hesitation.
- Clean the dustbin after each use to prevent future clogs and preserve airflow.
- Inspect and clean the filter every 2-3 months; a blocked filter lowers suction.
- Perform brush rolls maintenance, and keep air ducts clear and suction channels free of debris buildup.
If the model includes diagnostic features, use them to monitor suction levels and identify maintenance alerts early.
Regular inspection of side brushes, ducts, and intake openings helps prevent future clogs and keeps the system responsive. Consistent upkeep supports efficient operation and preserves the user’s freedom from repeated disassembly.
Frequently Asked Questions
What Are the Most Common Problems With Robot Vacuums?
Common robot vacuum maintenance issues include suction power drops, dust bin overflow, brush roll jams, sensor malfunctions, battery life problems, navigation errors, connectivity troubles, and cleaning performance decline; these common vacuum issues demand regular inspection and upkeep.
How to Clear Vacuum Blockage?
Clear the blockage like opening a locked gate: empty the bin, inspect the filter, perform debris removal, brush cleaning, and check ducts. These troubleshooting tips protect suction power, motor function, sensor issues, battery care, navigation problems, app connectivity.
How to Stop a Robot Vacuum From Getting Stuck?
He would improve robot navigation through obstacle detection, sensor calibration, and mapping technology; optimize surface compatibility and wheel traction; verify app connectivity; preserve battery longevity; and apply maintenance tips to protect cleaning efficiency and prevent recurring stalls.
What Is the Average Lifespan of a Robot Vacuum?
A robot vacuum typically lasts 4–6 years. Robot vacuum maintenance, cleaning frequency, battery replacement, filter care, troubleshooting tips, surface compatibility, noise levels, smart features, brand comparisons, and price ranges strongly affect longevity.
Conclusion
To summarize, resolving a clogged robot vacuum air path requires careful attention to each stage of the cleaning process. After powering off the unit, emptying the dustbin, washing the filter, and removing debris from brushes and suction ports, the internal airflow should be restored. A final test run confirms performance. With regular maintenance, the vacuum can operate efficiently and resist future blockages, preventing even a single overlooked strand of hair from becoming a titan of disruption.