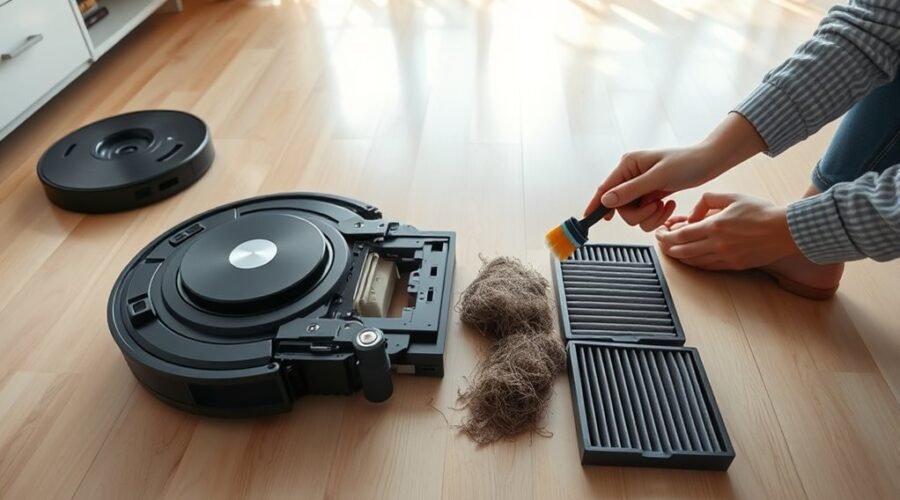
A clogged robot vacuum can leave dirt behind, make unusual noises, or stop cleaning before finishing a room. Most airflow problems come from a full dustbin, blocked filter, tangled brushes, or debris stuck inside the suction channel. You can often fix these problems at home without opening the motor housing.
Quick Answer
To unclog a robot vacuum, turn it off and remove the dustbin. Empty the bin, clean the filter according to your model’s instructions, and remove hair from the brushes. Check the suction inlet and accessible air ducts for trapped debris. Reassemble everything, then run a short cleaning test to confirm normal suction.
At a Glance
| Difficulty | Beginner for accessible parts; internal repairs may require professional service |
| Tools Needed | Soft brush, microfiber cloth, tweezers, scissors, and a brush-cleaning tool if available |
Signs Your Robot Vacuum Is Clogged
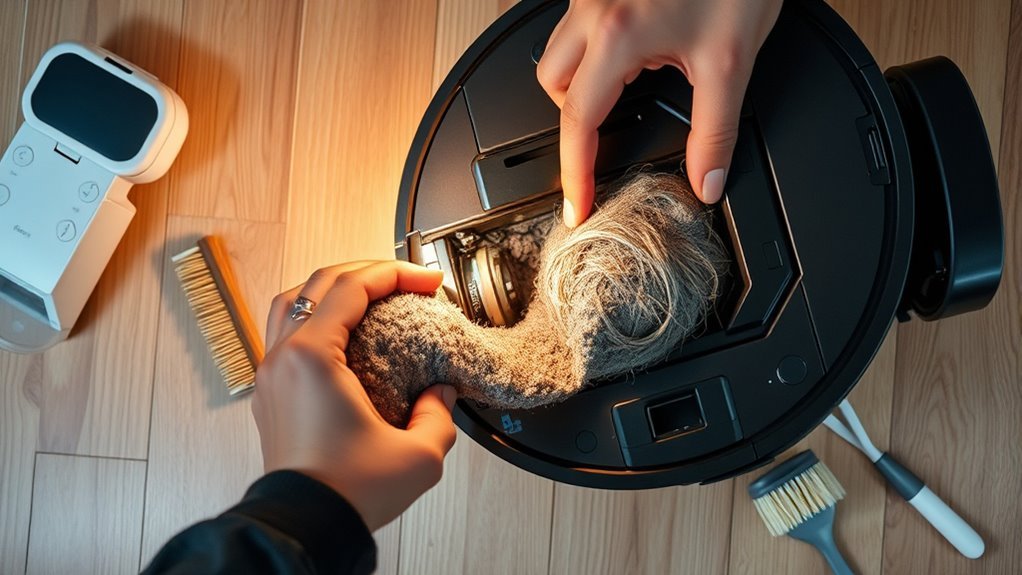
The most common sign of a clogged robot vacuum is weak suction. The machine may move normally but leave dust, crumbs, or pet hair behind. You might also notice debris falling out as the robot moves.
Other warning signs include:
- Poor cleaning performance: Dirt remains on the floor after a complete cleaning cycle.
- Unusual noises: Whirring, rattling, or grinding sounds appear during operation.
- Frequent pauses: The robot stops unexpectedly or displays a maintenance alert.
- Debris buildup: Dust collects around the suction inlet or inside the brush housing.
- Airflow errors: The robot reports a blocked filter, restricted airflow, or suction motor problem.
For example, iRobot identifies Error 26 on certain Roomba models as an insufficient airflow problem. Cleaning or replacing the bin filter is its recommended first step.
A red CLEAN button or warning light can also appear when something goes wrong. However, its meaning depends on the model. A red light does not automatically mean the suction path is blocked.
Check the accompanying error message, voice alert, or app notification before choosing a repair.
Noise can provide another clue. According to ECOVACS troubleshooting guidance, unusually loud operation can result from a full dustbin, blocked suction intake, or tangled brushes.
If your robot suddenly becomes louder while picking up less dirt, inspect the airflow system before running another full cycle.
Power Off and Empty the Dustbin
Start by turning off your robot vacuum and emptying its dustbin. A full or tightly packed bin can reduce airflow even when the suction motor still works.
Follow these steps before checking the filter or internal suction openings.
- Stop the current cleaning cycle.
- Turn off the robot using its designated power control.
- Remove the robot from its charging dock.
- Release the dustbin and carefully lift it out.
- Empty all collected dirt into a trash container.
- Inspect the dustbin outlet for compacted dust or hair.
Keep the robot powered off while removing or cleaning its brushes. If the dustbin is removable, carry it directly to the trash to avoid spilling debris into the vacuum body.
Power Down Safely
Powering down prevents the brushes or suction motor from starting while your hands are near moving parts. Use the shutdown procedure described in your model’s manual.
After removing the robot from its dock, place it on a stable surface. If you need to turn it over, use a soft towel to protect the top cover and sensors.
Check the dustbin compartment for loose debris. Use a soft, dry microfiber cloth to wipe accessible surfaces.
If the robot has dirty sensors, clean them separately according to the manufacturer’s instructions. Avoid getting moisture inside electrical openings.
Empty the Bin Thoroughly
A dustbin can look partly empty while still holding compacted dust around its outlet. This material may narrow the opening and prevent collected dirt from moving freely.
Open the dustbin lid and gently tap the container over a trash can. Remove packed hair or lint from its corners with a soft brush.
If your model has a washable dustbin, remove the filter and any parts that must stay dry before rinsing the bin. Use clean water and let the container dry completely.
Do not rinse a dustbin containing electronic components unless its manual specifically permits it.
Check the lid, seal, and release mechanism before reinstalling the container. The bin should sit securely without gaps or trapped debris along its edges.
Warning: Never reinstall a wet filter or dustbin. Moisture can restrict airflow and damage electrical components. Do not rinse filters, motors, sensors, or other parts unless your specific model’s instructions allow washing.
Clean the Filter and Dustbin
A dirty filter can make a robot vacuum lose suction even after its dustbin has been emptied. Fine dust collects between the filter fibers and restricts airflow toward the suction motor.
Remove the filter and inspect it for dust buildup, damage, or moisture.
To clean it safely:
- Remove the filter from the dustbin using its designated tab or release point.
- Tap a dry filter gently over a trash container to loosen dust.
- Use a soft cleaning brush if your manufacturer recommends one.
- Rinse the filter only when your model’s instructions confirm that it is washable.
- Allow any washable filter to dry completely before reinstalling it.
- Replace filters that are damaged, worn, or still clogged after proper cleaning.
Not all robot vacuum filters are washable. This is an important difference between models.
For example, iRobot’s bin and filter instructions state that filters in the specified Roomba e, i, j, and Combo 10 Max models must not be washed. Their filters should be tapped clean or replaced as needed.
However, the eufy X10 Pro Omni manual allows its designated dustbin filter to be rinsed with water and fully air-dried before reuse.
Cleaning frequency also varies by model. The original advice to clean every two to three months is not suitable as a universal rule.
For example, iRobot recommends cleaning certain Roomba filters weekly, or twice weekly in homes with pets. Its replacement schedule for those models is every two months. The eufy X10 Pro Omni manual recommends weekly filter cleaning and replacement every three to six months.
Use your model’s schedule rather than treating either interval as suitable for every robot vacuum.
Keeping a compatible spare filter can reduce downtime when a washable filter needs to dry or an old filter needs replacing.
Remove Hair From Brushes and Suction Ports
Hair and threads can wrap around a robot vacuum’s brushes and restrict cleaning performance. Debris can also become trapped between the brush housing and suction inlet.
Removing these obstructions helps the brushes rotate freely and allows dirt to reach the dustbin.
Brush Hair Removal
Start with the main roller brush, which usually sits underneath the vacuum. Remove its protective cover using the release tabs specified for your model.
Lift out the brush and check for wrapped hair, thread, and carpet fibers. Pay particular attention to both ends of the roller.
Use scissors or a brush-cleaning tool to cut away tightly wrapped strands. Keep the cutting edge away from the bristles, rubber rollers, bearings, and other moving parts.
If the roller has removable end caps, check them for hidden hair. Clean the side brushes and their mounting points as well.
| Action | Result |
|---|---|
| Remove hair from brushes | Allows brushes to rotate more freely |
| Clear suction ports | Removes restrictions in the airflow path |
| Recheck monthly | Helps detect buildup before it becomes severe |
Monthly checks provide a starting point for brush maintenance. Homes with pets or long hair may need more frequent cleaning.
Before reinstalling the roller, inspect the brush cover and its mounting points. Replace any part with broken clips or serious wear that prevents secure installation.
Suction Port Cleaning
The suction port is the opening that carries dirt from the brush area toward the dustbin. Hair, lint, and larger debris can become lodged inside this narrow passage.
With the robot powered off and the main brush removed, look directly into the accessible suction opening.
Use a soft brush or dry cloth to remove loose dust. Tweezers can help pull out visible hair or compacted debris near the opening.
If your model has a reachable air channel, a flexible pipe cleaner may help loosen residue. Use it gently and avoid pushing material farther inside.
Never force a rigid tool into the motor or fan assembly. The goal is to clear accessible openings without damaging internal seals, wiring, or moving parts.
Once the port is clear, reinstall the brush and check that it rotates freely by hand while the robot remains powered off.
Tangled Debris Inspection
Some clogs remain hidden after the visible hair has been removed. Fibers can collect around brush axles, end caps, bearings, and the edges of the brush housing.
Inspect these areas before closing the vacuum.
- Check the main brush axles for tightly wrapped strands.
- Inspect removable end caps and bearings for trapped fibers.
- Examine the side brush mounting points for hair buildup.
- Check the nearby suction channel for loose debris.
- Reinstall every component securely after cleaning.
A brush-cleaning tool can make this inspection easier, especially when hair is wrapped around a narrow axle.
Check the rollers for cracks, severe wear, or damaged connectors. Cleaning cannot repair a mechanically damaged brush, so replacement may be necessary.
After reassembly, make sure the cover sits flat and the brushes have no visible obstruction.
Clear Blockages in the Robot Vacuum Suction Path
If the dustbin, filter, and brushes are clean but suction remains weak, the blockage may be deeper in the accessible airflow path. This channel connects the floor intake to the dustbin and suction system.
Work from the easiest opening toward the harder-to-reach areas.
Remove the dustbin again and inspect the opening where dirt enters it. Look for compacted lint, hair, paper, or other objects blocking the passage.
Next, inspect the channel behind the brush housing. Use a soft brush or tweezers to remove any visible obstruction.
Clean only the areas your model allows you to access during routine maintenance.
| Component | Action | Result |
|---|---|---|
| Dustbin | Empty compacted debris and inspect the inlet | Restores space for collected dirt |
| Air duct | Remove visible obstructions with a suitable tool | Opens the suction passage |
| Brush roll | Remove wrapped hair and clean the ends | Restores free brush movement |
Also check the dustbin seal. A loose container, damaged rubber gasket, or poorly fitted filter can allow air to escape and weaken pickup.
If a blockage is hidden inside a sealed motor housing, do not force the casing open. Internal cleaning may require model-specific service instructions or professional repair.
Check the Auto-Empty Dock for Blockages
If your robot vacuum uses an automatic emptying dock, the blockage may be in the dock rather than the robot itself.
A full dust bag, obstructed collection port, or clogged evacuation tube can prevent the station from emptying the robot’s dustbin.
This may cause the onboard bin to stay full even after an automatic emptying cycle.
Check the dock using this sequence:
- Inspect the dust bag and replace it if full.
- Check that the bag and container lid are seated correctly.
- Turn off and unplug the dock before examining its accessible openings.
- Remove visible debris from the collection port.
- Inspect detachable duct covers or tubes only if your model’s instructions permit it.
- Reassemble the dock and test automatic emptying again.
For example, iRobot’s Clean Base blockage guide explains how to inspect its debris evacuation port and clear a blocked tube on supported stations.
Dock designs vary, so do not copy another model’s disassembly procedure without checking compatibility.
Pro Tip: If your robot’s dustbin fills up again immediately after automatic emptying, inspect the dock’s evacuation path before assuming the robot’s suction motor has failed. A blocked dock can leave the robot carrying debris from its previous cleaning cycle.
What If the Air Path Is Clear but Suction Is Still Weak?
Weak suction does not always mean a physical clog remains. The filter may be worn, the dustbin may not seal correctly, or the suction fan may have a problem.
Check that the filter is installed in the correct position and that the dustbin clicks securely into place.
If your robot offers adjustable suction levels, confirm that it is not operating in a reduced-power cleaning mode.
The eufy L50/L60 troubleshooting instructions identify clogged bins, blocked filters, dirty suction components, and brush problems as possible causes of poor pickup.
If the vacuum still produces little suction after cleaning and reassembly, stop troubleshooting the internal fan yourself unless the manufacturer provides a safe repair procedure.
Persistent motor errors, grinding sounds, or a fan that does not run may require replacement parts or professional service.
Test Suction and Prevent Future Clogs
After clearing the air path, run a short cleaning test to check whether suction has improved. A successful repair should allow the robot to pick up ordinary loose debris without unusual noises or repeated airflow errors.
Use a small test area on a hard floor where you can clearly see the results.
- Reinstall the dry filter, dustbin, brushes, and covers.
- Confirm that all removable parts are locked into position.
- Turn on the robot and select a suitable suction setting.
- Place a small amount of dry crumbs or loose dust on the test floor.
- Start a short cleaning cycle and observe whether the debris is collected.
- Check the floor for leftover dirt and listen for unusual motor or brush noise.
If pickup returns to normal, the blockage was likely responsible for the problem.
If cleaning performance remains poor, inspect the filter fit, dustbin seal, and suction setting again. A persistent error may point to a damaged component rather than another clog.
How Often Should You Clean a Robot Vacuum?
Regular maintenance helps prevent repeated clogs. The exact schedule depends on your model, floor conditions, and the amount of hair or dust collected.
Use these habits as a practical starting point:
- After each cleaning cycle: Empty the dustbin when needed, especially if it is full or packed with dirt.
- Weekly: Inspect the filter and remove collected dust according to the manufacturer’s instructions.
- Monthly: Check the main brush, side brushes, and accessible suction openings for wrapped hair and debris.
- More often in homes with pets: Inspect the brushes and filters whenever cleaning performance begins to decline.
- As required: Replace worn filters, damaged brushes, and full auto-empty dust bags.
These are general maintenance habits, not a replacement for the schedule supplied with your machine.
For example, iRobot’s Roomba s Series guidance recommends weekly filter cleaning, twice-weekly filter cleaning in homes with pets, and monthly brush checks.
Keeping large objects, cords, and loose items away from the robot’s cleaning route also helps prevent brush jams and intake obstructions.
When Should You Stop Cleaning and Get Professional Help?
Contact the manufacturer or a qualified repair service if the robot still has poor suction after you have cleaned every accessible part.
Professional help is especially appropriate if:
- The suction motor does not start or repeatedly reports an error.
- The vacuum makes grinding or scraping noises after cleaning.
- The robot has taken in liquid and shows signs of electrical trouble.
- A damaged seal or internal component cannot be replaced through normal maintenance.
- The air duct is blocked in an area that requires opening a sealed motor housing.
Continuing to operate a machine with a damaged motor or severe internal obstruction may cause further problems.
Key Takeaways
- A full dustbin and dirty filter are common causes of weak suction, but brush jams and blocked ducts can produce similar symptoms.
- Filter care is model-specific. Some filters can be washed, while others must remain dry.
- Hair wrapped around brush ends and bearings can be easy to miss during routine cleaning.
- Automatic emptying stations have separate dust paths that can become clogged.
- Persistent airflow errors after cleaning may indicate a damaged seal, fan, or other internal component.
Frequently Asked Questions
What Are the Most Common Problems With Robot Vacuums?
Common robot vacuum problems include weak suction, full dustbins, clogged filters, tangled brushes, navigation errors, sensor faults, and charging problems. Battery wear and app connectivity issues can also interrupt cleaning. Regular maintenance helps prevent many of these problems, although damaged motors and electrical components may require professional repair.
How to Clear Vacuum Blockage?
To clear a robot vacuum blockage, turn off the machine, empty its dustbin, and inspect the filter. Remove tangled hair from the brushes and clear visible debris from the suction inlet and accessible ducts. Reassemble the dry components and run a short test. Seek service if a blockage remains inside the sealed motor housing.
How to Stop a Robot Vacuum From Getting Stuck?
To stop a robot vacuum from getting stuck, remove loose cords, small objects, and other obstacles from its path. Clean its wheels and navigation sensors, and check that the brushes rotate freely. If supported, adjust the robot’s map or restricted areas in its app. Inspect worn wheels and confirm the battery charges properly.
What Is the Average Lifespan of a Robot Vacuum?
A robot vacuum typically lasts around 4–6 years, although actual lifespan depends on the model, usage, and maintenance. Frequent cleaning, filter replacement, brush care, and proper battery maintenance can help extend its useful life. Some parts may need replacement earlier, particularly in homes with pets or heavy daily cleaning.
Can You Wash a Robot Vacuum Filter?
You can wash a robot vacuum filter only if its manufacturer specifically identifies it as washable. Some eufy models have washable filters, while certain iRobot Roomba filters must never contact water. Always check your model’s instructions first. A washable filter must dry completely before it goes back into the vacuum.
Why Does My Robot Vacuum Still Have Weak Suction After Cleaning?
A robot vacuum may still have weak suction because its filter is worn, the dustbin is not sealed correctly, or an internal air passage remains blocked. Incorrect suction settings can also reduce cleaning performance. If every accessible part is clean and installed properly, a faulty fan or damaged component may need professional attention.
Conclusion
Fixing a clogged robot vacuum usually starts with its dustbin, filter, brushes, and suction openings. Clean each accessible component carefully, follow your model’s washing instructions, and test suction after reassembly.
If airflow returns to normal, regular maintenance can help prevent another blockage. If cleaning does not restore performance, check for damaged parts or arrange professional service rather than forcing open the motor housing.
Sources
- iRobot: Error 26 for Roomba i, j, and Combo 10 Max: Explains insufficient airflow errors and recommended filter maintenance.
- ECOVACS: DEEBOT Unusual Noise Troubleshooting: Identifies full dustbins, suction blockages, and tangled brushes as causes of abnormal noise.
- iRobot: Robot Bin and Filter Cleaning Instructions: Explains safe bin cleaning and why certain Roomba filters must not be washed.
- eufy: X10 Pro Omni User Manual: Provides washable-filter instructions, brush care, and model-specific maintenance schedules.
- eufy: L50/L60 Weak Suction Troubleshooting: Covers dustbin clogs, filter alignment, brush obstructions, and suction fan problems.
- iRobot: Clean Base Automatic Dirt Disposal Blockage Guide: Explains how to inspect and clear obstructions in compatible automatic emptying stations.
- Dyson: How Long Do Robot Vacuums Last?: Supports the typical 4–6-year lifespan estimate and discusses factors affecting durability.