Cleaning robot vacuum wheel axles begins with a careful shutdown and a stable upside-down position on a soft surface. A small set of tools can expose hair, dust, and compacted debris that often resist casual wiping. Once the axle area is clear, the housing and caster wheel need inspection, followed by minimal lubrication. The real difference often appears when worn parts are identified before the problem spreads.
Clean Robot Vacuum Wheel Axles Safely
To clean robot vacuum wheel axles safely, the vacuum should be powered off and placed upside down on a soft surface to prevent damage during access.
This stable setup allows the wheel housing to be exposed with a flat screwdriver, lifted gently to avoid stressing adjacent parts.
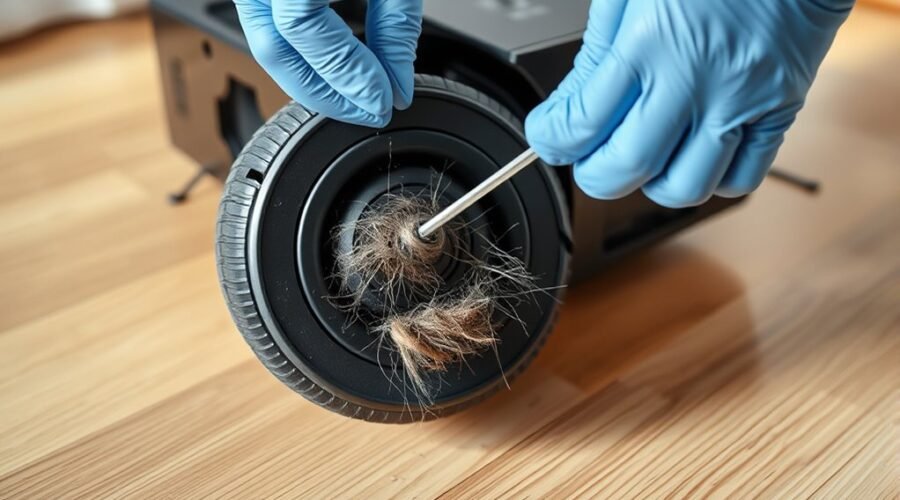
Once open, any hair or debris wrapped around the axle should be cut away with a seam ripper or small scissors, using controlled motions that protect the axle finish.
Carefully cut away hair or debris from the axle, using controlled motions to protect the finish.
The axle can then be wiped with a damp cloth to remove dust and residue. A light grease may be applied sparingly to reduce friction and guarantee smooth movement.
After treatment, all components should be reattached securely, and the wheel must sit properly in place.
This method lets the machine move with less resistance, preserving mechanical freedom and dependable operation.
Gather the Right Tools
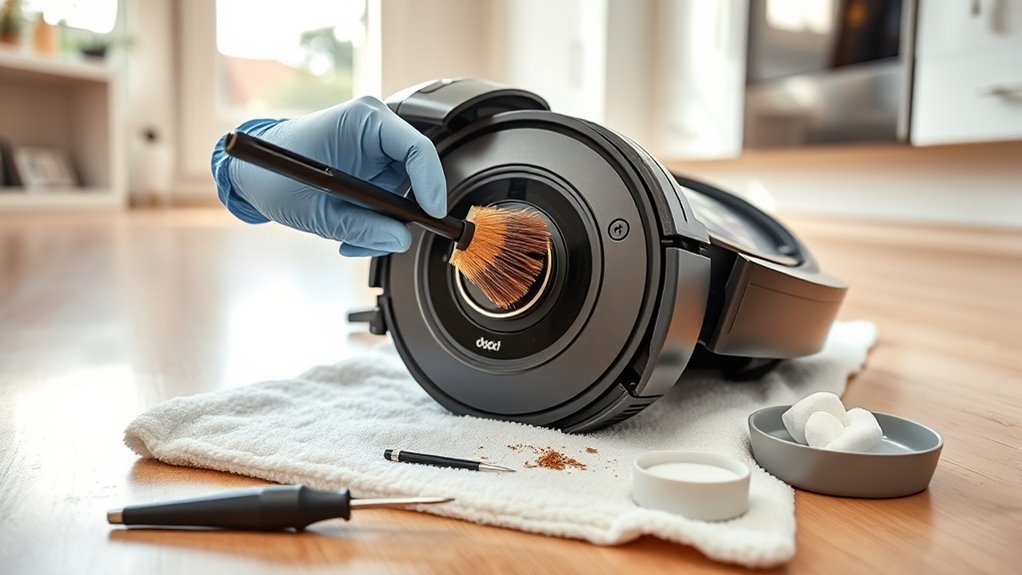
A proper tool kit should be assembled before the axle cleaning begins. To gather the right tools, the technician should prepare a flat screwdriver, a small brush, tweezers or a small pick, a cleaning cloth, and light grease.
The flat screwdriver provides controlled access by removing the wheel housing without unnecessary force. A small brush helps clear loose dust from the axle area, while tweezers or a small pick can isolate stubborn fibers or packed debris with precision.
The cleaning cloth should be dry or only lightly damp, so surrounding surfaces are wiped clean without introducing excess moisture. Light grease should be reserved for the final lubrication stage after inspection and cleaning.
Keeping each instrument within reach reduces interruptions and supports a systematic, self-directed workflow. With the correct tools ready, the axle service process becomes efficient, orderly, and fully under control.
Remove Hair and Debris From the Axles
Hair should be inspected around the wheel axles for buildup that can restrict movement and reduce performance.
Any wrapped strands should be cut away carefully with a seam ripper or small scissors to avoid damage to the components.
For debris lodged in tight areas, a small brush can be used to clear the axle space safely and restore smooth wheel rotation.
Hair Wrapped Around Axles
Wrapped fibers around robot vacuum axles can restrict wheel movement and reduce cleaning performance, so the wheels should be inspected and cleared on a regular schedule, ideally weekly. Hair commonly coils around the axle, creating friction and limiting wheel travel.
Before any maintenance, the unit should be powered off. A seam ripper or small yarn scissors can then be used to remove hair with controlled cuts and careful pulling, preserving wheel components.
After the strands are freed, a small brush should sweep away residual debris from the axle and surrounding recesses. These maintenance tips support reliable rotation, prevent buildup, and keep the wheel assembly liberated from jams.
Consistent inspection guarantees the axle remains clean, mobile, and ready for sustained operation.
Clearing Debris Safely
Safe debris removal begins with powering off the robot vacuum and flipping it upside down to expose the wheel axles.
With the Robot immobilized, inspect each Vacuum wheel for debris wrapped around the axle and cut it free with a seam ripper or small scissors, taking care not to nick plastic or wiring. The operator should clear the wheel methodically, lifting hair and threads in short motions until rotation feels unrestricted.
Dust and grit should then be brushed away, and a soft cloth used to gently wipe the axle housing and nearby wheel sensors. Regular inspection prevents friction, reduces malfunction risk, and preserves mobility.
After cleaning, a light grease film may restore smooth travel. A disciplined schedule keeps the machine responsive and supports the freedom of uninterrupted cleaning.
Tools For Tight Spots
When access is limited, a seam ripper or small yarn scissors can be used to cut and lift hair from the wheel axles without damaging adjacent parts.
For a stuck robot vacuum wheel, a flat screwdriver may pry off the housing, opening tight spaces for inspection. A small brush, such as a toothbrush, should then carefully remove lint and grit from the axle recesses.
The operator should wheel and gently rotate the assembly while cutting strands, allowing each pass to loosen trapped debris. After visible obstructions are cleared, the axle and surrounding channel should be checked again for residual fibers.
A thin application of light grease can facilitate smooth motion and reduce friction. Routine inspection of these points preserves performance and supports clean, self-directed movement.
Clean the Wheel Housing and Caster Wheel
The front caster wheel should be removed first, then the wheel housing inspected and wiped clean with a damp cloth to eliminate debris and limit friction.
A small brush or toothbrush can be used to clear hair and dirt from around the axle and within the housing.
After the axle is lightly greased, the wheel should be reinstalled and pressed into place until it clicks securely.
Clean Wheel Housing
Power off the robot vacuum before inspecting the wheel housing, then remove any hair or debris wrapped around the axle to restore smooth wheel movement.
To clean the wheel housing, a flat screwdriver may be used to lift the cover without distortion. Once exposed, a soft cloth or damp cloth should wipe the interior surfaces, removing debris, dust, and buildup that contribute to wheel issues.
Every contact point should be checked for residue that could restrict rotation. The caster wheel should remain aligned and free of friction, because precise motion depends on unrestricted travel.
Regular cleaning preserves mechanical freedom, reduces resistance, and supports dependable navigation.
When the housing is reassembled, the fit should be secure and even, confirming that no obstruction remains inside the assembly.
Remove Caster Debris
Remove the caster wheel by pulling it straight out from the robot vacuum to avoid damaging the axle. Then inspect both the wheel and housing for hair, dust, or debris that may restrict movement.
To remove caster debris, examine the wheel treads and inner cavity for hair or dirt packed around the pivot. A damp cloth should be used to clean the caster wheel and the housing surfaces until all residue is cleared.
This vacuum cleaner component relies on unobstructed rotation for stable obstacle avoidance and smooth navigation. After wiping, verify that the wheel spins freely and that no fibers remain trapped at contact points.
Regular inspection preserves control, reduces friction, and supports a cleaner, more autonomous path without unnecessary resistance.
Reinstall Wheel Securely
With the wheel housing cleaned, any remaining dirt or hair should be wiped away with a damp cloth. Then the interior must be allowed to dry completely before reassembly.
A soft brush may be used to clear dust buildup from corners and seams, including strands wrapped around the axle channel. The wheel housing should be inspected for residue, friction points, or trapped debris that could restrict motion.
Once the parts are completely dry, the caster wheel should be aligned with the axle and pressed firmly until it clicks, confirming a secure fit.
Before locking it in place, the wheel should be spun by hand to verify free rotation. This method preserves smooth movement, prevents jamming, and helps reinstall the wheel securely without unnecessary resistance.
Lubricate the Axles Without Overdoing It
A small amount of light machine oil or silicone-based lubricant should be applied to the cleaned axles, using a cotton swab for precise placement and to prevent excess from attracting dust and debris.
The front caster wheel and other pivot points should receive only a small film, enough to lubricate without saturating the assembly.
The axles must remain clean; any remaining grit can mix with oil and form a paste that restricts motion. A measured approach helps avoid attracting new contamination and preserves the freedom of movement the machine requires.
After application, the wheels should be rotated by hand several times so the lubricant spreads evenly across contact surfaces. This method supports smooth travel, reduces friction, and helps maintain performance over time.
Lubrication every few months, paired with regular inspection for wear, can extend axle life while keeping operation precise, quiet, and dependable.
Replace Worn Wheels or Contact Support
Inspect the wheels for flat spots, cracks, looseness, or uneven rotation, since worn components can reduce cleaning efficiency and disrupt navigation. When damage is confirmed, replace worn wheels with genuine parts from the official store to preserve compatibility and warranty protection.
The universal wheel should spin freely; binding may indicate debris, but persistent resistance can signal deeper wear. For technical clarity, the following steps apply:
- Verify the model number before ordering parts.
- Compare the old wheel against the new one before installation.
- If the wheel motor still fails after cleaning and replacement, contact support promptly.
This method can fix a stuck robot more reliably than repeated manual adjustments. Review the user manual for model-specific instructions, and check warranty status before paying for service.
Proper navigation and obstacle handling depends on sound wheel condition, making timely replacement part of disciplined care of your robot.
Frequently Asked Questions
How to Clean the Side Wheels on a Roomba?
Power off the Roomba, flip it onto a soft surface, remove side wheels, clear axles with tweezers, wipe treads damply, and reattach securely. This side wheel maintenance prevents robot wheel issues, boosting vacuum performance through regular maintenance schedule; DIY cleaning solutions help.
What Are the Most Common Problems With Robot Vacuums?
Common robot vacuum problems include reduced suction power, weak battery life, navigation issues, app connectivity failures, limited dustbin capacity, floor compatibility mismatches, clogged wheels, docking errors, floor marks, and motor faults hindering reliable autonomous cleaning.
How to Clean Roborock Vacuum Wheel?
A Roborock owner, for example, powers it off, flips it, removes each wheel, clears hair with tweezers, wipes axles, applies silicone grease, and reassembles. These robot maintenance tips follow a cleaning frequency guide, improving vacuum performance enhancement and troubleshooting wheel issues.
How Do I Clean the Wheels on My Shark Robot Vacuum?
He should power off, invert, remove hair with scissors, wipe wheels damply, clean the caster axle, and inspect wear. These wheel maintenance tips, robot vacuum care, cleaning tools needed, common cleaning mistakes, wheel axle issues, performance enhancement techniques matter.
Conclusion
To sum up, cleaning robot vacuum wheel axles is a straightforward maintenance task that protects performance and reduces wear. With the device powered off, debris removed, housings cleared, and lubricant applied sparingly, the wheels can move with the smoothness of a well-oiled hinge. Regular inspection helps identify damage early, while timely replacement of worn parts prevents strain on the drive system. Consistent care keeps the vacuum operating efficiently and reliably over time.