
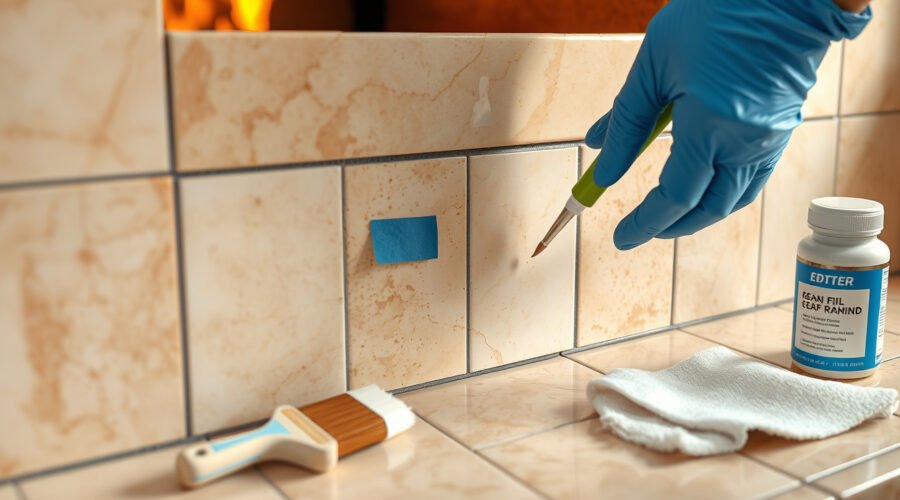
You can fix chipped tile on a fireplace surround without pulling out the whole tile, provided the tile is still firmly bonded and the damage is only on the surface. A lasting cosmetic repair comes down to four things: degreasing soot from the chip, scuffing the glazed edge, applying a heat-tolerant porcelain or ceramic epoxy in thin layers, and letting the patch cure for a full 24 hours before lighting a fire.
Quick Answer
To fix chipped tile on a fireplace surround, confirm the tile is cool and solid, wash away soot with dish soap, lightly scuff the damaged edge with 320-grit sandpaper, and mask around the spot with painter’s tape. Fill the chip in thin layers using a color-matched porcelain or ceramic epoxy rated to at least 250°F, level it flush, and let it cure for 24 hours.
At a Glance
| Time Required | 30–60 minutes of hands-on prep and filling, plus 24 hours for full curing |
| Difficulty | Easy for single-color surface chips; moderate when blending veined or matte tile |
| Tools Needed | Soft brush or vacuum brush, mild dish soap, microfiber cloths, painter’s tape, 320-grit sandpaper, plastic scraper or toothpick, gloves, and eye protection |
| Cost | $10–$35 for a porcelain or ceramic chip repair kit and basic prep supplies |
Should You Patch or Replace Chipped Fireplace Tile?
Patch a fireplace surround tile only when the chip is smaller than a quarter (about 1 inch or 25 mm across), shallower than 1/8 inch (3 mm), and the tile itself is firmly bonded to the wall. Press around the damaged tile and tap it gently with a plastic screwdriver handle. If the tile shifts, sounds hollow, or has a crack running from edge to edge, surface filler will quickly pop out.
Warning: Never repair tile while the fireplace surround is warm. If you see loose tiles, dark smoke stains above the opening, cracked firebox masonry, crumbling mortar joints, or scorched backing behind a tile, stop using the fireplace and schedule a professional inspection before making repairs.
Replace the tile instead of patching if the damage is larger than a coin, breaks all the way through the tile body, sits next to missing grout, or sits right on the inner firebox lip where radiant heat exceeds 250°F (121°C). Under International Residential Code (IRC) Section R1003.9 and NFPA 211 guidelines, non-combustible backing (such as 1/2-inch cement board) and heat-appropriate mortar are mandatory around the firebox opening. Cosmetic epoxy fillers are designed for the outer surround face, not the high-heat interior of a firebox.
Why Do Fireplace Surround Tiles Chip?
Fireplace surround tiles typically chip from direct mechanical impact, thermal stress, or unsupported tile edges. Heavy firewood logs, metal pokers, fireplace screens, and metal vacuum wands easily nick the hard, brittle glaze on ceramic or porcelain tile. Missing grout between joints also leaves tile corners exposed and vulnerable to chipping.
Repeated heating and cooling cycles make underlying installation flaws worse. When a surround is installed over standard drywall instead of cement backer board, or set with organic mastic instead of polymer-modified thinset mortar, heat weakens the bond behind the tile. Once a tile loses full mortar support, even slight pressure or thermal expansion can flake the glazed edge.
What You’ll Need for the Repair
Gather all tools and materials before mixing your repair compound, since most two-part tile epoxies begin setting within 10 to 25 minutes. Having your applicator and tape in place ensures a smooth, level patch before the filler thickens.
- Porcelain or ceramic repair compound: A two-part color-matched epoxy kit, epoxy putty stick, or solvent-based porcelain touch-up glaze rated to at least 250°F (121°C)
- Soft bristle brush or vacuum: Use a soft brush attachment to lift ash without scratching the glaze
- Mild dish soap and warm water: Cuts oily soot and fireplace residue
- Lint-free microfiber cloths: For washing, rinsing, and drying the repair area
- Painter’s tape: Protects surrounding glaze and sharpens patch edges
- 320-grit wet/dry sandpaper: Or the fine abrasive pad included in your tile repair kit
- Small applicator tools: Toothpicks, a wooden craft stick, a plastic putty knife, or a single-edge razor blade held flat
- Safety gear: Disposable nitrile gloves and eye protection
- Optional finish blender: Acrylic or enamel tile touch-up pens for veining, plus a compatible clear topcoat if required by your kit
Note: A chip repair kit is strictly a cosmetic surface fix. It seals the exposed clay or porcelain body and protects the sharp edge from catching, but it does not restore structural strength to a cracked or delaminating tile.
Recommended Products

1 MILLION HAPPY CUSTOMERS: Trusted worldwide, our repair kits have helped over a million people restore their favorite items to their original condition.

Perfect Color Match: Advanced pigment blending enables natural color matching for tile, marble, granite, and porcelain repairs, helping damaged areas blend seamlessly into existing surfaces. Commonly used in tile repair kits and porcelain tile repair kits scenarios for bathroom and kitchen restoration

Wide Application - This touch up paint pen adheres to a wide range of surfaces, including tile, tub, bathtub, sink, enamel, porcelain and refrigerators. It allows you to easily repair scratches, stains, chips, spots, yellowing, and other surface paint imperfections
How to Fix Chipped Tile on a Fireplace Surround Step by Step
Follow these steps in order while the fireplace is completely off and the surround tiles are at room temperature (60°F–80°F). Working on a warm surround makes epoxy cure too fast, weakens adhesion, and can cause bubbling.
Step 1: Clean Soot, Ash, and Debris From the Chip
Start by vacuuming loose dust and wood ash out of the chipped crater using a soft brush attachment. Never scrape inside the chip with a metal screwdriver or utility knife, which can crush the fragile glaze border and widen the blemish.
| Prep Stage | Action to Take | Why It Matters |
|---|---|---|
| 1. Dry brush | Brush or vacuum the chip and adjacent grout lines | Prevents loose ash or grit from tinting the filler gray |
| 2. Degrease | Wipe with warm water and a few drops of dish soap, then rinse | Strips oily soot, fingerprints, and polish that block adhesion |
| 3. Dry completely | Blot with a microfiber cloth and air-dry for 30–60 minutes | Trapped moisture inside porous ceramic stops epoxy from bonding |
Inspect the clean chip under a bright flashlight. If you see hairline cracks radiating outward or crumbly grout along the edge, address those issues before patching. Wipe the tile with a cloth dampened in warm, soapy water, rinse with a clean damp cloth, and let the bisque dry completely for at least 30 to 60 minutes.
Step 2: Lightly Sand the Chipped Edges
Once the tile is bone-dry, lightly roughen the inside rim of the chip with 320-grit sandpaper. Wrap a tiny square of sandpaper over the tip of a wooden craft stick or pencil eraser so you only touch the broken edge, not the intact surrounding glaze.
Use three or four gentle strokes just to knock off loose glaze splinters and create microscopic texture for the filler to grip. Wipe away the sanding dust with a damp microfiber cloth and let the spot dry for 10 minutes.
Pro Tip: If your fireplace surround has dark, high-gloss, or hand-glazed ceramic tile, apply painter’s tape around the chip before you sand. The tape acts as a bumper so a stray sandpaper stroke never dulls the surrounding finish.
Step 3: Mask Around the Chip With Painter’s Tape
Frame the chip with narrow strips of painter’s tape placed about 1/16 inch (1.5 mm) outside the damaged rim. Use a utility blade on a cutting mat to slice thin tape strips if the chip sits right next to a grout joint or raised relief pattern.
- Leave the entire chip exposed: Make sure no tape overlaps the crater itself, or the filler will peel up when you pull the tape.
- Burnish the inner tape edge: Press firmly along the border with your fingernail or a plastic card so wet filler cannot creep underneath.
- Pull the tape while the filler is still semi-soft: Peel the tape back at a 45-degree angle within 5 to 10 minutes of smoothing the patch, before the epoxy cures rock-hard and locks the tape in place.
Step 4: Fill and Level the Chip in Thin Layers
Apply your mixed repair compound in thin, controlled layers rather than one thick blob. Overfilling creates a raised bump that requires heavy sanding, which risks scratching the surrounding fireplace tile.
- Mix and tint the compound: Combine equal parts resin and hardener (for two-part kits) and blend in color drops little by little until the shade matches the dry surrounding tile in natural room light.
- Press a thin base coat into the crater: Use a toothpick or pointed craft stick to work the compound into the deepest part of the chip, pushing out any trapped air pockets.
- Strike the surface flush: Draw a flat plastic scraper or putty knife smoothly across the chip at a 45-degree angle so the filler sits level with the tile glaze.
- Peel the tape and clean smudges immediately: Remove the painter’s tape before the compound sets, and wipe any stray residue off the adjacent tile using a cloth dampened per label instructions.
- Apply a second thin coat if needed: Solvent-based porcelain glazes shrink slightly as solvents evaporate. Wait the label-specified recoat window (typically 1 to 2 hours for glazes, or 24 hours if sanding cured epoxy) before adding a final skim layer.
The best fireplace tile chip repair is unhurried: grease-free edges, thin coats, careful color matching in daylight, and a full 24-hour cure before lighting a fire.
Step 5: Cure Fully and Blend the Finish
Leave the fireplace completely off for the full cure window printed on the package—usually 24 hours at room temperature. While many epoxies and glazes feel dry to the touch in 10 to 25 minutes, lighting a fire before full chemical cross-linking completes can cause the patch to bubble, yellow, or smell.
Once fully cured, run your fingertip across the repair. If the patch feels slightly proud, gently wet-sand just the high spot with 400- to 600-grit sandpaper until flush. On veined marble-look porcelain or patterned ceramic, use a fine-tip acrylic or enamel touch-up marker over the cured base to mimic natural flecks, then dab on a compatible clear sealer only if your kit recommends it.
Choose the Right Porcelain or Ceramic Repair Patch
Select a filler engineered for your tile’s density and the heat level at that spot on the surround. According to the Tile Council of North America (TCNA) and ISO 13006 standards, porcelain tile has a water absorption rate of 0.5% or less, whereas non-porcelain ceramic tile absorbs between 0.5% and over 10%. Because porcelain is practically non-porous, household wall spackle or wood filler will flake right off.
| Repair Product Type | Best Chip Size & Tile | Typical Set / Full Cure | Max Heat Rating & Sheen |
|---|---|---|---|
| Two-Part Liquid/Paste Tile Epoxy Kit | Shallow-to-medium chips (up to 1/8 in deep) on porcelain or ceramic | 15–30 min set / 24 hr full cure | Up to 250°F (121°C); satin to semi-gloss (tintable with included pigments) |
| Two-Part Epoxy Putty Stick | Deeper corner or edge chips (1/8 in to 1/4 in) on vertical surrounds | 25 min set / 1 hr hard / 24 hr full cure | Up to 250°F–300°F; cures matte off-white (requires enamel paint topcoat) |
| Solvent-Based Porcelain Touch-Up Glaze | Pinholes, hairline nicks, and shallow glaze flakes on glossy tile | 10 min tack-free / 24 hr full cure | Up to 250°F (121°C); high-gloss finish in factory appliance/tile shades |
For vertical fireplace faces where runny fillers might sag, a moldable product like J-B Weld WaterWeld Epoxy Putty sets in 25 minutes, cures to 4,370 PSI, and withstands continuous temperatures up to 250°F. Because most whites vary in undertone, test your mixed tint on a piece of painter’s tape stuck next to the chip before applying it to the tile.
If you decide to replace a badly broken tile instead of patching, never use premixed organic mastic (ANSI A136.1) around a fireplace. As noted in the Custom Building Products AcrylPro technical data sheet, Type 1 mastic is not rated for radiant heat or temperatures above 100°F–125°F (38°C–52°C). Instead, set replacement ceramic or porcelain tiles under 15 inches per side with polymer-modified thinset mortar meeting ANSI A118.4, or step up to ANSI A118.15 medium-bed mortar for large-format tiles (15 inches or larger).
Recommended Products
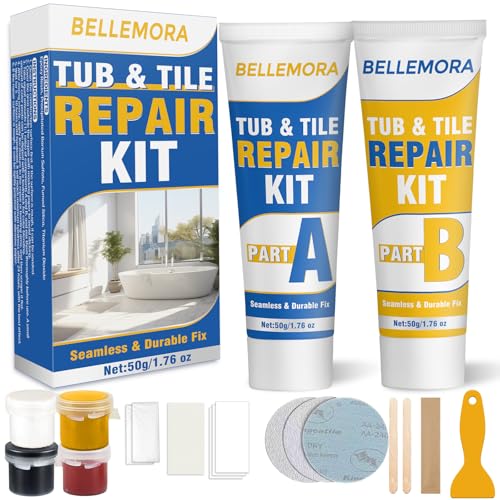
Multi-Surface Repair: This all-in-one fiberglass repair kit works seamlessly on enamel, acrylic, porcelain, and ceramic. It restores chips, cracks, and scratches on tubs, sinks, tiles, and more, delivering a smooth, waterproof finish that blends naturally with original surfaces

MAKE CHIPS & CRACKS LESS NOTICEABLE: Fill tile chips, cracks, holes and damaged edges, then smooth the repair flush with the surrounding surface for a cleaner, more finished look on ceramic and porcelain tile.

Instantly Restore Glossy White Tubs Like New: Flawlessly cover ugly chips, cracks, holes, scratches, dents, peel and rust with a smooth glossy white finish that blends into tubs, sinks, showers and tile surfaces for seamless-looking repairs
Troubleshooting Common Chip Repair Problems
Even careful repairs can dry slightly off-shade or uneven in sheen. Here is how to correct the four most common issues without digging out the entire patch.
The Patch Dried Too Light or Too Dark
Wait the full 24-hour cure period before judging the color, as many epoxies darken slightly as they harden. If the cured patch still stands out, lightly scuff the top with 320-grit paper and apply a thin glaze of acrylic enamel touch-up paint blended to match the tile’s warm ivory, cool gray, or bright white undertone.
The Patch Looks Too Glossy on Matte Tile
Solvent-based glazes and standard two-part epoxies naturally cure with a high sheen that catches living room light on satin or matte porcelain. Once the filler has cured for 24 hours, buff the surface gently in circular motions using a 600-grit sanding sponge or white non-scratch pad until the reflection matches the surrounding tile.
The Filler Shrank Below the Tile Surface
Liquid touch-up glazes lose volume as solvents flash off, leaving a shallow dimple in deeper chips. Clean the cured recess with a damp cloth, let it dry, and apply a second or third thin coat rather than trying to flood the hole in a single pass.
The Same Tile Chips Again
Repeated chipping in the exact same spot points to an ungrouted joint, an uneven tile edge (lippage) getting bumped by fireplace tools, or a loose tile flexing against the substrate. Rake out and replace missing grout, or reset the tile with polymer-modified thinset if it sounds hollow when tapped.
How to Prevent Future Fireplace Tile Chips
Protect your surround by placing your log rack and metal tool set at least 6 to 12 inches away from the tiled face so heavy logs and pokers cannot swing into the glaze. When cleaning cold ash out of the hearth, always snap a soft bristle brush onto your vacuum hose rather than bumping bare metal or hard plastic wands against the tile trim.
For wood-burning and gas fireplaces alike, the Chimney Safety Institute of America (CSIA) recommends an annual NFPA 211 Level 1 inspection to verify that your flue, smoke chamber, and firebox masonry are structurally sound. Catching deteriorating firebox mortar or excessive heat transfer early prevents thermal stress from cracking or loosening your surround tiles.
Key Takeaways
- Only patch cosmetic surface chips smaller than a quarter (1 inch) on cool, firmly bonded tiles that do not sound hollow.
- Because porcelain absorbs 0.5% water or less, use a dedicated two-part tile epoxy or porcelain glaze rated to at least 250°F—never drywall spackle or wood filler.
- Peel painter’s tape within 5 to 10 minutes of leveling the filler so it does not tear the curing edge, then wait a full 24 hours before lighting the fireplace.
- When replacing a full tile on a fireplace surround, use ANSI A118.4 or A118.15 polymer-modified thinset mortar rather than premixed organic mastic.
Frequently Asked Questions
How do you repair broken tile on a fireplace?
If the tile only has a small surface chip under 1 inch wide, wash it with dish soap, lightly scuff the edge with 320-grit sandpaper, tape around the spot, and fill it with a color-matched porcelain or ceramic epoxy. If the tile is cracked all the way through, sounds hollow, or wiggles, chisel out the damaged piece and set a replacement tile using ANSI A118.4 polymer-modified thinset mortar.
Can you fix chipped tile without replacing it?
Yes, you can fix a chipped fireplace tile without replacing it whenever the chip is shallower than 1/8 inch and the tile remains tightly bonded to the backer board. A two-part epoxy or porcelain touch-up glaze seals the exposed bisque, blends the color, and keeps the sharp glazed edge from chipping further.
What is the best filler for a chipped porcelain fireplace tile?
A two-part porcelain epoxy repair kit, epoxy putty stick, or solvent-based porcelain touch-up glaze rated up to 250°F (121°C) is best. Because porcelain tile is vitrified and absorbs 0.5% water or less, standard drywall spackle, caulk, and wood filler cannot grip the dense surface and will quickly peel away.
How much heat can porcelain tile repair epoxy withstand?
Most two-part tile repair epoxies, epoxy putties, and solvent-based porcelain glazes withstand continuous temperatures up to 250°F (121°C), with some heavy-duty epoxies rated to 300°F. That covers normal radiant heat on an outer fireplace surround face, but you should never use cosmetic epoxy inside the firebox or where surface temperatures exceed 250°F.
Do you need special adhesive for tile around a fireplace?
Yes, when replacing a full fireplace surround tile, use a polymer-modified thinset mortar meeting ANSI A118.4 (or ANSI A118.15 for tiles 15 inches or larger) over non-combustible 1/2-inch cement backer board. Never use premixed organic mastic (ANSI A136.1), which degrades above 100°F–125°F. For a small surface chip, you only need tile repair epoxy, not setting mortar.
How long does tile chip filler take to cure before lighting a fire?
Wait at least 24 hours after applying your final coat of epoxy or porcelain glaze before lighting the fireplace. Although most repair compounds feel dry to the touch within 10 to 30 minutes, exposing uncured resin to fireplace heat early can cause bubbling, shrinkage, yellowing, and strong chemical odors.
Can I use the fireplace after repairing a chipped tile?
Yes, you can use the fireplace normally once the repair compound has cured for a full 24 hours and no solvent odor remains. If the repaired tile sits right next to the firebox opening, check it after your first fire to ensure the surface stays well below the product’s 250°F limit and shows no discoloration.
Conclusion
Repairing a chipped tile on a fireplace surround takes less than an hour of hands-on prep when the damage is small and the tile is firmly attached. Clean away all soot, lightly scuff only the broken edge with 320-grit sandpaper, apply a color-matched two-part epoxy or porcelain glaze in thin layers, and give the patch a full 24 hours to cure before lighting your next fire. If you discover hollow-sounding tiles, full-depth cracks, or heat damage near the firebox opening, skip the cosmetic patch and replace the tile with polymer-modified thinset or call a certified chimney and tile professional.
Sources
- Tile Council of North America (TCNA): Porcelain vs. Non-Porcelain: backs the 0.5% water absorption threshold separating impervious porcelain from non-porcelain ceramic tile under ANSI A137.1.
- J-B Weld: WaterWeld Epoxy Putty Specifications: backs the 25-minute set time, 1-hour hard cure, 4,370 PSI bond strength, and 250°F temperature resistance for two-part epoxy putty repairs.
- Custom Building Products: AcrylPro ANSI A136.1 Technical Data Sheet: backs temperature and radiant-heat limitations (100°F max ambient cure, prohibited over radiant heat) for organic Type 1 tile mastic.
- Chimney Safety Institute of America (CSIA): Homeowner Safety Resources: backs annual NFPA 211 Level 1 chimney and fireplace inspection standards for wood and gas units.
- Better Homes & Gardens: Fireplace Tiling Errors: backs heat-rated material selection, surface preparation, and code-awareness guidance for fireplace tile.
- The Spruce: Tile Adhesive and Mortar Guide: backs the distinction between thinset, epoxy mortar, and mastic-style tile adhesives.
- Kiplinger: Home Winter Maintenance Checklist: backs regular fireplace, chimney, and heating-equipment inspection advice.
- Southern Living: Wood-Burning Fireplace Safety: backs annual inspection, smoke warning signs, and creosote-related safety context.
- ISO 13006:2018 Ceramic Tiles: backs porcelain and ceramic tile classification context.








[…] How to Fix Chipped Tile on a Fireplace Surround: Step-by-Step Guide […]