Peeling paint near living room windows is usually a sign of moisture, poor adhesion, old paint buildup, or damaged trim. You can repair it yourself if the surface is dry, sound, and lead-safe, but the best results come from fixing the cause first, removing only loose paint, priming bare spots, and repainting with thin, even coats.
Quick Answer
To fix peeling paint around windows, first check for moisture, leaks, soft wood, and possible lead paint. Scrape only loose paint, sand smooth if safe, clean the dust, repair gaps or holes, prime bare areas, then repaint with thin coats of satin or semi-gloss interior trim paint.
Key Takeaways
- Do not scrape or sand old window paint until you know whether lead paint may be present, especially in homes built before 1978.
- Primer and paint will not solve peeling if condensation, leaks, failed caulk, or rotted trim are still active.
- Use wood filler for small gouges, paintable caulk for trim gaps, and epoxy or replacement trim for soft or rotted wood.
- Thin coats, clean surfaces, and label-based dry times produce a smoother and longer-lasting finish than one heavy coat.
At a Glance
| Time Required | About 1–2 hours of hands-on work, plus primer, paint, and filler drying time |
| Difficulty | Beginner to moderate, depending on moisture damage and paint age |
| Tools Needed | Scraper, sanding sponge, putty knife, caulk gun, brush, painter’s tape, drop cloth, shop vac or HEPA vacuum, rags, gloves, eye protection, and a properly fitted respirator when dust is created |
| Cost | Usually $20–$75 if you already own basic tools; more if trim repair, testing, or professional help is needed |
Check for Safety and Moisture First
Before you touch peeling paint around a window, slow down and inspect the area. Window trim and sills get more condensation, rubbing, and temperature changes than many other painted surfaces, so peeling often comes back when the real cause is ignored.
Warning: If your home was built before 1978, or if you do not know the age of the paint, do not dry-scrape, dry-sand, or use a heat gun until you have ruled out lead-based paint. The EPA explains that homes built before 1978 are more likely to contain lead-based paint and that deteriorating paint on windows and window sills can be a hazard. Start with EPA guidance at Protect Your Family from Sources of Lead and consider a lead-safe certified professional before disturbing the surface.
Look for these common causes of peeling paint near windows:
- Condensation: Water beads on glass, runs onto the sill, and repeatedly wets the paint.
- Failed caulk: Cracked or missing caulk lets air and moisture enter around the trim.
- Window leaks: Stains, soft wood, swollen trim, or recurring dampness can point to a leak.
- Poor adhesion: Paint may peel if the previous surface was dusty, glossy, greasy, or unprimed.
- Old paint buildup: Too many thick coats can crack at edges and corners.
- Rot or damaged wood: Paint will not hold well on soft, punky, or crumbling trim.
The EPA’s mold guidance is simple: moisture control is the key to mold control. If condensation collects on windows, walls, or pipes, dry it quickly and reduce the moisture source. The EPA also recommends keeping indoor relative humidity below 60%, ideally between 30% and 50%. You can read the guidance at A Brief Guide to Mold, Moisture and Your Home.
Gather Your Essential Supplies
Having everything ready makes the repair cleaner and safer. Choose supplies based on the condition of the trim rather than grabbing one filler for every problem.
- Protection: Drop cloths, painter’s tape, gloves, eye protection, and a properly fitted respirator when sanding or creating dust.
- Dust control: Shop vac with a fine-dust filter or a HEPA vacuum, damp rags, and a trash bag for debris.
- Removal tools: A stiff putty knife or paint scraper. Use a wire brush only with care because it can scratch wood and create more dust.
- Sanding tools: 180- to 220-grit sanding sponge for feathering paint edges after loose paint is removed.
- Repairs: Wood filler for small holes and gouges, paintable acrylic-latex caulk for trim seams, and epoxy wood filler for minor firm wood damage.
- Primer: A high-adhesion, stain-blocking primer labeled for the surface and conditions. Use the product label for dry and recoat times.
- Paint: Interior trim paint in satin, semi-gloss, or gloss. These sheens are easier to wipe clean than flat paint around windows.
- Application tools: Angled sash brush, small roller if needed, stir stick, paint cup, and clean rags.
Note: Do not paint over active mildew, damp wood, or soft trim. If the area smells musty, stays wet, or has mold larger than a small patch, fix the water source and consider professional help before repainting.
Recommended Products
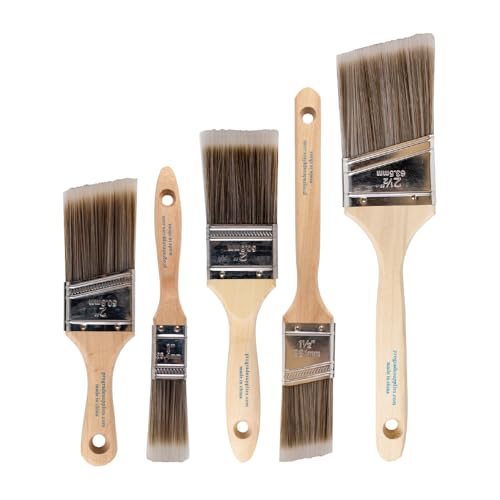
COMPLETE 5-PIECE BRUSH SET FOR EVERY PAINTING TASK — Includes 1 Inch Flat, 1.5 Inch Angle, 2 Inch Flat, 2 Inch Angle Stubby, and 2.5 Inch Angle brush giving you every size professional painters use daily. Get all 5 for less than the price of a single brush from hardware store brands — professional grade performance at a fraction of the cost. Perfect for walls, trim, cabinets, doors, furniture, and detailed cutting-in work on any project.

WHAT'S IN THIS 10 PIECE PAINT KIT FOR WALLS: includes one plastic paint tray; one 9 inch roller frame; one 4 inch mini roller frame; two 9 inch microfiber roller covers (1/2 inch nap); two 4 inch microfiber roller covers (1/2 inch nap); one 1 inch flat brush; one 1.5 inch angle sash brush; one 2 inch angle sash brush

Bates paint roller kit includes 19 essential pieces for home painting, prep, and cleanup projects.
Remove Peeling Window Paint Safely
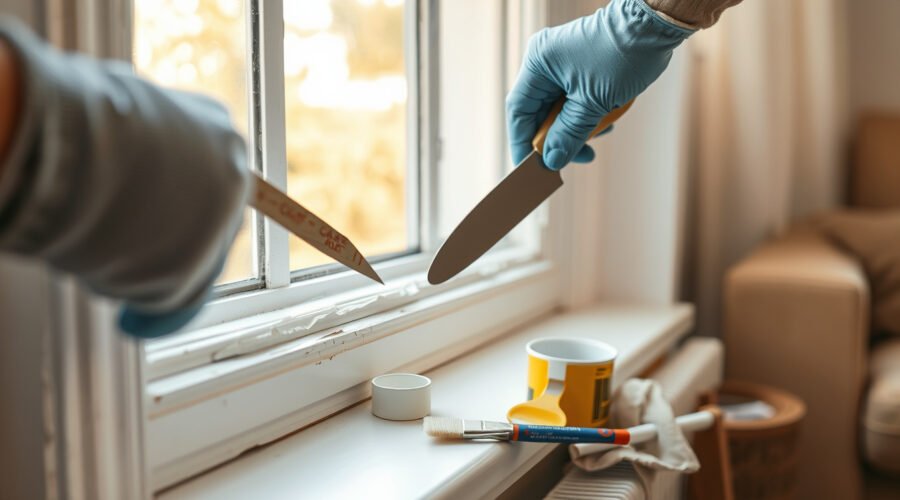
Once the area is dry and safe to work on, remove only the paint that is loose, curled, cracked, or no longer bonded. The goal is not to strip the entire window trim unless the finish is failing everywhere.
- Protect the room. Lay a drop cloth under the window and tape off the glass, wall, and hardware if needed.
- Test the edges. Use a scraper or putty knife at a low angle. If paint lifts easily, remove it. If it is bonded firmly, leave it in place.
- Feather the transition. After loose paint is gone, lightly sand the edge where bare wood or old primer meets the remaining paint. A 180- to 220-grit sanding sponge works well for most trim.
- Clean thoroughly. Vacuum dust, then wipe with a damp rag. Let the surface dry fully before filler, caulk, primer, or paint.
If sanding reveals shiny old paint, scuff it lightly so primer can grip. If sanding exposes dark water stains, soft wood, or a musty smell, pause and deal with the moisture issue before moving forward.
Recommended Products

10 in 1 Putty Knife: A mutifunctional paint scraper for home Improvement and professional painters

❤️【6 Pcs Includes】This Harniruco Putty Knife Set of 6 with variety of size from 1.5" 2" 3" 4" 6" 8"inches,The putty knife is made of high-quality plastic raw materials, with uniform color and long-lasting use

Sturdy Design: The blade and handle in our drywall knife are processed in one piece, which is very sturdy. Stainless steel blade has superior load-bearing performance for a long time to use
Repair Holes, Gaps, and Damaged Trim
Different defects need different repair materials. Using the wrong one can cause cracking, shrinking, or peeling later.
- Small nail holes and shallow gouges: Use wood filler. Press it in with a putty knife, let it dry or cure as directed, then sand smooth.
- Gaps where trim meets the wall or window frame: Use paintable acrylic-latex caulk. Smooth the bead with a damp finger or caulk tool.
- Deep cracks or small areas of firm wood damage: Use an epoxy wood repair product if the wood is still structurally sound.
- Soft, punky, swollen, or crumbling wood: Do not rely on paint to hide it. Repair or replace the damaged trim first.
Pro Tip: Caulk after sanding and dust cleanup, but before the final paint coats. Primer order depends on the product and repair: many bare wood areas should be primed before caulk, while the final paint should cover both the primed repair and cured paintable caulk.
Recommended Products

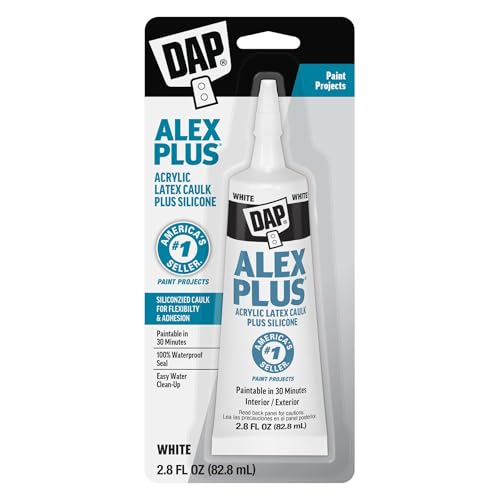
Paintable caulk in a 2.8 ounce size is ideal for small touch-ups and repairs, has strong multi-surface adhesion and won't shine through or discolor paint

Paintable caulk has strong multi-surface adhesion and won't shine through or discolor paint
Prime Bare Spots for Lasting Results
Primer helps new paint bond to bare wood, old paint edges, filler, and stained areas. It also helps prevent uneven flashing, where repaired spots show through the finish coat.
For most interior window trim, choose a bonding or stain-blocking primer labeled for trim and previously painted surfaces. If you are covering water stains, tannin bleed, or old discoloration, use a stain-blocking primer that specifically says it blocks those stains. If the label requires two coats on bare wood or stained areas, follow it.
Apply primer in a thin, even coat. Brush it into edges and corners without leaving heavy ridges. Let it dry for the full label-recommended time before sanding lightly or painting. In a cool or humid room, give primer extra time because moisture slows drying and can weaken adhesion.
Apply Paint in Light Coats for a Smooth Finish
For living room window trim, satin, semi-gloss, or gloss interior trim paint usually performs better than flat wall paint because it resists handling and is easier to clean. Choose your color separately from your sheen; for example, a white paint color can be made in satin, semi-gloss, or gloss depending on the paint line.
- Stir the paint well. Do not shake old paint by hand and assume it is mixed.
- Use an angled sash brush. It gives better control along glass, corners, and trim edges.
- Apply the first thin coat. Brush with the grain of the wood and avoid flooding corners.
- Let it dry as directed. Follow the paint label for recoat time. Wait longer if the room is cool, damp, or poorly ventilated.
- Sand lightly if needed. If the first coat feels rough, use a fine 220-grit sanding sponge, then wipe away dust.
- Apply the second coat. Most repairs look best with two finish coats; high-contrast color changes may need a third light coat.
- Remove painter’s tape while the paint is still slightly wet. Pull it back slowly at an angle to reduce tearing.
Keep the room ventilated while painting and drying. Use low-odor or low-VOC paint if indoor air quality is a concern, and follow all label instructions for ventilation, cleanup, and cure time. The EPA explains that paints and related products can be indoor sources of volatile organic compounds, so ventilation matters during and after painting. Learn more from the EPA’s page on volatile organic compounds and indoor air quality.
Prevent Peeling Paint From Coming Back
A good paint job lasts longer when the window area stays dry and stable. After the paint cures, use these habits to reduce repeat peeling:
- Wipe window condensation when you see it.
- Use kitchen and bathroom exhaust fans to reduce whole-home humidity.
- Keep indoor relative humidity below 60%, ideally 30%–50%.
- Repair cracked caulk around the interior trim before moisture reaches the paint edge.
- Check exterior caulk, flashing, and drainage if the same area keeps staining or peeling.
- Avoid closing painted windows tightly before the paint has cured enough, or the sash may stick.
- Clean trim gently with a damp cloth instead of harsh cleaners that can dull or soften the finish.
Paint failure around windows is often a moisture problem first and a paint problem second. Fix the water source before you focus on the finish.
Troubleshooting Peeling Window Paint
| Problem | Likely Cause | Fix |
| Paint peels again within weeks | Moisture, dust, glossy old paint, or skipped primer | Find the water source, clean better, scuff glossy areas, and spot-prime bare or repaired spots. |
| Bubbles appear under fresh paint | Trapped moisture, heavy coats, or painting before primer dried | Let the area cure, scrape failed paint, dry the surface, reprime, and repaint with thinner coats. |
| Paint feels tacky | Cool air, high humidity, poor ventilation, or thick paint | Increase ventilation, avoid touching the trim, and allow more cure time before closing windows tightly. |
| Brown or yellow stains bleed through | Water stains, tannins, or old discoloration | Use a stain-blocking primer rated for the stain type, then repaint after the primer dries. |
When to Call a Professional
DIY repair is fine for small, dry, lead-safe areas. Call a professional if any of these apply:
- Your home was built before 1978 and you need to disturb more than a tiny area of old paint.
- The painted surface is damp, soft, swollen, or crumbling.
- You see recurring water stains after rain or during cold weather.
- Mold covers more than a small area or returns after cleaning.
- The window does not close properly, leaks air badly, or has exterior flashing problems.
- Paint is failing across the whole wall or multiple windows, not just one small spot.
For projects that disturb lead-based paint in covered pre-1978 housing, the EPA’s Renovation, Repair and Painting Program requires certified firms and trained workers to use lead-safe work practices. You can review the rule at EPA Lead Renovation, Repair and Painting Program Rules.
Frequently Asked Questions
How do you fix peeling paint around windows?
Check for lead paint risk, moisture, leaks, and damaged wood first. If the area is safe and dry, scrape loose paint, sand the edges smooth, clean the dust, fill holes, caulk gaps, prime bare areas, and repaint with two thin coats of interior trim paint.
How do you repair large areas of peeling paint?
For a large area, first find out why the paint failed. If the paint may contain lead, do not sand or scrape it without lead-safe guidance. For lead-safe surfaces, remove loose paint, feather the edges, repair damaged areas, prime all bare or patched spots, then repaint in thin coats.
What prep work stops paint from peeling?
The most important prep is making sure the surface is dry, clean, dull, and sound. Remove loose paint, sand edges smooth, wipe away dust, repair holes and gaps, prime bare surfaces, and control condensation or leaks before applying the finish paint.
Can I paint over peeling paint if I use primer?
No. Primer cannot glue down paint that is already loose. Scrape off peeling areas first, feather the edges, clean the dust, and then prime bare or repaired spots. Painting over loose edges usually causes the new coat to peel with the old one.
Why does paint peel around windows more than other areas?
Windows collect condensation, experience temperature swings, and have joints where caulk can crack. Paint can also fail where sashes rub, where old glossy paint was not scuffed, or where moisture enters through leaks or damaged trim.
Should I use caulk or wood filler around window trim?
Use paintable caulk for flexible gaps and seams where trim meets the wall or window frame. Use wood filler for nail holes, chips, and shallow gouges in the trim itself. Use epoxy or replace the trim if the wood is soft, rotted, or structurally damaged.
Conclusion
Fixing peeling paint near your living room windows is not just a cosmetic touch-up. It is a small repair that works best when you treat the cause, protect yourself from dust hazards, prepare the surface correctly, and use primer and paint the way their labels recommend. Start with moisture and lead safety, remove only failed paint, repair the trim, prime carefully, and repaint with light coats. With those steps, your window area will look cleaner and the new finish will have a much better chance of lasting.
Sources
- U.S. EPA — Protect Your Family from Sources of Lead — backs up pre-1978 lead-paint risk, window/sill hazards, and lead-dust concerns during repairs.
- U.S. EPA — Lead Renovation, Repair and Painting Program Rules — backs up lead-safe certification and renovation requirements for covered pre-1978 projects.
- U.S. EPA — A Brief Guide to Mold, Moisture and Your Home — backs up moisture-control guidance, condensation response, and indoor humidity targets.
- U.S. EPA — Volatile Organic Compounds’ Impact on Indoor Air Quality — backs up ventilation and indoor air quality considerations when using paints and coatings.