Replacing a robot vacuum battery at home starts with matching the correct model and voltage to the manufacturer’s specifications. The unit should be powered off, then opened with the proper screwdriver after basic safety precautions are in place. The old battery can be disconnected and replaced, but secure reassembly and a charging test matter just as much. A few common mistakes can cause failure, and warranty limits may change the process.
Choose the Right Robot Vacuum Battery
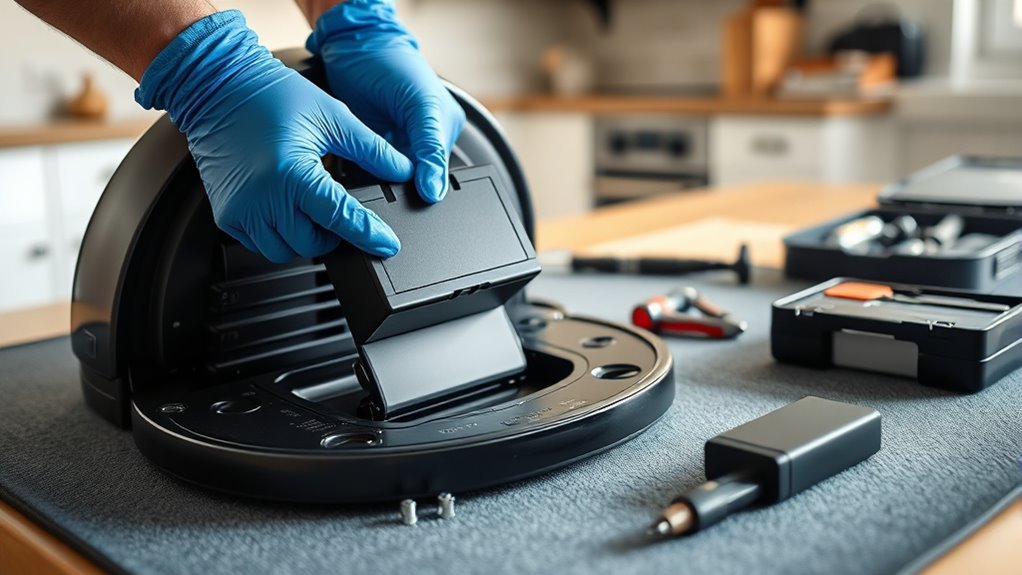
Selecting the correct replacement battery begins with verifying the robot vacuum’s model number and consulting the owner’s manual for the specified battery type. This prevents mismatched parts and preserves reliable operation.
Verify your robot vacuum’s model number and manual first to ensure the correct replacement battery.
For robot vacuums, the most common chemistries are lithium-ion and nickel metal hydride; Li-ion units usually deliver longer service life, often exceeding 1000 charging cycles. A manufacturer-approved replacement battery is the safest choice because it supports intended performance and reduces the risk of electrical or thermal damage.
When cleaning demands are extended, a spare battery can increase autonomy and reduce downtime, especially on models with limited runtime. Compatibility should remain the primary criterion, not price alone.
The old battery should later be routed to proper recycling, since responsible disposal limits environmental harm and supports material recovery. Selecting the right component gives users practical control over maintenance and helps keep robot vacuums operating efficiently.
Gather a Screwdriver and Safety Gear
With the correct replacement battery identified, the next step is to prepare the tools and protective equipment needed for safe access to the compartment. A flat head screwdriver and a cross head screwdriver should be placed within reach, since different screws may secure the housing.
Safety goggles should be worn before any panel is touched, protecting the eyes from dust or fragments that can be released during disassembly. Gloves add a second layer of defense against sharp edges and exposed components, preserving control and reducing injury risk.
The work area should be bright and uncluttered so screws, connectors, and small parts remain visible and recoverable. The owner’s manual should be kept open beside the robot vacuum, as it provides model-specific guidance on fasteners, access points, and cautions.
Proper preparation minimizes mistakes and gives the user disciplined, independent control over the repair process.
Power Off and Remove the Battery Cover
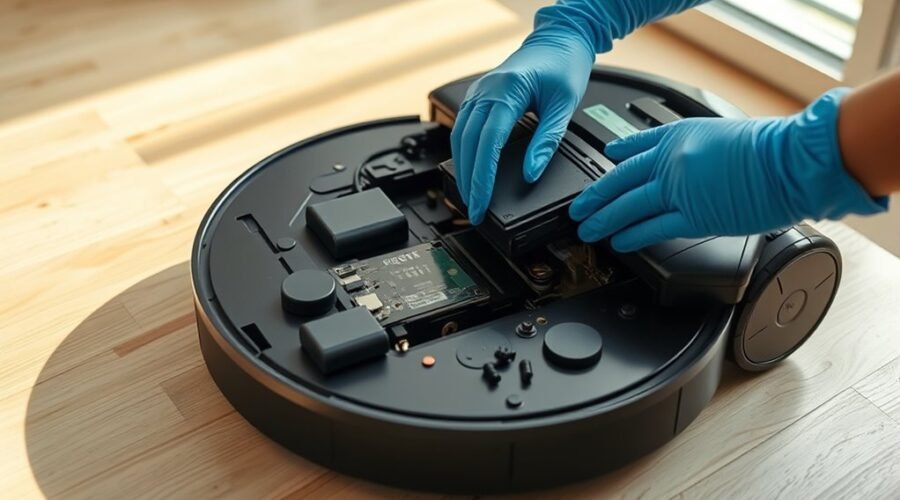
The robotic vacuum cleaner should be powered off completely before any fasteners or panels are removed, preventing accidental activation during service. This simple control preserves user autonomy and reduces the risk of surprise movement. Next, the technician should loosen the Edge Sweeping Brush screw with a flat head screwdriver to create access to the underside. Then the bottom assembly can be opened by removing five cross-head screws and setting them in order for reassembly. Careful handling is essential when working around the battery compartment; the objective is to remove the battery cover without stressing adjacent parts or stripping threads.
| Action | Purpose |
|---|---|
| power off | Prevent activation |
| Loosen brush screw | Improve access |
| Remove five screws | Open bottom cover |
| Track fasteners | Support reassembly |
| remove the battery cover | Expose battery bay |
Once the cover is clear, the unit is prepared for the next step, with internal hardware still intact and serviceable.
Disconnect the Old Battery
With the robot vacuum powered off and unplugged, the battery connectors should be located and released first.
The connector clips are then gently unfastened, avoiding strain on the wires or terminals.
Once detached, the battery can be lifted out carefully while preserving its orientation for reinstallation.
Power Off First
Before removing the battery, the robotic vacuum cleaner should be powered off completely and disconnected from any charger to eliminate the risk of accidental activation. This initial shutdown preserves control, reduces electrical hazard, and creates a safer path to replace the battery without interference.
The unit should be confirmed unplugged and free of charging contacts before any further handling. If access to the compartment requires it, the Edge Sweeping Brush screw may be loosened with a flat head screwdriver, but only as needed and with care.
The old battery should then be handled gently, with attention to swelling, leakage, or physical damage, since such signs call for proper disposal. Precision at this stage supports safe, independent maintenance and prevents avoidable failure.
Unclip Battery Connectors
Once the robot vacuum is powered down, the battery connectors can be located within the housing and separated with care. The battery should remain undisturbed while the connectors are examined for clips, plugs, tabs, or locking features. A controlled release prevents strain on wiring and preserves the battery interface for the next installation.
- Identify the connector type before movement.
- Release any tab or latch first.
- Unclip or pull the connectors apart gently.
- Inspect both connectors for corrosion or damage.
No excessive force should be applied; resistance usually indicates a hidden retainer that still must be freed.
After disconnection, the area should be checked for clean contact surfaces and intact wiring. This deliberate method keeps the process precise, practical, and safe, supporting independent maintenance at home.
Lift Battery Carefully
After the connectors are released, the battery compartment can be opened if a screw or cover remains in place, using the correct screwdriver to remove any fasteners. The robot vacuum should stay powered off throughout the procedure to prevent electrical hazards. The old vacuum battery is then lifted straight out, not angled, so connectors and wiring remain intact. A damaged pack should be noted before disposal.
| Check | Action | Result |
|---|---|---|
| Power off | Confirm shutdown | Safe handling |
| Fasteners | Remove cover | Access gained |
| Connectors | Disconnect gently | No damage |
| Lift path | Raise straight | No bending |
| Battery case | Inspect swelling | Proper disposal |
This controlled method helps replace the vacuum battery without stressing components, preserving the machine’s freedom to operate reliably.
Install the New Battery Securely
The replacement battery should match the vacuum model specified in the owner’s manual before installation begins.
Its contacts must be aligned precisely with the terminals in the battery compartment, then pressed firmly into place until it clicks and remains seated without movement.
Forcing the battery should be avoided, as it can damage the pack or the vacuum housing.
Align Battery Contacts
Align the new battery so its terminals line up exactly with the connectors in the battery well, then press it gently into place until it clicks and sits securely. This battery maintenance step preserves reliable power delivery and reduces avoidable wear.
- Inspect the compartment for dust, fragments, or trapped cables.
- Confirm the terminals match the connector orientation before contact.
- Apply steady, light pressure; do not force the fit.
- Check the contact points for cleanliness and absence of corrosion.
A clean alignment lets the robot vacuum resume autonomous work with fewer interruptions.
If resistance is felt, withdraw the battery and reassess the fit rather than pushing harder. Precise placement protects the connectors, supports efficient charging, and keeps maintenance straightforward and independent.
Seat Battery Firmly
With the correct replacement battery confirmed for the specific robot vacuum model, it should be positioned in the battery well so the terminals match the connectors exactly.
The battery must sit flush, and no force should be used. A careful downward press should follow until a click is heard or felt, showing the battery is firmly seated.
During this step, metal tools should stay away from the terminals to prevent short-circuiting and damage.
Once secured, the robot vacuum can be reassembled with attention to every cover, screw, and latch. Each part should lock into place so nothing shifts during operation.
A properly seated battery supports reliable power delivery, clean independence from service calls, and steady performance from the robot vacuum.
Put It Back Together and Tighten the Screws
Once the new battery is seated, the robotic vacuum’s bottom cover should be carefully repositioned for a snug fit, with the Edge Sweeping Brush clipped firmly back into place before securing the assembly. The Replenishment Kit for maintenance with iRobot® Accessories supports orderly reassembly by keeping replacement parts ready and matched.
- Align the cover evenly over the housing.
- Verify that no wires are trapped or bent.
- Tighten all five screws with a cross head screwdriver.
- Confirm the brush is fully latched and flush.
Each screw should be turned until secure, but not overtightened, to preserve threads and maintain a stable seal.
Tighten each screw securely, but avoid overtightening to preserve threads and maintain a proper seal.
A final inspection should confirm that the shell sits flat and that internal components remain unobstructed. This careful reassembly protects the vacuum’s inner systems, reduces vibration, and restores the machine to a clean, self-reliant state, ready for the next operational check.
Test Charging and Runtime
Verify charging by connecting the charger securely and checking for indicator lights that confirm the robot vacuum is receiving power. During this test charging phase, observe whether the unit reaches full charge without interruption. A stable charging cycle supports reliable runtime and reduces dependence on repeated manual intervention.
| Battery Type | Typical Cycles | Runtime Signal |
|---|---|---|
| Lithium-ion | 1000+ | Longer, steadier |
| NiMH | ~500 | Shorter, less durable |
| Replaced pack | Varies | Compare after use |
After charging, run a standard cleaning cycle and record runtime. If operation falls below 30 minutes, the battery may no longer sustain useful service. A successful replacement should deliver a clear increase in runtime, demonstrating restored mobility and practical autonomy. Regular software updates can also support battery management, helping maintain efficiency over time.
Fix Charging Issues and Check Warranty
If the robot vacuum still fails to charge, the charger and wall outlet should be tested first to rule out external power faults. A detached inspection can then focus on the battery and its contacts. Swelling, leakage, or casing distortion signals immediate replacement, because damaged cells can compromise charging safety and device freedom from failure.
If a new battery does not restore normal operation, reset the vacuum using the manufacturer’s procedure, since control faults can mimic power loss.
- Confirm the charger is outputting power.
- Inspect the outlet with another device.
- Examine the battery for swelling or damage.
- Verify warranty status before purchasing replacements.
Warranty review matters: many brands cover battery replacements for a defined period or under specific conditions. Manufacturer-approved parts should be used to preserve warranty coverage and guarantee compatibility.
This disciplined approach reduces wasted effort, restores reliable charging, and keeps the machine operating on terms set by the user, not by avoidable faults.
Frequently Asked Questions
How Many Years Does a Robot Vacuum Battery Last?
A robot vacuum battery typically lasts 2 to 5 years, depending on battery types and usage. Battery lifespan improves with proper charging, maintenance, and room-temperature storage; reduced runtime usually signals diminished capacity and replacement need.
Is It Easy to Replace a Roomba Battery?
Yes, it is generally easy. Most Roomba models use removable battery types and require only basic replacement tools, usually a flat-head and cross-head screwdriver. The task is practical, quick, and typically completed in 10–15 minutes.
How Do I Replace the Battery in My Robot Vacuum Cleaner?
First, it powers off like a silent machine at rest. He removes screws, disconnects the old battery, matches battery types, fits the new pack, reassembles, then tests operation; maintenance tips preserve freedom through reliable cleaning.
Can Cordless Vacuum Batteries Be Replaced?
Yes, cordless vacuum batteries can be replaced with compatible battery types. Proper replacement tools are required, and the owner’s manual should confirm the part ID. Reduced runtime, charging failure, or swelling indicate replacement.
Conclusion
Replacing a robot vacuum battery is a practical maintenance task when done with the correct model, proper tools, and basic safety precautions. Why risk poor performance or damage by using an incompatible battery or skipping a final test? After installation, confirm secure reassembly, verify charging behavior, and run a short cleaning cycle to ascertain stable runtime. If charging problems persist, check warranty coverage or manufacturer support, and recycle the old battery through an approved disposal program.