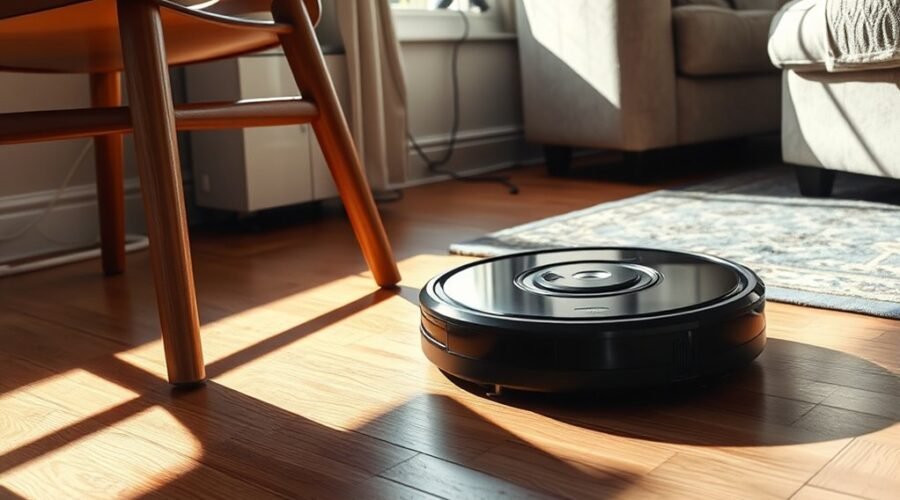
If your robot vacuum keeps bumping into furniture, dirty sensors, a stuck bumper, or poor obstacle detection may be responsible. Dark furniture, glass surfaces, and narrow spaces can also confuse navigation. Some gentle contact is normal, but repeated hard impacts deserve attention. Here’s how to find the cause and stop unnecessary collisions.
Quick Answer
Robot vacuums bump into furniture when their sensors cannot detect obstacles accurately or their navigation system relies on physical contact. Clean the sensors, inspect the front bumper, remove floor clutter, and create no-go zones around troublesome furniture. If collisions continue, check the saved map, update the software, and consider a model with better obstacle avoidance.
Key Takeaways
- Gentle bumper contact can be normal. Repeated hard impacts or pushing furniture may indicate a problem.
- Black, transparent, reflective, and unusually low objects are difficult for some sensors to detect.
- Magnetic strips work only with compatible robot vacuums. Ordinary tape does not create an electronic boundary.
- Furniture clearance must exceed the robot’s full height, including its raised laser sensor.
- LiDAR mapping improves route planning, but dedicated obstacle detection is also important for avoiding small objects.
Why Do Robot Vacuums Bump Into Furniture?
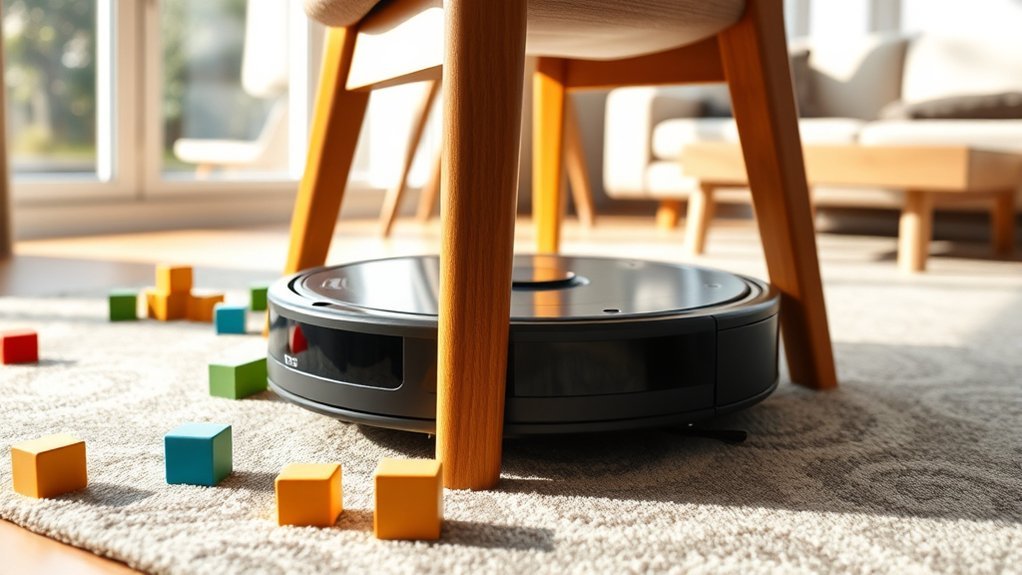
Robot vacuums bump into furniture because their sensors cannot always measure an object’s distance, shape, or height. Some machines also use their bumpers to identify obstacles during cleaning.
That means not every collision indicates a malfunction. Older robots and models with basic navigation may gently touch walls or furniture before changing direction.
According to iRobot’s bumper troubleshooting guidance, Roomba vacuums use light-touch bumper technology. Certain models may have trouble slowing down near extremely dark objects or obstacles narrower than 2 inches (50 mm).
However, strong impacts, repeated pushing, and collisions that suddenly become more frequent can signal a problem.
Common causes include:
- Dirty sensors: Dust, fingerprints, or pet hair block infrared, laser, or camera sensors.
- Stuck bumpers: Trapped debris prevents the front bumper from moving and detecting contact correctly.
- Dark furniture: Black finishes may reflect too little infrared light for reliable detection.
- Reflective surfaces: Mirrors, glass, and polished metal can confuse optical sensors.
- Low obstacles: Chair legs, furniture bases, and narrow objects may sit outside the sensor’s detection area.
- Poor room layout: Tight spaces and uneven furniture legs can trap the vacuum.
- Outdated navigation data: Changed furniture positions or mapping errors can produce inefficient routes.
Some models also struggle in low light or direct sunlight. Camera-based navigation may require enough room lighting to recognize smaller objects.
To identify the problem, watch where the vacuum makes contact. If it bumps everything, inspect its hardware. If it only hits one table or sofa, investigate that obstacle and the surrounding layout.
Clean the Sensors and Front Bumper
Cleaning the sensors and front bumper is the best first troubleshooting step. Dust can interfere with obstacle detection, while a jammed bumper may prevent the robot from recognizing contact.
Turn off the vacuum before inspecting its sensors. Use the cleaning method recommended for your model because some manufacturers specify dry cleaning while others permit a slightly damp cloth.
Clean Sensors Regularly
Clean sensors help your robot vacuum detect furniture and maintain a steady cleaning path. Even a thin layer of dust can reduce detection accuracy.
Follow these steps:
- Power off the robot. Disconnect it from the charging dock if the manual recommends doing so.
- Locate the sensors. Check the front obstacle sensors, side sensors, laser window, and camera if fitted.
- Wipe each sensor gently. Use a clean, dry microfiber cloth unless your manufacturer specifies another method.
- Remove trapped hair. Check the edges of sensor windows and surrounding openings.
- Inspect for damage. Look for deep scratches, cracks, or loose components.
- Run a test. Start cleaning in an open area with a visible obstacle and observe whether the robot slows down.
Avoid spraying cleaning solution directly onto sensors. Liquid entering electronic components can cause damage.
Check the sensors whenever you notice poor navigation. Homes with pets or heavy dust may need more frequent maintenance.
Check Front Bumper
The front bumper detects physical contact and helps the robot change direction. If it becomes stuck, the vacuum may continue pushing against furniture instead of turning away.
With the vacuum switched off, gently press the bumper at different points. It should move and return to its normal position without sticking.
Check for:
- Hair or debris trapped around the bumper edges.
- Dust buildup behind accessible bumper openings.
- Visible cracks or deeply scratched sensor covers.
- A bumper that remains pressed inward.
- Uneven movement between the left and right sides.
Clean accessible areas with a soft cloth or brush. Do not force the bumper or disassemble it unless the manufacturer’s service instructions permit it.
If the bumper still sticks after cleaning, the problem may involve its springs, contact switches, or internal sensors.
Remove Sensor Obstructions
Sensor obstructions can include more than ordinary dust. Pet hair, adhesive residue, protective film, and debris lodged between moving parts can all affect navigation.
Check the entire front sensor area and clear any visible obstruction. Also inspect the laser turret or camera cover if your model has one.
Some robots use sensors near their wheels or underside to measure movement and detect floor edges. Keep those areas clean according to the user manual.
After cleaning, observe whether the vacuum:
- Slows down before reaching large furniture.
- Turns away after gentle bumper contact.
- Stops repeatedly striking the same obstacle.
- Follows a more consistent path around chair legs.
Manufacturer guidance supports this approach. ECOVACS obstacle-avoidance troubleshooting identifies dirty sensors and strong reflections as possible causes of collisions. It also recommends customer support when significant impacts continue.
Pro Tip: Test the robot beside the same chair or table before and after cleaning its sensors. Use the same furniture position and lighting. This helps you determine whether maintenance improved detection or whether the obstacle itself remains difficult to recognize.
Fix Problems With Dark Furniture and Glass
Dark furniture and glass can confuse robot vacuum sensors because they reflect light differently from ordinary solid surfaces. Black finishes may absorb infrared signals, while glass and mirrors can reflect or redirect them.
As a result, your robot may approach an object without slowing down or misjudge where a wall begins.
These problems commonly appear around black table legs, mirrored cabinets, sliding glass doors, and polished metal furniture.
Try these fixes:
- Identify the troublesome surface. Watch whether collisions occur mainly around dark, transparent, or reflective objects.
- Improve room lighting. Give camera-based obstacle detection enough light to recognize furniture.
- Reduce direct glare. Close curtains when strong sunlight interferes with navigation.
- Add a visible boundary. Use a stable, sensor-visible barrier or a suitable temporary marker near difficult glass surfaces.
- Create a restricted zone. Keep the robot away from furniture it repeatedly fails to recognize.
Light-colored mats or temporary barriers may help in some situations by creating a clearer visual boundary. However, they are not guaranteed to improve every infrared or laser sensor.
For fragile furniture, a no-go zone is usually more dependable than experimenting with surface reflectivity.
Do not place unstable decorations or breakable objects in the robot’s path just to create a barrier.
Set Up No-Go Zones and Virtual Barriers
No-go zones prevent compatible robot vacuums from entering areas where they repeatedly hit furniture or become trapped. They are especially useful around narrow chair arrangements, low sofas, loose cables, and fragile decorations.
You can create digital boundaries on supported mapping models or use compatible physical boundary accessories.
No-Go Zones Setup
To create a no-go zone, first make sure your robot vacuum has a saved home map and supports restricted areas.
On compatible ECOVACS models, the ECOVACS virtual boundary instructions describe opening Map, selecting Virtual Wall, and creating line-shaped or rectangular boundaries.
The exact controls depend on the model and app version.
Follow this general process:
- Complete a home map. Allow the robot to map the rooms you want cleaned.
- Open the map editor. Find the virtual wall or no-go zone feature.
- Select the problem area. Mark the space around furniture that causes repeated collisions.
- Adjust the boundary. Make sure the robot can still reach nearby safe areas.
- Save the map. Confirm that the restricted area appears correctly.
- Test the boundary. Start a cleaning session and watch whether the robot avoids it.
Some ECOVACS models also support different boundaries for vacuuming and mopping.
When you rearrange furniture or move the charging station, check whether the saved map still matches your home.
For multi-floor cleaning, use the correct floor map before starting a session.
Virtual Barrier Options
Virtual barriers help prevent collisions by keeping the robot away from difficult spaces. The right option depends on the navigation technology and accessories your machine supports.
| Option | Function |
|---|---|
| App no-go zones | Block selected areas on a saved map |
| Magnetic strips | Create boundaries for compatible models |
| Boundary tape | Works only when supported by the robot’s boundary-detection system |
| Virtual wall emitters | Create electronic barriers for supported models |
| Physical blockers | Prevent entry without requiring app features |
| Software updates | May improve navigation and boundary handling |
Magnetic strips are not universal. For example, eufy’s boundary strip compatibility guide lists supported models and confirms that some RoboVacs cannot recognize magnetic boundaries.
Ordinary adhesive tape does not function as a magnetic or electronic boundary unless a compatible detection system is present.
Choose app-based restrictions when available. For robots without mapping features, stable physical blockers can prevent unwanted entry.
Stop Your Robot Vacuum From Getting Stuck
A robot vacuum often gets stuck because the available space is too narrow, furniture sits too low, or loose objects interrupt its path. Preventing these traps also reduces repeated collisions.
Prepare the room before cleaning:
- Clear cables: Secure charging cords and other loose wires away from the floor.
- Adjust chairs: Move closely packed chairs to create a wider cleaning path.
- Secure loose rugs: Flatten curled edges and remove fringe that could catch the brushes.
- Check low furniture: Look for gaps where the robot can enter but cannot turn or reverse.
- Remove small obstacles: Pick up toys, shoes, and objects that may block narrow passages.
- Protect difficult areas: Use mapped restrictions or stable physical barriers.
Some furniture designs create repeated traps. U-shaped chair bases, narrow leg clusters, and sofas with uneven clearance can make the robot circle without finding an exit.
Temporary foam barriers or carefully positioned blockers may help. Keep them secure so the robot cannot push them into a worse position.
If the vacuum becomes trapped in the same place during several cleaning runs, permanently restrict that area rather than repeatedly rescuing it.
Also inspect the drive wheels for tangled hair or debris. Restricted wheel movement can make turns less accurate and contribute to poor navigation.
Raise Low Furniture With Risers
Furniture risers can stop a robot vacuum from getting trapped under a sofa, bed, or cabinet. Raising furniture creates additional clearance, allowing the machine to move underneath without striking the frame.
However, 4 inches of clearance is not enough for every robot vacuum. The required height depends on the model, especially whether it has a raised laser navigation tower.
For example, eufy’s furniture clearance guidance lists a height of 2.85 inches (72.5 mm) for certain Bounce and Dynamic Navigation models. Its iPath Laser Navigation series is approximately 3.96 inches (101 mm) tall, with some models requiring slightly more space.
Even when the gap is marginally higher than the robot, it may still become stuck.
Before installing risers:
- Measure the robot’s total height, including any laser turret.
- Measure the lowest point beneath the furniture.
- Allow extra space for uneven floors and changing clearance.
- Choose risers designed for the furniture’s leg shape and weight.
- Install the risers evenly and confirm that the furniture remains stable.
- Test the robot’s ability to enter, turn, and exit.
Choose furniture risers based on the robot’s full height and the furniture’s weight, not a universal clearance measurement.
Risers may increase the floor area your vacuum can reach while reducing scratches caused by repeated contact.
Warning: Use only furniture risers rated for the full load, including people sitting or lying on the furniture. Unstable risers can cause tipping or collapse. Do not raise furniture when its manufacturer advises against it.
If risers are unsuitable, blocking the gap may be safer than allowing the robot to enter.
Choose a Robot Vacuum With Laser Mapping
A robot vacuum with laser mapping can follow a more organized cleaning route and build a detailed map of your home. This often reduces unnecessary turns and repeated contact compared with basic random navigation.
However, laser mapping alone does not guarantee that the robot will avoid every furniture leg or small object.
Laser Mapping Accuracy
LiDAR, short for Light Detection and Ranging, uses laser measurements to estimate distances and map surrounding obstacles.
A LiDAR-equipped robot can identify room boundaries, plan efficient routes, and often support virtual walls or no-go zones.
Navigation systems differ:
- Random or bounce navigation: The robot changes direction when sensors or bumpers detect obstacles.
- Gyroscope navigation: Motion sensors help the robot follow organized paths without necessarily storing a reusable home map.
- LiDAR mapping: Laser distance measurements create a map for systematic cleaning and navigation.
- Camera-based navigation: Visual information helps the robot recognize its surroundings, with capabilities varying by model.
The eufy navigation technology comparison explains these differences. It places the RoboVac G30 among Dynamic Navigation models that use gyroscope-based route planning rather than stored LiDAR maps.
That distinction matters when comparing a robot’s cleaning pattern with its actual ability to recognize furniture.
Fewer Furniture Collisions
Laser mapping can reduce furniture collisions by helping the robot follow known room boundaries. It is particularly useful for planning routes around large, fixed objects.
Yet chair legs, transparent panels, and objects below the laser’s scanning height may remain difficult to detect.
For better collision prevention, look for a combination of features:
- LiDAR or another reliable home-mapping system.
- Dedicated front obstacle-detection sensors.
- Accurate bumper contact detection.
- Editable no-go zones and virtual walls.
- Effective recognition of small, low, and irregular objects.
Advanced robots may use cameras, structured-light sensors, or other depth-sensing technology alongside mapping.
These systems can improve obstacle avoidance, but you should still expect occasional contact in difficult conditions.
Better Navigation Control
Better navigation control lets you decide where the robot cleans and which areas it avoids. This reduces the need to rearrange furniture before every cleaning session.
Useful controls include saved room maps, restricted zones, room-specific cleaning, and adjustable obstacle-avoidance behavior.
For example, iRobot offers a feature called Careful Drive on certain Roomba models. Its Careful Drive support guidance identifies the s9, s9+, j9, and j9+ as supported models.
On compatible devices, the feature attempts to avoid direct contact with suitable obstacles. However, its effectiveness can decrease around dark surfaces, reflective materials, and low objects.
When choosing a robot, compare its actual avoidance features rather than assuming that every machine with smart mapping behaves the same way.
Also consider software support. Firmware updates may improve navigation, although they cannot correct the physical limitations of missing or damaged sensors.
Pick Brushes That Protect Furniture Finishes
Soft, well-maintained brushes can reduce the risk of scuffing furniture finishes. However, brush placement and the robot’s approach to furniture also affect how much contact occurs.
Many robot vacuums use side-mounted brushes to sweep dirt from edges and corners. These brushes may touch chair legs or baseboards even when the robot’s main body avoids them.
Front-mounted or extended brush designs can sometimes make contact with delicate finishes. Repeated rubbing may gradually wear paint, varnish, or other protective coatings.
To reduce damage:
- Choose softer brush materials: Flexible filaments are generally less abrasive than stiff bristles.
- Inspect for damage: Replace bent, frayed, or warped brushes.
- Remove tangled debris: Hair and hard particles can interfere with normal brush movement.
- Protect delicate furniture: Keep the robot away from easily scratched legs and decorative surfaces.
- Check protruding parts: Make sure brush arms and plastic covers are not broken or loose.
Some models offer brush-related settings or interchangeable components. Use only accessories approved for your vacuum.
Good maintenance helps the robot clean edges without creating unnecessary friction against furniture.
If a brush repeatedly marks a particular cabinet or table leg, restrict that area instead of allowing ongoing contact.
Prevent Mopping Damage to Wood and Upholstery
Robot vacuums with mopping functions can damage sensitive furniture when moisture reaches unprotected wood or nearby upholstery. Excess water may cause staining, swelling, or deterioration of certain finishes.
The risk is greater when the robot repeatedly brushes wet pads against furniture bases or leaves moisture near absorbent materials.
To prevent damage:
- Check floor compatibility. Use wet-cleaning functions only on surfaces approved by the flooring manufacturer.
- Adjust the water level. Select an appropriate moisture setting if the robot supports water-flow control.
- Keep mop pads clean. Remove grit that could scratch floors or contact delicate materials.
- Protect upholstery. Restrict wet cleaning near exposed fabric or absorbent furniture bases.
- Use compatible cleaning solutions. Follow the robot and floor manufacturers’ recommendations.
- Inspect the cleaning path. Look for puddles, excessive moisture, or repeated contact with furniture.
Some robot mops dispense water directly onto the pad, while others use different wet-cleaning systems. Do not assume every model immediately recovers the liquid it releases.
Protective coatings suitable for vulnerable wood can provide additional resistance to moisture, but they do not replace proper water control.
Clean mop pads, suitable water settings, and restricted wet-cleaning zones help protect furniture and sensitive flooring.
Warning: Do not allow standing water near unsealed wood, electrical connections, or moisture-sensitive furniture. If your robot leaks or leaves excessive water, stop mopping and correct the problem before restarting.
Where moisture exposure is a concern, use a no-mop zone or clean that area manually.
Know When to Upgrade Your Robot Vacuum
Consider upgrading when your robot vacuum repeatedly hits furniture despite cleaning its sensors, checking the bumper, and correcting its navigation settings.
Occasional gentle contact is normal for many models. Replacement becomes more reasonable when the machine regularly pushes heavy objects, damages finishes, or cannot navigate your home’s layout.
Before buying another vacuum, try these final checks:
- Clean all accessible navigation sensors.
- Confirm that the front bumper moves freely.
- Inspect the wheels for damage or restricted movement.
- Check the app for navigation errors and available firmware updates.
- Restore or rebuild the map if the layout has changed significantly.
- Test the vacuum in an open room with ordinary furniture.
- Contact the manufacturer if forceful collisions continue.
If the robot works properly in an open room but fails around particular furniture, targeted restrictions may solve the issue without a new purchase.
If it strikes large, visible obstacles everywhere, a sensor or bumper fault is more likely. Repair may be worthwhile when replacement parts and service are available.
When upgrading, prioritize obstacle avoidance, mapping accuracy, dependable bumper detection, and suitable brushes.
A newer model with LiDAR and dedicated object-recognition sensors may offer better performance in cluttered rooms.
Keep in mind that robot vacuums have a limited service life. According to Dyson’s robot vacuum lifespan guidance, typical service life is approximately four to six years, while battery performance may begin declining after two to four years.
Age alone does not mean a robot needs replacing. Proper maintenance, replacement brushes, and a new battery can extend useful operation.
For older robots with limited sensing technology, however, upgrading may provide safer navigation and fewer interruptions.
Frequently Asked Questions
How to Stop a Robot Vacuum From Going Under Furniture?
To stop a robot vacuum from going under furniture, draw a no-go zone on a saved map or block the gap with a stable physical barrier. If you want the robot to clean underneath, measure its full height and increase clearance with properly rated furniture risers.
What Are the Most Common Problems With Robot Vacuums?
The most common robot vacuum problems include getting stuck, dirty sensors, navigation errors, weak suction, tangled brushes, and charging faults. Repeated collisions often come from blocked sensors, a stuck front bumper, difficult surfaces, or a changed room layout. Check those basics before resetting or replacing the robot.
What Robot Vacuum Cleaners Don’t Bump Into Furniture?
No robot vacuum can guarantee zero furniture contact. Models such as the iRobot Roomba s9+, Neato D8, Roborock S7, and ECOVACS DEEBOT T8 use different navigation and detection systems. The eufy RoboVac G30 uses gyroscope-based navigation rather than LiDAR. Compare actual obstacle-avoidance capabilities, not just mapping features.
What Is the Average Lifespan of a Robot Vacuum?
A robot vacuum often lasts about four to six years, although daily use, maintenance, and build quality change that range. Batteries may show reduced performance after roughly two to four years. Replacing brushes, filters, or a worn battery can extend useful service without upgrading the entire machine.
Conclusion
If your robot vacuum keeps bumping into furniture, start by cleaning the sensors and checking the front bumper. Then address difficult surfaces, narrow gaps, and outdated navigation maps.
No-go zones, physical barriers, and safe furniture clearance can prevent repeated collisions. If strong impacts continue after troubleshooting, contact the manufacturer or consider a robot with more advanced obstacle detection. The goal is fewer interruptions, less furniture damage, and reliable cleaning without constant supervision.
Sources
- iRobot: Why Is My Roomba Bumping Into Obstacles Harder Than Before?: Explains light-touch bumper behavior, dark objects, small obstacles, and sensor cleaning.
- ECOVACS: Why Does the Robot Sometimes Fail to Avoid Obstacles?: Supports sensor maintenance, normal light contact, reflective-surface limitations, and service recommendations.
- ECOVACS: How to Set Virtual Boundaries: Explains app-based virtual walls and restricted cleaning areas.
- eufy: Which RoboVacs Work With Boundary Strips?: Identifies compatibility limits for magnetic boundary accessories.
- eufy: RoboVac Getting Stuck Under Furniture: Provides robot height measurements and furniture clearance advice.
- eufy: Introducing RoboVac Navigation Technology: Compares bounce, gyroscope-based, and LiDAR navigation systems.
- iRobot: Careful Drive: Identifies supported models, furniture-avoidance behavior, and limitations.
- Dyson: How Long Do Robot Vacuums Last?: Supports typical service life, battery aging, and maintenance recommendations.