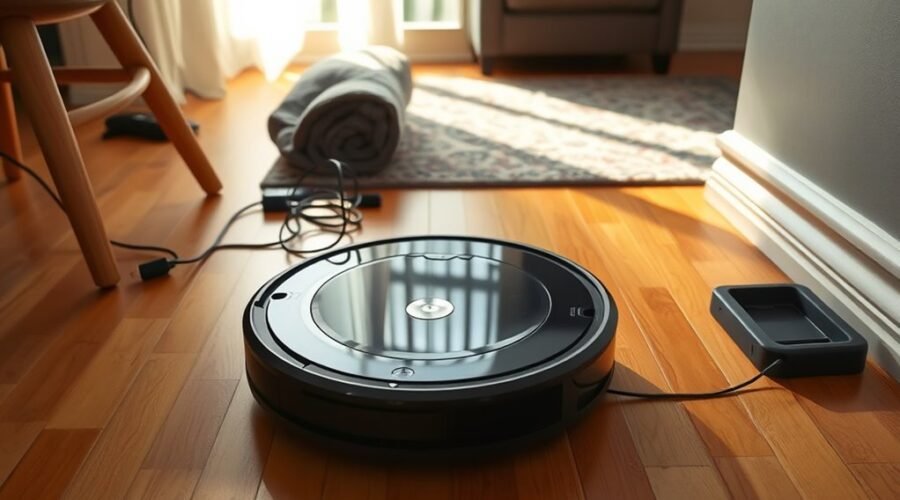
If your robot vacuum keeps stopping during cleaning, the cause may be simpler than you think. A weak battery, tangled brush, blocked wheel, dirty sensor, or charging problem can interrupt a cleaning cycle. The fastest way to fix it is to identify when and where the robot stops, then work through the likely causes in order.
Quick Answer
If your robot vacuum keeps stopping, check its battery level and error message first. Empty the dustbin, remove hair from the brushes and wheels, clean the sensors, and inspect the charging contacts. Clear nearby obstacles and restart the robot. If it still stops, check firmware and charging performance before considering a battery replacement or repair.
Why Does a Robot Vacuum Keep Stopping Mid-Clean?
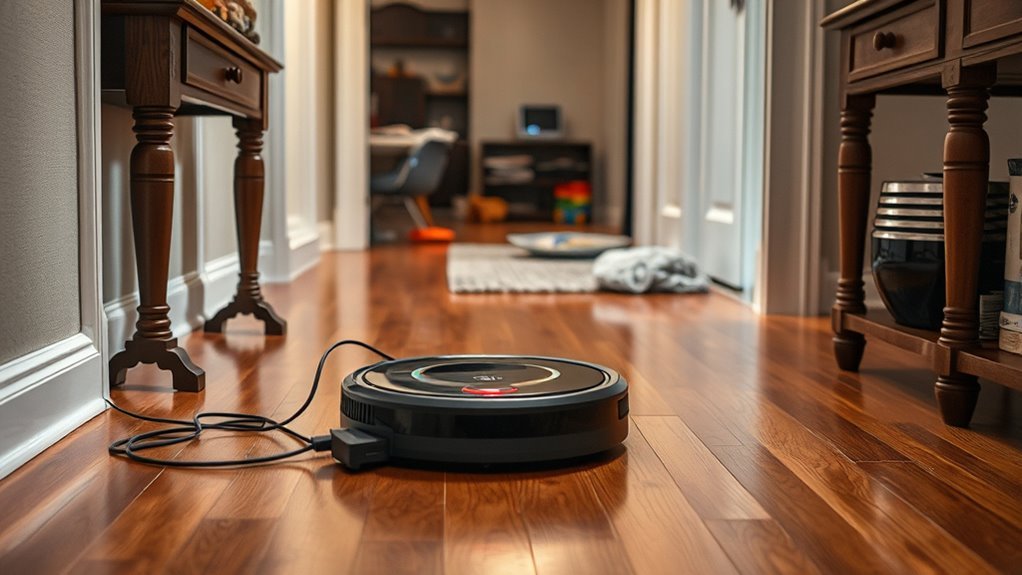
Robot vacuums stop during cleaning because of power problems, mechanical resistance, navigation errors, or protective safety systems. Some stops are normal, such as returning to the dock for charging. Others indicate a problem that needs attention.
The easiest way to narrow down the cause is to watch what happens just before the machine stops.
| What Happens | Likely Cause |
|---|---|
| Stops after a few minutes | Low battery, charging problem, or mechanical fault |
| Stops with a grinding or clicking noise | Tangled brush or jammed wheel |
| Stops in the same location | Obstacle, floor transition, or sensor error |
| Stops and returns to the dock | Normal recharging or an interrupted cleaning task |
| Stops with an app alert | A reported maintenance, navigation, or system fault |
| Stops despite a full charge | Brush, wheel, airflow, battery, or electronic problem |
According to ECOVACS troubleshooting guidance, common causes include battery problems, blocked brushes, dirty sensors, full dustbins, and software issues.
Do not assume every unexpected stop means the robot is broken. Start with the visible symptoms and work toward more advanced fixes.
Check Battery Life and Charging
A low or aging battery is a common reason a robot vacuum stops before finishing. Poor charging contact can cause similar symptoms, even when the machine appears to be sitting correctly on its dock.
Start by checking the battery level in the companion app or on the robot’s display. Then confirm that the dock is receiving power and the robot is actually charging.
Check the Charging Dock and Contacts
Dirty metal contacts can prevent the battery from charging properly. The contacts are usually located underneath or along the rear of the robot, with matching contacts on the dock.
- Unplug the charging dock before cleaning its contacts.
- Remove the robot and inspect both sets of metal contacts.
- Clean away visible dirt using the method recommended for your model.
- Allow any moisture to dry completely before reconnecting power.
- Return the robot to the dock and confirm that charging begins.
For example, iRobot’s charging-error guidance recommends cleaning charging contacts when a robot cannot charge correctly.
Also make sure the dock sits on a stable surface and has a clear approach. A robot that cannot align with the contacts may repeatedly attempt to dock without charging.
Check Battery Health
Battery performance declines with age and use. A robot vacuum battery may show noticeable wear after roughly 2 to 5 years, although actual life varies by model and charging conditions.
Signs of battery deterioration include:
- Much shorter cleaning sessions than when the robot was new.
- Unexpected shutdowns despite a reported charge.
- Repeated returns to the dock during short cleaning tasks.
- Difficulty holding a charge after the charging system has been checked.
Allow the robot to charge fully according to its manual. There is no universal three-hour charging rule because battery capacity and charging systems differ.
If runtime remains far below its original performance after a full charge, contact the manufacturer about a compatible replacement battery.
Warning: Do not open a sealed battery pack, use an incompatible replacement, or continue charging a battery that appears swollen, damaged, or unusually hot. Follow the manufacturer’s battery replacement procedure.
Clear Brushes, Wheels, and Suction Paths
Tangled brushes and jammed wheels can stop a robot vacuum even when its battery is fully charged. Hair, thread, carpet fibers, and small objects may prevent moving parts from turning freely.
Turn the robot off before inspecting its underside. Place it on a soft, stable surface to avoid scratching the casing or sensors.
Remove Hair From the Main Brush
- Release the main brush cover using the model’s designated tabs or clips.
- Remove the roller assembly.
- Cut or pull away wrapped hair and thread using an appropriate cleaning tool.
- Inspect the roller ends and removable end caps for hidden buildup.
- Reinstall the brush and confirm that it rotates freely.
Hair often collects around the roller ends, where it may be less visible. A brush can look clean across its center while still being jammed near the bearings.
The ECOVACS main brush cleaning procedure also recommends removing debris from the brush ends and checking that the roller turns smoothly after reinstallation.
Inspect the Wheels and Suction Inlet
Check the side wheels, front caster wheel, and side brush for trapped debris. Remove any hair wrapped around accessible axles.
Next, examine the suction inlet and visible air channels. Small objects, paper, or compacted dirt can block airflow and reduce pickup.
If a wheel remains stiff after cleaning, or the brush produces an unusual grinding noise, stop using the robot until the affected part has been inspected.
Cleaning brushes and wheels every one to two weeks is a useful general routine. Homes with pets or long hair may need more frequent attention.
Clean Sensors and Fix Navigation Errors
Dirty sensors can make a robot vacuum stop, turn unexpectedly, or avoid an otherwise clear area. These sensors help the robot detect edges, obstacles, walls, and its charging dock.
Start by cleaning the accessible sensor windows with a soft, dry, lint-free cloth. Use the cleaning method in your model’s manual, especially around camera lenses and laser navigation modules.
| Check | Action |
|---|---|
| Sensor windows | Wipe away dust with a soft, dry cloth |
| Floor layout | Remove cables, clothing, and small objects |
| Surface type | Test dark carpets and reflective surfaces |
| Repeated stops | Inspect the trouble spot and use a no-go zone if available |
Check Cliff Sensors
Cliff sensors help prevent a robot from falling down stairs. On some models, dark carpets or unusual floor patterns can cause false drop-off readings.
If the vacuum repeatedly stops at the same dark rug, clean its underside sensors and test it on another flat surface.
Never cover or disable cliff sensors to make the robot cross a dark surface. Doing so can remove protection against actual drops.
Check Navigation and Mapping
Reflective surfaces, mirrors, furniture changes, and blocked navigation sensors can affect how a robot understands its surroundings.
If the vacuum follows strange routes or repeatedly revisits one area, inspect its map in the companion app.
Check that:
- The correct floor map is selected.
- Restricted zones do not accidentally block the cleaning route.
- The charging dock has not been moved unexpectedly.
- Doors and passages needed for the cleaning task are open.
Test the robot in another room after cleaning the sensors. If it works normally elsewhere, the original location may be causing the navigation problem.
Empty the Dustbin and Replace Filters
A full dustbin or clogged filter can reduce suction and restrict airflow. Some robot vacuums also pause cleaning when their bin-full detection system reports that the container needs attention.
Empty the dustbin after each cleaning session, particularly when collecting pet hair or heavy debris.
Clean the Dustbin and Airflow Path
- Remove the dustbin and empty its contents.
- Check for compacted dirt near the inlet.
- Inspect the filter and its housing.
- Clean the filter using the manufacturer’s approved method.
- Reinstall the filter and dustbin securely.
If your robot has a self-emptying station, inspect its dust bag, collection channel, and inlet for blockages. A full station bag or blocked evacuation path can prevent automatic emptying.
Some models also use optical sensors to detect a full bin. Dirt on these sensors may cause repeated bin-full warnings even after you empty the container.
When Should You Replace the Filter?
Filter replacement depends on the robot model, cleaning frequency, and environment. The original recommendation of every 3 to 6 months applies to some models, but it is not universal.
For example, the official Roomba i Series maintenance schedule specifies weekly filter cleaning and replacement every two months.
Do not wash a filter unless its instructions specifically say it is washable. A damaged or damp filter can reduce performance and may harm the machine.
Update Firmware and Reconnect Wi-Fi
Firmware problems can affect navigation, scheduling, and cleaning behavior. An unstable Wi-Fi connection may also interfere with app controls or prevent the robot from receiving updates.
However, an offline message does not automatically mean the robot has stopped cleaning. First confirm whether the machine itself has stopped or only its app connection has failed.
Firmware Update Benefits
Firmware is the software that controls the robot’s hardware and operating functions. Updates may fix bugs, improve navigation, and correct known operating problems.
If your robot supports app-based updates, follow these steps:
- Place the robot on its charging dock.
- Connect your phone to a stable network.
- Open the manufacturer’s companion app.
- Check for an available firmware update.
- Follow the on-screen instructions and allow the update to finish.
For DEEBOT models, the ECOVACS HOME app provides access to supported firmware and device settings.
Do not interrupt the power supply during an update. If the robot recently began stopping after a software change, try a normal reboot before making further changes.
Reconnect Wi-Fi Steps
If the robot appears offline, check the router and network before resetting the vacuum.
- Confirm that the router is powered on and the internet connection is working.
- Check the Wi-Fi signal near the charging dock.
- Restart the companion app if it is not responding.
- Confirm that your robot supports the selected Wi-Fi network.
- Use the manufacturer’s Wi-Fi reconnection procedure if the connection remains unavailable.
Some robot vacuums require a compatible 2.4 GHz network for initial setup. Check your specific model rather than assuming every robot supports the same wireless bands.
A Wi-Fi reset and a factory reset are not the same thing. Use the dedicated network reset procedure when only the wireless connection needs to be repaired.
Remove Obstacles and Test Trouble Spots
If your robot vacuum keeps stopping in the same location, something in that area may be blocking its movement or confusing its sensors.
Inspect the location before changing software settings. Physical obstacles are often easier to identify and remove than a suspected mapping fault.
Clear Loose Cables
Charging cables, shoelaces, clothing, and small toys can become tangled around a robot vacuum’s brushes or wheels.
Move these items away from the cleaning route before starting a session.
Pay particular attention to cables near desks, entertainment centers, and charging stations. Even robots with obstacle detection may fail to recognize thin cords.
If a cable cannot be moved, use a virtual no-go zone to keep the robot away from it, provided your model supports that feature.
Check Stuck Furniture
Low furniture, narrow spaces, and chair legs can trap a robot vacuum. It may enter a gap successfully but lack enough clearance to turn or leave.
Look for these common trouble spots:
- Low sofas and cabinets.
- Narrow spaces between furniture legs.
- Loose rugs and raised carpet edges.
- Uneven door thresholds.
- Furniture bases with limited ground clearance.
Move furniture slightly where practical. If a gap continues to trap the robot, block access with a virtual barrier or no-go zone.
A robot that repeatedly becomes stuck should not be left to force its way through the same obstacle.
Test Problem Areas
Testing one room at a time helps separate a location problem from a robot problem.
Start a cleaning session in an open room with a clear floor. Watch how the vacuum moves and whether it completes the task.
Then test the area where it normally stops.
- Test carpet edges and floor transitions.
- Watch for problems near reflective surfaces.
- Check whether the bumper moves freely.
- Inspect brushes and wheels after a repeated stop.
- Set no-go zones around confirmed trouble spots.
If the robot works in an open room but repeatedly fails at one location, inspect that location rather than immediately replacing the battery.
Reset the Robot Vacuum Safely
A normal reboot can clear temporary software problems without deleting your saved settings. A factory reset is more disruptive and should be considered only after basic troubleshooting fails.
Do not remove the battery or hold random button combinations to reset an unfamiliar robot.
Try a Normal Reboot First
Use the restart procedure specified for your model. Some robots support rebooting through their companion app, while others require a particular button sequence.
For example, iRobot’s reboot instructions explain that a normal reboot can clear common errors without deleting maps, schedules, or preferences.
After restarting:
- Confirm that the robot powers on normally.
- Check whether the original error message has disappeared.
- Start a short cleaning session in a clear area.
- Observe whether the problem returns.
If the robot operates normally after rebooting, a temporary software problem may have caused the interruption.
When to Consider a Factory Reset
A factory reset restores the robot’s settings and may help with persistent software or configuration problems.
Warning: A factory reset may erase maps, cleaning schedules, Wi-Fi settings, and saved preferences. Check whether your model supports backing up its maps before proceeding.
The iRobot factory reset guide distinguishes a normal reboot from a reset that removes stored settings and account information.
Use the procedure for your exact model. After the reset, reconnect the robot through its app and restore any supported saved settings.
If the vacuum still stops after cleaning, charging checks, and a proper reboot, the problem may involve hardware rather than software.
Decode Error Lights and Messages
Error lights, voice alerts, and app messages can help identify why a robot vacuum stops. Their meanings vary by manufacturer and model, so an identical light or code may indicate different problems on different machines.
Record the exact message before restarting or resetting the robot.
Error Light Meanings
A red light, flashing indicator, or repeated beep can signal a problem, but the light color alone is not enough to identify the cause.
Start with the following checks:
- Read the complete app notification or displayed error code.
- Check whether the robot is charging.
- Inspect the dustbin and filter.
- Look for tangled brushes or jammed wheels.
- Clean accessible sensor windows.
- Match the indicator pattern with the model’s user manual.
Some robots use different light patterns for charging, updating, docking, and mechanical faults.
Do not assume that a solid red light always means the dustbin is full or that every blinking light indicates a charging fault.
Message Code Fixes
App notifications and error messages are often more useful than light colors. They can narrow the fault to a particular component and suggest the next troubleshooting step.
There is no universal E1–E5 error-code system for all robot vacuums. Use the exact code definition supplied by your manufacturer.
| Message or Symptom | Likely Cause | Action |
|---|---|---|
| Bin full | Full bin or dirty bin sensor | Empty bin and inspect sensors |
| Brush blocked | Tangled roller or side brush | Remove debris |
| Sensor blocked | Dust or obstruction | Clean sensor windows |
| Charging error | Poor contact, dock issue, or battery fault | Inspect charging system |
| System error | Software or hardware problem | Reboot and follow model-specific guidance |
If an error returns immediately after the recommended fix, avoid repeatedly forcing the robot to operate.
Contact manufacturer support when a motor, sensor, charging component, or battery fault remains unresolved. Have the model number, serial number, and exact error message available.
Prevent Future Stops With Regular Maintenance
Regular maintenance reduces the chance of brush jams, airflow restrictions, charging failures, and navigation errors. A simple routine also makes it easier to identify unusual wear before it interrupts cleaning.
Use the manufacturer’s maintenance schedule as your main guide. The following general checklist covers the components most likely to need attention.
| When | Maintenance Task |
|---|---|
| After each cleaning session | Empty the dustbin and remove visible debris. |
| Weekly | Inspect the main brush, side brush, and accessible wheels. |
| Every one to two weeks | Remove wrapped hair and inspect the suction inlet. |
| Monthly or as needed | Clean accessible sensors and inspect charging contacts. |
| According to the manufacturer | Clean or replace filters and worn brushes. |
| When performance changes | Check battery runtime, charging behavior, and error history. |
For self-emptying robots, include the station’s dust bag and collection channel in your maintenance routine.
Keep the dock accessible and avoid placing loose items where the robot needs to turn or approach its charging contacts.
Regular maintenance cannot prevent every electronic failure, but it helps rule out common problems before more involved repairs become necessary.
Key Takeaways
- A robot returning to its dock may be recharging normally rather than experiencing a fault.
- Repeated stops in one location often point to obstacles, floor transitions, or navigation problems.
- A clean-looking brush can still have hair wrapped around its end caps or bearings.
- Charging problems should be checked before assuming the battery needs replacement.
- Error codes and indicator lights must be interpreted using the correct model documentation.
- A normal reboot is preferable to a factory reset when troubleshooting temporary software problems.
Frequently Asked Questions
What Is the Average Lifespan of a Robot Vacuum?
A robot vacuum typically lasts about 4–6 years, depending on build quality, use, and maintenance. Battery capacity often declines sooner than the rest of the machine. Regular brush cleaning, filter replacement, and battery care can help extend its useful life.
What Are the Most Common Problems With Robot Vacuums?
The most common problems include battery wear, charging failures, brush jams, wheel obstructions, dirty sensors, full dustbins, and navigation errors. Connectivity and software problems can also affect operation. Most basic faults can be identified through routine inspections and model-specific error messages.
Why Does My Vacuum Cleaner Keep Stopping and Starting?
Repeated stopping and starting may indicate a low battery, obstruction, sensor problem, or temporary software fault. Check the error message, clear the brushes and suction path, and confirm that the vacuum is charging properly. If it returns to the dock and later resumes, that may be normal recharge-and-resume behavior.
Why Does My Roomba Keep Stopping After a Few Minutes?
A Roomba that stops after a few minutes may have a weak battery, dirty charging contacts, tangled rollers, blocked wheels, or a sensor error. Check the exact alert in the iRobot app. Clean the affected component, recharge the robot, and try a normal reboot if the problem continues.
Why Does My Robot Vacuum Stop in the Same Spot?
A repeated stopping location usually suggests an obstacle, narrow furniture gap, floor transition, or sensor reading problem. Inspect the area and test the robot on a clear floor. If it works elsewhere, adjust the furniture layout or create a no-go zone around the trouble spot.
Is It Normal for a Robot Vacuum to Stop and Recharge?
Yes. Many robot vacuums automatically return to their charging dock when the battery becomes low. Compatible models can recharge and resume unfinished cleaning. This behavior is normal during larger cleaning tasks, although manually moving the robot or interrupting its mission may prevent automatic resumption.
Conclusion
If your robot vacuum keeps stopping, start with its battery, charging contacts, brushes, wheels, dustbin, and sensors. These checks can resolve many common interruptions without a factory reset or major repair.
If the problem continues, record the exact error message and contact the manufacturer with your model details. A clear symptom history can help identify whether the robot needs a replacement part or professional service.
Sources
- ECOVACS: Why Your Robot Vacuum Keeps Stopping: Common stopping causes, battery wear, navigation issues, and troubleshooting.
- iRobot: Charging Error 19: Charging-contact maintenance and charging fault diagnosis.
- ECOVACS: Main Brush Cleaning: Brush removal, debris cleaning, and reinstallation.
- iRobot: Roomba i Series Maintenance Schedule: Filter, brush, sensor, and charging-contact maintenance intervals.
- Dyson: Robot Vacuum Troubleshooting: Navigation, obstacle checks, and normal mid-clean recharging.
- iRobot: Rebooting Your Robot: Model-specific reboot procedures and preserved settings.
- iRobot: Factory Reset Guidance: Reset procedures and potential loss of saved settings.
- Dyson: How Long Do Robot Vacuums Last?: Typical robot vacuum lifespan and battery deterioration.