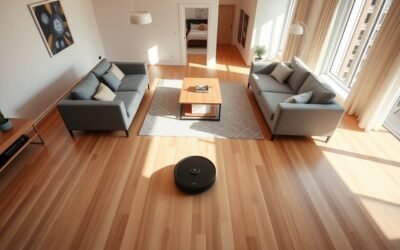
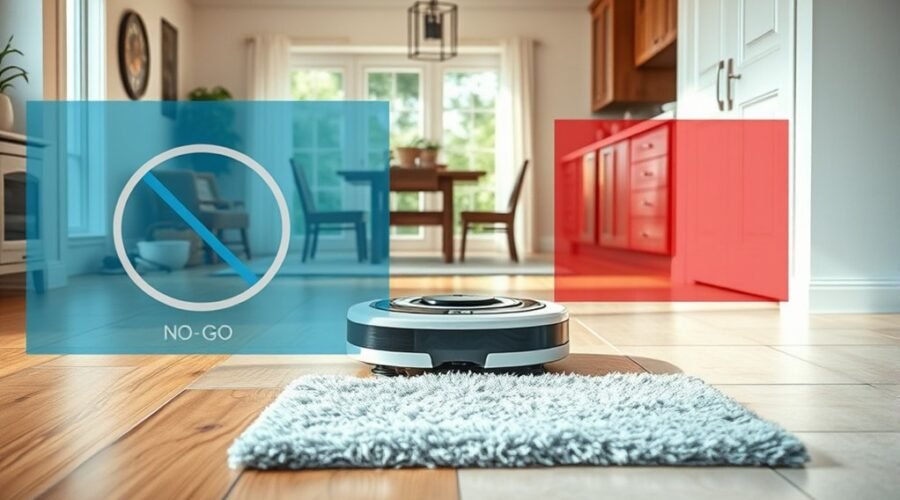
No-Go Zones vs No-Mop Zones is an important difference to understand when setting up a robot vacuum. Both features use a saved home map, but they control different cleaning actions. Choosing the right boundary helps you protect rugs, avoid tangled cords, and clean more of your floors without unnecessary restrictions.
Quick Answer
No-Go Zones stop a robot vacuum from entering selected areas during cleaning. No-Mop Zones prevent wet cleaning in areas such as carpets, rugs, and moisture-sensitive floors. Depending on the model, the robot may still vacuum a No-Mop Zone or avoid it entirely while the mop is attached. Use each boundary according to the floor and cleaning task.
Key Takeaways
- Virtual boundaries work best when your robot has an accurate, saved map of the floor.
- Carpets and rugs often need No-Mop Zones, while cords and fragile objects are better candidates for No-Go Zones.
- Some robot vacuums support a separate virtual wall that blocks movement across a doorway or passage.
- The number of available boundaries varies by model. Ten zones is not a universal limit.
- Keep routes to rooms and the charging dock open, and adjust boundaries whenever your layout changes.
What Are No-Go and No-Mop Zones?
)
No-Go Zones and No-Mop Zones are virtual areas you draw on a robot vacuum’s digital map. They help control where the robot travels and which cleaning tasks it performs.
A No-Go Zone tells the robot to stay out of a marked area. This is useful around loose wires, delicate furniture, pet feeding stations, and places where the vacuum regularly gets stuck.
A No-Mop Zone prevents mopping in a selected area. It is useful for rugs, carpets, and flooring that should not come into contact with water.
However, a No-Mop Zone does not behave identically on every machine. Some robot vacuums can enter and vacuum the area without mopping. Others avoid the marked area whenever the mopping attachment is installed.
These features depend on the robot’s mapping system and supported cleaning modes. You can find a detailed explanation in the manufacturer’s official boundary definitions.
Used correctly, these settings reduce cleaning interruptions and let you protect selected parts of your home without blocking entire rooms.
No-Go Zones vs No-Mop Zones: Key Differences
The main difference between No-Go Zones and No-Mop Zones is how much cleaning they restrict. No-Go Zones prevent entry, while No-Mop Zones restrict wet cleaning based on the robot’s design and operating mode.
| Feature | No-Go Zone | No-Mop Zone |
|---|---|---|
| Main purpose | Prevent robot entry | Prevent wet cleaning |
| Vacuum-only mode | Entry blocked | Vacuuming generally allowed |
| Mopping mode | Entry blocked | Mopping blocked; movement depends on model |
| Best uses | Cords, fragile decor, pet bowls, clutter | Carpets, rugs, moisture-sensitive floors |
| Where you configure it | Supported robot mapping app | Supported vacuum-and-mop mapping app |
No-Go Zones control where the robot can travel. No-Mop Zones control where wet cleaning is allowed.
For example, a rug in the middle of a living room usually needs a No-Mop Zone. A group of charging cables behind the television is a better candidate for a No-Go Zone.
There is also an important difference between robot models. Some flat-mop robots cannot lift their mopping attachments and must avoid No-Mop Zones during a mopping run. Their manufacturer’s No-Mop feature guidance confirms that they can return to those areas for vacuuming once the water tank is removed.
Robots with compatible mop-lifting systems may instead cross or vacuum selected areas while keeping the mop away from the floor.
How Mapping Helps Set Boundaries
Robot vacuum mapping creates a digital floor plan that supports virtual boundaries. Once the map is saved, you can mark areas that require different cleaning behavior.
Accurate mapping helps the robot recognize restricted locations and plan routes around them.
Digital Map Creation
Many smart robot vacuums use LiDAR or visual simultaneous localization and mapping (vSLAM) to understand the layout of a home.
LiDAR measures distances using laser light. vSLAM uses camera-based information and movement tracking to build and update a map.
Both approaches can support room identification, obstacle-aware navigation, and virtual boundaries when the robot’s software includes those features.
For the first mapping run:
- Place the charging dock in its intended location.
- Remove loose cords, shoes, and small objects from the floor.
- Open the doors to rooms you want the robot to map.
- Start a mapping or complete cleaning run using the supported app.
- Allow the robot to finish and save the floor map.
After mapping, you can place No-Go and No-Mop Zones over the relevant areas. The official robot map customization guide explains how supported mapping systems let users edit rooms and create cleaning restrictions.
Zone Placement Control
Precise zone placement lets you protect a small area without removing an entire room from the cleaning route.
Most compatible apps display the floor map and let you move or resize a virtual boundary. Available shapes and controls depend on the model.
A practical setup process is:
- Open your robot vacuum’s companion app.
- Select the saved map for the correct floor.
- Find the map editing or restricted-area controls.
- Choose No-Go Zone, No-Mop Zone, or Virtual Boundary.
- Draw or position the restriction over the intended area.
- Adjust its size so the full area is covered.
- Save the changes and run a cleaning test.
Some systems also support irregular shapes or line-style virtual walls. You can see an example in this official virtual boundary setup guide.
A saved boundary should remain associated with the correct floor map. If the robot builds a new map, previously configured restrictions may need to be recreated.
Why No-Go Zones Protect Delicate Spaces
No-Go Zones are especially useful when a robot should avoid contact with objects or flooring altogether. They reduce unwanted movement around fragile items and spots where the machine could become tangled or stuck.
They are best treated as cleaning controls rather than guaranteed safety barriers.
Protecting Fragile Furniture
Fragile furniture, antique decorations, and glass display pieces can benefit from a No-Go Zone.
Even a robot with obstacle detection may occasionally touch furniture legs or move lightweight objects. Blocking a sensitive area reduces the chance of those encounters.
- Identify delicate items: Look for unstable tables, floor decorations, glass objects, and furniture with exposed delicate finishes.
- Mark the surrounding area: Make the boundary large enough to keep the robot away from the objects and their supports.
- Check the route: Ensure the boundary does not unnecessarily block access to the rest of the room.
- Update the map: Move or remove the restriction when furniture is rearranged.
You do not need to block every piece of furniture. Use these zones where the robot’s normal navigation could create a problem.
Blocking Hazardous Areas
No-Go Zones also help a robot avoid loose wires, crowded corners, and other areas that interrupt normal cleaning.
These restrictions are useful around power strips, charging cables, pet bowls, and places where repeated contact could cause spills or tangles.
| Area | Risk | Result |
|---|---|---|
| Wires | Tangling | Fewer interruptions |
| Glass decor | Accidental contact | Less risk of breakage |
| Delicate furniture | Scratches or bumps | Reduced contact |
| High-traffic spots | Collisions with objects | Fewer encounters in restricted corners |
| Mixed layouts | Narrow or obstructed routes | More controlled navigation |
Warning: Virtual No-Go Zones are not guaranteed physical safety barriers. Do not rely on them alone near open stair edges, fireplaces, exposed electrical hazards, or other dangerous areas. Remove hazards or use suitable physical protection when necessary.
Manufacturer instructions also warn that virtual zones are intended to control cleaning areas, not to isolate hazards. This limitation is stated in the official robot vacuum operating manual.
When No-Mop Zones Keep Carpets Dry
No-Mop Zones help prevent a robot vacuum from wetting rugs, carpets, and flooring that should remain dry. They are particularly valuable in homes with both carpet and hard floors.
For example, you might have tile flooring in a dining room with a large rug underneath the table. A No-Mop Zone lets you keep that rug outside the wet-cleaning area.
Depending on the robot’s features, it may vacuum the rug during the same run, lift its mop before crossing, or avoid the rug while the mop is installed.
Three common benefits are:
- Carpet protection: Restricting wet cleaning reduces the risk of unwanted moisture reaching carpet fibers.
- Mixed-floor cleaning: The robot can mop suitable hard flooring while respecting areas that need dry treatment.
- Flexible routines: You can keep the saved No-Mop Zone and use a separate vacuum-only run where needed.
No-Mop Zones can also protect moisture-sensitive hard flooring. However, the correct setting depends on the floor’s finish and the manufacturer’s cleaning recommendations.
A robot that lifts its mop may still leave some moisture if its system or settings do not work as expected. Test its behavior before allowing unattended mopping near valuable rugs or sensitive surfaces.
Where to Place Virtual Boundaries
Virtual boundaries work best when they target specific problems. Place them around areas that are unsafe for normal robot movement or that require different floor-cleaning treatment.
Common locations include:
- Behind entertainment centers: Use a No-Go Zone around exposed cables and power strips.
- Under delicate furniture: Restrict access if the robot could scratch, bump, or become trapped beneath it.
- Around pet feeding stations: Keep the vacuum away from bowls that might spill.
- On carpeted sections: Use No-Mop Zones to prevent wet cleaning.
- Across doorways: Use a supported virtual wall when you want to prevent entry into a particular room.
- Near crowded corners: Exclude problem areas without unnecessarily blocking the whole room.
Place virtual boundaries around actual cleaning problems, not every object the robot might encounter.
Remember that a virtual wall differs from an area-based No-Go Zone. A wall usually creates a line the robot cannot cross, while a No-Go Zone marks a region it must avoid.
For most homes, the best boundaries are small enough to preserve floor coverage but large enough to protect the intended space.
Best Rooms for Each Zone Type
Different rooms benefit from different boundary settings. The right choice depends on the floor surface, furniture layout, and obstacles rather than the room’s name alone.
Kitchens, dining rooms, hallways, and delicate-flooring areas often need a combination of both features.
Kitchens and Dining Areas
Kitchens often have hard floors that benefit from regular mopping. Therefore, a No-Mop Zone is usually unnecessary across the entire kitchen.
Instead, use restrictions around specific problem areas.
- Kitchens: Use No-Mop Zones for rugs or moisture-sensitive sections. Allow mopping on suitable sealed hard floors.
- Dining areas: Add No-Go Zones around delicate furniture or unstable decorations where collision risk is high.
- Mixed surfaces: Combine both settings when a room has hard flooring, rugs, and furniture that needs protection.
If you have a washable kitchen mat, its cleaning needs may differ from those of the surrounding tile. Mark the mat separately when the robot should not mop it.
Hallways and Entryways
Hallways and entryways often contain shoes, mats, cords, and other temporary obstacles. They also connect rooms, so their boundaries must leave enough space for the robot to travel.
Use No-Go Zones around cluttered corners or objects the vacuum repeatedly hits. However, avoid placing a restriction across the only route between rooms unless you want that entire route blocked.
No-Mop Zones are useful where an entryway changes from tile to carpet or contains a rug that should stay dry.
For example, a hallway with tile flooring and a carpet runner may need a No-Mop Zone over the runner while the surrounding tile remains available for mopping.
Some Shark robots call these restrictions Carpet Zones rather than No-Mop Zones. The official Shark mapping instructions distinguish No-Go Zones, which block access, from Carpet Zones, which restrict mopping.
Delicate Flooring Spaces
Delicate floors need boundaries based on the type of damage you want to prevent. If moisture is the concern, a No-Mop Zone is usually more suitable. If physical contact is the concern, choose a No-Go Zone.
For instance, sealed hardwood may be suitable for some robot mopping systems when used according to the floor and robot manufacturers’ instructions. Unsealed wood, damaged finishes, and moisture-sensitive flooring may require dry cleaning instead.
- Use No-Go Zones around fragile furniture and floor areas where robot wheels or brushes could cause damage.
- Use No-Mop Zones on rugs, unsealed flooring, or other surfaces that should not be wet cleaned.
- Use both when a delicate area must avoid water and robot movement.
Not every hardwood floor needs to become a No-Go Zone. If vacuuming is safe but wet cleaning is not, restricting only the mop preserves more useful cleaning coverage.
How Many No-Go and No-Mop Zones Should You Set?
There is no universal number of virtual zones that every robot vacuum supports. The available limit depends on the model, app, and type of boundary.
For example, the manufacturer’s X8/LR20/LR30/L35 boundary setup instructions specify up to 10 No-Go Zones, 10 No-Mop Zones, and 10 virtual boundaries separately on one map.
Other robot mapping systems support different numbers of zones. Therefore, the limit should never be assumed to be 10 for every device.
More importantly, the maximum number is not a target.
Start with only the restrictions you need. A few carefully placed zones can be more useful than numerous overlapping boundaries.
Too many restricted areas may create longer routes, reduce accessible floor space, or prevent the robot from reaching certain rooms.
A good setup should satisfy three conditions:
- Areas containing fragile items or repeated obstacles remain protected.
- Moisture-sensitive surfaces stay outside wet-cleaning routes.
- The robot can still travel freely between permitted rooms and return to its dock.
If adding a new boundary causes missed cleaning, consider whether it blocks a necessary passage.
Common Virtual Boundary Mistakes
Virtual boundary problems usually come from incorrect placement, outdated maps, or confusion between cleaning modes. These mistakes can make an otherwise capable robot vacuum miss important areas.
The following issues are worth checking.
- Using No-Go Zones instead of No-Mop Zones: This blocks vacuuming as well as mopping, even when the floor could safely receive dry cleaning.
- Using No-Mop Zones around tangled wires: Some robots can still enter these areas during vacuum-only cleaning, leaving the wires exposed to the brushes.
- Drawing boundaries too tightly: Small positioning errors may let the robot cross the intended line or contact nearby objects.
- Blocking a doorway: A restriction across the only entrance can prevent the robot from reaching an entire room.
- Restricting the dock: A zone over or too close to the charging station can interfere with normal navigation and return routes.
- Ignoring furniture changes: Boundaries created for an old layout may block cleanable areas or fail to cover new obstacles.
- Assuming every robot handles No-Mop Zones identically: Some models avoid the zone during mopping rather than vacuuming through it.
Pro Tip: After adding a restriction, run a short cleaning test while you watch the robot. Check whether it respects the boundary, reaches nearby areas, and returns to the dock. This reveals mapping mistakes before you rely on unattended cleaning.
If the robot ignores a boundary, first inspect its position on the saved map. Enlarge the restriction slightly if it does not fully cover the intended area.
Then check whether the robot is using the correct floor map and cleaning mode. A No-Mop Zone will not necessarily block entry during vacuum-only cleaning.
For persistent navigation issues, clean accessible navigation sensors according to the owner’s instructions and restart the robot from its dock. Remapping may help if the saved layout is no longer accurate.
When to Update Your Boundaries
Update No-Go and No-Mop Zones whenever your home’s layout or cleaning needs change. A boundary that worked well before may become unnecessary or incorrectly positioned after furniture moves.
| Update trigger | Action |
|---|---|
| Furniture moved | Resize or relocate No-Go Zones around obstacles. |
| New carpet or tile | Review No-Mop Zones for the new flooring. |
| Missed spots or stalls | Inspect restrictions and check whether routes remain open. |
| Holidays or seasonal changes | Add temporary restrictions around decorations, then remove them when no longer needed. |
Multiple-story homes also need attention because each saved floor map may contain separate restrictions.
When switching floors, confirm that the robot has selected the correct map before beginning a cleaning cycle.
If your robot repeatedly enters a restricted area, its saved map or position tracking may be inaccurate. The manufacturer’s Smart Map troubleshooting guidance recommends checking boundary placement, leaving a small buffer, starting from the dock, and addressing mapping problems when necessary.
Keep your boundary setup as simple as possible. Remove temporary restrictions once the obstacles are gone, and preserve access to areas that still need cleaning.
Frequently Asked Questions
Is the Mop Feature Worth It on Robot Vacuums?
Yes, if you have plenty of sealed hard flooring and want lighter everyday cleaning. A mop feature will not replace occasional scrubbing, and you will need to wash pads and maintain the water system. For rooms with mostly carpet, the extra upkeep may not be worthwhile.
Why Does My Shark Robot Go Into No-Go Zones?
A Shark robot may enter a No-Go Zone if its saved map is inaccurate, the zone is too small, or the robot starts from an unfamiliar position. Open the SharkClean map, enlarge and save the boundary, then test from the dock. Clear obstacles and remap if the problem continues.
Which Robot Vacuum Has the Best No-Go Zones?
No single robot vacuum has the best No-Go Zones for every home. Look for reliable mapping, easy boundary editing, and multiple saved maps if you have several floors. Narwal Freo models with compatible app features offer selectable restrictions for vacuuming, mopping, or both. Compare the exact model’s capabilities before choosing.
Can You Tell Robot Vacuum Areas Not to Go To?
Yes. If your robot supports saved maps and virtual zones, you can mark areas it must not enter. Some models also support a line-style virtual boundary for doorways. Basic models without these mapping features may require physical barriers or other supported boundary accessories.
Does a No-Mop Zone Still Get Vacuumed?
Yes, on compatible robots and in supported cleaning modes. Some machines vacuum No-Mop Zones while lifting or avoiding contact with the mop. Others stay outside these areas whenever the mop attachment or water tank is installed, then vacuum them during a separate dry-cleaning run.
How Many No-Go Zones Can a Robot Vacuum Have?
The number depends on the robot model and mapping app. Some systems allow up to 10 No-Go Zones, 10 No-Mop Zones, and 10 virtual boundaries separately on one map. Others allow more. Use only the restrictions you need so the robot can still reach all permitted cleaning areas.
Conclusion
No-Go Zones and No-Mop Zones serve different purposes, but both make robot vacuum cleaning more controlled. Use No-Go Zones to prevent entry into delicate or troublesome areas, and No-Mop Zones to protect carpets and moisture-sensitive flooring.
The best setup uses an accurate map, carefully placed restrictions, and enough open space for the robot to move between rooms. Start with the areas that genuinely need protection, test the boundaries, and adjust them as your home changes.
Sources
- Official manufacturer support: Virtual Boundary, No-Go Zone, and No-Mop Zone: Explains the main differences between boundary types and their effect on cleaning coverage.
- iRobot: Guide to ClearView LiDAR Maps: Supports digital map editing and the distinction between Keep Out and No Mop Zones.
- Official manufacturer support: No-Mop Feature of Hybrid RoboVacs: Explains how certain robots avoid No-Mop Zones when the water tank is installed.
- Official manufacturer support: Virtual Boundary Setup: Describes map editing, zone placement, resizing, and saving restrictions.
- Official X10 Pro Omni User Manual: Explains boundary controls and the limitations of virtual zones for hazardous areas.
- SharkNinja: Robot Vacuum Product Resources: Supports the distinction between No-Go Zones and Carpet Zones in supported Shark mapping apps.
- Official Manufacturer Support: No-Go Zone and Virtual Boundary Setup: Confirms the separate 10-zone limits for supported models.
- iRobot: Guide to Imprint Smart Maps: Covers boundary placement, navigation issues, room access, and troubleshooting.