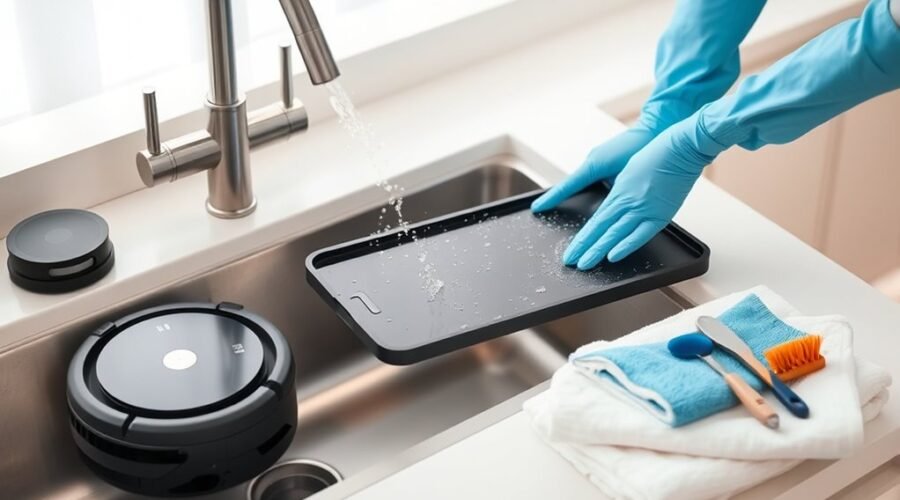
A dirty robot vacuum mop tray can collect hair, muddy water, and detergent residue that interfere with mop washing and drainage. Cleaning it is usually simple, but you need to know which parts are safe to rinse. This guide explains how to remove, wash, dry, and reinstall the tray without damaging its seals or water channels.
Quick Answer
To clean a robot vacuum mop tray, stop the cleaning cycle, disconnect power, and remove the tray according to your model’s instructions. Empty loose debris, rinse the washable tray with clean water, and scrub gently with a soft brush. Clear accessible drainage holes, dry the parts as instructed, and reinstall everything securely.
At a Glance
| Difficulty | Easy for a removable, washable tray |
| Tools Needed | Soft brush, microfiber cloth, clean water, and a drying rack or towel |
Power Off and Remove the Mop Tray
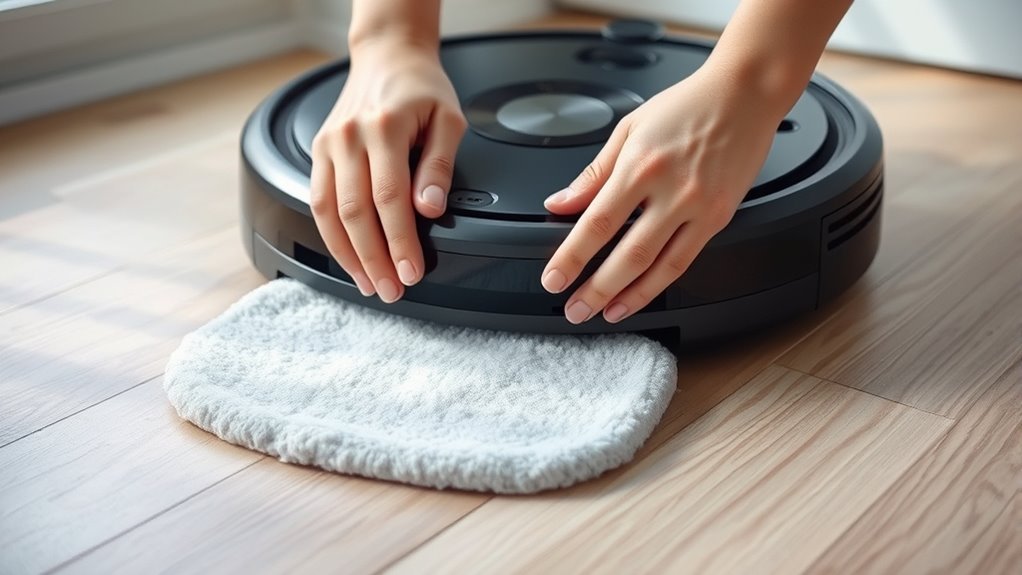
Before removing the mop tray, stop the robot and make sure its moving parts have stopped. Unplug the docking station before cleaning its interior or removing dock components.
Some models have a removable tray inside the dock. Others have a water tray attached to the robot’s mop assembly. The removal method depends on the design.
- Stop the cleaning cycle. Wait until mop washing, draining, and other moving parts have stopped.
- Disconnect power. Unplug the dock before manual cleaning. Turn off the robot when its instructions require it.
- Locate the release mechanism. Look for a latch, handle, or removable tray section shown in the product manual.
- Remove the tray carefully. Keep it level to prevent dirty water from spilling onto the dock or robot.
- Empty loose debris. Dispose of collected hair, dirt, and wastewater before rinsing.
Do not pull a tray that feels locked in place. Check whether a latch or service procedure must be used first.
For example, some roller-mop designs require the mop assembly to extend before the tray can be released. The manufacturer’s model-specific tray release steps explain this type of procedure.
Once removed, inspect the tray for visible dirt, cracked plastic, damaged clips, and loose seals. Address damaged parts before continuing.
What You Need to Clean the Mop Tray
You can clean most removable mop trays with a small collection of household supplies. Gentle tools are better than hard brushes or abrasive cleaning pads.
- Microfiber cloth: Wipes away dirt, water marks, and loose residue.
- Soft brush: Cleans corners, grooves, and accessible drainage openings.
- Clean water: Rinses dirt from washable plastic parts. Use lukewarm water only if your manual permits it.
- Soft sponge: Helps remove stuck-on grime without scratching the surface.
- Clean towel or drying rack: Holds washed parts while moisture evaporates.
- Mild detergent: Optional, and only for components whose manufacturer specifically allows it.
Keep a separate container or sink available for washing the tray. This prevents loosened debris from falling back into the dock.
If your robot uses removable mop pads, inspect their holders and attachment points as well. These parts may collect hair or cleaning residue.
Keep electronic components, motors, and charging contacts away from running water.
Rinse the Mop Tray Under Warm Water
Rinsing a removable, water-safe mop tray clears loose dirt before you begin scrubbing. Use a gentle flow of clean water rather than a powerful jet.
Warm water can help loosen residue, but it should not be hot enough to affect plastic or seals. Follow your model’s temperature and washing instructions.
Warm Water Rinse
Start with the tray’s broad surfaces, then rinse the grooves where wastewater collects. Hold the tray so dirty water can run out naturally.
- Place the removable tray under a gentle stream of water.
- Move the water across its surface and accessible corners.
- Use a soft brush to loosen dirt between ridges.
- Rinse again until the loosened residue is gone.
A removable dock tray should be washed separately from the powered base. The cleaning-tray and base instructions for a compatible robot show this distinction clearly.
Remove Surface Residue
After the first rinse, check for dirt that remains stuck to the tray. Pay attention to raised ridges, corners, filter openings, and places where the mop pads make contact.
Use a damp microfiber cloth to wipe away loose film. If hair is wrapped around a removable scraper or filter, lift it away gently.
A soft brush is useful for accessible grooves. However, avoid forcing its bristles into narrow pipes or delicate fittings.
Rinse the tray again to remove the particles you have loosened. The surface should feel clean rather than gritty or sticky.
Air Dry Completely
After rinsing, remove excess water before reinstalling the tray. Some manufacturers allow immediate reinstallation after wiping, while others instruct you to dry removable components thoroughly.
- Hold the tray over a sink and allow trapped water to drain.
- Pat accessible surfaces with a clean, lint-free cloth.
- Place the tray on a clean rack in a ventilated location if additional drying is required.
There is no universal 24-hour drying requirement for every mop tray. Use the instructions for your model and make sure moisture does not enter electrical areas.
Never speed up drying with an oven, hair dryer, or direct heat unless the manufacturer specifically approves the method.
Scrub Stubborn Dirt Without Scratching It
Stubborn dirt often collects where mop pads rub against the tray. A soft sponge or microfiber cloth usually removes it without damaging the plastic.
Use light pressure and small circular movements. Concentrate on one dirty area at a time rather than scrubbing the entire tray aggressively.
- Dampen a soft cloth or sponge with clean water.
- Wipe the stained area gently to loosen the residue.
- Use a soft brush along textured ridges and corners.
- Rinse the removable tray to wash away loosened dirt.
- Inspect the surface and repeat the gentle cleaning if needed.
If water alone cannot remove the grime, use mild soap only when the manufacturer allows it. Some wash-basin cleaning instructions permit mild soap and a sponge for stubborn debris.
Other models require plain water. Do not assume a cleaning product approved for one dock is safe for another.
Warning: Do not use steel wool, abrasive powders, stiff brushes, bleach, or unapproved chemical cleaners. These may damage plastic surfaces, seals, or parts of the washing system. Never pour cleaning chemicals directly into the dock.
After scrubbing, inspect the tray under good lighting. There should be no visible dirt blocking its filter holes or drainage features.
Clean the Mop Tray Holder and Water Path
The mop tray holder and accessible water channels need attention because they can collect debris that affects wastewater drainage. You should clean only the parts intended for user maintenance.
Inspect the tray’s drainage openings, filters, seals, and holder before putting everything back together.
Mop Tray Holder Care
The holder keeps the tray or mop attachment in its correct position. Hair around its edges or clips can prevent it from fitting securely.
- Remove the holder only if your model allows it.
- Brush away trapped hair and loose debris.
- Rinse the holder if the manufacturer identifies it as washable.
- Inspect its clips, attachment points, and seals.
- Dry or wipe the holder as instructed before reassembly.
Look for cracks, bent clips, or damaged rubber parts. If the holder cannot lock into position, it may need replacement rather than more cleaning.
A loose holder can affect pad movement or allow water to collect in the wrong place.
Water Path Cleaning
The water path carries clean water to the mop or wastewater away from the washing area. Hair, lint, dirt, and mineral deposits can restrict accessible openings.
Start by checking the drainage holes and removable filter in the tray. Remove visible debris using a soft brush or cloth.
Do not push tools deep into internal tubing or force water through the dock’s plumbing. These parts may contain pumps, valves, and seals that are not designed for manual disassembly.
When reinstalling the tray, check that the water path lines up correctly. One manufacturer’s water-pipe alignment guidance specifically requires the pipe to sit inside the washboard groove.
If wastewater continues to collect after cleaning, inspect the dirty-water tank and its seal before assuming the pump has failed.
Manufacturer drainage troubleshooting steps identify clogged tray filter holes, a full dirty-water tank, and poor tank sealing as possible causes.
Pro Tip: Before replacing a tray because of drainage problems, inspect its removable filter and the dirty-water tank lid. A small blockage or poorly seated seal may be responsible for the error.
Let Every Part Dry Completely
Drying prevents leftover wash water from becoming trapped around the tray, pads, or holder. Follow the drying instructions for each component because plastic trays and fabric mop pads may have different requirements.
Place washable parts in a clean, well-ventilated area. Keep them away from excessive heat and direct sunlight when the manufacturer advises against it.
- Mop tray: Drain and wipe away water, then air-dry further if required.
- Mop pads: Spread removable fabric pads apart so air can circulate through them. Follow the recommended washing and drying method.
- Pad holders: Remove moisture from attachment points, edges, and recessed areas.
- Filters: Shake off excess water and dry according to the manufacturer’s instructions.
Some self-cleaning docks automatically dry the mop pads after washing. This does not mean every removable dock component needs the same drying cycle.
Before reinstallation, check for visible water around connectors and areas that must remain dry.
Replace torn mop pads, cracked holders, or damaged seals when cleaning cannot restore their condition.
Clean the Dock Tray and Base Area
The docking station can collect residue even when the removable mop tray looks clean. Dirt often gathers around the basin, wastewater filter, drainage opening, and area where the robot parks.
Unplug the dock before manually cleaning its base. Never rinse the entire powered station under running water.
- Remove washable components. Take out the tray, washboard filter, or removable roller according to the manual.
- Clear loose debris. Remove hair, lint, and dirt from accessible areas.
- Wipe the dock basin. Use a clean cloth, dampened where the instructions permit.
- Clean the wastewater filter. Rinse it separately if the filter is washable.
- Empty the used-water tank. Dispose of the wastewater and rinse the tank when permitted.
- Inspect the dust intake and vents. Remove visible dry debris without allowing water into the openings.
- Check docking contacts. Keep charging contacts and sensors free of residue using the model’s approved cleaning method.
The dirty-water tank deserves particular attention. Wastewater left standing can develop an unpleasant odor, while debris around the lid may prevent a proper seal.
Do not spray water or cleaning products onto electrical contacts or sensor openings.
After cleaning, reinstall the filters, tray, and other parts in their correct positions. Make sure nothing blocks the robot’s docking path.
Avoid Mop Tray Cleaning Mistakes
Most mop tray cleaning problems come from using the wrong cleaner, washing a non-removable component, or reinstalling parts incorrectly. A few simple checks can prevent unnecessary damage.
Follow these precautions during routine maintenance.
- Do not wash the entire dock. Only rinse components identified as removable and water-safe.
- Avoid harsh cleaning products. Unapproved disinfectants, vinegar, and strong detergents may damage parts of the water system.
- Do not force stuck clips. Check the removal procedure before applying additional pressure.
- Do not ignore standing water. Check drainage holes, the dirty-water tank, and its seals.
- Do not reinstall damaged parts. Cracked trays and worn seals may lead to leaks or poor fitting.
- Do not use a dishwasher without approval. Heat and detergent may damage components that are intended for handwashing.
It is especially important to distinguish a removable washing tray from the robot’s internal water tank.
Some internal tanks must not be submerged or rinsed at all. The manufacturer’s water tank precautions for a particular combo robot explicitly prohibit rinsing or immersing its tank.
Clean only the components your model identifies as washable, and keep water away from electrical areas.
After washing, inspect the connection points and remove any residue that could prevent a secure fit.
Once the parts are reinstalled, check that the tray sits level and the holder locks into place.
How Often to Clean the Mop Tray
Mop tray cleaning frequency depends on the model and how often you mop. Check the tray after each cleaning session, but use the manufacturer’s schedule for routine washing.
For example, one official recommended maintenance schedule calls for cleaning the washing tray every one to two weeks and the dirty-water tank after each use. Other docking systems recommend monthly basin cleaning or cleaning when visibly dirty.
The following table combines routine inspection with practical maintenance intervals. Model-specific instructions take priority.
| Interval | Action |
|---|---|
| After every use | Inspect the mop tray and empty the dirty-water tank as instructed |
| After pet hair or heavy spills | Clean the tray promptly if visible debris has collected |
| Every 1–2 weeks | Clean the washboard on models with this maintenance interval |
| Monthly | Inspect and deep-clean the dock basin where the manual recommends it |
| Before reinstalling | Dry components as instructed and confirm a secure fit |
Homes with pets, muddy entryways, or frequent spills may need more frequent cleaning. Visible buildup, unpleasant odors, and slow wastewater drainage are signs that maintenance should not wait.
If the tray remains dirty after several gentle cleaning attempts, check for worn scrapers, damaged filters, or other parts that may need replacing.
A working system should leave the tray correctly seated, allow wastewater to drain normally, and complete mop washing without repeated tray-related errors.
Key Takeaways
- A dock’s removable washing tray and the robot’s internal water tank can have very different cleaning rules.
- Clogged filter holes and poorly seated wastewater tank seals can cause drainage errors.
- Some models need washboard cleaning every one to two weeks, while others use different maintenance intervals.
- Correctly aligned channels, filters, and holders matter as much as removing visible dirt.
- A dry-looking tray is not enough if its clips, seals, or drainage openings remain damaged.
Frequently Asked Questions
What Are the Downsides of Using a Robotic Vacuum Cleaner?
Robot vacuums can miss tight corners, struggle with high-pile carpet, and get caught on cords or small objects. Models with mopping docks also need regular cleaning of pads, trays, tanks, and filters. They reduce daily work but do not replace all manual cleaning.
Can You Put Vinegar in a Robot Vacuum Mop?
Do not add vinegar to a robot mop’s water tank unless the manufacturer specifically allows it. Many models require plain water or an approved solution, and unapproved liquids may damage seals or water-system parts. Clean the removable tray with water unless your model permits another cleaner.
How Do I Sanitize My Mop?
Wash a removable mop pad using the method allowed by its manufacturer, then dry it fully. Some pads are machine-washable, while others require handwashing. Do not soak pads or robot components in 70% isopropyl alcohol unless the manufacturer explicitly approves that method.
What Is the Average Lifespan of a Robot Vacuum?
Robot vacuum lifespan varies with use, battery condition, maintenance, and repair options. European consumer survey data summarized by the European Environment Agency suggest an average around five and a half years for robot vacuums in the sampled markets. An individual unit may last less or longer.
Why Is Water Sitting in My Robot Mop Tray?
Standing water can mean a clogged tray filter, blocked drain opening, full dirty-water tank, or poorly seated tank seal. Clear accessible debris and check the tank lid and seal before testing the dock. If it still cannot drain, follow the manufacturer’s troubleshooting steps.
Can I Put a Robot Vacuum Mop Tray in the Dishwasher?
Do not put a mop tray in the dishwasher unless your model’s instructions explicitly say it is dishwasher-safe. Heat and detergent can damage plastic, seals, or fitted parts. Hand-rinse a removable tray and clean it with a soft brush instead.
Conclusion
Regular mop tray cleaning helps prevent residue buildup, drainage problems, and unpleasant odors. Remove only the washable components, clean them gently, and check the holder, water path, and dock basin before reassembly.
Follow your model’s maintenance schedule and drying instructions. If water still collects or the tray will not fit securely, inspect the filters and seals before replacing parts or requesting service.
Sources
- ECOVACS Support: How to Clean the Water Tray: Model-specific tray removal, filter cleaning, and reinstallation.
- TP-Link Tapo: Cleaning the Tray and Detachable Base: Tray rinsing, brushing, base wiping, and reinstallation.
- iRobot Support: Cleaning the Pad Washing Roller and Basin: Basin maintenance, mild soap, filter cleaning, and drainage inspection.
- Xiaomi Support: Cleaning the X20 Pro Washboard: Washboard cleaning and correct water-pipe alignment.
- eufy Support: Omni Station Drainage Troubleshooting: Clogged tray filters, wastewater tank seals, and drainage errors.
- iRobot Support: How to Mop with the Roomba 200/2000 Combo Robot: Water tank cleaning restrictions and approved cleaning products.
- Xiaomi Support: X20+ Maintenance Recommendations: Cleaning intervals for trays, tanks, and other components.
- European Environment Agency: Evolution in Average Lifespans of Household Appliances: European consumer survey findings on robot vacuum lifespan.