A robot vacuum mop tray collects residue quickly, and improper cleaning can damage seals or clog the water path. The process begins with power fully off and the tray removed with care, followed by a gentle rinse and targeted scrubbing of stuck debris. Attention must also extend to the holder, dock tray, and drying stage, since a missed step can affect performance and hygiene in ways that are not always obvious.
Power Off and Remove the Mop Tray
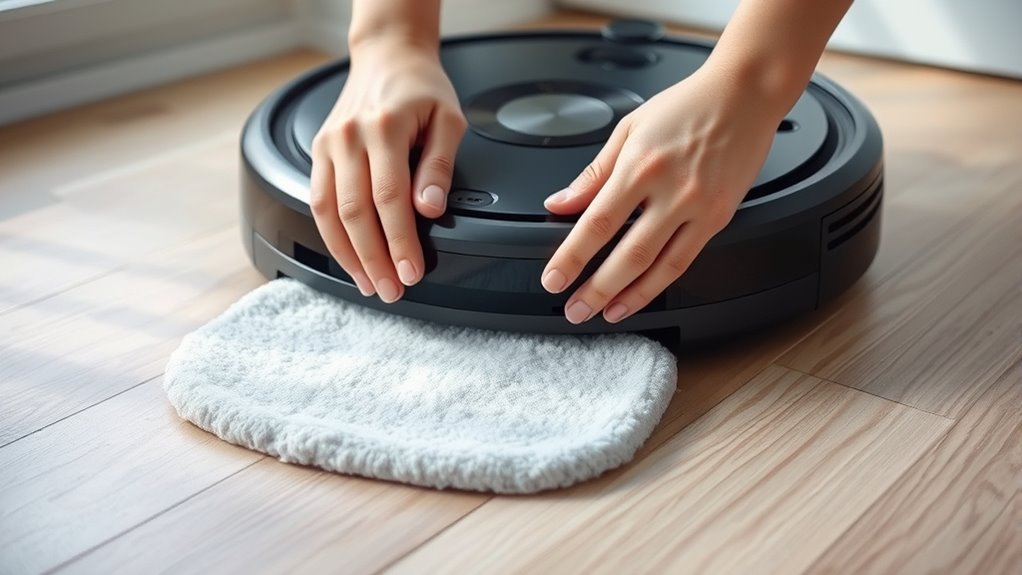
Before removing the mop tray, the robot vacuum should be powered off to prevent accidental activation and guarantee safe handling. This step establishes control and protects the operator from unexpected motion.
Once the unit is off, the mop tray can be detached carefully, following the manufacturer’s instructions so no clips, seals, or connectors are damaged. The tray should be handled level to limit spills, and any residual water should be emptied before full removal.
A brief inspection for debris or buildup is advisable at this stage, since contamination can reduce cleaning effectiveness and compromise hygiene. After the tray is removed, it may be prepared for clean-up in the next stage.
Proper removal supports peak performance and preserves the robot’s function. Disciplined handling here reduces wear, prevents avoidable faults, and allows the device to remain ready for liberated, uninterrupted cleaning.
What You Need to Clean the Mop Tray
A proper cleaning kit for the mop tray includes a microfiber cloth, warm water, a soft brush, and, where the manufacturer allows it, a mild detergent for stubborn residue.
Before any cleaning routine begins, the robot vacuum should remain unplugged and the tray removed, preserving both safety and mechanical integrity.
A separate container of clean water is useful for wiping away loosened debris and limiting redeposit on the surface.
The soft brush reaches corners, seams, and drainage features without abrasion, while the cloth removes remaining film.
If the machine uses mop pads, the pad holder should also be checked and cleaned separately to sustain consistent mopping performance.
Detergent, when authorized, should be used sparingly and never left behind.
After cleaning, all parts should air dry completely before reinstallation, reducing mildew risk and supporting hygienic operation.
This disciplined setup enables a careful, independent maintenance process.
Rinse the Mop Tray Under Warm Water
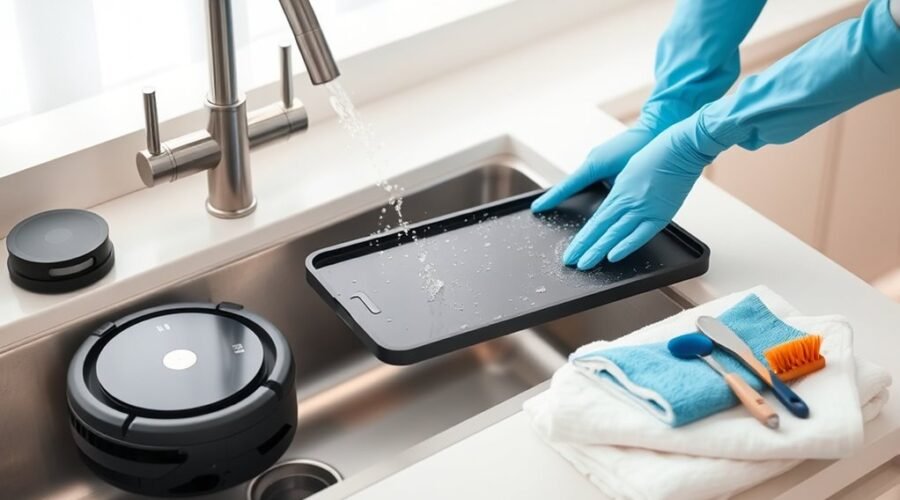
The mop tray should be removed from the powered-off robot vacuum and rinsed under warm water to loosen surface residue and lift away dirt and grime.
All crevices and corners should be flushed thoroughly to remove trapped debris without using detergents or abrasive cleaners.
After rinsing, the tray should air dry completely for at least 24 hours before reattachment.
Warm Water Rinse
Rinsing the mop tray under warm water helps loosen and remove dirt and grime accumulated during cleaning sessions. The tray should be held under a steady stream of warm water, not hot, to protect seals and material integrity while preserving the freedom of reliable operation.
A soft brush or cloth may be used to target stubborn stains without scratching the surface.
- A clear stream washing the mop tray
- A soft brush moving across corners
- The tray resting to air dry
After rinsing, the mop tray should air dry completely for at least 24 hours before reinstallation.
Regular warm water rinsing after each mop session supports hygiene, prevents mildew growth, and maintains peak cleaning performance in a precise, low-effort maintenance routine.
Remove Surface Residue
Once the mop tray has finished air drying, it should be removed from the robot vacuum with the power turned off to prevent accidental operation.
The mop tray should then be rinsed under warm water to remove surface residue, dirt, and loose debris from cleaning sessions. Gentle flow is sufficient; no harsh detergents or abrasives should be used, because they can degrade the tray’s surface and limit performance.
After rinsing, the tray should be inspected for remaining particles and cleaned again if necessary. Regular rinsing after each use helps preserve cleaning efficiency and supports a more autonomous routine.
Air Dry Completely
Warm water should be used to rinse the mop tray thoroughly, removing dirt and residue without introducing harsh detergents that could damage the material.
Every surface, seam, and corner should be rinsed so no cleaning products remain to impair performance.
Afterward, the mop tray must be placed in a ventilated area to air dry completely for at least 24 hours before reattachment.
Heat sources such as hair dryers or ovens should be avoided, because excess heat can warp the tray and reduce fit.
- A clean tray resting on a wire rack.
- Water droplets falling from each edge.
- Open air moving across the drying surface.
Routine drying belongs in a maintenance schedule that preserves efficiency, extends service life, and supports the user’s freedom from repeated failures.
Scrub Stubborn Dirt Without Scratching It
Gently scrubbing the mop tray with a soft microfiber cloth or sponge removes stubborn dirt and residue without scratching the surface. The operator should work in small circles, applying light pressure to lift debris while preserving the finish.
For resistant spots, the cloth may be dampened with warm water; the heat helps loosen grime and reduces the need for force. If cleaning power must be increased, add a few drops of mild dish soap to the water, then wipe the area again.
Abrasive cleaners, scrub brushes, and other harsh tools should be avoided because they can mar the tray and impair performance. After the surface is clean, it should be rinsed lightly with a clean damp cloth to remove any soap film.
Before reattachment, the mop tray must be completely dry. This careful method protects equipment and keeps maintenance efficient, controlled, and free from unnecessary damage.
Clean the Mop Tray Holder and Water Path
The mop tray holder should be removed from the robot vacuum and rinsed under warm water to clear residue and reduce mildew risk.
The water path should then be inspected for blockages, with a soft brush or cloth used to remove any debris that could restrict flow.
Before reassembly, the holder and seals should be fully dry and clean to prevent mold, odors, and leaks.
Mop Tray Holder Care
After each mopping session, the mop tray holder should be removed and rinsed to prevent mildew and residue buildup.
During each cleaning session, a soft brush or cloth should be used on the mop tray holder and water path, with no abrasive pads that could scar the surfaces. The water path must remain open so flow is not restricted by clogs or blockages.
- A clear holder, bright with rinse water.
- A soft brush tracing hidden channels.
- Components laid out to air dry.
Inspection should follow, with worn parts replaced promptly to preserve distribution and performance.
Allow all rinsed components to air dry completely before reassembly, ensuring hygiene and reducing mold risk.
This disciplined care keeps the system efficient and supports independent, reliable cleaning.
Water Path Cleaning
Remove the mop tray holder from the robot vacuum and rinse it thoroughly with clean water to clear away residue from previous cleaning sessions.
The water path should then be inspected for clogs, trapped debris, or mineral deposits that restrict flow and weaken mopping performance. If buildup remains, a soft brush or cloth can be used to scrub the mop tray and internal channels gently, without harsh chemicals or abrasives.
Each cleaning cycle benefits from this precise maintenance, which protects water dispersion and keeps the system free. After rinsing, all parts should air dry completely before reassembly to prevent mold or mildew.
The water path and mop tray should be inspected every few cleaning cycles to preserve efficient, autonomous operation.
Let Every Part Dry Completely
Allow all mop tray components, including the mop pads and holders, to air-dry for at least 24 hours before reassembly.
After each rinse, let it dry fully so the mop tray remains free of mildew and odors. The parts should be placed in a well-ventilated area, away from direct sunlight, where they can become completely dry without warping or fading.
Heat sources such as hair dryers or radiators should be avoided, because accelerated drying can distort materials and reduce performance.
- A folded tray resting on a clean rack, beads of water gone.
- Mop pads spread apart, edges lifted, air moving through fibers.
- Holders set upright beside an open window, evenly air-dried.
Before reinstalling, confirm that every pad is completely dry to prevent moisture buildup and bacterial growth.
Damaged, damp, or worn components should be inspected and replaced promptly. This disciplined drying phase preserves hygiene and supports liberated, reliable cleaning.
Clean the Dock Tray and Base Area
Before cleaning the dock tray and base area, the dock should be unplugged to prevent accidental operation.
To clean the dock tray, remove the washboard filter, rinse it with clean water, and set it aside until fully dry before reinstalling. This preserves filtration efficiency and supports stable performance.
The used water tank should be emptied after each mop session, then rinsed so residue and odor do not accumulate.
The dock’s dust intake and vents should be wiped with a dry cloth to prevent clogs and maintain airflow.
The base area should be inspected regularly for hair, strings, and debris; remove hair with care so docking remains accurate and charging contacts stay unobstructed.
A clear tray and base reduce strain on the system and keep the robot free to return, recharge, and clean without unnecessary interruption.
Avoid Mop Tray Cleaning Mistakes
Even with the dock tray and base area kept clear, improper mop tray care can still reduce performance. To avoid cleaning mistakes, the operator should unplug the unit before handling the mop tray, then rinse it with clean water only. Avoid using detergents, bleach, or abrasive pads, since these can degrade the surface and weaken the tray’s function.
Even with a clear dock area, unplug before handling the mop tray and rinse with clean water only.
Inspect the connection points and remove any residue that could prevent a secure fit or disrupt mopping.
- A damp mop tray left on a shelf can trap moisture and invite mold.
- A dry, lint-free mop pad reattached too soon can still carry hidden dampness.
- Clean fingers testing the connection points can reveal debris before it causes failure.
After washing, the mop tray should air dry for at least 24 hours. The mop pad must be completely dry before reattachment. This disciplined routine preserves clean operation and supports the user’s freedom from avoidable maintenance errors.
How Often to Clean the Mop Tray
The mop tray should be cleaned after every use to prevent residue buildup and maintain consistent mopping performance. Routine mop washing keeps water channels open, supports hygiene and effectiveness, and reduces maintenance burdens. For households with pets or frequent spills, it is best to clean the mop tray after each cycle, especially when debris is visible.
| Interval | Action |
|---|---|
| Every use | Clean the mop tray |
| After pet or spill use | Clean immediately |
| Weekly | Inspect for clogs |
| Monthly | Perform deep cleans |
| Before reinstalling | Air dry fully |
Regular inspection helps prevent residue buildup that can impede water flow and weaken mop output. Monthly deep cleans are recommended to remove lingering dirt and sanitize surfaces. After washing, the tray should air dry completely before reinstallation, since trapped moisture can invite mildew. This disciplined schedule preserves control, cleanliness, and reliable operation.
Frequently Asked Questions
What Are the Downsides of Using a Robotic Vacuum Cleaner?
Robot vacuums often underperform on dense floor types, with limited robot vacuum efficiency, shorter battery lifespan, and higher noise levels. They also require frequent maintenance tips, may miss debris, and can fail around cords or furniture.
Can You Put Vinegar in a Robot Vacuum Mop?
No—like acid mist in delicate machinery, vinegar harms a robot vacuum mop. For robot vacuum maintenance, use cleaning solution alternatives or plain water; mop tray care demands safe cleaning practices. Vinegar benefits are outweighed by damage.
How Do I Sanitize My Mop?
They sanitize it by soaking the mop in warm water with 70% isopropyl alcohol, one of the effective sanitizing solutions, then rinsing, scrubbing, and air-drying. These mop cleaning techniques use safe cleaning materials and support maintenance; sanitation frequency: monthly.
What Is the Average Lifespan of a Robot Vacuum?
The average robot vacuum lifespan is 2–5 years. Proper robot maintenance tips, cleaning frequency recommendations, battery care advice, troubleshooting common issues, and maximizing suction power can extend service toward 7 years in disciplined use.
Conclusion
Proper mop tray care helps a robot vacuum perform reliably and hygienically. After each use, the tray should be powered off, removed, rinsed with warm water, and scrubbed gently with a soft brush if needed. The holder, water path, dock tray, and base area should also be checked and cleaned. Complete air drying is essential before reassembly. Like a tuned engine, a clean system runs more smoothly and delivers better results.