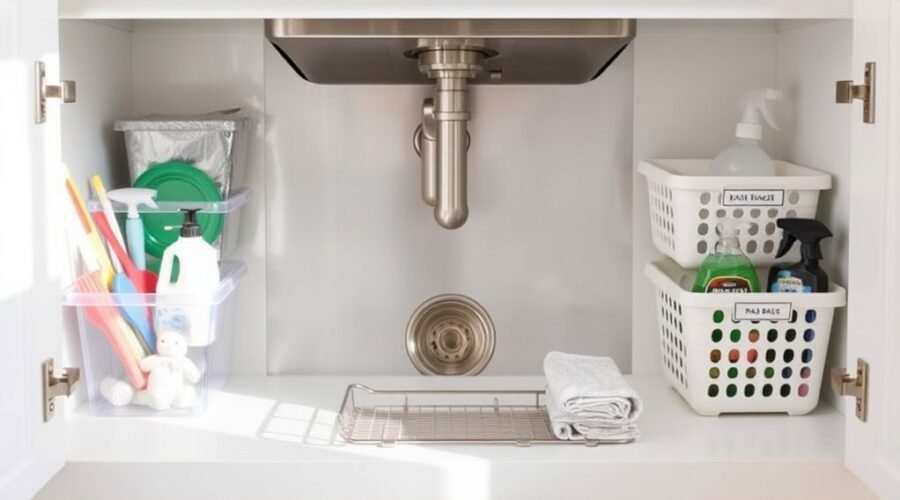
Organizing under a kitchen sink with a garbage disposal starts with measuring the cabinet and noting pipe placement. The disposal takes up valuable space, so clutter has to be removed first. A shelf liner can protect the base, while low-profile bins and adjustable organizers make better use of awkward gaps. Door storage helps with small items, but the real challenge is keeping daily supplies within reach without creating a crowded mess.
Measure Your Under-Sink Space
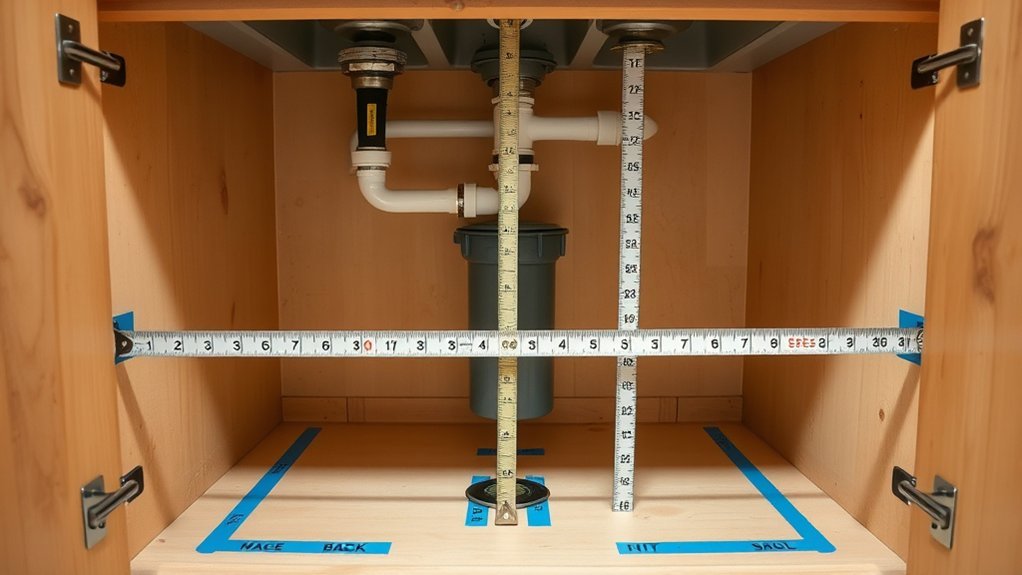
Before choosing any organizers, the under-sink area should be measured carefully in width, depth, and height, with attention to the garbage disposal, plumbing pipes, and any other obstructions.
Accurate measurements help reveal what the cabinet can truly hold. A tape measure should be used to record the opening at the cabinet door, since that access point can limit the size of storage pieces.
The height of the disposal matters as well, because it may reduce vertical clearance and affect organizer placement. Corners, angles, and pipe positions should be noted so usable space is not wasted.
These measurements should be written down clearly and kept nearby when comparing products. Careful planning supports freedom from clutter and prevents purchases that block plumbing access or fit poorly around the sink hardware.
Clear Out What You Don’t Need
The first step is to remove everything from under the sink and sort through each item.
Expired cleaners, broken tools, and duplicate products should be discarded so only usable essentials remain.
This makes it easier to keep the space organized and reserved for everyday cleaning needs.
Purge Expired Cleaners
A quick purge of expired cleaners helps keep the space safe and efficient. During organizing, it pays to purge expired cleaners first, then inspect each bottle for a date, damage, or a weak formula.
Old products can lose power and may become unsafe, so they should be set aside for disposal. Empty or nearly empty containers also deserve removal; they steal room and add visual noise.
A clear system for cleaning supplies supports freedom from clutter and wasted effort. Use one shelf for active products and check stock regularly.
When a bottle is finished, replace only what is needed. This one-in, one-out habit keeps the cabinet light, controlled, and easy to maintain without excess.
Remove Duplicates
Removing duplicates is one of the fastest ways to clear under-sink clutter and make storage more usable. When a home has a garbage disposal, space around plumbing is already limited, so it helps to remove duplicates without hesitation.
Extra sponges, repeat sprays, and backup brushes can crowd the cabinet and slow organizing the space. A practical review should group items by purpose, then eliminate anything that has the same job as another product.
Each remaining supply should have a clear place, ideally in a stackable or pull-out organizer that keeps it visible. This simple edit creates room, reduces confusion, and supports a more liberated routine.
Revisit the area periodically to remove duplicates again before clutter returns.
Keep Essentials Only
Once duplicates are cleared out, the next step is to empty the cabinet completely and sort each item for necessity. Anything expired, broken, or rarely used should leave. Only essential cleaning supplies, garbage bags, and the tools needed for daily kitchen tasks deserve a place in the cabinet. Clear organizers can support sink organization by making each item visible and easy to reach. A dedicated section for trash bags and cleaning pods keeps the layout efficient.
| Item | Keep? | Note |
|---|---|---|
| Dish soap | Yes | Used often |
| Garbage bags | Yes | Store together |
| Broken sprayer | No | Discard now |
| Extra sponge | Only if needed | Limit clutter |
Regular reassessment preserves freedom from clutter and keeps the space disciplined.
Protect the Cabinet Floor
A waterproof shelf liner or mat helps protect the cabinet floor from water damage and stains while keeping the space clean.
Flexible silicone liners can be cut to fit neatly around plumbing fixtures for a tailored fit.
Liners without raised patterns also allow sliding organizers to move more easily, improving access under the sink.
Waterproof Shelf Liner
A waterproof shelf liner adds a simple layer of protection beneath the sink, helping guard the cabinet floor against leaks, spills, stains, and long-term water damage. A waterproof shelf liner can help organize the space while keeping surfaces easier to maintain. | Benefit | Value |
| — | — |
|---|---|
| Water resistance | Blocks minor leaks |
| Silicone with lip | Contains spills |
| Flexible fit | Adapts to fixtures |
| Smooth surface | Helps organizers roll |
| Low cost | Protects the cabinet |
A waterproof, flexible shelf liner supports a cleaner, more orderly cabinet and extends the life of the wood. A small lip adds containment, improving cleanup and reducing effort. A flat surface without raised patterns lets bins move freely, supporting easy access and practical freedom under the sink.
Cut Around Plumbing
Cutting the liner to fit around pipes and drain lines helps protect the cabinet floor without blocking access to plumbing.
Around the sink, a waterproof liner should be measured carefully, then trimmed to follow each obstruction with clean edges. A small lip can help contain spills, keeping water from reaching the cabinet base and reducing stains.
Flexible liners work best because they lie flat, allow smooth rolling organizers, and make stored items easier to reach. Silicone liners add durability and create a strong barrier against leaks from pipes.
The result is a cabinet that stays dry, accessible, and easier to manage, supporting a tidy space without surrendering access or flexibility.
Plan Around Pipes and Disposal
Planning around pipes and the garbage disposal starts with measuring the available space carefully, since even small obstructions can affect which organizers will fit. This clear first step helps prevent cramped storage and supports a more liberated, workable cabinet.
Attention to pipes and disposal height makes it easier to choose pull-out drawers or a Lazy Susan without blocking access.
- Measure width, depth, and clearance around plumbing.
- Keep pull-out drawers below the disposal’s lowest point.
- Use a Lazy Susan for small items near open space.
- Line shelves with water-resistant material for spill protection.
Frequent-use cleaning supplies belong at the front, where they can be reached quickly. Less-used items can move to the back, leaving the cabinet efficient and uncluttered.
Pick the Right Under-Sink Organizer
The right under-sink organizer should fit the cabinet’s dimensions and work around pipes and the garbage disposal without blocking access. Purpose-built under-sink organizers make that easier by matching the irregular shape below the basin.
Choose an under-sink organizer that fits around pipes and the disposal without sacrificing easy access.
Two-tiered shelves and pull-out drawers can claim vertical space that would otherwise go unused, keeping supplies visible and ordered. Adjustable-height frames help the setup adapt to plumbing changes, so the cabinet stays free from cluttered compromise.
Slide-out styles are especially useful for reaching items stored at the back without bending into a cramped gap. Waterproof or water-resistant materials add protection against leaks, drips, and disposal spills, preserving both the organizer and its contents. A simple liner can reinforce that barrier.
The most effective choice supports freedom from digging, reaching, and wasting time. It should serve the space, not force the space to serve it.
Add Pull-Out Storage
Pull-out drawers turn the under-sink cabinet into usable storage by bringing supplies forward instead of forcing a search into the back. They free the space around pipes and the garbage disposal, making the cabinet feel open, ordered, and easier to claim.
With customizable pull-out solutions, the layout can adapt to awkward plumbing and still hold daily cleaning supplies without waste. Two-tiered organizers add vertical capacity, while sliding shelves help retrieve items stored deeper in the cabinet with less effort.
- Store sprays and cloths on upper and lower levels
- Use sliding shelves for deep, hard-to-reach items
- Add lazy Susans for small bottles and containers
- Fit pull-out drawers around plumbing and the garbage disposal
This setup reduces clutter and supports a cleaner routine. It replaces bending, reaching, and rummaging with direct access. The result is practical freedom: every item has a place, and that place is easy to reach.
Use Cabinet Doors for Small Items
Cabinet doors can do more than close off the space under the sink; they can hold the small, frequently used items that otherwise crowd the shelf. By using adhesive hooks or small baskets on cabinet doors, organizing becomes more efficient and the vertical space is put to work.
Cabinet doors can hold the small, frequently used items that otherwise crowd the shelf.
Sponges, brushes, and dish towels stay visible and easy to reach. Clear pocket organizers help sort small items such as trash bags or cleaning pods without hiding them. A tension rod can support spray bottles or dish soap, while a slim magnetic strip keeps metal tools, like scissors or a bottle opener, in order.
The key is restraint: only lightweight pieces should hang on the doors. This protects hinges and prevents warping over time.
With a simple setup, cabinet doors become useful storage surfaces, freeing the cabinet interior and creating a cleaner, more independent routine.
Store Daily Cleaning Supplies Up Front
Keeping daily cleaning supplies at the front of the under-sink cabinet makes routine tasks faster and easier. In practical organizing, this means placing all-purpose cleaners, sponges, and other essentials where they can be reached without effort.
A tote or caddy can hold frequently used items, allowing them to move freely from sink to counter and back again. Clear bins or labeled containers help separate cleaning supplies, reduce clutter, and support a clean, orderly system.
Taller bottles fit best on the back shelf or in the center of a two-tiered organizer, leaving shorter items visible in front. Regular rotation keeps older products in use and prevents the under-sink cabinet from becoming crowded with unnecessary extras.
- Front-load daily cleaning supplies
- Use a tote for easy carrying
- Store tall bottles behind shorter items
- Label bins for simple organizing
Keep Garbage Disposal Items Handy
For garbage disposal items, a small dedicated tote keeps cleaners, citrus peels, baking soda, and similar supplies easy to reach and neatly contained. This simple setup helps organize garbage disposal-related items without crowding the cabinet or slowing access.
| Item | Placement |
|---|---|
| Cleaning supplies | Front of cabinet |
| Repair tools/manuals | Small nearby container |
| Extra maintenance items | Pull-out drawer or shelf |
A Lazy Susan can serve as a clear station for disposal cleaners, letting the user rotate to what is needed without digging through clutter. A pull-out drawer or shelf also supports efficient storage, especially when space is limited under the sink. Keeping the most used items in front preserves order and reduces friction during routine tasks. By assigning each category a fixed place, the cabinet stays calm, functional, and ready for use.
Do a Quick Monthly Tidy-Up
A quick monthly tidy-up keeps the area under the sink efficient and safe. It gives the cabinet a reset, removing expired or unused cleaning supplies and leaving only what truly matters. This monthly tidy-up also reveals leaks, water spots, or damage around the garbage disposal before they become bigger problems. A fast wipe-down prevents buildup and keeps the space manageable.
- Sort organizing items by use: daily cleaners in front, occasional tools behind.
- Remove anything expired, empty, or duplicated.
- Check pipes, seals, and the disposal for leaks or wear.
- Wipe the cabinet and refresh a waterproof liner if needed.
Stackable or pull-out organizers help use vertical space without crowding pipes or the disposal. They keep smaller items visible and reachable, so the setup stays orderly with less effort.
Frequently Asked Questions
What Are Some Common Mistakes to Avoid When Organizing Under Sink Storage?
Common mistakes include ignoring pipes, overstuffing, keeping expired items, choosing unsuitable organizers, and skipping regular cleaning. Effective space optimization requires separating cleaning supplies and plumbing tools while preserving access, order, and ease.
What Is the Best Organiser for Under the Kitchen Sink?
The best organiser is a two-tier system with shelf risers and pull out bins, plus drawer dividers for smaller items. It maximizes vertical space, keeps supplies visible, and preserves freedom from clutter.
How Can I Organize Everything Under My Sink?
It can be organized by clearing clutter, cleaning the cabinet, measuring around pipes, and choosing space saving solutions like shelves or drawers. Cleaning supplies should be grouped in labeled container options, with frequent items placed frontmost.
Can You Have a Garbage Disposal With an Undermount Sink?
Yes—an undermount sink can pair with a garbage disposal. About 70% of modern kitchens support it. The key is sink compatibility factors, disposal installation tips, and maintenance best practices for safe, freeing, efficient operation.
Conclusion
In the end, organizing under the kitchen sink with a garbage disposal comes down to smart planning and simple maintenance. By measuring the space, clearing clutter, protecting the cabinet floor, and choosing organizers that work around pipes, the area can stay functional and neat. Using door space and keeping daily supplies accessible helps everything run smoothly. With a quick monthly tidy-up, the cabinet remains a calm, efficient space instead of a cluttered cave.