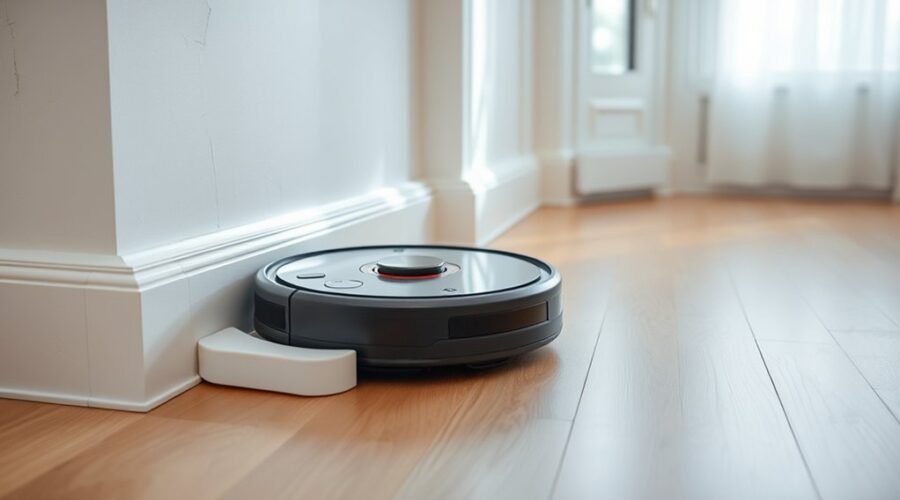
Can a robot vacuum damage baseboards even when it seems to move gently? Repeated contact can leave gray marks, scratches, or chipped paint on trim, especially around corners. Understanding why your vacuum touches walls helps you prevent damage without giving up automated cleaning.
Quick Answer
Yes. Robot vacuums can scuff or scratch painted baseboards through repeated bumper contact, especially at outside corners. Light contact during edge cleaning is normal for some models. However, hard or repeated impacts need attention. Cleaning the sensors, adjusting supported navigation settings, and using compatible protective guards can reduce the risk.
Key Takeaways
- Outside corners are more exposed because the vacuum may strike the same small area repeatedly.
- Fresh, soft, or poorly bonded paint can show wear sooner than a durable, fully cured finish.
- Modern obstacle detection reduces some collisions but cannot guarantee damage-free cleaning.
- A dirty sensor or stuck bumper can explain why a vacuum suddenly starts hitting walls harder.
- Felt strips and bumper guards may help, but they must not block sensors or restrict bumper movement.
Can a Robot Vacuum Damage Baseboards?
Yes, a robot vacuum can damage baseboards, particularly painted trim exposed to frequent contact. The damage usually starts with small scuffs or paint transfer rather than deep scratches.
A vacuum may touch the same wall several times while following an edge. Outside corners are especially vulnerable because they extend into its cleaning path.
The contact does not always mean the machine is malfunctioning. According to official edge-cleaning guidance, light bumper contact can be part of normal navigation on certain models.
However, repeated hard collisions are different from gentle contact. A robot that frequently strikes the same corner may leave visible marks or gradually wear away the paint.
How much damage occurs depends on several factors:
- Bumper design: A rigid contact surface may transfer more impact than a cushioned one.
- Navigation behavior: Repeated turns and wall-following passes increase contact.
- Paint condition: Thin, soft, or poorly bonded coatings are easier to mark.
- Baseboard shape: Projecting corners and raised trim are exposed to direct contact.
- Maintenance: Dirty sensors or restricted bumper movement can cause unusual collisions.
Some owners notice marks after only a few cleaning cycles. Others report little visible damage after long-term use. These experiences vary by model, room layout, and surface finish.
The practical goal is to distinguish normal light contact from repeated collisions that require intervention.
What Causes Baseboard Scuffs?
Baseboard scuffs occur when a robot vacuum bumps, rubs, or scrapes against a finished surface. Hard contact, repeated movement, and vulnerable paint can all contribute.
Identifying the type of damage helps you choose the right fix.
Hard Bumps
Hard bumps happen when the vacuum reaches an obstacle before slowing down enough. The front bumper then absorbs the contact and tells the robot to change direction.
Older or simpler navigation systems may rely more heavily on physical contact. However, even a modern robot can strike an obstacle when its sensors fail to recognize it.
Pay attention if your vacuum suddenly begins hitting walls harder than before.
Possible causes include:
- Dust covering the obstacle-detection sensors.
- Hair or debris trapped around the bumper.
- A bumper that does not move freely.
- Dark or reflective surfaces that affect certain sensors.
- Furniture or trim shapes that the robot does not recognize correctly.
A mechanical problem deserves attention before adding protective accessories. Otherwise, the vacuum may continue striking the same surfaces.
Painted Edge Wear
Painted edge wear develops when a bumper repeatedly rubs against the same part of a baseboard. The first signs may be dull patches, gray streaks, or small areas of missing paint.
Paint quality matters because the outer coating receives the friction. A thin or poorly bonded finish can wear before the underlying wood or MDF becomes damaged.
Fresh paint is another concern. A coating can feel dry while still developing its full hardness.
Once the finish begins wearing away, later cleaning passes may enlarge the affected area.
Corner Contact Points
Outside corners are common problem areas because they project into the robot’s path. A small turning error can bring the bumper directly against the corner.
Repeated contact concentrates pressure on a narrow section of painted trim.
Look for damage around:
- Doorway corners where the vacuum changes direction.
- Hallways with narrow turning spaces.
- Furniture positioned close to projecting trim.
- Baseboards beside the charging dock or its approach path.
- Raised decorative molding that extends beyond the wall.
These areas deserve closer attention than long, uninterrupted sections of straight baseboard.
Which Robot Vacuum Models Are Gentler?
Robot vacuums with gentle bumper contact and effective obstacle detection are generally better suited to protecting finished trim. However, a newer model is not automatically safer than an older one.
The important difference is how the individual vacuum detects an approaching surface, slows down, and responds to contact.
| Model class | Typical contact outcome |
|---|---|
| Older units with basic bump navigation | May rely more on physical contact and repeated direction changes |
| Newer units with gentle bumpers and obstacle sensors | Can slow down or avoid some obstacles before contact |
| Newer units with compatible protective accessories | May provide additional cushioning without interfering with navigation |
Recent Roomba designs use light-touch bumper technology to reduce harsh contact. Other mapping robots combine distance sensors with physical bumpers to identify obstacles.
Still, obstacle detection has limits. Some systems struggle with dark surfaces, reflective finishes, narrow objects, or low obstacles.
When choosing a vacuum, look beyond suction power and battery life. Consider the following features:
- Gentle bumper response: The robot slows before touching an obstacle.
- Wall-distance detection: Sensors help the machine follow edges without excessive contact.
- Obstacle avoidance: The vacuum recognizes furniture and other objects before reaching them.
- Adjustable cleaning boundaries: Supported no-go zones let you exclude vulnerable areas.
- Edge-distance controls: Some models let you choose how closely the machine approaches trim.
Verified purchaser feedback often describes minimal damage with newer models, including reports of more than a year of operation without significant marking. However, individual reports do not establish that a particular vacuum will protect every finish.
For a home with delicate painted trim, the best choice is a model that combines reliable navigation with a gentle, properly functioning bumper.
How Soft Bumpers Protect Baseboards
Soft bumpers reduce the force transferred to baseboards when a robot vacuum touches them. They also help the machine respond to obstacles without relying entirely on rigid plastic contact.
These features are useful, but they do not eliminate every possible scuff.
Soft Bumper Cushioning
A soft-touch bumper uses a flexible or cushioned contact surface to reduce the impact of a collision. Its movement also allows the robot to detect contact and change direction.
Compared with a rigid housing, cushioning can make contact less abrupt.
Many modern robots combine this physical protection with proximity sensors. The sensors detect nearby obstacles, while the bumper provides a response when direct contact still occurs.
The result is generally gentler interaction with furniture and painted trim.
However, cushioning only helps when the bumper moves freely. A trapped piece of debris or displaced bumper can interfere with its normal operation.
Reducing Baseboard Scuffs
Reducing scuffs requires more than a soft bumper. The robot must also recognize obstacles correctly and avoid repeatedly rubbing against the same surface.
For example, iRobot’s bumper troubleshooting guidance explains that Roomba uses light-touch contact and may strike obstacles harder when its sensors become dirty.
The guidance also identifies very dark surfaces and narrow objects as potential detection challenges.
If your vacuum starts leaving marks, inspect its bumper before assuming the baseboard paint is the only problem.
Check whether the front bumper moves smoothly, examine its edges for rough spots, and clean the appropriate sensors following the manufacturer’s instructions.
A smooth bumper paired with properly functioning sensors offers better protection than cushioning alone.
Why Painted Baseboards Scuff More Easily?
Painted baseboards can show scuffs because repeated rubbing affects the outer paint film. The surface may lose its sheen, pick up marks, or develop scratches even when the underlying trim remains intact.
The risk depends on the coating’s durability, preparation, and condition.
Several paint characteristics make a difference:
- Finish hardness: Softer coatings may show marks more easily.
- Paint adhesion: Poor surface preparation can make the coating easier to damage.
- Sheen: Flat finishes may show rubbing damage more readily than suitable, more durable trim finishes.
- Curing: Recently applied paint may not have developed its full resistance to wear.
- Previous damage: Existing scratches and peeling areas can worsen with repeated contact.
Benjamin Moore’s guidance on paint marring explains that repeated rubbing can change a painted surface’s sheen. It recommends durable, washable coatings and suitable higher-sheen finishes for areas exposed to frequent wear.
For baseboards that are regularly contacted by a robot vacuum, a suitable satin or semi-gloss trim coating may be a better long-term choice than a less durable flat finish.
Factory-finished trim may also resist marks well, but performance depends on the material and coating. No finish should be considered completely scratchproof.
When repainting, allow the coating to cure according to its product instructions before exposing it to repeated contact.
How to Prevent Robot Vacuum Baseboard Damage
The best way to prevent baseboard damage is to identify repeated contact and reduce it at the source. Start with maintenance and navigation settings before adding physical protection.
Follow these steps to protect vulnerable trim.
1. Watch the Robot During Its First Cleaning Runs
Run the vacuum while you can observe its movement around walls, doorways, and furniture.
Watch for corners it hits repeatedly or areas where the bumper scrapes along painted surfaces.
Pay special attention to narrow spaces and the path between the cleaning area and charging dock.
Light contact may be normal. Repeated hard impacts or visible new marks indicate that something needs adjustment.
2. Clean the Bumper and Obstacle Sensors
Turn off the vacuum as directed in its manual. Inspect the front bumper for debris, scratches, or anything restricting its movement.
Clean the obstacle sensors using the materials and procedure specified for your model.
Do not force a stuck bumper or spray cleaning liquid into sensor openings.
If the bumper remains stuck or misaligned, use the manufacturer’s repair instructions or contact support.
3. Create No-Go Zones Around Vulnerable Areas
If your robot supports virtual boundaries, you can block it from entering problem areas on its map.
This works well near projecting corners, delicate furniture, and tight spaces where collisions occur repeatedly.
For example, manufacturer guidance for the Omni C30 Edge recommends no-go zones when reflective or dark baseboards cause detection problems.
On that model, the documented path is:
eufy app → Map Editing → No-Go Zone Settings
Other models use different menus and may call this feature a restricted zone or virtual boundary.
Remember that a blocked area will no longer receive automatic cleaning. You may need to vacuum that small section manually.
4. Adjust Edge-Cleaning Behavior Where Supported
Some robot vacuums allow you to change how closely they approach walls.
For models supporting TruEdge 3.0, official edge-distance guidance describes two settings:
- Standard: Maintains a safer distance from baseboards and obstacles.
- Extreme: Cleans closer to edges for more complete coverage.
The documented setting is under ROBOT Advanced Settings → TruEdge 3.0.
If your model offers this control and you are seeing scuffs, the safer-distance option is the better starting point.
Some robots may also provide other navigation or movement controls. Use only settings documented for your exact model rather than assuming every vacuum has a speed or gentle-navigation mode.
5. Protect Vulnerable Corners
Use suitable felt strips or protective corner guards where repeated contact occurs.
Apply them to clean, dry surfaces and check that the adhesive is compatible with the paint.
If you prefer adding protection to the robot itself, confirm that the accessory fits your model and does not affect its sensors, bumper movement, or docking clearance.
Warning: Do not place felt pads or adhesive strips over obstacle sensors, camera windows, charging contacts, or moving bumper joints. An incorrectly placed guard may interfere with navigation or docking. Check the manufacturer’s guidance before modifying the robot.
6. Maintain the Paint and Keep Cleaning Paths Clear
Repair chipped or peeling paint before repeated contact enlarges the damage.
Remove loose cords, fragile decorations, and small obstacles near baseboards. These objects can cause unusual turns or repeated attempts to pass through a narrow gap.
After making adjustments, observe another cleaning run to see whether the contact has improved.
If the robot still strikes the same point, exclude that area or contact the manufacturer for model-specific troubleshooting.
How to Spot Early Scuff Marks
Early baseboard scuffs often look like faint gray streaks, dull patches, or small changes in paint texture. They are easiest to notice on white trim and projecting corners.
Finding them early helps prevent minor marks from becoming deeper scratches.
Inspect the following areas after your first few cleaning cycles:
- Outside corners near doorways.
- Baseboards beside furniture legs.
- Wall edges where the robot frequently turns.
- Narrow spaces that require several direction changes.
- Trim near the vacuum’s regular docking route.
Use bright, angled light to reveal subtle surface changes.
A dry microfiber cloth can help you distinguish loose dust from a mark embedded in the paint.
If the mark wipes away easily, it may be dust or surface transfer. If the area remains dull, rough, or discolored, the paint itself may be affected.
Look for these differences:
- Surface transfer: A colored mark sitting on top of otherwise intact paint.
- Paint abrasion: A dull or rough area where the coating has worn.
- Scratch: A visible line or groove in the surface.
- Chip: A section where paint has separated and exposed the material underneath.
If you are unsure whether a mark is getting worse, photograph the same corner under similar lighting after later cleaning runs.
This gives you a simple way to check whether your protective adjustments are working.
How to Clean Robot Vacuum Scuffs and Repair Damaged Baseboards
Minor marks can often be cleaned without repainting. Deep scratches and missing paint require a different approach because cleaning cannot restore the removed coating.
Start with the gentlest method and inspect the result before continuing.
- Remove loose dust: Wipe the baseboard with a clean, dry microfiber cloth.
- Test a hidden area: Make sure the paint tolerates gentle cleaning before treating a visible mark.
- Use mild soapy water: Lightly dampen a soft cloth or nonabrasive sponge and gently wipe the scuff.
- Remove residue: Wipe the area with a separate, lightly dampened cloth.
- Dry the surface: Use a soft towel and check whether the mark remains.
- Repair damaged paint: If the finish is scratched or chipped, prepare and touch up the affected area with compatible paint.
According to Benjamin Moore’s painted-surface cleaning guidance, soft cloths, mild soap, and gentle cleaning are preferable to abrasive scrubbing.
The manufacturer also explains that many wall and cabinet paints need about 30 days to reach full cure. Your trim paint may have a different curing period, so follow its product instructions.
Warning: Avoid aggressive scrubbing, abrasive pads, and harsh solvents on painted baseboards. They can remove or dull the finish. Test any cleaning product in an inconspicuous area first, especially on fresh paint.
If cleaning reveals exposed wood or MDF, allow the area to dry and repair it using suitable preparation, primer, and matching trim paint.
Address the vacuum’s contact problem before repainting. Otherwise, the new finish may develop the same marks.
When to Use Felt Strips or Bumper Guards
Felt strips and bumper guards are most useful when a robot repeatedly contacts specific surfaces despite normal maintenance and navigation adjustments.
Choose protection based on the problem area and the accessory’s compatibility with your vacuum.
| Option | Best use | Effect |
|---|---|---|
| Felt strips | Exposed baseboard corners and contact points | May reduce rubbing and minor scuffs |
| Bumper guards | Furniture, wall edges, and repeated collision points | Provide an additional cushioning barrier |
| Both together | Rooms with several vulnerable surfaces | Can add protection when correctly installed |
| Soft-touch bumpers | Robots designed for gentle physical contact | Reduce direct impact compared with rigid contact |
| Manufacturer advice | Uncertain accessory compatibility or unusual collisions | Helps avoid unsuitable modifications |
Felt strips work best when you can identify a small area that receives repeated contact.
For example, a projecting doorway corner may need protection while the rest of the baseboards remain untouched.
Clean the surface before applying an adhesive-backed strip. Check whether the adhesive is suitable for painted trim and whether it can be removed without lifting the finish.
Bumper guards are more appropriate when contact occurs across several nearby surfaces. They may cushion furniture legs, wall edges, or other exposed areas.
However, adding an aftermarket guard directly to a robot requires extra care.
The material must not interfere with obstacle detection, mechanical bumper travel, wheels, brushes, or docking.
Newer robots with soft-touch bumpers may still benefit from carefully selected protection, but additional padding is not always necessary.
If the robot already avoids contact effectively, unnecessary accessories may introduce more problems than they solve.
After installing any protection, run the vacuum while observing the affected area. Check that the robot follows its normal route without scraping, becoming stuck, or failing to dock.
For rooms with multiple problem areas, combining compatible protection with virtual boundaries may work better than relying on padding alone.
Frequently Asked Questions
How to Protect Baseboards From Robot Vacuum?
Protect baseboards by cleaning the vacuum’s sensors, checking its bumper, and using no-go zones around vulnerable corners. Compatible felt strips or bumper guards can add protection. Inspect painted trim regularly and choose gentler edge-cleaning settings when your model supports them.
What Robot Vacuum Doesn’t Damage Baseboards?
No robot vacuum can guarantee that every baseboard will remain undamaged. Models with gentle bumpers, reliable obstacle sensors, and adjustable cleaning boundaries may reduce the risk. Look for demonstrated navigation performance rather than assuming all newer models are equally gentle.
What Are the Downsides of Using a Robotic Vacuum Cleaner?
Robot vacuums may miss corners, struggle with thick carpets, and require regular maintenance. They can also produce noise, encounter mapping errors, scuff furniture or baseboards, and experience battery wear. Most cannot clean stairs and still need occasional human supervision.
Why Is My Robot Vacuum Leaving Marks on My Baseboards?
Your robot vacuum may be rubbing its bumper against painted trim or repeatedly hitting the same corner. Weak paint, dirty sensors, and restricted bumper movement can make the problem worse. Inspect the contact points and correct the navigation problem before repairing the marks.
Is It Normal for a Robot Vacuum to Bump Into Baseboards?
Yes, some robot vacuums lightly touch baseboards during edge cleaning. Their bumpers help them detect obstacles and change direction. However, frequent hard impacts, sudden changes in behavior, or visible paint damage indicate that the bumper, sensors, or navigation settings need attention.
Can You Put Felt Pads on a Robot Vacuum Bumper?
You may be able to use compatible felt pads, but do not assume every robot supports them. Pads must not obstruct sensors or restrict bumper movement. Check the manufacturer’s instructions first. Protecting the baseboard corner itself may be a simpler alternative.
Conclusion
Robot vacuums can damage baseboards, but most concerns begin with repeated contact rather than severe impacts. Painted corners, rigid bumpers, and sensor problems increase the risk.
Start by inspecting the affected trim and checking the vacuum’s bumper and sensors. Then adjust supported navigation settings or add compatible protection where needed.
With proper maintenance and early attention to scuffs, you can enjoy automated cleaning while keeping your baseboards in better condition.
Rights Reserved.
Sources
- Xiaomi Support: S40 Pro Edge-Cleaning Behavior: Explains normal light contact with baseboards and troubleshooting stronger collisions.
- iRobot Support: Roomba Bumper Troubleshooting: Covers light-touch bumper operation, sensor limitations, and cleaning guidance.
- eufy Support: Omni C30 Edge Baseboard Contact: Explains obstacle-detection limitations and model-specific no-go zone controls.
- ECOVACS Support: TruEdge 3.0 Edge-Distance Settings: Documents Standard and Extreme modes and their approach distances.
- Benjamin Moore: How to Fix Paint Burnishing: Explains paint marring, repeated friction, and durable finishes.
- Benjamin Moore: Cleaning Freshly Painted Surfaces: Supports gentle cleaning methods and paint-curing precautions.