
To add visual height with layered wall decor, start with a striking statement piece at eye level, around 57-60 inches. Measure your wall space and plan your layout to create balance. Use a mix of sizes, layering smaller items above larger ones with 2-5 inches of space. Consider textures and materials for depth, and experiment with different arrangements. Finally, follow hanging tips for both lightweight and heavy decor. Keep going to discover more essential techniques!
Start With a Focal Point: Choosing the Right Statement Piece
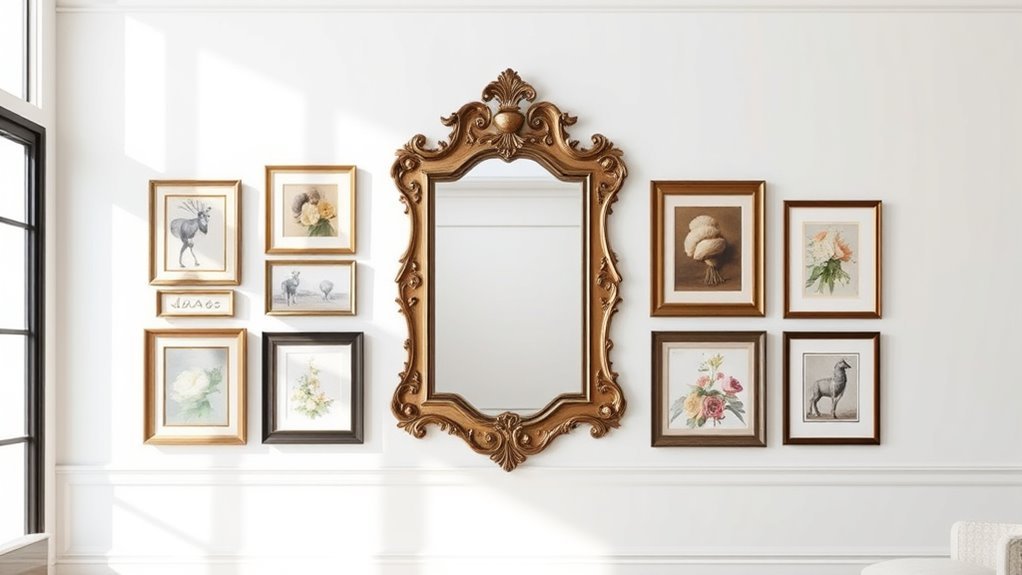
When you step into a room, your eyes naturally gravitate toward a striking statement piece that commands attention and sets the tone for the entire space. This focal point, whether it’s a large canvas or an intriguing sculpture, creates visual interest and anchors your decor. Aim for artwork that’s about 60 inches from the floor to its center for best viewing and a balanced look. Choose a piece that resonates with the room’s purpose—calming images for bedrooms or vibrant art for living areas. Make sure the colors and style complement your existing decor, transforming your wall into an engaging backdrop. With the right statement piece, you’ll not only enhance aesthetics but also express your unique personality and liberate the space.
Measure Your Wall Space: Finding the Perfect Layout
Before you start hanging your decor, grab a tape measure and assess your wall dimensions carefully. This’ll help you visualize how different art pieces can fit together without overcrowding or leaving awkward gaps. Planning on the floor first lets you experiment with balance and scale, ensuring your final layout is both cohesive and visually stunning.
Assess Wall Dimensions Accurately
Accurately evaluating your wall dimensions is essential for crafting a stunning layered decor layout. Use a tape measure to capture the height and width of your wall, ensuring you have precise measurements for planning. Jot down these figures to visualize your space, steering clear of overcrowding or leaving empty gaps. Remember to take into account the ceiling height; it plays a vital role in enhancing visual height. Take note of architectural features like windows or moldings, as these elements influence the placement and scale of your decor. With your measurements in hand, you can determine the ideal size and number of art pieces needed, creating a balanced arrangement that elevates your space and invites liberation through artistic expression.
Visualize Art Placement Options
As you commence on the journey of visualizing your art placement options, it’s essential to embrace the dimensions of your wall with creativity and intent. Begin by measuring your wall and recording its height and width. This careful planning allows you to determine how many pieces fit without overcrowding. Aim to position the center of your art at eye level, around 57-60 inches from the floor, to create an inviting visual impact. Use painter’s tape to outline your planned arrangements in your space, making adjustments before any permanent placements. Here’s a simple layout guide to help you visualize your options:
| Wall Size | Ideal Art Size | Center Height |
|---|---|---|
| Small | 12×12 inches | 57 inches |
| Medium | 24×36 inches | 60 inches |
| Large | 48×60 inches | 58 inches |
Plan for Balance and Scale
To create a balanced and visually appealing wall decor arrangement, you’ll want to thoughtfully consider the scale and layout of your space. Start by measuring your wall’s height and width, then visualize how to hang art that integrates both larger pieces and smaller pieces for a cohesive look.
- Use the standard eye level of 57–60 inches as a guide for placement.
- For spacious walls, consider taller pieces or stacking smaller items vertically to draw the eye upward.
- Maintain consistent spacing of 3-6 inches between pieces for harmony.
- Avoid overcrowding and empty gaps to keep your arrangement dynamic yet balanced.
Essential Tools for Layering Wall Decor Successfully
To layer your wall decor like a pro, you’ll need some essential tools at your side. Grab a tape measure to nail down spacing, a level to keep everything straight, and various hanging hardware to support your designs. With the right equipment, you’ll transform your walls into a stunning visual masterpiece.
Essential Tools Checklist
A well-equipped toolkit is essential for successfully layering wall decor and achieving that perfect gallery effect. With the right tools, you’ll release your creativity and transform your space. Here’s what you’ll need:
- Tape measure: For precise spacing and layout.
- Hammer: To securely hang your decor with ease.
- Carpenter’s level: Verify everything is straight and visually pleasing.
- Picture hooks: Use two for larger pieces, adding stability and support.
Having a sturdy step ladder and a pencil handy will also help you reach new heights and mark hook placements accurately. With these essential tools, you can confidently create a layered wall display that reflects your unique style and liberates your living space.
Measuring Equipment Importance
Equipping yourself with the right tools sets the stage for a successful wall decor project, but understanding the importance of measuring equipment can elevate your design game even further. A tape measure is your best friend, allowing you to pinpoint wall dimensions and guarantee decor is positioned perfectly to enhance visual height. Don’t overlook the carpenter’s level; it ensures your artwork hangs straight, avoiding that skewed look that disrupts your aesthetic. Secure your pieces using sturdy picture hangers, especially those with D-rings for heavier items. Recording measurements and planning placements beforehand creates a cohesive arrangement that maximizes impact. With these essential tools in hand, you’re ready to free your walls and unleash your creativity!
Hanging Hardware Options
When it comes to hanging wall decor, choosing the right hardware can make all the difference in achieving a polished and professional look. Here are some essential hanging hardware options to evaluate for your layered designs:
- Picture hooks: Ideal for securing frames and ensuring they stay put.
- Wall anchors: Perfect for providing extra support, especially on drywall, keeping your artwork from sagging.
- D-rings: Attach these to the back of your frames for stability and easy leveling.
- Carpenter’s level: A must-have for verifying that your artwork is hung straight, giving your decor that finished touch.
Choosing Art and Decor That Complements Your Layered Wall Decor

Choosing the right art and decor for your layered wall can elevate the entire aesthetic of your space, especially if you focus on elements that enhance verticality. When you’re choosing pieces, look for artwork that features vertical lines or elongated shapes to draw the eye upward. Mix frame sizes and styles to create visual interest, but guarantee you stick to a cohesive color palette to maintain harmony. Incorporate tall vases or sculptures to emphasize height and add layers. Consider wall-mounted shelves to showcase smaller art or decor, breaking up the wall space beautifully. Finally, choose contrasting colors between the wall and artwork to make each piece pop, answering those decorating questions that ultimately liberate your walls and spirit.
Experiment With Layering Heights and Arrangements
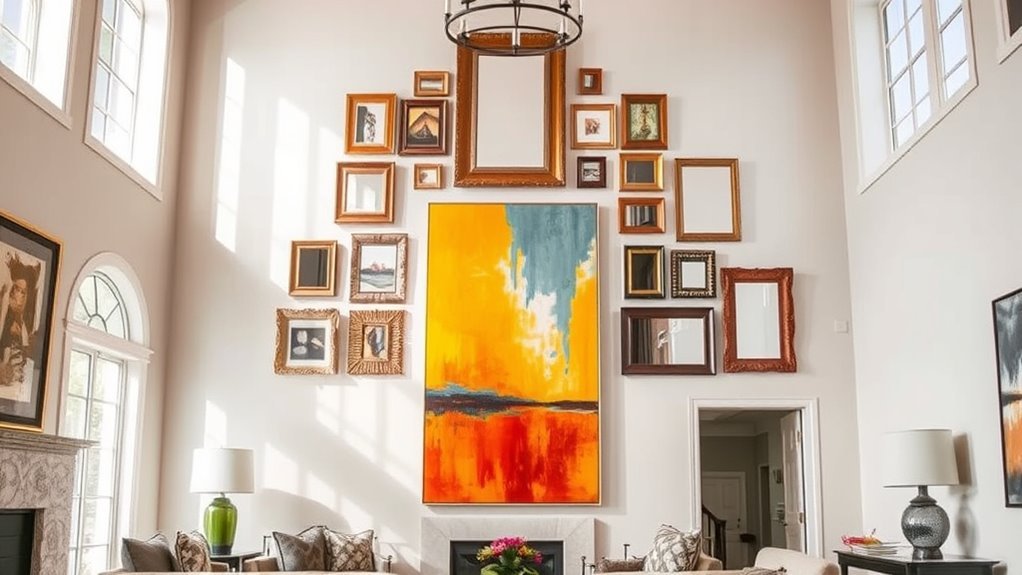
As you immerse yourself in the art of layering heights and arrangements, remember that the key to an enchanting display lies in the balance of scale and placement. Start by hanging artwork at eye level, allowing larger pieces to anchor your display. Layer smaller items above or below, leaving 2-5 inches of space for a dynamic effect. To enhance visual height, consider these tips:
- Integrate vertical elements like tall mirrors or narrow shelves.
- Use risers or stands to elevate smaller decor items.
- Create a sense of movement by varying frame sizes.
- Employ a carpenter’s level to maintain straight lines.
This thoughtful arrangement will draw the eye upward, creating a breathtaking layered wall decor that transforms your space.
Add Textures and Materials for Enhanced Visual Interest
To elevate your layered wall decor, infusing textures and materials is a game changer. Mixing woven textiles, wood, metal, and ceramics creates a fascinating visual interest that draws the eye. Layering different materials, like a canvas piece with a rustic wooden shelf, adds depth and contrast for a dynamic arrangement.
Utilizing natural elements like greenery softens harder surfaces, while varying frame materials—metal, wood, acrylic—enhances the overall design. Here’s a simple breakdown of textures to reflect on:
| Texture Type | Effect |
|---|---|
| Smooth | Clean, modern appeal |
| Rough | Rustic, organic warmth |
| Natural Elements | Softens hard edges |
Embrace this layering of textures to liberate your wall decor from the ordinary!
Hanging Tips for Lightweight and Heavy Decor
Hanging your decor properly transforms a wall into an enchanting focal point. To achieve that effortless look, follow these hanging tips for both lightweight and heavy decor:
- For lightweight decor (under 5 pounds), use adhesive strips or small nails to protect your walls.
- When tackling medium-weight items (5-20 pounds), opt for picture hooks or wall anchors for solid support.
- Heavy decor (over 20 pounds) demands wall studs or heavy-duty wall anchors for safety.
- Always measure the height of your decor and mark the wall with a pencil for accurate placement.
Once you’ve hung your pieces, use a carpenter’s level to verify everything’s perfectly straight. This attention to detail guarantees a polished finish that elevates your space.
Evaluating Visual Balance: Tips for Adjusting Your Art Arrangement
When arranging your art, start by evaluating the heights to guarantee everything sits comfortably at eye level, creating a seamless viewing experience. Balance visual weight by pairing larger pieces with smaller ones, allowing them to complement rather than compete for attention. Finally, group similarly themed artworks together to tell a cohesive story that draws the eye across your display.
Assessing Art Heights
Finding the perfect height for your artwork can transform a space from bland to breathtaking. When evaluating art heights, keep these tips in mind to release your inner designer:
- Position the center of your art around eye level (57-60 inches) for a striking effect.
- Maintain 3-6 inches of spacing between pieces for a cohesive look.
- For larger works, leave 12-20 inches of blank space above and below to enhance prominence.
- When hanging smaller pieces above furniture, aim for the bottom of the art to sit 5-6 inches from the top of the furniture.
Balancing Visual Weight
Achieving visual balance in your art arrangement can elevate the entire aesthetic of your space, ensuring no single piece dominates the scene. Start by considering the visual weight of your pieces; larger works should be complemented by smaller ones for harmony. Use the rule of thirds to guide placement, distributing artworks evenly across the wall. Overlapping frames can create depth, but keep crucial elements visible. Adjust spacing between pieces to 3-6 inches, promoting a cohesive look.
| Piece Size | Color Palette | Arrangement on the Floor |
|---|---|---|
| Large | Warm Tones | Centered |
| Medium | Cool Tones | Side by Side |
| Small | Neutral Shades | Above Larger Pieces |
| Mixed | Vibrant Accents | Layered |
Creating Harmonious Groupings
Creating harmonious groupings for your wall art is essential to crafting a visually appealing space, as it brings together different pieces into a cohesive narrative. To achieve this, consider the following:
- Hang artwork that resonates with a unified color scheme.
- Arrange the pieces with 3-6 inches of space for visual separation.
- Align the center point at eye level (57-60 inches) for inviting displays.
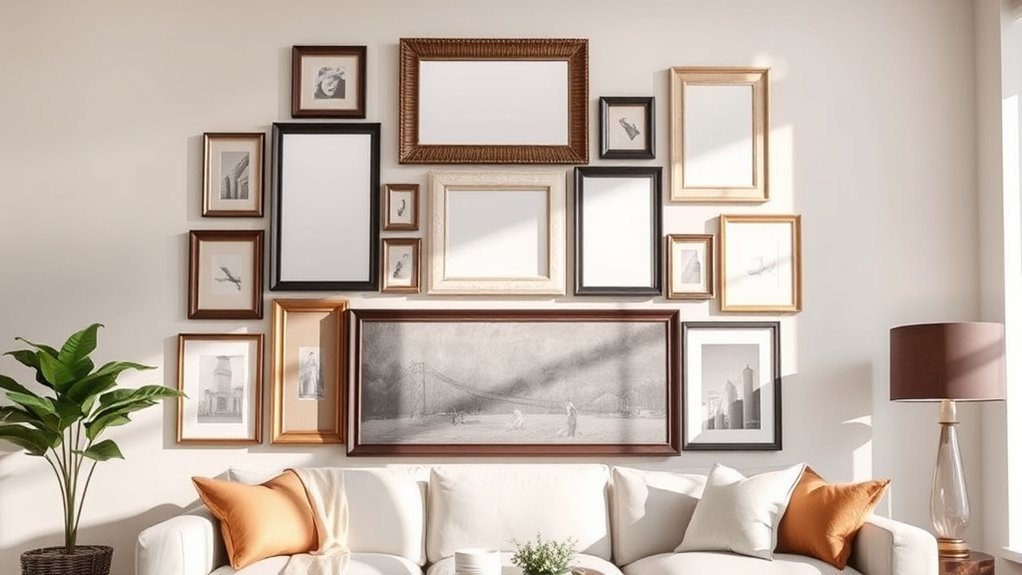
- Experiment with staggered arrangements, mixing sizes and orientations for dynamic visual height.
Put on the Finishing Touches to Elevate Your Decor
As you put the finishing touches on your decor, consider how a few strategic elements can transform your space into a visually enchanting retreat. Incorporate tall elements like floor lamps or vertical wall art to draw the eye upward, creating an illusion of height. Use layered wall decor techniques, mixing frames of varying sizes to add depth and interest. Remember to leave empty space between pieces; this breathing room allows each element to shine, contributing to an overall feeling of elevation. Utilize vertical lines in artwork, tall mirrors, or elongated sculptures to emphasize upward movement. Finally, embrace architectural features like tall bookcases or decorative wall paneling that reach the ceiling, enhancing the sophistication and visual height of your decor.
What Makes a Good Statement Piece?
When you want to make a bold statement in your space, choosing the right focal piece can elevate the entire room. A good statement piece captures attention and breathes life into your wall decor. Here’s what to evaluate:
- Oversized or uniquely designed: It should draw immediate attention.
- Bold colors or striking patterns: A powerful contrast enhances visual impact.
- Harmonizes with your theme: It resonates with the room while commanding presence.
- Positioned at eye level: Placing it around 57-60 inches up maximizes accessibility.
Incorporating texture, like mixed media or three-dimensional elements, adds depth, enriching the overall aesthetic. Let your statement piece inspire freedom and creativity, turning your walls into a canvas for self-expression.
Frequently Asked Questions
How to Add Height to Decor?
To add height to your decor, incorporate wall art with vertical lines, place tall plants in corners, and use layered shelves. Don’t forget ceiling accents to draw the eye upward, creating an expansive feel.
What Is the 3-5-7 Rule in Decorating Interior Design?
The 3-5-7 rule in interior design emphasizes visual balance by incorporating three sizes of decor, grouping five pieces, and spacing them seven inches apart. This layering technique creates stunning wall decor that captivates the eye effortlessly.
What Is the 70/30 Rule in Art?
The 70/30 rule in art emphasizes a harmonious composition, where 70% of your space showcases a focal piece, and 30% features smaller artworks. This creates visual balance and aesthetic harmony, enhancing your design principles and creative techniques.
How Do I Add Height to a Wall?
To elevate your space, adorn your walls with tall art and mirrors that reflect light. Use vertical stripes for walls, place tall plants strategically, and let them stretch toward the ceiling height, creating a liberating illusion.
Conclusion
Now that you’ve layered your wall decor like a master artist, take a step back and admire your work. Just like a well-composed symphony, each piece plays its part in creating visual harmony. Remember, this isn’t just about filling space; it’s about crafting an experience. So, whether you’re channeling your inner Picasso or simply adding a touch of flair, trust your instincts. Your wall is now a canvas that tells your unique story—let it shine!
Leave a Reply