If you’re trying to dehumidify a garage, start by finding where the moisture is coming from. A dehumidifier can help, but it works best when you also seal air leaks, improve drainage, dry wet vehicles and stored items, and use a hygrometer to track the actual relative humidity. The goal is not just drier air for one day. The goal is a garage that stays dry enough to protect tools, vehicles, cardboard boxes, wood, and stored gear.
Quick Answer
To dehumidify a garage, keep relative humidity around 30% to 50%, use a properly sized dehumidifier, drain it continuously if possible, and stop moisture at the source by sealing gaps, fixing leaks, improving drainage, and removing wet items quickly.
Key Takeaways
- Use a digital hygrometer first so you know whether the garage is mildly damp, consistently humid, or actively wet.
- Aim for 30% to 50% relative humidity when practical; keeping humidity below 60% helps reduce mold risk.
- Choose dehumidifier capacity by square footage, measured humidity, temperature, and water load—not by car count alone.
- Fix leaks, wet floors, poor drainage, and air gaps or the dehumidifier will keep fighting new moisture.
At a Glance
| Time Required | 30 minutes to inspect and set up; 24 to 72 hours to see stable humidity changes |
| Difficulty | Easy to moderate, depending on drainage and air-sealing needs |
| Tools Needed | Digital hygrometer, dehumidifier, drain hose or condensate pump, caulk, weatherstripping, fan, flashlight |
| Cost | Low for sealing and monitoring; moderate for a portable dehumidifier; higher if you need a pump, outlet, drain, or major leak repair |
What Causes Garage Humidity?
Garage humidity usually comes from more than one source. Wet vehicles bring in rain, snow, slush, and mud. Tires, wheel wells, and undercarriages can drip water onto the slab for hours after you park. If the garage has poor airflow, that water evaporates into the air and raises relative humidity.
The concrete slab can also contribute moisture, especially if the slab lacks a proper vapor retarder or the surrounding soil stays wet. Gaps around the garage door, service door, windows, wall penetrations, and sill plates can pull humid outdoor air inside. Poor grading, clogged gutters, roof leaks, plumbing leaks, and pooling water near the garage can add even more moisture.
Stored items matter too. Damp cardboard, rugs, firewood, sports gear, wet towels, and snow-covered tools can keep releasing moisture long after the floor looks dry. A garage that smells musty or feels clammy usually has a source problem, not just an air problem.
What Humidity Level Is Best for a Garage?
For most garages, a practical target is 30% to 50% relative humidity. The U.S. Environmental Protection Agency recommends keeping indoor humidity below 60% when possible, ideally between 30% and 50%. The CDC also advises keeping home humidity no higher than 50% all day when preventing mold is the priority.
Use a digital hygrometer instead of guessing. Put it away from direct sunlight, vents, and the dehumidifier outlet so the reading reflects the room, not one small air pocket. Check it in the morning and evening for several days, especially after rain, snow, car washing, or humid weather.
A garage that stays above 60% relative humidity needs action. A garage that sits above 70% often needs source control plus mechanical dehumidification.
Do not chase an extremely low number. In many climates, keeping an unconditioned garage at exactly 30% year-round is unrealistic and can waste energy. For most storage and tool protection, keeping the space near 45% to 50% is a good working target.
Signs Your Garage Needs Moisture Control
You may need to dehumidify your garage if you notice any of these signs:
- Condensation on windows, metal doors, pipes, tools, or the garage floor
- Musty odors that return after cleaning
- Rust on tools, bicycles, shelving, fasteners, or vehicle parts
- Soft, sagging, or moldy cardboard boxes
- White powdery deposits, damp spots, or dark staining on concrete
- Peeling paint, swollen wood, warped trim, or sticky drawers
- Visible mold or mildew on stored items, drywall, wood, or insulation
Warning: If you see widespread mold, smell strong mustiness, or find water-damaged drywall or insulation, do not just add a dehumidifier. Find and repair the water source first, and consider professional help for large mold areas.
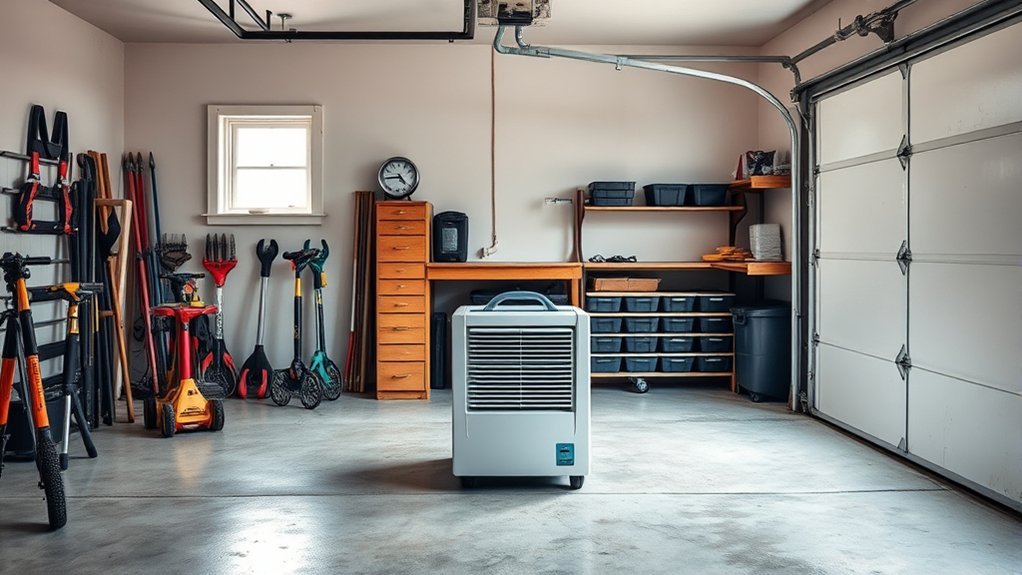
How to Choose a Garage Dehumidifier
To choose the right garage dehumidifier, match the unit to the garage size, measured humidity, temperature, and moisture load. According to ENERGY STAR, dehumidifier capacity is usually measured in pints per 24 hours, and the capacity you need depends on the size of the space and the conditions in that space.
Start with this practical sizing guide, then adjust based on your hygrometer readings:
| Garage Condition | Typical Signs | Starting Point |
| Mildly damp | RH around 50% to 60%, light musty smell, no standing water | Smaller portable unit or a 20- to 30-pint class model for many one-car garages |
| Consistently humid | RH around 60% to 70%, condensation, damp boxes, light rust | 35- to 50-pint class model, especially for larger one-car or two-car garages |
| Very wet or high-load | RH above 70%, wet vehicles daily, leaks, standing water, heavy condensation | Large 50-pint class unit, condensate pump, source repairs, or commercial drying help if water intrusion is active |
Choose features that make garage use easier: adjustable humidistat, auto restart after power loss, continuous drain connection, washable filter, low-temperature operation if the garage gets cold, and a pump if the drain is higher than the dehumidifier outlet.
For warmer garages, a refrigerant or compressor dehumidifier is usually the most common choice. For colder, unheated garages, check the manufacturer’s operating-temperature range before buying. Some compressor units lose efficiency or frost up in cool spaces, while desiccant models are often used in lower-temperature applications.
Note: Pint ratings are useful for comparison, but they are measured under test conditions. A cold, leaky, wet garage may need more capacity than a dry, insulated garage of the same square footage.
Where to Place and Run a Garage Dehumidifier
Place the dehumidifier on a level surface near the center of the garage or near the dampest area, as long as airflow is not blocked. Leave at least 6 to 12 inches of clearance around the intake and outlet, unless your model’s manual requires more.
- Set the humidistat around 45% to 50% to start.
- Keep the garage door and windows closed while the dehumidifier runs, unless outdoor air is clearly drier than indoor air.
- Keep stored items away from walls so air can move behind shelves, boxes, and equipment.
- Clean the filter on the schedule listed in the manual, or more often in dusty garages.
- Use the hygrometer to adjust the setpoint after several days of real readings.
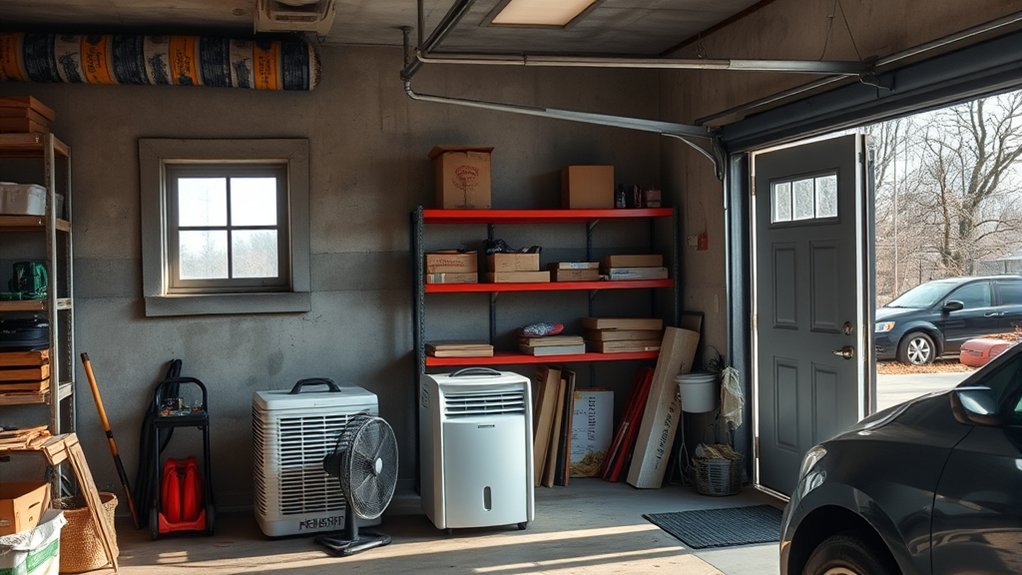
Pro Tip: Run a fan for air movement, not as a substitute for drying. A fan helps move damp air toward the dehumidifier, but it will not remove moisture unless the moisture has somewhere to go.
How to Set Up Garage Dehumidifier Drainage
Continuous drainage is the easiest way to keep a garage dehumidifier working without emptying the bucket every day. Use the dehumidifier’s hose attachment and route the line to an approved drainage point, such as a floor drain, utility sink, sump pit, condensate pump, or safe outdoor discharge point.
For gravity drainage, the hose must slope downward the entire way. A sag, loop, kink, or uphill section can trap water and stop the unit from draining. If the drain is higher than the dehumidifier outlet, use a condensate pump or a dehumidifier with a built-in pump.
In cold weather, avoid draining outdoors where the line can freeze. A frozen hose can back water up into the unit or onto the garage floor. Route the hose to a warmer drain location or use the bucket until freezing conditions pass.
Warning: Do not drill through a concrete slab or wall for permanent drainage unless you know what is below or behind it and the work is allowed locally. Use an existing drain, sump, utility sink, or condensate pump instead.
How to Lower Garage Humidity Without a Dehumidifier
You can lower garage humidity without a dehumidifier by reducing moisture entry, improving controlled airflow, drying wet items quickly, and keeping water away from the slab. These steps also make a dehumidifier work better if you add one later.
Improve Airflow
Improving airflow helps move damp air out and prevents stagnant pockets behind shelves and stored equipment. Use controlled ventilation instead of relying on random air leaks.
- Open the garage door or windows only on low-humidity days.
- Install a wall vent, exhaust fan, or transfer fan if the garage regularly traps humid air.
- Use a ceiling fan or portable fan to keep air moving around corners and storage areas.
- Leave space between boxes, walls, and shelving so air can circulate.
Ventilation works best when outdoor air is drier than indoor air. On hot, humid days, opening the garage door can make the problem worse.
Seal Moisture Entry
Sealing moisture entry is one of the most important steps. Humid outdoor air and rainwater can keep the garage damp even when a dehumidifier is running.
- Replace worn garage door bottom seals and side weatherstripping.
- Caulk gaps around windows, service doors, wall penetrations, and trim.
- Seal cracks where the slab meets the wall if air or water is entering.
- Improve grading so water drains away from the garage, not toward it.
- Clean gutters and extend downspouts away from the foundation.
Manage Wet Vehicles and Storage
Wet vehicles are one of the fastest ways to raise garage humidity. After rain or snow, squeegee standing water toward a drain or out of the garage if safe. Use containment mats for snow melt, but empty them before the water evaporates back into the room.
Do not store damp cardboard, rugs, towels, firewood, or sports gear directly on the concrete. Use plastic bins with lids for moisture-sensitive items, and elevate storage on shelves so air can move underneath.
The EPA mold course notes that wet building materials and furnishings should be dried within 24 to 48 hours to help avoid mold growth. That same rule is useful for damp garage storage: dry it quickly or move it out.
How to Fix Moisture Problems at the Source
A dehumidifier treats moisture in the air. Source control stops new moisture from entering. The best long-term fix usually combines both.
Seal Air Leaks
Check the garage door, service door, window frames, sill plates, wall seams, and pipe or wire penetrations. Seal visible gaps with exterior-grade caulk, foam rated for the location, or weatherstripping. Replace brittle or flattened rubber seals.
Air sealing matters because humid outdoor air can enter through small gaps and raise relative humidity. It also helps reduce temperature swings that lead to condensation on cold surfaces.
Stop Water Entry
Inspect the roof, gutters, downspouts, siding, windows, slab edges, and plumbing lines. Repair leaks immediately. If the floor gets wet during storms, check grading, driveway slope, door thresholds, and nearby drainage.
The EPA moisture control guidance emphasizes managing moisture through site drainage, foundations, walls, roof assemblies, plumbing, and HVAC systems. In a garage, that means water should be directed away before it reaches the slab or wall cavities.
Reduce Condensation
Condensation forms when warm, moist air touches a cold surface. Insulating the garage door, exposed pipes, and shared walls can reduce temperature swings. Better air sealing also helps because it limits the amount of warm, humid air entering the garage.
If condensation appears mostly on the floor during spring or summer, the slab may be cooler than the incoming air. Keep doors closed during humid weather, run the dehumidifier, and avoid storing moisture-sensitive items directly on the concrete.
Troubleshooting: Why Garage Humidity Stays High
| Problem | Likely Cause | Fix |
| Humidity drops, then rises again | Air leaks, door openings, wet vehicles, or damp storage | Seal gaps, dry wet items, improve drainage, and keep the door closed during humid weather |
| Dehumidifier runs constantly | Undersized unit or active moisture source | Check RH, inspect for leaks, empty water sources, and consider a larger unit or pump setup |
| Unit ices up | Garage is too cold for that model or airflow is blocked | Check the manual’s temperature range, clean the filter, improve clearance, or use a cold-rated model |
| Water is not draining | Hose is kinked, level, clogged, frozen, or routed uphill | Shorten and slope the hose, clear the line, protect it from freezing, or add a condensate pump |
| Musty smell remains | Moldy cardboard, damp fabric, hidden leak, or contaminated storage | Remove damp materials, clean hard surfaces, fix leaks, and improve airflow around storage |
Garage Dehumidifier Safety and Maintenance
Garages are often dusty, damp, and full of tools, chemicals, and extension cords, so safety matters.
- Plug the dehumidifier directly into a properly grounded outlet that matches the manual.
- Do not run the unit through a lightweight extension cord, power strip, or adapter.
- Keep the unit away from standing water and do not operate it with wet hands.
- Check the CPSC dehumidifier recall list if the unit is older or secondhand.
- Clean the filter regularly so dust does not block airflow.
- Wash the bucket and inspect the drain hose to prevent slime, clogs, and odors.
- Keep flammable liquids, rags, and clutter away from the unit’s intake, exhaust, and cord.
Warning: If the outlet, plug, cord, or dehumidifier feels hot, smells like burning, sparks, or trips the breaker repeatedly, unplug it and stop using it until the cause is fixed.
Frequently Asked Questions
Is it possible to dehumidify a garage?
Yes. You can dehumidify a garage with a properly sized dehumidifier, controlled ventilation, air sealing, better drainage, and wet-item management. The best results come from fixing moisture sources first, then using the dehumidifier to maintain a stable RH target.
What should I set my garage dehumidifier to?
Start around 45% to 50% relative humidity. If the garage still smells musty or condensation appears, lower the setting slightly. If the unit runs constantly and the garage is already dry enough, raise the setting to save energy.
Should I leave the garage door open while running a dehumidifier?
Usually no. Keep the garage door closed while the dehumidifier runs, especially on humid days. Open the door or windows only when outdoor air is drier than the air inside the garage.
Should you use a dehumidifier if you have COPD?
A dehumidifier can help reduce dampness and mold risk, but it is not a COPD treatment. If you have COPD or another respiratory condition, ask your clinician about the best indoor humidity range for your situation and avoid spending time in a moldy or dusty garage.
Can a dehumidifier help with snoring?
A bedroom dehumidifier may help some people if high humidity is causing congestion or throat irritation, but a garage dehumidifier will not address snoring. Chronic or loud snoring can have medical causes, so it is worth discussing with a healthcare professional.
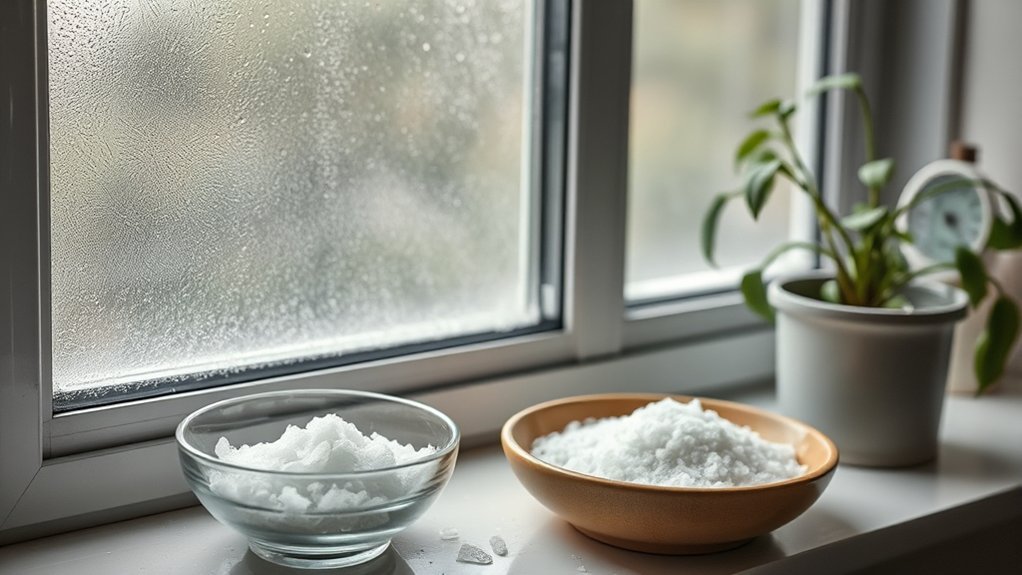
What can I put in my garage to absorb moisture?
For small enclosed areas, you can use silica gel packs, activated charcoal, calcium chloride tubs, or moisture absorbers. They work best in cabinets, toolboxes, storage bins, and closets. They are not a replacement for a dehumidifier in a large, damp garage.
Can I drain a garage dehumidifier outside?
Yes, if the hose slopes downward, discharges safely away from the building, and will not freeze. In cold weather, use an indoor drain, sump pit, utility sink, condensate pump, or the bucket instead.
Conclusion
Dehumidifying a garage works best when you treat both the air and the source of the moisture. Use a hygrometer, aim for about 30% to 50% relative humidity, choose a dehumidifier based on measured conditions, and set up safe continuous drainage when possible. Then seal gaps, fix leaks, improve grading, manage wet vehicles, and keep stored items dry. When moisture stops entering faster than you can remove it, the garage becomes easier to protect from mold, rust, odors, and long-term damage.
Sources
- U.S. EPA — A Brief Guide to Mold, Moisture and Your Home — backs the 30% to 50% ideal RH range and below-60% mold-prevention guidance.
- CDC — Mold — backs no-higher-than-50% humidity guidance, airflow, and leak repair recommendations.
- ENERGY STAR — Dehumidifiers — backs dehumidifier sizing factors and capacity measured in pints per 24 hours.
- ENERGY STAR — Dehumidifier Testing and Capacity — backs capacity and energy-efficiency rating definitions.
- U.S. EPA — Moisture Control Guidance — backs source-control thinking for drainage, foundations, roofs, plumbing, and maintenance.
- U.S. Consumer Product Safety Commission — Dehumidifier Recalls — backs recall and fire-risk safety checks for dehumidifiers.