If your robot vacuum mop is leaving streaks, the floor may look worse after a cleaning cycle. Long lines, cloudy haze, and sticky patches can have different causes. The pattern helps you choose the right fix without wasting another full cleaning run.
Quick Answer
Robot vacuum mop streaks usually come from dirty pads, leftover cleaning solution, incorrect water flow, or mineral-rich water. Start by vacuuming loose debris, washing or replacing the mop pad, and using only a cleaner approved for your model. Test a small area with less moisture before cleaning the entire floor.
Key Takeaways
- Sticky streaks often indicate cleaner residue, while gray marks suggest a dirty mop pad.
- Cleaning-solution compatibility and dilution ratios vary between robot models.
- Hardwood needs minimal moisture, while compatible sealed tile may tolerate higher water flow.
- A dirty docking station can contaminate freshly washed pads.
- Repeated mopping helps only after you correct the cause of the streaks.
Why Robot Mops Leave Streaks
)
Robot mops leave streaks when dirt, cleaner residue, or minerals remain on the floor after the water evaporates. A dirty mop pad can also spread grime across a clean area instead of collecting it.
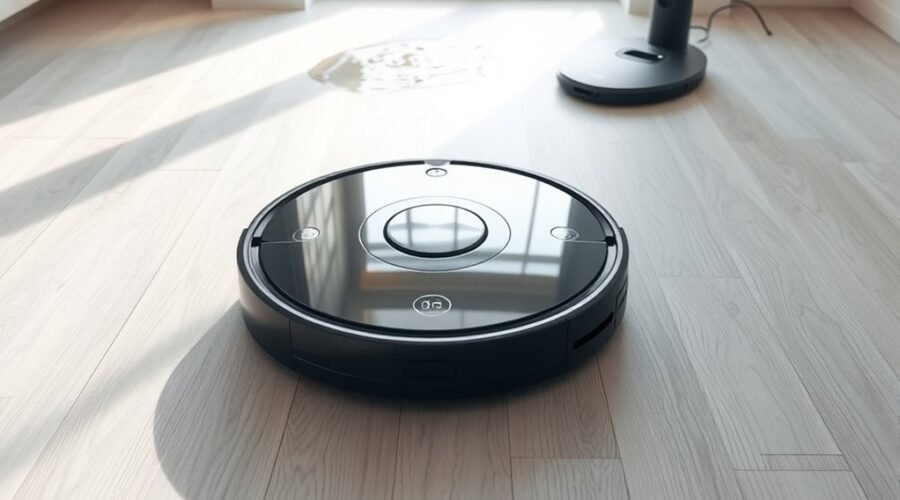
Sometimes the marks are temporary water tracks. Glossy floors and strong lighting can make them more noticeable before the surface dries.
The appearance of the streaks can help identify the cause:
- Gray or muddy lines: The mop pad may be dirty, overloaded, or spreading loose dust.
- Sticky or shiny streaks: Too much cleaning solution or existing floor polish may be leaving residue.
- White spots or cloudy marks: Hard water minerals may remain after evaporation.
- Wide, uneven wet tracks: Water flow may be too high, or the pad may not distribute moisture evenly.
- Repeated parallel lines: The mop pad, roller, or cleaning path may be leaving uneven moisture or dirt.
Hard water contains dissolved calcium and magnesium. These minerals can leave deposits when water dries, as explained in the USGS guide to water hardness.
If your floor looks clear after drying, the problem may be temporary moisture marks. If the haze remains or feels sticky, check the mop pad and cleaning liquid first.
Check the Mop Pad First
A dirty or worn mop pad is one of the most common causes of robot mop streaks. Once the fibers become loaded with dirt, the pad may spread residue instead of absorbing it.
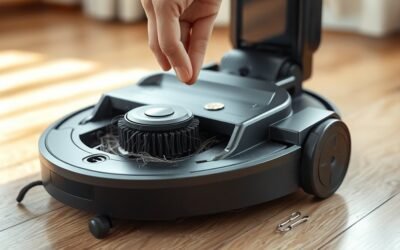
Remove the pad and inspect it before changing other settings. Look for embedded grit, stiffness, discoloration, frayed edges, or flattened fibers.
A clean mop pad should spread moisture evenly and collect dirt without dragging visible residue across the floor.
- Remove the mop pad. Check both the cleaning surface and its attachment points for dirt or damage.
- Wash reusable pads. Follow the manufacturer’s washing instructions and avoid fabric softener.
- Replace worn pads. Install a compatible replacement if the fibers remain stiff, frayed, or flattened after washing.
- Discard single-use pads. Never reuse disposable wet pads beyond their intended cleaning cycle.
If your robot uses a roller mop, inspect the entire roller. Wrapped hair, trapped debris, or uneven wear can cause repeated lines.
After fitting a clean pad, test the robot on a small area. If the streaks disappear, you have likely found the cause.
Use the Right Cleaning Solution
Using the wrong cleaning solution can leave sticky streaks and damage a robot mop. Household detergents, excessive concentrate, and incompatible floor cleaners may create foam or residue inside the water system.
Only use a cleaning formula specifically approved for your robot model. A product labeled safe for hardwood is not automatically safe for the robot’s tank, seals, or pump.
For example, iRobot’s Braava compatibility guidance lists different cleaning instructions depending on the machine.
- Braava jet m6: The instructions specify six capfuls of Braava jet cleaning concentrate with water when using that formula.
- Braava jet 240: The listed concentration uses two capfuls of the same cleaner with water.
- Approved Bona cleaners: Bona Hardwood Floor Cleaner and Bona Hard-Surface Floor Cleaner are premixed and do not require dilution for the compatible Braava models listed.
Roborock uses different instructions. Its Qrevo S support guidance recommends Roborock cleaning solution at a 1:300 dilution ratio. It also warns that other formulas may cause excessive foam or damage.
These examples show why there is no universal rule such as adding one capful to every robot mop reservoir.
Warning: Never add vinegar, bleach, dish soap, or other household chemicals to your robot’s tank unless its manufacturer explicitly approves them. Incompatible liquids can damage internal parts, affect the floor finish, or create harmful chemical mixtures.
If you suspect excess solution, empty and rinse the tank according to the manual. Then test with fresh water only if your robot supports water-only operation.
A clean pad and correctly prepared liquid should leave less residue than an overloaded pad using an overly concentrated mixture.
Set Water Flow for Your Floors
Incorrect water flow settings can create streaks even when the pad and cleaning solution are clean. Too much water leaves puddles or wet tracks. Too little water may prevent the pad from lifting dirt evenly.
The best setting depends on the flooring material, surface condition, and robot design. Begin with the lowest effective moisture level and adjust only when needed.
Match Flow to Flooring
Different floors respond differently to moisture. Sealed hardwood needs a light touch, while suitable tile surfaces may handle more water.
The National Wood Flooring Association’s maintenance guidance recommends avoiding wet mops on wood floors because repeated excess moisture can damage the finish and wood.
| Floor Type | Starting Water Setting | What to Watch |
|---|---|---|
| Sealed hardwood | Lowest effective setting, if damp mopping is approved | Moisture collecting at plank edges or seams |
| Luxury vinyl plank | Low, then adjust if permitted | Standing water and streaks around plank joints |
| Sealed ceramic or porcelain tile | Low to medium, increasing if needed | Water collecting around grout lines |
These are starting points, not universal settings. Some robots use numbered water levels, while others link water output to mopping intensity.
Raise Water Only on Compatible Absorbent Floors
Some textured or absorbent surfaces need slightly more moisture for even cleaning. However, absorbent does not always mean safe to wet.
For example, grout lines on suitable sealed tile can retain dirt and may need better pad contact. A small increase in water output can help if the mop is leaving dry patches.
Unsealed wood, damaged laminate, and moisture-sensitive natural stone should not receive extra water simply because they absorb it quickly.
Check that the flooring is suitable for damp mopping before raising the setting.
Adjust for Even Coverage
Even coverage matters more than maximum water output. Your robot should leave a light, consistent damp path rather than puddles or dry gaps.
- Select a small test area on the floor.
- Start with the recommended moisture setting for the surface.
- Watch the mop path for uneven wetting or pooled water.
- Raise or lower the setting one level if needed.
- Inspect the result after the floor dries.
Also examine the roller mop or pad mount. Dirt, poor attachment, or uneven contact can produce streaks even when the water setting is correct.
If changing the setting makes no difference, inspect the water outlets and supply components using the robot’s maintenance instructions.
Clean the Tank and Docking Station
A dirty tank or mop-washing docking station can reintroduce grime after you have cleaned the pad. Dried cleaning solution, dirty water, and debris can also interfere with the robot’s fluid system.
Start by checking the clean-water tank, dirty-water tank, and washing tray if your model has them.
- Empty dirty water. Dispose of wastewater and rinse the collection tank after cleaning.
- Inspect the clean-water tank. Look for sediment, mineral deposits, or leftover cleaning solution.
- Clean the wash tray. Remove trapped hair, sludge, and debris from removable parts following the manual.
- Inspect filters and channels. Clear accessible buildup only using manufacturer-approved methods.
- Check tank connections. Make sure the tanks and seals fit correctly before restarting the robot.
Some self-washing robots let you adjust how often the mop returns to the dock. More frequent washing can help when cleaning muddy entryways or other heavily soiled rooms.
Do not assume the docking station keeps itself completely clean. Even an automatic wash system needs periodic inspection.
Keep water away from electrical contacts, charging components, and any parts the manufacturer says must remain dry.
Mop Dry Floors Before Wet Cleaning
Running a dry vacuum pass before wet mopping removes loose dust, hair, and grit. Otherwise, those particles can mix with water and leave muddy streaks.
This is especially useful in kitchens, entryways, and areas where outdoor dirt collects.
For example, the BISSELL ReadyClean A3 streaking instructions specifically recommend running dry mode before wet mode.
- Run the robot in vacuum-only or dry-cleaning mode.
- Check that visible loose debris has been removed.
- Spot-clean heavy spills or sticky deposits by hand.
- Start the wet mopping cycle with a clean pad.
If the vacuum leaves grit behind, inspect its dustbin, filter, and brushes before starting the mop cycle.
A dry-first routine also reduces the amount of dirt the wet pad must collect. This helps keep the pad cleaner throughout the room.
Run a Second Pass to Remove Residue
A second mopping pass can remove loosened dirt and light streaks left behind by the first cycle. However, repeating the same settings will not fix an overly concentrated cleaner or a dirty mop pad.
Correct the likely cause before sending the robot over the floor again.
- Wash or replace the mop pad after the first pass.
- Adjust the water level if the floor was too wet or unevenly cleaned.
- Run a second cleaning cycle over the affected area.
- Inspect the floor after drying before repeating the process.
If the surface feels sticky from excess cleaner, use fresh water only when the robot and flooring allow it. Avoid adding more detergent to remove detergent residue.
Overlapping paths may improve coverage. Some Roborock models support repeated room cleaning with a cross-hatch pattern, as described in the Roborock cleaning-pattern guidance.
For high-traffic areas, a controlled second pass can be more useful than increasing cleaning solution strength.
Fix Robot Mop Streaks on Hardwood and Vinyl Plank
Hardwood and vinyl plank floors can show streaks clearly under sunlight or overhead lighting. Both need clean pads and controlled moisture, but their surface-care requirements are not identical.
Before wet cleaning, make sure the flooring manufacturer permits damp mopping and that the surface is in good condition.
Pad Care Tips
Clean, soft mop pads help reduce scratches and visible drag marks on delicate floors. A pad with embedded grit can damage the finish while spreading dirt.
- Wash reusable microfiber pads after each mopping session.
- Remove trapped hair and grit before reinstalling them.
- Avoid fabric softener, which can coat fibers and reduce cleaning performance.
- Allow washed pads to dry as directed and replace damaged pads promptly.
Use floor-appropriate pads when your robot offers different options. Make sure each pad attaches flat without bunching or folding.
For a roller-mop system, check that the roller rotates freely and its cleaning surface is not worn unevenly.
Safe Cleaning Solutions
A cleaner must be suitable for both the floor finish and the robot’s fluid system. An unsuitable formula may create a dull film even if the robot is otherwise working correctly.
For hardwood, use only products allowed by the flooring manufacturer and approved for the robot.
For vinyl plank, avoid abrasive formulas, harsh chemicals, and cleaning agents that can damage the protective surface.
The Shaw Floors luxury vinyl care guide warns against ammonia-based, vinegar-based, and abrasive cleaners.
Existing wax or polishing-product residue may also cause haze. If the robot keeps spreading it, remove the buildup using the flooring manufacturer’s approved cleaning method rather than using a stronger robot-mop solution.
If you switch cleaning products, rinse the tank as directed and clean the pad first. Avoid mixing leftover formulas.
Floor Type Settings
Choose a low-moisture cleaning setting for hardwood and vinyl plank unless the flooring and robot manufacturers recommend otherwise.
The goal is to remove dirt while preventing water from collecting along plank edges.
- Sealed hardwood: Use the lowest effective moisture setting when damp mopping is permitted.
- Luxury vinyl plank: Start with low moisture and increase only if the floor-care instructions allow it.
- Microfiber pad options: Choose a compatible soft pad that will not drag grit across the finish.
- Cleaning intensity: Avoid unnecessary repeated wet passes on moisture-sensitive flooring.
Stop wet mopping if you notice swelling, lifting edges, loose seams, or moisture remaining between boards.
Unsealed hardwood and floors with damaged finishes need special care. A flooring professional can help determine whether machine mopping is suitable.
Keep Streaks From Coming Back
Preventing robot mop streaks is easier than removing dried residue after every cleaning cycle. The most useful routine combines clean pads, approved fluids, a maintained dock, and water settings matched to the floor.
Use the following checklist to keep your robot working consistently.
| Action | Result |
|---|---|
| Clean or replace mop pads | Less dirt transferred between areas |
| Use approved cleaning solutions | Lower risk of sticky residue |
| Dry vacuum before wet mopping | Less loose debris mixed with water |
| Match water flow to the floor | More consistent moisture coverage |
Regular cleaning also prevents heavy soil from building up. Schedule mopping often enough that the pad is not overloaded during each run.
After every wet cycle, inspect the pad and dirty-water container. Check the wash tray periodically if your robot cleans its own mop.
Allow floors to dry before walking over them. Good room ventilation can help moisture evaporate more evenly.
If the robot suddenly starts leaving streaks despite clean pads and correct settings, check whether water is reaching the mop evenly.
A nearly dry pad, repeated water drops, or uneven wet tracks may indicate a blocked outlet, poorly seated tank, or fluid-delivery problem.
If cleaning and basic maintenance do not restore normal operation, contact the robot manufacturer for model-specific troubleshooting. Avoid opening pumps or electrical components without appropriate repair instructions.
Frequently Asked Questions
Why Is My Robot Vacuum Mop Leaving Streaks on the Floor?
Your robot vacuum mop is probably spreading soil from a dirty pad or leaving behind excess water or cleaning solution. Wash the pad, vacuum loose grit first, and try a lower water setting. If marks remain, inspect the tank and docking station.
Why Do My Floors Get Streaks After Mopping?
Streaks appear when dirty water, cleaner residue, or dissolved minerals dry on the surface. A previously applied polish can also create haze. Clean a small area with a fresh pad and an approved fluid to work out which residue is causing the marks.
Why Is My Roborock Leaving Streaks on the Floor?
A Roborock may leave streaks if its mop pad is dirty, its wash tray needs cleaning, or its water output is too high. Check the model’s cleaner rules before adding any liquid. Test one room with clean pads and a lower moisture setting.
How to Mop the Floor Without Leaving Streaks?
Vacuum grit first, install a washed or new mop pad, and use only water or the cleaner approved for your robot. Choose a moisture setting suited to the floor and let it dry. Wash the pad before repeating any area that still looks cloudy.
Conclusion
Robot vacuum mop streaks usually come from dirty pads, unsuitable cleaning liquid, excess moisture, or residue left on the floor. Start with a clean pad and fresh water, then adjust the cleaning settings for your surface. Keep the tank and docking station clean, and use a second pass only when needed. These simple checks can help your robot deliver more even cleaning results without repeated manual touchups.
Sources
- BISSELL Support: Guidance on dry cleaning, mop pad maintenance, and streak prevention.
- iRobot Braava Compatibility Guide: Approved cleaning solutions and model-specific dilution instructions.
- Roborock Qrevo S Support: Cleaner compatibility, dilution ratio, water settings, and docking station maintenance.
- National Wood Flooring Association: Hardwood floor maintenance and moisture precautions.
- Shaw Floors Luxury Vinyl Care: Approved cleaning practices and chemicals to avoid on vinyl flooring.
- Roborock S8 Pro Ultra Support: Repeated room cleaning, cross-hatch cleaning patterns, and mop settings.
- U.S. Geological Survey: Hardness of Water: Dissolved minerals, water hardness, and mineral deposits.