To add a dehumidifier to your HVAC system, you should choose a ducting method that fits your layout, then size the unit for your home’s square footage and humidity load. Connect it to a dedicated return and route dry air to the supply plenum for even distribution. Plan a continuous-slope drain line or condensate pump, plus a dedicated power circuit. Keep filters, ducts, and dampers clean, and you’ll see why setup details matter.
How to Add a Dehumidifier to Your HVAC System
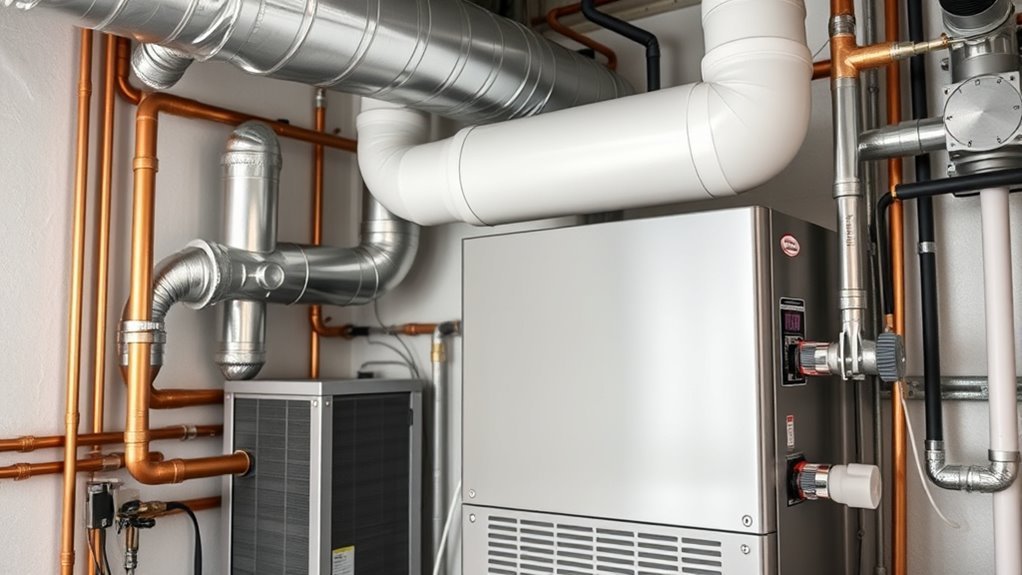
To add a dehumidifier to your HVAC system, start by confirming that your existing setup can support a whole-house model that connects to the ductwork for steady moisture control. You’ll get the best results when you pair the dehumidifier with compatible HVAC equipment and a licensed contractor who handles the installation. Expect professional labor to cost about $1,300 to $2,800, depending on access and system complexity. During operation, the unit pulls humid air, cools it over a coil, condenses moisture, and sends drier air back through the ducts. That process helps protect your space, supports energy efficiency, and improves indoor air quality without overworking your air conditioner. Keep the system working well by replacing filters every 2 to 3 months and scheduling annual inspections. With a properly sized, professionally installed dehumidifier, you can reclaim comfort and reduce dampness with less dependence on bulky, power-hungry cooling.
Choose the Right Dehumidifier Ducting Method
You should start by choosing whether your dehumidifier will use independent ducting, since that setup gives you the cleanest airflow control and the best moisture removal. If you tie it into HVAC ducts, a supply-side connection can work efficiently, but you’ll need to account for blower coordination and proper duct sizing. Bypass and injection layouts can also work, but they depend on larger ducts, dampers, and correct air-handler operation to avoid airflow problems.
Independent Ducting Setup
Independent ducting is often the best way to integrate a dehumidifier because it gives the unit its own intake and supply ducts, so airflow stays dedicated and easier to manage without tying it to the air conditioner. You get cleaner airflow management, less static pressure, and better moisture removal efficiency. Because the dehumidifier uses one blower, it can work independently inside your HVAC system with lower energy consumption.
| Factor | Benefit |
|---|---|
| Separate intake | Stable airflow |
| Separate supply | Clear routing |
| One blower | Lower static pressure |
| Dedicated path | Stronger moisture removal |
| Warm dehumidified air | Better comfort |
Place the dehumidified air where you’ll feel it, but avoid blowing it straight into occupied zones too hot. This setup keeps you in control, with simpler ducting and more efficient humidity removal.
Supply-Side Connection Benefits
A supply-side connection can be a smart choice because it delivers dry air directly into the living spaces, improving moisture removal without forcing the air conditioner to do all the work. You route the dehumidifier discharge into the supply plenum, so dry air mixes with conditioned air before it reaches rooms. That helps your HVAC unit hold consistent humidity levels and keeps the AC from running harder than needed. Because the dehumidifier operates independently, you get targeted moisture control with less cooling demand. This setup also limits moisture from the evaporator coil from cycling back into your ducts, so the air stays drier. Over time, you can gain energy savings from fewer runtime hours and lower system load, while still keeping comfort steady and control in your hands.
Bypass And Injection Options
When you’re choosing how to duct a dehumidifier into HVAC, the bypass method and injection method each solve the same problem in different ways. In the bypass method, you pull air from the return side and send dry air to the supply side, so you can cut ductwork, but you may need larger ducts and dampers to stop backflow. The injection method ties both connections to one air handler side, then blends dry air with conditioned air; that works best in hot, humid climates and often needs the air handler running with the dehumidifier. Both approaches fit an existing HVAC system, but you still need proper sizing and layout. Get that right, and you keep airflow free, the system unburdened, and moisture removal efficient.
Add a Dedicated Return for Better Airflow
Installing a dedicated return duct for your dehumidifier improves airflow by letting dry air discharge directly into the supply plenum, which lowers static pressure and boosts moisture removal efficiency. You gain a dedicated return that keeps the dehumidifier independent from the AC, so each unit can run on its own schedule without fighting for airflow. That separation stabilizes dew point control and helps your system stay balanced under changing loads. During dehumidifier installation, size the return path correctly, seal every joint, and keep bends smooth to avoid losses. Better airflow also reduces the chance of moisture reintroducing from the evaporator coil, so you preserve the dry-air result you paid for. The payoff is higher system efficiency and real energy savings, because the dehumidifier won’t cycle as often to reach the same target. In short, you free your HVAC from unnecessary resistance and let it dehumidify with precision.


Send Dry Air to the Supply Plenum
Sending the dehumidifier’s dry air into the supply plenum lets you distribute moisture-reduced air evenly through the home, so you get better comfort and indoor air quality without adding much heat. When you send dry air to the supply plenum, your whole-house dehumidifier can work with the HVAC system instead of fighting it. You keep dew point stable, lower humidity levels, and ease the air conditioner’s load. That means your cooling system doesn’t have to remove as much latent moisture to stay effective. Use a properly sized supply connection and a dedicated return path; this reduces static pressure and helps preserve moisture removal capabilities. The dehumidifier can run on its own when the AC isn’t calling, so you don’t reintroduce moisture from the evaporator coil. Install the ductwork cleanly, seal all joints, and verify airflow so the system delivers dry, comfortable air without wasting energy or compromising control.
Why Supply-Side Ducting Works Better
Supply-side ducting usually works better because it sends dry air directly into the conditioned space, which improves whole-home airflow and comfort. With this setup, your dehumidifier fights indoor humidity where you live, not in a dead-end loop. The supply duct keeps static pressure lower, so the unit can move air more effectively and pull more moisture from the stream. Because the dehumidifier runs on its own path, it doesn’t depend on air conditioning cycles to do the job, which improves energy efficiency and can reduce runtime for both systems. You also avoid reintroducing moisture from the AC evaporator coil, so humidity levels stay steadier. That matters when you want control, not compromise. Drier air can feel slightly warmer, so your air conditioning may only come on when you actually need cooling. Supply-side ducting gives you cleaner control, better balance, and a more liberated indoor environment.
Add Fresh Air Ventilation
You can add a fresh air intake to your HVAC system so outside air enters through a controlled path instead of leaking in randomly. Pair that intake with filtration and a whole-house dehumidifier, and you’ll condition incoming air while keeping humidity in the 30–50% range. This setup improves ventilation, helps limit mold growth, and can reduce HVAC load when it’s configured to meet airflow targets.
Fresh Air Intake
A fresh air intake lets your HVAC dehumidifier double as a mechanical ventilation system, bringing in outside air, filtering it, and helping maintain healthier indoor air quality. You can size the fresh air opening from ASHRAE guidelines so your HVAC system delivers the right ventilation rate for your home’s square footage and occupancy. This setup gives you freedom from stale air while the dehumidifier strips moisture from incoming fresh air, stabilizing humidity levels and cutting the mold, dust, and respiratory triggers that thrive in damp rooms. You can also tune the intake for extreme temperatures, keeping performance efficient and comfort steady when weather swings. Use controlled fresh air, not excess leakage, so your system stays balanced and your home stays resilient.
Ventilation and Filtration
By adding fresh air ventilation to a whole-house dehumidifier, you can filter and condition outdoor air before it enters the home, improving indoor air quality while controlling moisture. Size the fresh air intake to match ASHRAE guidance, so you get enough mechanical ventilation without driving humidity levels up. Your dehumidifier pulls moisture from incoming air, which matters most in humid climates where damp air can push indoor humidity above 50%. Pair it with proper filtration to capture allergens, dust, and pollutants before they circulate. This setup helps your HVAC work less, cuts AC runtime, and can lower energy use over time. You get cleaner air, steadier comfort, and more control over your space.
Size the Dehumidifier for Your Home
To size the dehumidifier correctly, calculate your home’s total square footage and estimate the moisture load from daily living. This is how you size the dehumidifier for your home without guesswork. For whole-house dehumidifiers, use 20 pints per day per 1,000 square feet as a baseline, then adjust for local humidity levels and heavy occupancy. Your goal is ideal humidity levels, not overkill.
Size by square footage and moisture load, then adjust for humidity and occupancy to hit ideal levels.
- Measure the conditioned area and note ceiling height.
- Compare the load to your existing HVAC so the unit integrates cleanly.
- Consult professional installation advice to confirm the needed pints-per-day rating.
In wetter regions, choose higher capacity to handle persistent moisture and protect comfort. If you undersize, you’ll waste energy and still feel sticky; if you oversize, you may cycle inefficiently. Match the dehumidifier to your home’s real demand, then let it work with your system to keep indoor air dry, balanced, and more livable.
Plan Drainage and Power
Route the drain line with a continuous downward slope to a proper termination point so condensate can leave the dehumidifier without backing up. If gravity drain isn’t feasible, install a condensate pump and size it for the lift and flow you need. Confirm the unit has a dedicated 120V circuit and that both the drain and power locations are easy to access for service.
Drain Line Routing
Start by routing the dehumidifier drain line to a suitable discharge point, such as a floor drain or sump pump, so condensed water can leave the system without backing up. Keep the line sloped at least 1/4 inch per foot toward the drainage point. Use PVC piping for a rigid, leak-resistant run. If the unit sits below the drainage point, install a condensate pump so water moves freely and you stay in control.
- Verify slope and support.
- Seal joints and test flow.
- Follow local building codes.
A clean routing plan prevents clogs, overflow, and unnecessary dependence on service calls. When you keep the drain line direct and compliant, you protect your HVAC investment and preserve the freedom of a dry, efficient space.
Dedicated Electrical Circuit
Because a whole-house dehumidifier draws consistent power, you should plan for a dedicated electrical circuit that won’t overload your existing HVAC wiring. Size it to the unit’s power requirements, usually 5 to 15 amps, and have a licensed electrician install it to meet code and safety rules. Place the circuit near the installation site so you can keep wiring short and service access simple. At the same time, confirm your drainage system can support reliable drainage from the unit. A nearby drain line reduces risk and keeps the system self-managing. When you coordinate power and drainage early, you avoid rework, protect performance, and keep your climate control setup clean, independent, and easier to maintain.
Condensate Pump Options
A condensate pump is the practical fix when gravity drainage isn’t available, since it moves the water your dehumidifier collects to a nearby drain or sump. You’ll use it to keep removing moisture without bottling up your system.
- Choose a condensate pump with 20–30 feet of lift capacity so it matches your drainage needs.
- Pick direct-drive for simpler installation or diaphragm for lower noise and better energy efficiency.
- Mount it near the dehumidifier, plug it into a standard outlet, and inspect it often.
That setup helps control humidity levels with less hassle. Keep the pump clean, clear clogs, and test the overflow switch during maintenance. A reliable pump protects your freedom from leaks, preserves performance, and keeps your HVAC dehumidifier running steady.
Avoid Airflow, Drainage, and Control Errors
To keep your dehumidifier working efficiently with the HVAC system, you’ll need to avoid airflow, drainage, and control mistakes that can reduce moisture removal. Use independent ducting or a bypass layout so the dehumidifier doesn’t fight the main system for airflow. Add dampers where needed to stop backflow and keep humidity balanced across zones. Keep filters and ducts clean; even minor buildup can choke airflow and cut efficiency.
Give the dehumidifier its own drain line so condensate leaves freely and can’t pool, overflow, or interrupt operation. Don’t let water depend on shared routing that can fail under load. For control, install a smart controller that coordinates the dehumidifier with HVAC demand and tracks humidity precisely. That lets you hold the target level without wasting energy or over-drying the space. When you manage airflow, drainage, and control with intent, you protect performance and keep the system working on your terms.
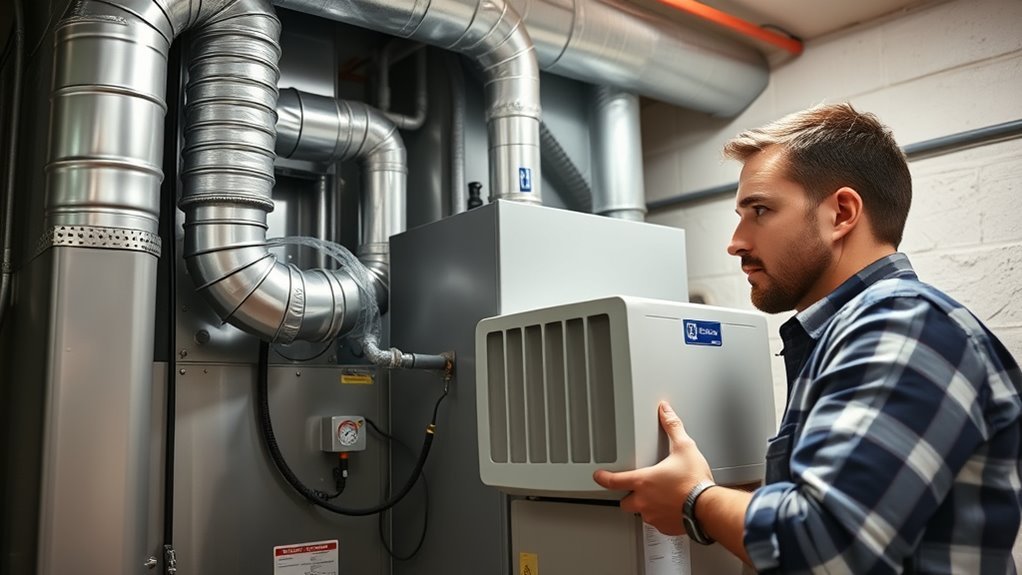
When You Need an HVAC Pro
When your HVAC layout needs ductwork changes, dedicated drainage, or tighter humidity control, it’s time to bring in a licensed HVAC professional. You’ll get correct sizing, clean integration, and fewer system risks when installing a dehumidifier.
- An HVAC professional measures your humidity levels and matches the unit to your home’s load.
- They build proper ductwork and drainage so moisture leaves the system safely.
- They calibrate controls so the dehumidifier runs efficiently and supports indoor air quality.
DIY work can leave gaps, overload equipment, or damage your HVAC system. A trained tech checks airflow, seals, and condensate paths before startup. They’ll also maintain and recalibrate the unit over time, which helps it last longer and perform better. If you want reliable moisture control without wasting energy or compromising comfort, don’t guess—hire the pro.
Frequently Asked Questions
Can You Add a Dehumidifier to an Existing HVAC?
Yes, you can add one to your existing HVAC if your system’s compatible. You’ll choose dehumidifier types, use proper installation methods, and follow maintenance tips to boost energy efficiency and health benefits while controlling humidity.
How Much Does It Cost to Add a Dehumidifier to Your HVAC System?
A whole-house dehumidifier costs you about $1,300-$2,800 installed—like buying drier air on tap. You’ll weigh installation costs, system compatibility, humidity levels, energy efficiency, maintenance requirements, and seek professional advice for your setup.
Should You Use a Dehumidifier if You Have COPD?
Yes—you should use a dehumidifier if you have COPD. You can lower humidity levels, improve air quality, ease COPD symptoms, and boost breathing comfort. HVAC integration can deliver steady health benefits throughout your home.
Does a Dehumidifier Help With Rhinitis?
Yes, a dehumidifier can help your rhinitis by reducing humid environment effects, supporting allergy symptom management, and improving air quality. You’ll get nasal congestion relief, better respiratory health benefits, and stronger moisture control techniques.
Conclusion
Adding a dehumidifier to your HVAC system can cut indoor humidity by up to 30%, improving comfort and reducing mold risk. You’ll get the best results when you choose the right ducting method, size the unit correctly, and route dry air to the supply plenum. Don’t skip drainage, power, or control setup, since small errors can hurt performance. If your system needs major duct changes, you should call an HVAC pro.