Replacing a robot vacuum caster wheel at home requires careful preparation and a controlled approach. The proper tools, a powered-down unit, and a clean work area reduce the risk of damage. The wheel assembly must be removed without forcing the housing, then inspected for debris, wear, or cracks. What happens next determines whether the repair holds or fails on the first test.
Tools for Caster Wheel Removal
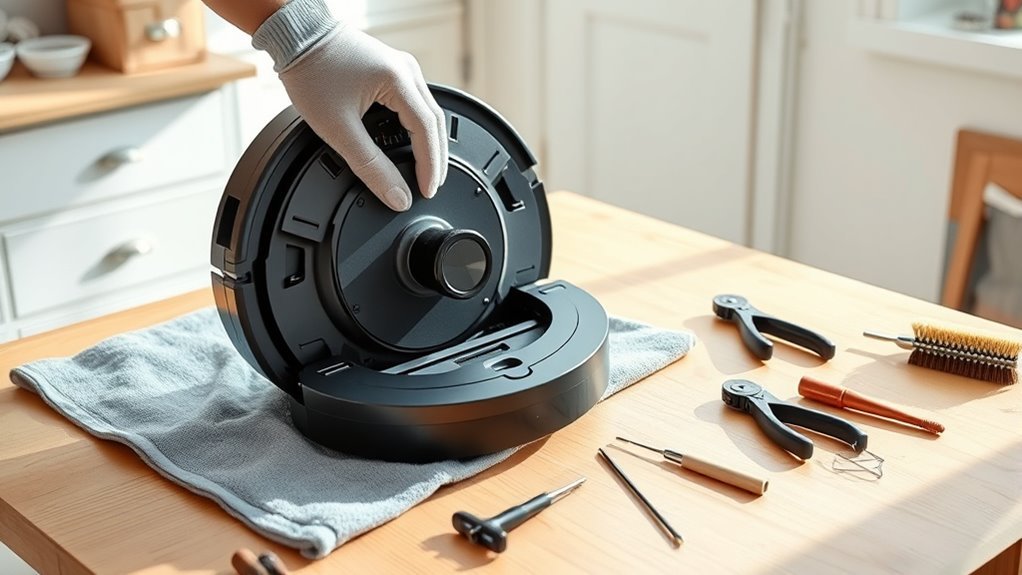
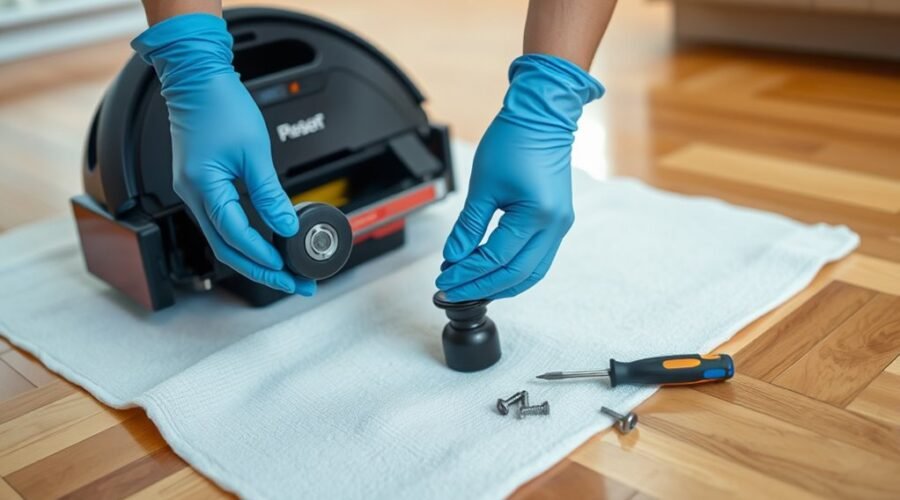
Before removing the caster wheel, a few basic tools should be prepared to streamline the process and reduce the risk of damage. For a ROBOT VACUUM, a flathead screwdriver may be needed to lift covers or small components that block access.
A flashlight supports careful inspection of the wheel area, revealing dust, debris, or obstructions that prevent spinning freely. A soft brush or cloth should be kept nearby to clear the surrounding housing before removal and again afterward, preserving cleanliness and reducing wear.
Gloves improve grip and protect the hands during handling, especially when parts are tight or contaminated. A small container is useful for organizing screws and other small pieces so they are not lost during the work.
With these tools assembled, the technician can proceed in an orderly manner, maintaining control and helping the machine regain unobstructed movement.
Remove the Caster Wheel Assembly
The caster wheel assembly should be grasped firmly and pulled straight from the robot to detach it without excessive force.
Twisting motions should be avoided to preserve the integrity of the mounting points and assembly components.
Once removed, the connection points should be inspected for cracks, wear, or other visible damage before any cleaning or replacement proceeds.
Detach Wheel Assembly
Firmly pull the caster wheel assembly straight out from the robot to detach it, using controlled force to avoid damaging surrounding components. This step supports caster wheel maintenance by freeing the unit for assessment and service.
The operator should keep the work area clear, allowing unrestricted motion and reducing risk of snagging. If resistance occurs, do not pry; measured traction preserves structural integrity and prevents additional common wheel problems.
The detached assembly should be handled with care and placed on a clean surface for later reinstallation or replacement. These troubleshooting tips help maintain autonomy over the repair process and guarantee the mechanism remains ready for the next stage.
- Remove with steady, even force
- Avoid twisting or levering
- Store safely after detachment
Inspect Connection Points
Gently pull the caster wheel assembly free from the robot, then inspect the connection points for debris, obstruction, wear, or visible damage that could interfere with removal or later reinstallation.
The assembly should be handled carefully while being separated, with firm traction applied only as needed to prevent strain on the mount.
Once detached, confirm that it is fully free before any cleaning or servicing begins.
The connection points on the chassis should be examined methodically for signs of wear, misalignment, or connection issues that could compromise fit.
These troubleshooting steps support reliable reassembly and preserve mechanical integrity.
Practical maintenance tips include clearing residue, checking for loosened debris, and documenting damage so replacement decisions remain informed and autonomous.
Take Out the Robot Vacuum Wheel
The caster assembly is then secured in a stable position, and the wheel is removed by applying firm, even pressure to the housing.
A steady grip is maintained throughout the extraction, with twisting motions avoided to protect both the wheel and the assembly.
Once detached, the wheel and housing are inspected for debris or visible damage before reassembly proceeds.
Remove Caster Assembly
Next, the caster assembly is removed by pulling it straight from the robot vacuum with steady pressure, taking care not to apply excessive force that could damage the housing or mount.
The unit should be held firmly while the assembly is pushed and drawn free, keeping the motion controlled and deliberate. Before full extraction, the housing can be inspected for obstructions and visible wear that may explain common wheel problems. Such checks support caster maintenance tips and troubleshooting wheel issues without wasting time.
- Verify the mount is clear.
- Confirm the assembly moves evenly.
- Preserve the part for reinstallation.
Handled with precision, the caster assembly yields cleanly, allowing the user to proceed with confidence and mechanical freedom.
Detach Wheel Carefully
With the caster assembly already free, the wheel can be detached by applying firm, controlled pressure while keeping the assembly steady. Before pushing, verify that no debris or blockage remains in the housing. A steady grip prevents twisting, which can scar components and limit liberation of the wheel.
| Step | Action | Purpose |
|---|---|---|
| 1 | Inspect for obstructions | Prevent binding |
| 2 | Pull or press firmly | Release the wheel |
| 3 | Examine wear | Confirm reuse readiness |
Avoid excessive force; the goal is separation, not deformation. After removal, inspect the wheel and assembly for cracks, flats, or other visible issues. These wheel maintenance tips preserve caster wheel materials and reduce vacuum performance impact. Careful handling supports reliable reinstallation and maintains the robot’s motion path without unnecessary resistance.
Clear the Wheel Housing
After turning off the robot vacuum and unplugging it, the wheel housing should be inspected for any debris, hair, or other obstructions that could restrict caster movement. A methodical clearing process preserves mobility and supports user autonomy through disciplined wheel maintenance tips, vacuum cleaning techniques, and robot troubleshooting advice.
- Use a soft brush to dislodge compacted lint and dust.
- Wipe the cavity with a dry cloth to remove loose particles.
- Verify that no foreign material remains inside the housing.
The housing must be checked for damage as well, since cracks or deformation can impede smooth operation.
The housing must be checked for damage, since cracks or deformation can impede smooth caster movement.
Any residue should be removed with controlled motions, avoiding force that could stress adjacent components. The objective is complete clearance before the caster wheel is detached or reinstalled.
When the interior is unobstructed, the robot vacuum is better prepared for reliable movement, and the next repair step can proceed without avoidable resistance or contamination.
Clean and Inspect the Caster Wheel
Once the wheel housing is clear, the caster wheel itself should be cleaned and inspected methodically. First, visible hair and debris should be removed by hand to prevent clogs and preserve motion. A soft brush then can dislodge particles trapped in crevices, supporting practical wheel maintenance tips for users who value autonomy over avoidable downtime. If residue remains, a damp cloth may be used, provided the material is compatible with the wheel surface.
| Checkpoint | Action |
|---|---|
| Surface debris | Remove by hand |
| Crevices | Brush gently |
| Residue | Wipe with damp cloth |
| Condition | Inspect for cracks |
| Performance | Note resistance |
During inspection, common wheel issues such as cracks, deformities, and uneven wear should be recorded. Cleaning frequency recommendations generally favor routine attention after heavy use or at regular intervals. Regular care improves efficiency, reduces friction, and extends service life, allowing the vacuum to move with greater freedom and less obstruction.
Know When to Replace the Wheel
A caster wheel should be replaced when wear or instability begins to affect operation. Assessment should focus on performance indicators rather than guesswork.
Visible cracks, chips, or deformities signal material fatigue across wheel types and justify removal from service. Excessive wobbling, resistance, or unusual noise during movement indicates compromised support and reduced control.
Visible cracks, wobbling, or unusual noise indicate wheel fatigue and compromised support.
When hair or debris buildup persists after standard cleaning, the obstruction may have damaged the bearing surface or axle interface. Frequent stalling or navigation failure further confirms that the wheel no longer supports efficient travel.
- Inspect for structural damage and irregular shape.
- Observe motion for wobble, drag, or noise.
- Replace if cleaning no longer restores function.
Methodical maintenance tips help preserve autonomy, yet they also reveal when replacement is the more rational choice.
Once these signs appear, continued use only prolongs friction and limits the robot’s ability to move freely and reliably.
Reinstall the Wheel Into the Housing
With the worn caster wheel removed, the replacement can be positioned back into the housing. The wheel should be aligned carefully with the housing edges, using wheel alignment tips that favor a straight, centered fit.
Once aligned, gentle pressure is applied until both sides of the axle snap securely into place. Excessive force is avoided, since it can damage the wheel or deform the housing and compromise the user’s freedom from repeated repairs.
After seating, the wheel is inspected to confirm it lies evenly and is not tilted. A level position supports stable motion and protects performance over time.
The wheel is then spun manually to verify smooth rotation and proper function. If resistance, wobble, or uneven seating appears, installation troubleshooting should begin by rechecking alignment and the axle’s placement.
These maintenance best practices help guarantee the caster wheel operates reliably, preserving autonomy through precise, controlled reinstallation.
Snap the Caster Wheel Assembly Back In
The caster wheel assembly should be aligned carefully with the designated slot on the robot to guarantee correct positioning.
Even pressure should then be applied to both sides of the assembly until it snaps securely into place without forcing.
An audible click confirms that the assembly is locked correctly.
Align Assembly Properly
Carefully align the caster wheel assembly with the designated slot on the robot, making sure every component is seated in the correct position for a proper fit. Effective alignment techniques support assembly precision and reduce the risk of binding during installation.
Use practical installation tips to guide the housing into position without forcing it.
- Confirm both axle ends are centered in the mount.
- Verify there is no visible gap along the seam.
- Rotate the wheel lightly to assess freedom of movement.
When the assembly is positioned correctly, its edges should sit flush against the robot body, signaling correct orientation. This method preserves mechanical independence and lets the device move without unnecessary resistance.
After placement, inspect for secure engagement before continued use.
Press Until It Snaps
Align the caster wheel assembly with the designated housing on the robot, then apply firm, even pressure until it snaps securely into place. The release of tension should be audible or tactile, confirming a locked fit.
Both sides of the axle must sit flush within the housing to preserve tracking and prevent drift. Excessive force is unnecessary and may fracture the mount or impair rotation.
Different caster wheel types may seat with slight variation, yet the locking principle remains the same: steady pressure, no improvisation.
After installation, rotate the wheel gently and verify smooth movement. This final check helps identify common wheel issues early and supports practical wheel maintenance tips.
When seated correctly, the assembly restores orderly motion and reduces avoidable mechanical dependence.
Test the Wheel for Smooth Movement
Once the caster wheel assembly is reinstalled, the robot vacuum should be gently pushed to check for resistance or unusual sounds that could indicate improper fitment. Manual rotation should then confirm free movement; grinding, binding, or sticking suggests misalignment or contamination. For users pursuing liberated, low-friction operation, this inspection supports confident use and efficient recovery.
- Place the vacuum on a flat surface and observe straight-line travel.
- Verify that the chassis glides without wobbling, veering, or dragging.
- Run a few short cleaning cycles to confirm normal load performance.
These troubleshooting techniques help isolate installation errors before they become service issues. After testing, inspect the wheel area for debris or damage, since ongoing wheel maintenance tips improve reliability and support performance optimization.
When the wheel moves smoothly under push testing, manual spin checks, and brief operational trials, the assembly is likely seated correctly and ready for regular use.
Keep the Caster Wheel Working Smoothly
Regular inspection keeps the caster wheel moving freely and reduces the risk of obstruction from debris or hair buildup. For effective caster wheel maintenance, the wheel and housing should be examined routinely, with any accumulation removed before it interferes with rotation.
A soft brush is suitable for controlled cleaning techniques, as it dislodges fine particles without stressing the assembly. During each service interval, the wheel, axle, and surrounding casing should be checked for wear, cracks, or deformation, and any defect should be addressed promptly to preserve function.
After cleaning, the wheel must be reinstalled with both sides of the axle fully snapped into place so alignment remains secure. This method supports performance optimization by keeping motion consistent, minimizing drag, and extending operational life.
Routine attention grants the robot vacuum greater autonomy, reducing avoidable failure and maintaining efficient travel across the floor.
Frequently Asked Questions
How to Remove Castor Wheel From Roomba?
He would pull the Roomba caster assembly firmly free, then press the wheel out of its housing, checking for obstructions. Cleaning tips, maintenance routines, and troubleshooting issues follow: inspect, clean, and reinstall carefully.
Can Caster Wheels Be Removed?
Yes, caster wheels can be removed. Different caster wheel types usually detach for maintenance; careful inspection, firm pulling or pushing, and troubleshooting issues help avoid damage. These maintenance tips support autonomous cleaning freedom and control.
What Is the Average Lifespan of a Roomba?
A Roomba’s average lifespan is 3 to 5 years. Consistent robot vacuum maintenance preserves cleaning efficiency, while timely battery care and troubleshooting issues can extend service life, reduce waste, and support greater household autonomy.
Can You Replace Wheels on an iRobot?
Yes; iRobot wheels can be replaced. It recommends compatible replacement wheel options for specific models. Following robot maintenance tips and vacuum troubleshooting techniques, one detaches the worn wheel, cleans the housing, then snaps the new axle securely.
Conclusion
To summarize, replacing a robot vacuum caster wheel at home is a controlled maintenance task when performed methodically. With the device powered off, the assembly removed carefully, and the housing cleared of debris, the new wheel can be seated securely and tested for free movement. Routine inspection and cleaning help preserve performance and reduce wear. When handled correctly, the caster wheel returns to service like a small gear restored to the machine’s steady rhythm.