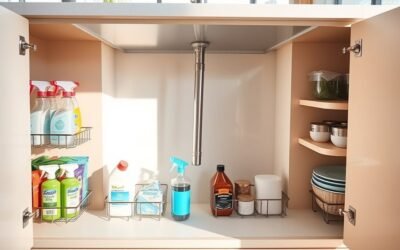
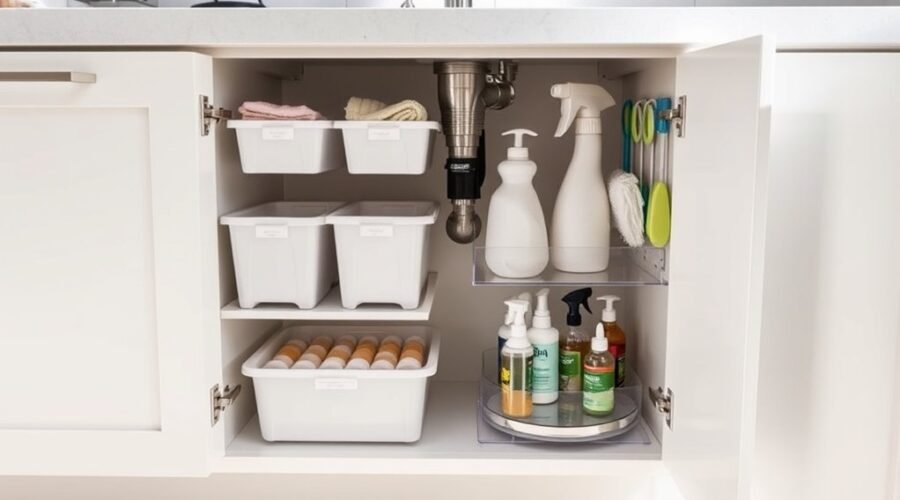
Learning how to organize under the kitchen sink can turn a crowded cabinet into useful storage. Pipes, a garbage disposal, and limited space often make standard organizers difficult to fit. The solution is to plan around these obstacles, keep everyday items accessible, and protect the cabinet from leaks.
Quick Answer
To organize under the kitchen sink, empty the cabinet, check for leaks, and measure the available space around the plumbing. Use removable bins, adjustable shelves, or pull-out organizers that fit without blocking pipes. Keep daily supplies near the front, add lightweight door storage, and secure hazardous cleaning products away from children and pets.
At a Glance
| Difficulty | Beginner-friendly |
| Tools Needed | Measuring tape, cleaning cloth, and optional storage bins, trays, shelves, or hooks |
Clear Out the Under-Sink Cabinet
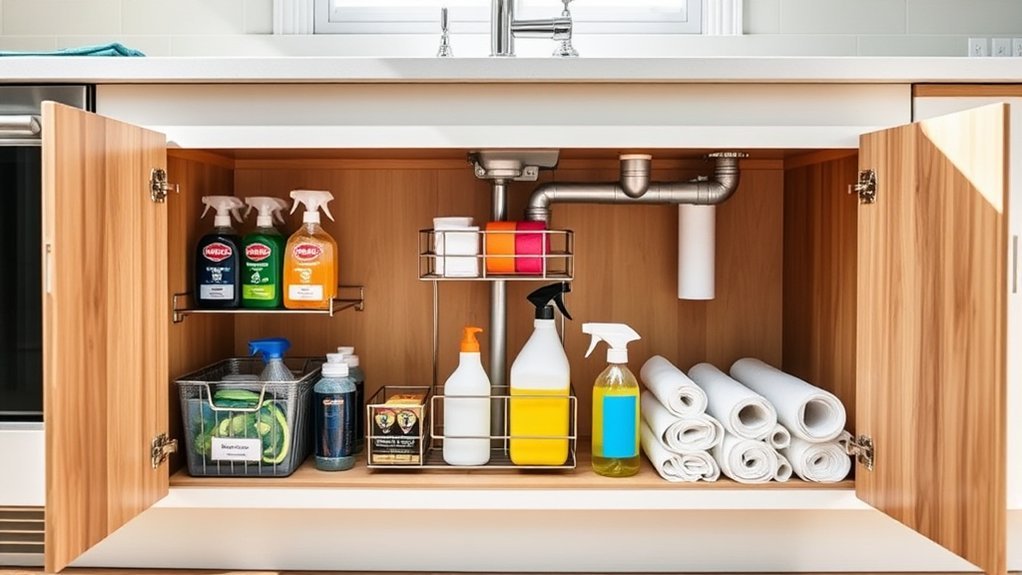
Start by removing everything from the under-sink cabinet. An empty cabinet makes it easier to find hidden clutter, inspect the plumbing, and see how much usable space remains.
Do not buy organizers until you know what you actually need to store.
- Empty the cabinet. Remove cleaning bottles, trash bags, sponges, brushes, tools, and other stored items.
- Inspect the interior. Look for damp areas, water stains, damaged cabinet panels, and leaking containers.
- Clean the surfaces. Wipe the cabinet with a suitable mild cleaner and dry it completely.
- Sort the contents. Separate everyday essentials, occasional supplies, backup products, and items that belong elsewhere.
- Remove unnecessary items. Set aside empty bottles, damaged tools, unused supplies, and products that need safe disposal.
Check cleaning product labels before throwing anything away. Some expired or damaged chemicals require special handling rather than ordinary household trash.
The EPA’s household hazardous waste guidance explains why certain cleaners and chemicals should never be mixed or poured down a drain.
Once you have sorted everything, group the remaining items by purpose. This helps you determine whether you need deep bins, small containers, or a dedicated cleaning caddy.
Measure Around Pipes and Plumbing
Measure the available space around the plumbing before choosing any storage system. Under-sink cabinets have irregular openings because drains, supply lines, valves, and garbage disposals take up room.
The goal is to measure the space an organizer can actually occupy, not just the cabinet’s overall dimensions.
- Measure the interior width. Record the usable distance between the cabinet walls.
- Measure the depth. Check the distance from the cabinet opening to the back wall.
- Measure the height. Find the clearance between the cabinet floor and the underside of the sink.
- Locate plumbing obstacles. Record where the drain, P-trap, supply lines, shutoff valves, and disposal sit.
- Check the door opening. Measure the narrowest opening between the hinges and cabinet frame.
A flexible measuring tape helps you reach awkward corners. Sketching the cabinet on paper can also make the layout easier to understand.
Measure the empty areas on both sides of the plumbing separately. A cabinet may have enough overall width for a large organizer but still lack a clear path for installing it.
Keep shutoff valves and plumbing connections accessible. You should be able to reach them without dismantling permanently installed storage.
How to Organize Under the Kitchen Sink With the Right Storage
The best under-sink storage depends on the location of your plumbing and the supplies you need. Removable bins work well in irregular spaces, while pull-out organizers help you reach items stored farther back.
Adjustable shelves, turntables, and modular containers are useful when they fit securely without touching pipes.
IKEA’s under-sink organization guide also recommends combining flexible containers, waste bins, and accessible storage around plumbing.
Measure Cabinet Dimensions
Always compare an organizer’s outside dimensions with your cabinet measurements. Include handles, drawer rails, and other parts that extend beyond the main storage area.
Before choosing an organizer, check these details:
- Can the unit pass through the cabinet opening?
- Will tall bottles fit beneath shelves and pipes?
- Can drawers slide forward without hitting the door or hinges?
- Can lids open without touching the sink basin?
- Can you remove the organizer to inspect or repair plumbing?
Pay special attention to pull-out drawers. Their advertised width may fit the cabinet, but their full sliding movement may not clear the plumbing.
If the cabinet contains a garbage disposal, measure the usable space beside and beneath it rather than assuming a standard organizer will fit.
Work Around Plumbing
Choose storage based on the empty spaces surrounding the pipes. Avoid forcing a large shelf into an area that would work better with several smaller containers.
These arrangements can help:
- Beside the drain: Use narrow bins for cleaning bottles or brushes.
- Above an open section: Install a small shelf that clears the plumbing.
- Along an unobstructed side: Add a pull-out drawer for frequently used supplies.
- Inside a clear corner: Use a turntable if it can rotate without hitting pipes or bottles.
Adjustable shelving is especially useful when plumbing crosses the cabinet at different heights. A removable shelf also makes future cleaning and maintenance easier.
Pro Tip: Cut a piece of cardboard to match the footprint of an organizer before buying it. Place the cardboard inside the cabinet to test whether the unit will fit around pipes, hinges, and other obstacles.
Choose storage that is easy to remove or adjust. A flexible arrangement is usually more useful than a tightly packed system that blocks access.
Stack Bins to Use Vertical Space
Stackable bins help you use the empty height beneath the sink. They work best in areas with enough clearance above the plumbing and where each container remains easy to reach.
Keep heavy items low and avoid stacks that wobble or require you to move several containers to reach everyday supplies.
Recommended Products

Stackable Storage Bins-- The top of the drawer has groove design ensures stacking. Use these stackable drawers to save space, which is also keep organized.
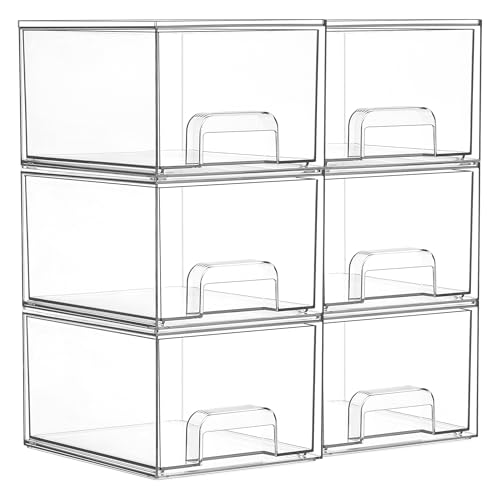
[Multi-Purpose Organizers] Small storage drawers help you to organize everywhere in your home. They can be used as organizers and storage for makeup, bathroom countertop, kitchen or laundry under sink, medicine cabinet, pantry, vanity. You can flexibly use our storage organizer for house organization and storage according to your needs.

Dustproof Storage Bins---The storage drawers help you to organize everywhere in your home. It is ideal for storing refrigerator food, snacks, medicines and office items. The storage bins has built-in removable dividers to achieve "one box for one thing" or "one box for one category".
Choose Stackable Bins
Choose sturdy, washable bins that match the size of your supplies. Clear containers make it easier to identify what is inside, while labeled opaque bins can work just as well.
Organize them by purpose:
- Place larger, heavier supplies in a stable bottom bin.
- Use a separate container for smaller brushes and scrubbers.
- Keep dry sponges and cleaning cloths together.
- Store lightweight backup items on upper levels.
Choose bins designed for stacking rather than placing unstable containers on top of each other.
If you use ordinary open bins, make sure you can lift each one out without catching it on nearby pipes.
Sort By Height
Sorting supplies by height helps you make better use of each shelf. Tall spray bottles need open vertical space, while smaller items can fit beneath a shelf or inside shallow drawers.
Separate supplies into groups before arranging them:
- Tall items: Spray bottles, large cleaning containers, and handled brushes.
- Medium items: Dish soap, refill containers, and small cleaning tools.
- Short items: Sponges, microfiber cloths, scrub pads, and small accessories.
Position tall containers where the cabinet offers the most clearance. Use shorter bins in lower spaces beneath pipes or raised shelves.
Keep similar supplies together so you can remove an entire category without searching through the cabinet.
Maximize Vertical Clearance
Vertical storage should increase capacity without making the cabinet harder to use. Leave enough space above each bin to reach inside or remove it comfortably.
Use these practical methods:
- Add a tiered organizer in a clear area beside the drain.
- Use adjustable shelves when bottle heights vary.
- Place frequently used items on the easiest level to reach.
- Reserve upper storage for lightweight supplies used less often.
- Check that stacked bins remain stable when the cabinet door closes.
Pull-out trays can improve access to lower levels, especially in deeper cabinets.
Avoid placing heavy bottles on high shelves where they could fall. The most effective layout balances storage capacity with stability and access.
Add Waste Sorting Bins Under the Sink
Under-sink waste bins make it easier to separate everyday trash from recyclable materials. A compact arrangement can keep waste containers close to the work area without taking up valuable floor space.
Choose bins according to the available cabinet space and how your household separates waste.
The IKEA HÅLLBAR pull-out frame offers one option for built-in waste sorting. It mounts at the bottom of a compatible cabinet and lets you pull the waste bins forward.
The frame measures 10⅜ inches wide, 17¾ inches deep, and 12⅜ inches high. Check your cabinet opening, plumbing, and bin clearance before selecting it.
IKEA DAMMÄNG waste bins provide another option for separating bottles, cans, and larger packaging.
The 13-gallon DAMMÄNG model measures 10¾ inches wide, 25½ inches deep, and 18 inches high. Its depth may prevent it from fitting inside some under-sink cabinets, making a freestanding location more suitable.
For everyday waste sorting, consider these arrangements:
- General waste: Use an easy-to-empty bin with a suitable lid.
- Recyclables: Keep a separate container for accepted bottles, cans, and packaging.
- Small waste: Add a lightweight door-mounted bin if the door and hinges can support it.
Use larger containers with accessible lids for bulkier waste when space permits. Make sure lids can open fully without hitting the sink or plumbing.
Empty waste bins before they overflow. Wash and dry reusable containers regularly, especially those used for food scraps.
Recommended Products
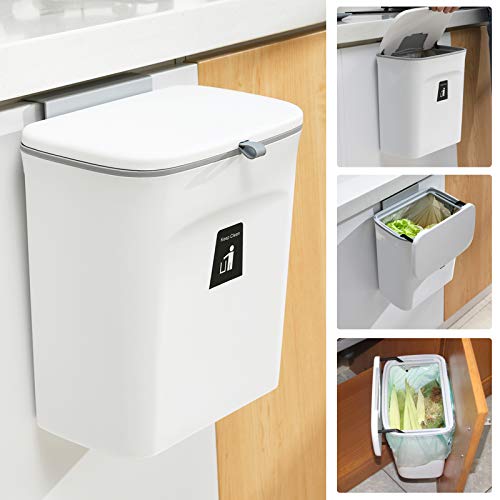
Lid Can Effective Prevent Odor From Escaping:" Indoor hanging compost bin with lid designed specifically as a hidden non smelling, super easy access for load and unload; The compost bucket is the odorless storage for kitchen waste in your home, no charcoal filter costs

VERSATILE UNDER COUNTER TRASH CAN – This space-saving waste bin can be used as a regular, standalone trash can, but it can also be conveniently hung to keep your floor spaces clean. Hang on the inside of a door for the perfect under cabinet storage, or on the outside for easy access.

【RACK ONLY - TRASH CAN NOT INCLUDED】Package includes the stainless steel pull-out rack and mounting screws ONLY. CRITICAL SIZE NOTE: While the overall rack measures 16"D x 11"W x 16"H, the maximum usable INNER width for your trash can is 9 INCHES. Please measure both your cabinet and your trash can base before ordering!
Keep Cleaning Supplies Within Reach
Organize cleaning supplies by how often you use them. Keep everyday essentials easy to reach, while placing less frequently used products in a separate, suitable storage area.
Removable caddies and labeled containers help you find supplies without rearranging the entire cabinet.
Try this setup:
- Create a dishwashing zone. Keep dish soap and everyday washing tools together.
- Use a removable cleaning caddy. Group compatible supplies used for routine cleaning.
- Separate dry and liquid items. Keep clean cloths and spare sponges away from possible bottle leaks.
- Improve visibility. Add suitable battery-powered cabinet lighting if the interior is dark, keeping it away from possible moisture.
- Limit backups. Move excess supplies elsewhere when they crowd the working area.
VARIERA boxes or similar washable containers can help keep cleaning bottles upright. Use a separate tray for liquids that could spill.
Warning: Keep hazardous cleaning products in their original labeled containers. If children or pets can access the cabinet, store dangerous products in a securely locked location or a suitable high cabinet. Do not rely on ordinary storage bins to prevent access.
The U.S. Consumer Product Safety Commission’s cleaner storage guidance recommends locking up household cleaners and keeping them out of children’s reach.
Also, never mix bleach with other cleaning products. The CDC’s bleach safety guidance explains that mixing bleach with other cleaners can release dangerous vapors.
Keep bottle caps closed and follow each product’s storage instructions. Avoid storing chemicals beside food, medicines, or items that could absorb spills.
Protect the Cabinet From Leaks
Protecting the cabinet from moisture is just as important as organizing its contents. Small plumbing leaks and spilled cleaners can damage cabinet surfaces if they remain unnoticed.
Start by inspecting the cabinet floor, pipe joints, and connections around the garbage disposal.
A protective liner can make everyday cleaning easier. For example, the IKEA VARIERA drawer liner can be trimmed to fit and helps protect cabinet surfaces from scratches.
However, an ordinary drawer liner is not the same as a waterproof tray with raised edges. A liner alone should not be relied upon to contain plumbing leaks.
To reduce moisture damage:
- Place a washable, leak-catching tray beneath cleaning bottles.
- Use a suitable protective mat or tray beneath the stored items.
- Keep liquid containers upright with their lids closed.
- Inspect the area around drainpipes, seals, and water connections.
- Remove wet liners or absorbent pads and dry the cabinet beneath them.
Do not cover an active plumbing leak with a mat or tray. The source of the water must be repaired.
Warning: If you notice an active leak, swollen cabinet panels, or persistent dampness, address the water problem before reinstalling storage. A qualified plumber may be needed to repair leaking connections or a damaged drain.
The EPA’s home moisture and mold guidance identifies leaking kitchen sink pipes as a possible cause of mold growth in cabinets and walls.
Check beneath storage trays occasionally rather than assuming the liner has kept everything dry. This helps you spot hidden moisture before it causes further damage.
Use the Cabinet Door for Extra Storage
The inside of the cabinet door offers extra storage for small, lightweight items. Hooks, shallow caddies, and compact organizers can hold everyday tools without occupying the cabinet floor.
Choose accessories that fit within the door’s available clearance.
Useful door storage ideas include:
- Adhesive hooks: Hang cleaning gloves, lightweight brushes, or scrubbers.
- Small caddies: Hold dry sponges and other compact supplies.
- Trash bag holders: Keep spare bags rolled or folded in one place.
- Shallow organizers: Store small cleaning accessories that do not need deep shelves.
For heavier supplies, use a properly supported organizer inside the cabinet rather than relying on adhesive hooks.
Before installing anything, close the cabinet door slowly to test the clearance. Check that hooks and containers do not hit the plumbing, shelves, or stored bottles.
Also consider the type of attachment. Removable adhesive organizers may be useful in rental kitchens, while screw-mounted accessories require suitable cabinet material and careful installation.
Avoid drilling where plumbing, electrical wiring, or other hidden components could be damaged.
Keep the door storage shallow and simple. If an accessory prevents the door from closing fully, move it or choose a smaller option.
Keep Your Under-Sink Cabinet Organized
A practical storage system should be easy to maintain after the initial cleanup. You should be able to find supplies, return them to their places, and check the plumbing without emptying the whole cabinet.
Use this simple maintenance routine:
- Return cleaning tools to their assigned containers after use.
- Let wet brushes, gloves, and sponges dry before placing them in enclosed storage.
- Remove empty bottles and unnecessary packaging.
- Empty waste bins and clean spills promptly.
- Check storage trays and plumbing for moisture.
- Review backup supplies and remove items you no longer need.
A common mistake is filling every available gap with another organizer. Leaving some open space makes it easier to remove containers and reach essential plumbing.
Choose a layout that fits your routine rather than one that only looks tidy when the cabinet is first arranged.
Key Takeaways
- Measure the cabinet opening as well as the interior. Pipes, hinges, and disposal units can prevent an otherwise suitable organizer from fitting.
- Use shallow containers for short supplies and reserve taller spaces for bottles and cleaning tools.
- Choose waste bins by their actual dimensions, not just their stated capacity.
- Keep hazardous products in secure storage, with original labels and closed lids.
- Use removable trays so you can inspect the cabinet floor and plumbing for hidden leaks.
Frequently Asked Questions
What Are Some Smart Ways to Organize Under the Kitchen Sink?
The smartest ways include using removable bins, adjustable shelves, pull-out trays, and cabinet-door hooks. Measure around the plumbing first, then assign separate areas for cleaning supplies, waste bins, and small tools. Keep everyday items accessible and leave room to inspect pipes and shutoff valves.
What Are Some Common Mistakes to Avoid When Organizing Under Sink Storage?
Common mistakes include buying organizers before measuring, overcrowding the cabinet, blocking plumbing connections, and stacking unstable containers. Avoid hiding active leaks beneath liners or storing hazardous cleaners where children can reach them. Choose storage that remains easy to remove, clean, and maintain.
What Is the Best Organizer for Under the Kitchen Sink?
The best organizer is one that fits your cabinet’s usable space and keeps supplies accessible. A two-tier pull-out organizer works well when there is room beside the plumbing. For cabinets with several obstacles, separate removable bins or adjustable shelves may be a better choice.
What Are Some Good Storage Options for Under the Kitchen Sink?
Good storage options include clear bins, labeled baskets, pull-out drawers, tiered shelves, turntables, and door-mounted hooks. Waste-sorting bins can also work if they fit around the plumbing. Choose washable materials and a layout that allows you to remove supplies without blocking the drain or valves.
Conclusion
Organizing under the kitchen sink works best when storage fits around the plumbing rather than filling every available space. Start with a clean cabinet and accurate measurements. Then add removable bins, useful shelves, and compact door organizers while keeping cleaning products secure.
Protect the cabinet from spills, check for leaks, and maintain a simple arrangement. The result is a practical storage area that makes daily kitchen tasks easier.
Sources
- IKEA: Organize Under the Kitchen Sink: Modular storage, waste sorting, and organizing around plumbing.
- IKEA: HÅLLBAR Pull-Out Frame: Product measurements, installation, and waste-sorting use.
- IKEA: DAMMÄNG Bin With Lid: Bin dimensions, capacity, and stacking features.
- IKEA: VARIERA Drawer Liner: Liner material, protective purpose, and care instructions.
- U.S. Environmental Protection Agency: Household Hazardous Waste: Safe handling and disposal of hazardous household products.
- U.S. Consumer Product Safety Commission: Cleaner Storage Safety: Keeping hazardous cleaning products secured and away from children.
- Centers for Disease Control and Prevention: Cleaning and Disinfecting With Bleach: Precautions against mixing bleach with other cleaners.
- U.S. Environmental Protection Agency: Mold House Tour: Kitchen plumbing leaks, moisture, and mold prevention.