Robot vacuum cliff sensors prevent falls by detecting sudden drops with infrared signals. They are usually mounted on the underside near the front edge, where dust and debris collect quickly. Cleaning them is simple, but the wrong method can cause false errors or missed detections. A careful approach starts with power removal and the right tools, then continues with a few checks that reveal whether the problem is only surface buildup or something more serious.
How Robot Vacuum Cliff Sensors Work
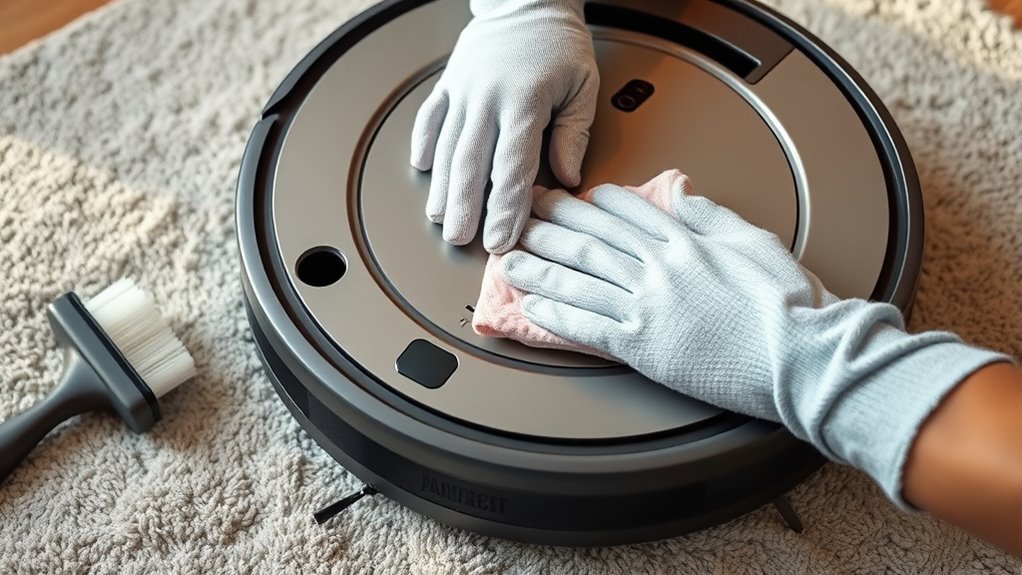
Robot vacuum cliff sensors use infrared light to detect changes in elevation and prevent the machine from driving over edges or stairs. These cliff sensors function as downward-facing infrared sensors that emit light toward the floor and measure the returning signal.
Robot vacuum cliff sensors use infrared light to detect drops, helping the machine avoid stairs and edges.
When the reflection is strong, the robot interprets stable ground and continues cleaning; when the light does not return, the control system treats the area as a drop-off. Most units use four to six sensors to improve detection of surfaces across the chassis and reduce blind spots.
This distributed layout supports reliable navigation without constant user intervention, preserving autonomy in daily cleaning. Regular cleaning matters because dust or debris on the sensor windows can block or scatter infrared light, causing false cliff readings.
To maintain performance, clean the sensors with a dry, soft cloth and inspect them routinely. Clear sensors help the robot move freely, safely, and without avoidable interruptions.
Where to Find Cliff Sensors on Your Vacuum
Cliff sensors are typically mounted on the underside of the robot vacuum, along the front edge, where they can detect changes in floor height.
Most models use multiple sensors in a symmetrical layout; for example, Roomba 500 to 900 series units commonly include several, while S-series Roombas have four, with two on each side of the wheels.
To locate and clean them safely, the vacuum should be placed upside down on a soft surface.
Cliff Sensor Locations
The cliff sensors on a robot vacuum are typically mounted on the underside along the front edge, where they can detect drops and other changes in elevation.
On most models, these cliff sensors are arranged in a row to support obstacle avoidance and prevent falls near stairs or ledges. Roomba 500-, 600-, and e-series units usually use four evenly spaced sensors.
S-series models also use four, with two positioned on each side of the wheels for improved detection.
700-, 800-, 900-, i-, and j-series Roombas often use six sensors across the front.
Regular maintenance includes cleaning the sensors so they can detect changes in elevation accurately and avoid false “Eek! Cliff!” alerts during operation.
Underside Sensor Layout
Beneath the chassis, cliff sensors are usually arranged along the front edge of the robot vacuum, where they monitor floor changes and help prevent falls from stairs or ledges.
On the underside, their placement varies by robot vacuum models, yet the goal remains consistent: stable, independent movement. Common layouts include:
- front-edge detection points
- wheel-adjacent sensors
- evenly spaced arrays
- low-profile optical windows
- manual-reference positions
Cleaning frequency should match dust exposure, and sensors regularly inspected can reduce false cliff alerts.
Dirt on the underside may trigger erratic navigation, forcing unnecessary stops or turns. For exact locations, the manual remains the authoritative guide, since layouts differ across robot vacuum models.
Precise upkeep preserves safe travel and keeps the machine free to move.
Model-Specific Sensor Counts
Sensor placement on Roomba models follows a model-specific pattern, so identifying the exact count helps narrow where the cliff sensors sit on the underside. The Robot Vacuum uses different sensor layouts by series, and that changes how one should inspect and clean.
| Series | Count | Location |
|---|---|---|
| 500/600/e | 4 | Front edge underside |
| S-series | 4 | Two per side near wheels |
| 700/800/900 | 6 | Across the front |
The cliff sensors should be checked monthly for dust or dirt. On every Vacuum, buildup can trigger false drop-off readings, reduce performance, and cause erratic navigation. A clean sensor array supports accurate edge detection and steadier movement, giving the Robot clearer guidance and the user more control.
How to Clean Robot Vacuum Cliff Sensors
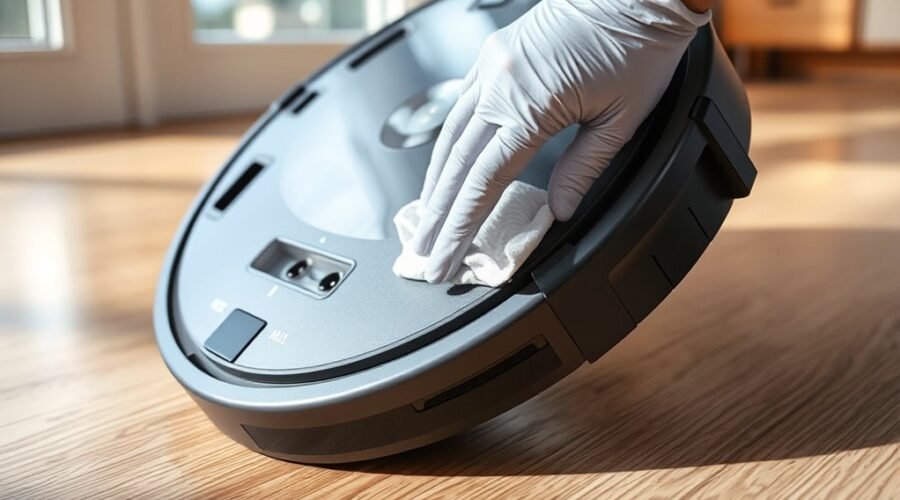
Cliff sensors on the underside of a robot vacuum should be cleaned with the unit powered off to prevent accidental activation and guarantee safety. These cliff sensors help the machine detect drop-offs, supporting navigation and obstacle avoidance.
To clean efficiently, a technician should inspect the sensor windows under good light and gently wipe them with a dry microfiber cloth. This removes dust without scratching the surface.
Inspect the sensor windows in good light, then gently wipe with a dry microfiber cloth to remove dust safely.
- Turn the robot vacuum off and unplug the dock if needed.
- Locate the underside cliff sensors near the front edge.
- Gently wipe each sensor with a microfiber cloth.
- For stubborn grime, slightly dampen the cloth with water.
- Schedule regular cleaning every 1–2 weeks for accuracy.
If residue remains, the cloth may be lightly dampened, but harsh chemicals should be avoided because they can damage sensor components.
Regular cleaning preserves detection reliability, reduces false cliff warnings, and helps the vacuum operate with greater freedom and precision.
Fix Persistent Cliff Sensor Errors
Persistent cliff sensor errors are often resolved by cleaning the sensor windows with a dry microfiber cloth and removing any dust or debris.
The surrounding area should be checked for poor lighting, obstructions, or damage that could trigger false cliff alerts.
If the fault persists, the robot vacuum should be reset and retested to determine whether a deeper mechanical issue remains.
Clean Sensor Windows
Turn the robot vacuum upside down and clean the plastic windows covering the cliff sensors with a soft, dry microfiber cloth, focusing on the underside near the front edge where these sensors are typically located.
To clean sensor windows and gently clean debris, use a soft cloth in short, controlled passes, then a cotton swab for corners. Maintain your robot vacuum by removing dust from each cliff sensors lens without moisture or abrasives.
- Inspect the front underside.
- Wipe each window evenly.
- Use light pressure only.
- Clear packed dust carefully.
- Repeat every 1–2 weeks.
Regular upkeep preserves sensing accuracy and supports reliable navigation, especially in dusty homes or households with pets.
Check False Cliff Alerts
False cliff alerts usually indicate that dust, debris, or a partial obstruction is interfering with the cliff sensors on the robot vacuum’s underside.
Use a dry microfiber cloth; sensors with a soft cotton swab improve sensor clean access without abrasion. Regular dust detection checks prevent needless pauses.
| Check | Action | Result |
|---|---|---|
| Underside sensors | Inspect for dirt | Removes false triggers |
| Light level | Use bright conditions | Improves detection accuracy |
| Cleaning method | Wipe gently | Protects optics |
| Signal | Meaning | Response |
| Persistent alert | Residue remains | Repeat sensor clean |
| Intermittent alert | Lighting issue | Relocate to brighter area |
| No visible debris | Hidden obstruction | Inspect again |
If errors continue, customer support should be consulted. Often you use careful inspection first, then targeted cleaning to restore freedom of movement and accurate cliff avoidance.
Reset And Retest
To reset cliff sensor errors, the robot vacuum should be powered off and the dust bin removed to expose the sensors for easier access.
After the sensors are clean with a soft, lint-free cloth, wait several minutes before restoring power so residual moisture can evaporate.
If false edge warnings continue, consult the user manual and perform the specified reset sequence, often a timed button hold.
Then retest the sensors in a controlled area.
- power off the unit
- remove the dust bin
- clean each sensor lens
- reset by manual procedure
- retest near edges
A successful retest shows stable navigation without repeated cliff alerts.
If errors remain, repeat inspection and clean again.
Ongoing maintenance every one to two weeks supports reliable operation and preserves a liberated, untethered cleaning routine.
How Often to Clean Cliff Sensors
Cliff sensors should typically be cleaned every 1–2 weeks to maintain accurate edge detection and reduce the risk of falls. This cleaning frequency supports peak performance in most homes and limits nuisance false “Eek! Cliff!” messages.
In a household with pets, weekly attention is often justified because fur and tracked grit accumulate faster on sensor windows. Where dirt load is heavy, the same interval is prudent.
In smaller homes with light foot traffic, monthly cleaning may be adequate, provided the sensors are monitored for dust buildup and response changes.
Always follow manufacturer’s guidelines, since recommended intervals vary by model and sensor design. If the vacuum begins pausing near thresholds or misreading edges, cleaning should be performed immediately rather than deferred.
Regular, disciplined maintenance preserves autonomy, reduces unnecessary interruptions, and keeps the robot moving without avoidable hesitation.
When Cliff Sensor Problems Need Repair
Persistent “Eek! Cliff!” alerts usually mean cliff sensor problems that exceed routine care. After cleaning every 1–2 weeks, if alarms continue, the unit should be examined for blocked optics, physical damage, or misalignment.
- Wipe sensor windows with a dry microfiber cloth.
- Check for hair, dust, or adhesive residue.
- Inspect housing for cracks or impact marks.
- Confirm sensor alignment and mounting stability.
- Contact customer support if faults persist.
This sequence helps prevent buildup from turning into avoidable downtime. Modifications such as removing baffles may restore a direct line of sight, but they are irreversible and should be approached only with full technical understanding.
When cleaning fails to restore normal navigation, repair is the practical next step, not repeated resets. A stable, liberated workflow depends on recognizing when maintenance ends and component failure begins, then acting decisively.
Frequently Asked Questions
How to Clean Cliff Sensors on Roomba?
He turns the Roomba over, wipes each cliff sensor window with a dry microfiber cloth, then uses a cotton swab for sensor dirt buildup. This cliff sensor maintenance supports vacuum performance enhancement through safe cleaning techniques and robot vacuum troubleshooting.
My Roborock Keeps Saying “Cliff Sensor Error.” How Can I Fix This?
Stop and inspect, not reset and panic: a Roborock cliff sensor error usually needs simple robot vacuum maintenance. Dry-clean the underside sensors, improve lighting, then test movement. Persistent troubleshooting errors may indicate sensor technology faults requiring support.
How to Clean Robot Vacuum Cleaner Sensor?
He powers it off, wipes the sensor windows with a dry microfiber cloth, and avoids liquids. This robot maintenance tips, sensor troubleshooting guide, vacuum cleaning techniques, pet hair solutions, smart home gadgets, tech care advice approach prevents faults.
How to Clean Shark Robot Cliff Sensors?
Shark robot cliff sensors are cleaned by powering off, flipping the unit on a soft surface, and wiping the underside with a dry microfiber cloth; cotton swabs aid tight spots, preserving cliff sensor maintenance, sensor performance, vacuum efficiency.
Conclusion
In conclusion, robot vacuum cliff sensors are simple but critical safety components that detect drops and prevent falls. Cleaning them safely begins with powering off the unit, removing the dust bin, and wiping the sensor windows with a dry microfiber cloth; a lightly dampened cloth may help with stubborn residue. With many users reporting fewer navigation errors after routine maintenance, cleaning every 1–2 weeks is practical. Persistent faults after reset usually indicate a repair need.