A robot vacuum filter affects suction, airflow, and overall cleaning performance. Proper maintenance starts with powering down the unit, emptying the dustbin, and removing the filter without forcing it. From there, the process depends on the filter type, the amount of debris, and the drying method used. Small mistakes can reduce efficiency or damage the part, which makes the next steps worth attention.
What You Need Before Cleaning the Filter
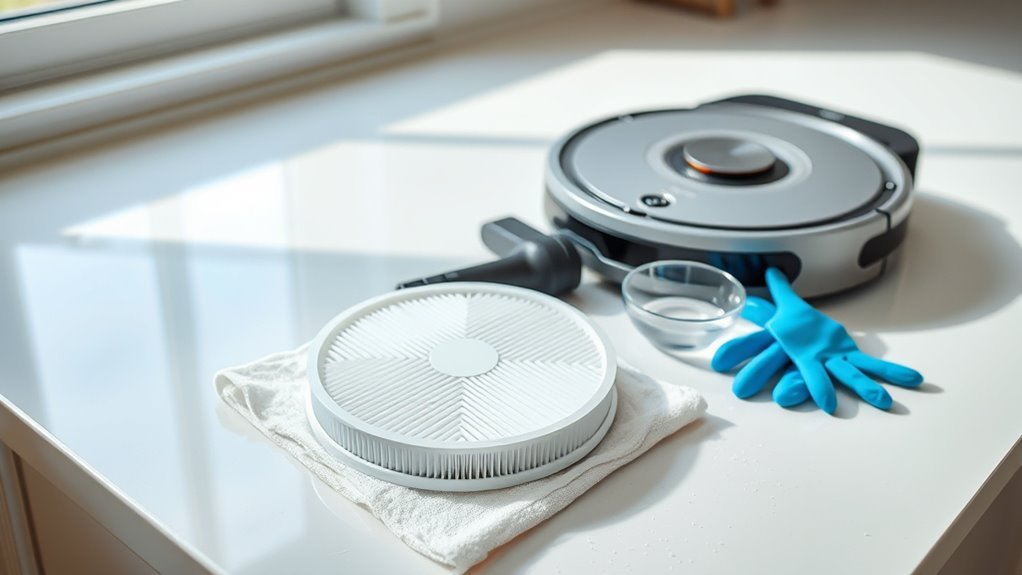
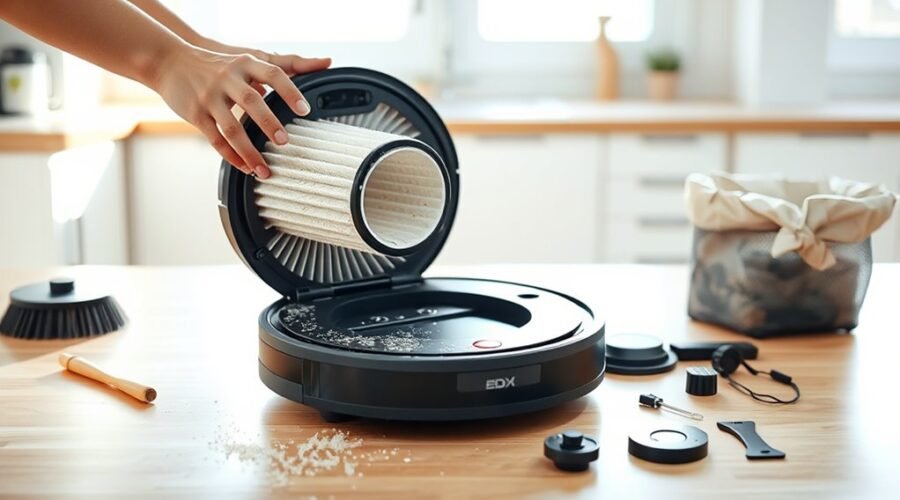
Before cleaning a robot vacuum filter, it is important to gather a soft brush, lukewarm water, and a clean dry cloth, along with a nearby trash can for removing loosened debris. These tools allow controlled maintenance without unnecessary interruption.
The user manual should be consulted first so the correct filter location, cleaning limits, and model-specific instructions are understood. A well-ventilated area should also be prepared for the filter to air dry after washing, with direct sunlight avoided to reduce material stress.
The dustbin should be emptied before work begins, since trapped dirt can fall back onto the filter during handling. A clean cloth is useful for wiping surfaces and keeping the workspace orderly.
With the robot vacuum powered off and unplugged, the process can proceed safely and with greater personal autonomy, minimizing risk while preserving filter performance. Proper preparation protects both the device and the user, and supports efficient, self-directed care.
How to Remove the Filter Safely
With the robot vacuum powered off and unplugged, the dustbin should be located and opened by pressing its release button or pulling it out, depending on the model.
The filter can then be removed safely by following the unit’s instructions and lifting it from the dustbin or compartment without force. A firm tug is unnecessary and may damage both the filter and the vacuum housing. If the filter resists, the manual should be checked before proceeding.
The filter lifts out gently; if it resists, check the manual rather than forcing it.
Once free, the filter may be tapped gently over a trash can to release loose debris; it should not be shaken aggressively. This controlled method preserves the filter’s structure and keeps maintenance simple, allowing the user to act with confidence rather than dependence.
Because placements vary by model, the manual remains the most reliable reference for exact removal steps. Careful handling at this stage supports longer service life and easier upkeep.
How to Clean a Robot Vacuum Filter
Once the filter has been removed safely, cleaning begins with a careful inspection and a light tap to dislodge remaining debris.
To clean the filter, the robot vacuum should remain powered off and unplugged, preserving safety and control. Gently rinse the filter under lukewarm water, then shake off excess moisture. For HEPA filters and similar media, this method supports regular maintenance without forcing particulate deeper into the mesh.
- Tap loose dust free over a bin.
- Rinse gently with lukewarm water.
- Let it air dry in a ventilated area.
- Check the filter status before reinstalling.
It is essential to avoid using heat, including dryers or direct sun, because distortion can reduce filtration efficiency.
After it is fully dry, reinsert it, perform a test run, and verify suction. If wear is visible, replace the filter every 3-6 months. Consistent care supports peak performance and preserves a cleaner, more liberated home.
How to Clean the Filter Housing
After powering off and unplugging the robot vacuum, the dustbin should be removed by pressing the release button or sliding it out. Then the filter compartment can be accessed and the filter lifted out carefully.
To clean the filter housing, the interior of the filter housing should be inspected for trapped dust, hair, and debris. A dry cloth or a soft brush can then be used to wipe the surfaces, including corners and seams where buildup tends to collect.
If residue remains, the dustbin may be rinsed thoroughly with water only when the manufacturer permits it, then wiped clean. The housing should not be reassembled until every surface is dry, because moisture can prevent mold and damage components. Regular cleaning of this area helps maintain peak performance and preserves airflow.
Once the filter is completely dry and the housing is clean, the filter can be reinserted, and the dustbin returned to its place without forcing any part.
How to Dry the Filter Fast
To dry the robot vacuum filter quickly, excess water should be gently shaken off immediately after rinsing to prevent pooling inside the filter material.
The filter should then rest in a well-ventilated area, away from direct sunlight, to create ideal air-drying conditions. For faster results, position in front of a fan so air moves across all surfaces.
Avoid using heat sources, including dryers or microwaves, because they can warp the filter material and reduce performance.
- Shake off excess water before setting it aside.
- Let it dry completely on a clean, open surface.
- Use a fan to accelerate evaporation.
- Check that it is completely dry before reinstalling.
These steps help dry fully before reinserting, and they prevent mold from developing inside the filter.
A careful drying routine preserves function, supports efficient suction, and keeps the unit ready for unrestricted use.
When to Replace the Filter
A robot vacuum filter should typically be replaced every 3 to 6 months to preserve suction performance and cleaning efficiency. This interval helps keep the robot vacuum filter operating at peak performance, especially in homes with heavy debris or frequent use.
A drop in suction power often signals that it is time to replace the filter, even before the calendar interval ends. Visible wear and tear, such as fraying, deformation, or persistent discoloration, also indicates reduced function.
Some models specify replacement after about 120 hours of use, regardless of appearance, so users should check the manufacturer’s guidance to maintain your robot vacuum correctly.
Companion apps can simplify oversight by issuing reminders for replacement and tracking filter replacement needs. By following these indicators, users can clean your robot vacuum with greater control, reduce performance loss, and preserve the freedom that comes from reliable, unattended floor care.
How Often to Clean the Filter
A robot vacuum filter should be cleaned at least once per week as part of routine maintenance.
In homes with pets or elevated dust levels, cleaning 2–3 times weekly is more appropriate because hair and fine debris load the filter more quickly.
This schedule helps preserve suction performance and reduces airflow restriction between replacements.
Weekly Cleaning Schedule
A robot vacuum filter should be cleaned at least once per week to preserve suction strength and consistent performance. This weekly cleaning schedule supports cleaning the filter, helps maintain ideal suction power, and limits conditions that reduce efficiency.
In homes with pets or elevated dust, the interval should increase to 2-3 times weekly. Operators should monitor the filter for visible signs of dirt or blockage, since these indicate the need for immediate attention. Regular maintenance prevents dust buildup and reduces strain on the system.
- Inspect the filter after each cleaning cycle.
- Tap out loose debris before washing, if allowed.
- Allow the filter to dry fully before reinstalling.
- Record cleaning dates to support extending filter lifespan and improve air quality.
Pet Hair And Dust
In homes with pets, the robot vacuum filter should be cleaned 2–3 times per week to prevent pet hair and dust from clogging the system and reducing suction.
Frequent maintenance keeps the filter clear, supports ideal airflow, and helps the robot vacuum maintain consistent performance. Pet hair accumulates quickly, so inspection after every few uses is practical, especially in high-shedding households.
Cleaning also traps allergens and dander more effectively, improving indoor air quality for occupants who need relief from irritants. A neglected filter can overheat the motor and shorten service life, making timely cleaning essential.
When the filter is clean, clogs are reduced, suction remains stable, and the machine can operate with greater efficiency and autonomy.
Common Filter Problems and Fixes
Clogged filters are among the most common causes of reduced suction, so they should be checked regularly and cleaned every 1 to 3 months, depending on use and household conditions.
Regular maintenance helps maintain peak performance and prevents sensor impact from restricted airflow. A practical inspection should identify clogged filters, visible damage, and odor issues before they spread.
When needed, owners can clean or replace the part according to design:
- Washable filters can be rinsed, dried fully, and reused.
- Disposable filters should be replaced once clogged or worn.
- Persistent odor issues may respond to effective deodorization with vinegar or baking soda.
- Visible damage means replacement is required to protect cleaning efficiency.
This approach frees the machine to move with accuracy, preserve suction, and avoid unnecessary strain.
Clear filter care is a precise, low-effort safeguard for reliable navigation and cleaner floors.
How to Tell If the Filter Is Damaged
A damaged robot vacuum filter often shows visible wear such as tears, holes, or frayed edges.
Reduced suction performance or weaker cleaning results can indicate that the filter is no longer functioning effectively.
Persistent odors from the vacuum may also suggest contamination or damage beyond normal cleaning.
Visible Wear And Tears
Routine inspection of the robot vacuum filter can reveal damage that reduces suction and cleaning efficiency. During maintenance, one should inspect and check the filter for visible wear, then clean any loose debris before a closer assessment.
- Frayed edges suggest structural breakdown.
- Holes indicate a compromised filter media.
- Discoloration or brittleness signals aging.
- Warping can prevent a secure fit.
Such defects may let dust escape and diminish suction power, undermining performance. A filter with clear visible wear should be removed from service and considered for replacement immediately.
This practical habit protects indoor air quality and preserves cleaning efficiency without unnecessary delay. Regular observation gives users control over machine upkeep and helps maintain effective, independent operation.
Reduced Suction Performance
A noticeable drop in suction during operation often indicates that the robot vacuum filter is clogged or damaged and needs immediate attention. To clean and restore peak suction, inspect the robot vacuum filter after each run if cleaning frequency is high, and at least every two weeks. A clogged filter can reduce suction power and restrict airflow, limiting effective debris pickup. | Check | Indicator | Action |
| — | — | — |
|---|---|---|
| Suction | Weak pickup | Clean filter |
| Surface | Visible signs of wear | Replace filter |
| Odor | Unpleasant odors | Inspect and clean |
| Use rate | Frequent runs | Shorten inspection interval |
| App | Reminders about filter status | Follow alerts |
Routine checks preserve autonomy and prevent performance loss. When damage, clogging, or repeated decline appears, replace the filter to maintain reliable operation and clean results.
Persistent Odors Or Damage
Persistent odors after cleaning, along with visible damage, indicate that a robot vacuum filter may no longer be serviceable.
Persistent odors usually mean moisture or embedded dirt remains trapped, so cleaning tips alone will not restore peak performance.
Inspect for visible damage: tears, holes, discoloration, and structural deformities. These defects reduce filtration and can lower suction power, causing reduced performance and more dust return.
- Check for odor after drying.
- Look for tears or holes.
- Compare shape for deformity.
- Replace the filter if damage appears.
If these signs are present, replace the filter immediately to preserve air quality and maintain efficient operation.
Regular replacement every 3–6 months supports consistent capture of particles and keeps the robot vacuum free enough to work without avoidable resistance.
How to Make Your Filter Last Longer
To extend a robot vacuum filter’s service life, it should be cleaned at least once a week to prevent dust buildup from reducing suction and straining the material.
When owners clean their robot vacuum filter, they should use a soft brush or hand vacuum on non-washable media, because aggressive washing can damage fibers. They should verify the filter is completely dry before reinstalling it, since residual moisture can prevent mold and lower efficiency.
To maintain peak suction power, the filter should be replaced every 3 to 6 months, or after about 120 hours of use, so it continues to capture allergens and maintain air quality.
Replace your robot vacuum filter every 3 to 6 months, or after about 120 hours of use.
Owners should monitor the filter for visible wear, including tears, warping, or discoloration, and replace the filter promptly if damage appears.
These practices reduce waste, preserve performance, and extend its lifespan without sacrificing the freedom of a clean, low-maintenance home.
Frequently Asked Questions
Can Roomba Filters Be Washed and Reused?
Usually not; only washable foam models permit gentle rinsing. HEPA filters should never be washed. Roomba maintenance tips, filter types comparison, and filter replacement frequency matter for robot vacuum care, vacuum efficiency impact, and longevity.
Can I Use Vinegar in My Robot Vacuum?
No; vinegar belongs only on removable exterior parts. For robot maintenance tips, a cleaning solutions comparison and vinegar benefits overview, it aids odor elimination methods, not electronics, preserving robot vacuum longevity and best maintenance practices.
What Is the Average Lifespan of a Robot Vacuum?
Robot vacuums average 3–6 years, depending on robot vacuum maintenance, vacuum battery lifespan, and robotic vacuum features. Cleaning frequency guidelines, filter replacement tips, troubleshooting common issues, surface compatibility, pet hair performance, best robot brands, smart home integration, extend longevity.
Are Robot Vacuum Filters Washable?
Yes—some robot vacuum filters are washable, others are disposable. His filter maintenance depends on filter types and user manuals; cleaning frequency affects vacuum efficiency, debris types, suction power, allergy benefits, and filter replacement, supporting robot maintenance.
Conclusion
In practice, safe robot vacuum filter care is straightforward: power off the unit, remove the filter per the manual, tap out loose debris, rinse only if the manufacturer allows it, and dry it completely before reinstalling. For example, a household that cleaned the filter weekly and replaced a cracked one early preserved suction and reduced clogs. Regular inspection, proper drying, and timely replacement help protect the motor and maintain consistent cleaning performance.