A stuck robot vacuum wheel usually points to debris, worn parts, or a simple alignment issue. The fix often starts with power removal and a careful inspection of the underside. Main wheels, caster parts, and wheel housing can trap hair and dirt that stop movement. A few basic checks may restore function quickly, but some faults require closer examination before the cause becomes clear.
Why Your Robot Vacuum Wheel Sticks
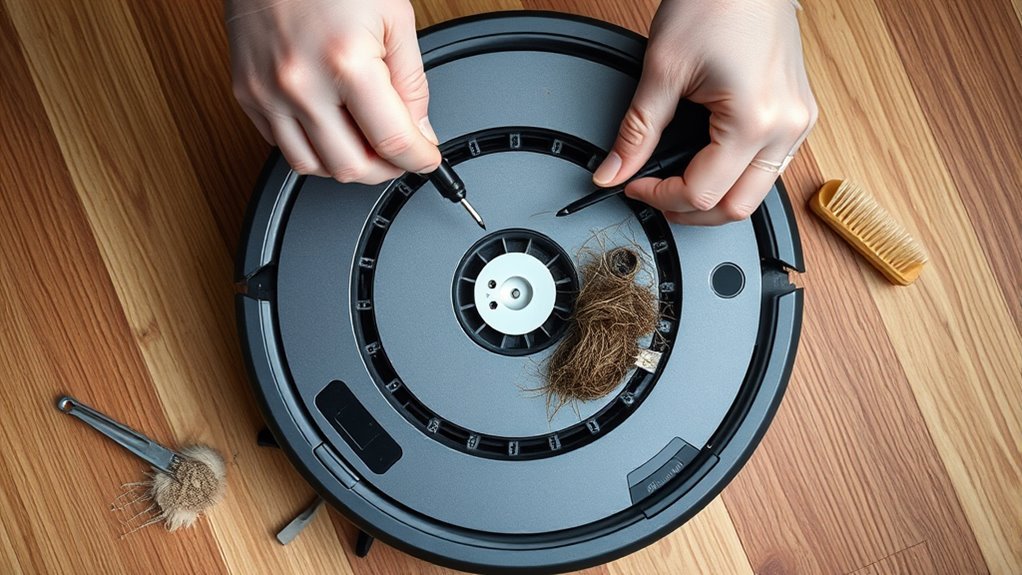
A robot vacuum wheel often sticks when debris, hair, or threads wrap around the axle and restrict rotation. Such wheel issues usually begin with hair wrapped around the axle, compacted dust buildup in the housing, or small fibers wedged near the tread.
These conditions raise friction and reduce traction, especially on hard floors and carpet edges. External obstructions also matter: loose cords, thick rugs, and furniture legs can block movement and force the wheel to stall.
Over time, worn rubber treads and internal components weaken grip and limit smooth travel across surfaces. The wheel sensors then register abnormal resistance, and the control system may trigger obstacle avoidance behavior to prevent further strain.
For users seeking autonomous movement without interruption, identifying these mechanical and sensing causes clarifies why the wheel stops turning and why navigation becomes uneven.
Fix a Stuck Robot Vacuum Wheel
To fix a stuck robot vacuum wheel, power off the unit and flip it over so the wheel assembly can be inspected directly for debris or visible damage.
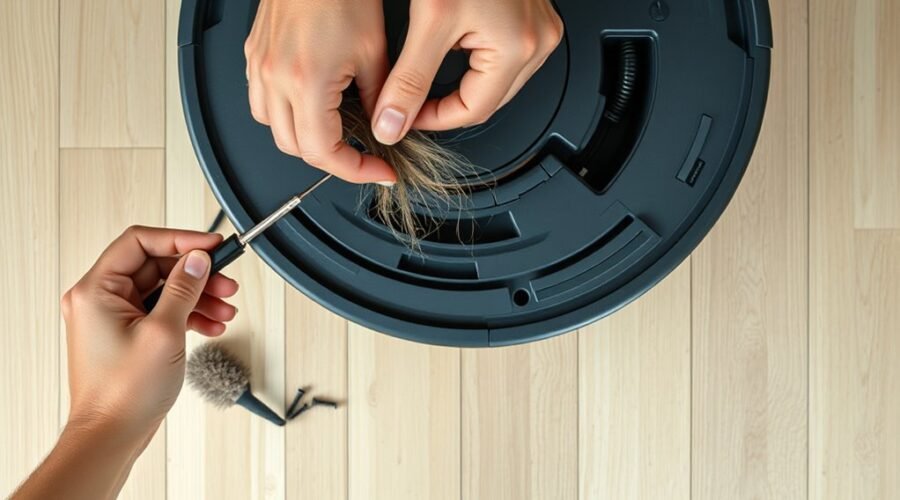
A careful technician will remove hair or dirt wrapped around the axle, then clean wheel and housing surfaces to reduce friction and restore travel. Use a small brush or tweezers to remove hair from seams, joints, and the wheel well without forcing parts.
Next, check caster wheel function, confirming it pivots smoothly and is not blocked by compacted debris.
After cleaning, manually rotate each wheel to verify free movement and detect resistance, grinding, or looseness. If motion remains restricted, inspect for worn bushings, cracked components, or motor failure.
When internal wear is suspected, the practical path is to seek customer support or professional service, allowing the machine to regain mobility without unnecessary strain.
This approach helps fix a stuck robot vacuum wheel efficiently and preserves dependable operation.
Clean the Main Wheels and Caster
After powering off the robot vacuum and flipping it over, each main wheel should be inspected for debris, hair, and other obstructions that can cause sticking.
To clean the main wheels, a damp cloth should be used to remove dust and grime from the treads and surrounding wheel housing, reducing friction and restoring movement.
The front caster wheel should be detached carefully, then cleaned at its axle and reinstalled until a firm click is heard. This process helps maintain independent motion and reliable navigation.
- Wipe each wheel with a damp cloth.
- Remove hair caught near the tread edges.
- Clean the front caster wheel axle.
- Check for smooth rotation after reassembly.
Regular maintenance tips include inspecting tread wear and replacing damaged wheels promptly.
After cleaning, each wheel should spin freely by hand, confirming that no resistance remains and that the vacuum can move without restraint.
Remove Hair and Debris From the Wheel Housing
With the vacuum powered off and turned upside down, any remaining hair or debris around the wheel axle and housing should be removed using a small brush or tweezers.
Each wheel should be inspected closely so wrapped hair does not restrain movement or force the mechanism to drag. The tool should be guided into crevices to remove compacted debris without bending internal parts.
Inspect each wheel closely so tangled hair and debris do not restrain movement or cause the mechanism to drag.
After loose material is cleared, the housing should be clean-wiped with a damp cloth to lift dust buildup that can increase friction and limit freedom of motion.
The front caster wheel also should be checked for obstruction, and its axle should be cleaned until it spins freely. A careful pass around both side wheels and the caster helps restore smooth travel and reduces the chance of sticking.
Regular inspection and clean maintenance support reliable performance and keep the robot moving with greater independence.
Check for Worn Tires or Damaged Parts
Inspect the wheel treads for cracks, thinning, or other signs of wear that could reduce traction and cause uneven movement. Worn tires often slip under load, so the wheel assembly should be examined closely for damaged parts that restrict freedom of motion. A precise check helps prevent navigation errors and preserves efficient cleaning.
- Look for split rubber, flattened edges, or bald spots on the tread.
- Inspect the wheel assembly for broken clips, warped housings, or loose joints.
- Verify the wheel axle is straight and seated properly, without bending or misalignment.
- Confirm the wheel sensors are clean and responding normally to movement.
If deterioration is visible, replace the worn tires before performance declines further. Damaged parts in the wheel assembly can bind the mechanism and create resistance that the motor must fight.
Clean sensors and sound axle alignment support reliable travel, reducing unnecessary strain and keeping the vacuum responsive and independent.
Test Wheel Spin and Reset the Vacuum
The robot vacuum should be lifted gently and each wheel rotated by hand to confirm smooth movement and identify any resistance.
If rotation is restricted, the wheel housing should be checked for hair, dust, or debris, then cleaned before restoring power.
After the vacuum is turned off and back on, its next cleaning cycle should be observed to verify normal wheel operation and confirm that no error alerts appear.
Test Wheel Rotation
Gently spin the wheel by hand to check for resistance, binding, or debris that could be preventing normal movement. This test wheel rotation step helps identify a stuck robot vacuum wheel before deeper faults spread.
If the wheel turns unevenly, clear the wheel housing and verify that sensor windows remain unobstructed so the system can detect obstacles correctly. Then power on the vacuum and watch the first movement. A free wheel should rotate smoothly under load.
- Rotate by hand
- Inspect sensor openings
- Power on briefly
- Watch for smooth travel
If motion fails, reset the unit to refresh control logic. If the wheel still hesitates, the wheel motor may have internal wear or a loose connection. In that case, professional inspection is the practical next move.
Reset Vacuum Power
If the wheel still hesitates after a manual spin test, a full power reset can help determine whether the fault is electronic rather than mechanical.
To reset vacuum power, press the power button to shut the unit down completely, wait about 10 seconds, then press and release it to reboot.
Once restarted, manually spin each wheel again and confirm smooth movement without scraping or binding.
If the wheel remains stuck, debris may still be present, or a sensor may be misreading travel.
During a short navigation test, observe wheel sensors for abnormal response, delayed turns, or repeated corrections.
If the wheels turn freely after reset, the issue was likely a temporary software glitch.
Regular resets can recalibrate navigation and preserve performance.
What to Do If the Wheel Still Won’t Move
When a wheel remains immobile after cleaning, the next step is to inspect for internal wear, motor failure, or sensor contamination that may be triggering resistance alerts. A technician should confirm that no debris, cords, or compacted fibers are still binding the wheel assembly.
Tweezers can remove hidden material from the axle channel, while the motor should be tested for weak response or irregular noise.
- Check wheel sensors for dust or obstruction.
- Inspect for tangled cords or lodged debris.
- Power cycle the robot vacuum to clear navigation faults.
- Contact customer service if movement still fails.
If the wheel stays stuck after these checks, the fault may lie deeper in the drivetrain or control board. A reset can restore navigation logic, but persistent immobility suggests a component-level defect.
At that point, warranty support or professional repair offers the most direct path to restored function and user freedom.
Frequently Asked Questions
How to Release a Jammed Wheel?
Release the jammed wheel by clearing debris and testing rotation. Wheel maintenance tips, common wheel issues, troubleshooting guide, DIY wheel repairs, and vacuum cleaning hacks help restore freedom of movement and prevent recurring resistance.
Why Is My Roomba Wheel Stuck?
Debris and freedom collide: a Roomba wheel is usually stuck by hair, dust, or obstacles. A troubleshooting guide should cover common vacuum issues, wheel maintenance tips, robotic cleaner problems, and wheel replacement advice.
How Do I Fix a Stuck Wheel on My Roborock Vacuum?
Power off, invert the Roborock, clear hair and debris, then test wheel rotation. Use robot maintenance tips from a vacuum troubleshooting guide, cleaning robot wheels, sensor calibration methods, and troubleshooting robotic issues; replace worn parts if needed.
How to Fix a Wheel on a Vacuum Cleaner?
It requires cleaning the wheel assembly, removing debris, checking axle wear, and replacing damaged parts. Such vacuum maintenance tips support troubleshooting vacuum issues, common vacuum repairs, improving vacuum performance, and preserving robot vacuum features.
Conclusion
To summarize, a stuck robot vacuum wheel is often freed by careful cleaning, inspection, and a simple reset. Like clearing grit from a small gear in a watch, each step restores smooth motion and prevents further strain. When debris is removed, wheels spin freely, and worn parts are identified early, the vacuum can return to steady service. If the wheel remains immobile, professional support becomes the safest next move.