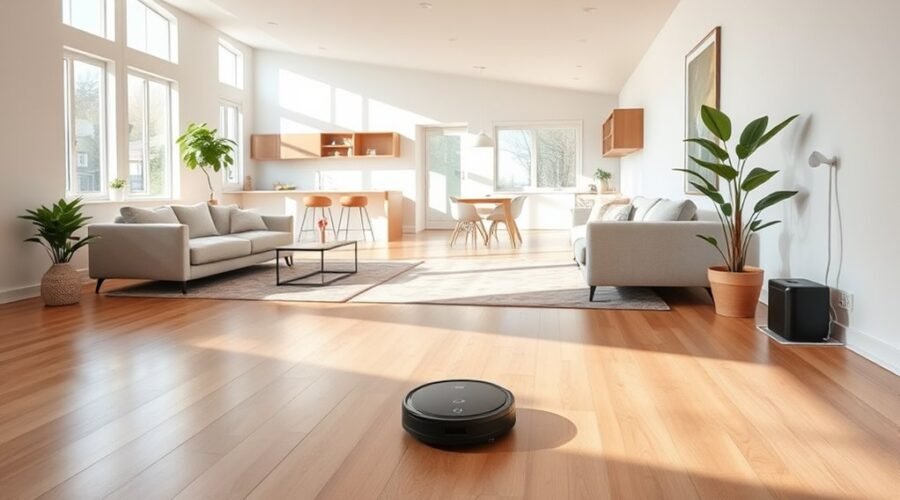
A robot vacuum for open floor plans can clean large, connected spaces with little daily effort. But wide rooms, furniture groups, and mixed flooring can still cause missed spots or wasted cleaning passes. The right setup helps your robot build an accurate map, follow efficient routes, and return to its dock without getting lost.
Quick Answer
To set up a robot vacuum for an open floor plan, place its dock against a clear wall, remove floor obstacles, and complete an uninterrupted mapping run. Then divide the map into cleaning zones, adjust suction for each floor type, and schedule regular cleaning. Keep sensors and brushes clean to maintain reliable coverage.
At a Glance
| Time Required | One complete mapping run, followed by app customization |
| Difficulty | Beginner-friendly on supported models |
| Tools Needed | Mapping-capable robot vacuum, charging dock, compatible app, and Wi-Fi connection |
How Robot Vacuums Handle Open Floors
)
Robot vacuums handle open floor plans by mapping accessible space and planning cleaning paths around furniture. Models with LiDAR or visual navigation can track their position and organize large rooms into manageable cleaning areas.
LiDAR uses laser measurements to detect walls and objects. Visual simultaneous localization and mapping, or vSLAM, uses camera information to recognize features in the room.
LiDAR generally works without depending on room lighting. Camera-based navigation may need enough light to recognize its surroundings accurately.
The iRobot Smart Maps guide explains how mapping robots identify rooms, create zones, and use environmental features for navigation.
Open layouts have fewer doorways to restrict movement, but obstacles still matter. Dining chairs, floor lamps, cables, and furniture legs can interrupt cleaning routes.
Obstacle avoidance helps compatible robots move around objects. However, not every model can reliably recognize small items such as charging cables or socks.
Suction power affects debris pickup, especially on carpets and rugs. Navigation quality determines whether that suction reaches the areas needing attention.
In a large living room connected to a kitchen and dining area, the robot can use one saved map to clean the entire space or focus on individual zones.
Set Up Your Robot Vacuum Map
A reliable map is the foundation of efficient cleaning in an open floor plan. Start with an accessible layout, complete the initial scan, and customize the saved map afterward.
Follow these steps to create a useful floor map.
- Prepare the floor. Remove cables, toys, shoes, and other loose objects that could block navigation.
- Open connected rooms. Leave doors open wherever you want the robot to map and clean.
- Position the dock. Place it against a stable wall with the clearance required by your model.
- Connect the robot. Charge the vacuum and complete its app and Wi-Fi setup.
- Start the first map. Select the mapping function in the app, if available. Otherwise, use the manufacturer’s recommended initial cleaning cycle.
- Let the run finish. Avoid carrying the robot or moving its dock while mapping.
- Review the completed map. Save it, label available rooms, adjust boundaries, and create cleaning zones.
For example, you might divide one continuous space into a living area, dining area, kitchen, and entryway. This lets you clean the kitchen after meals without vacuuming the whole floor.
Some models support a dedicated mapping run that explores without vacuuming. Other robots create the initial map during normal cleaning.
The ECOVACS first-time mapping instructions describe both Quick Mapping and mapping through a standard cleaning cycle on supported DEEBOT models.
Pro Tip: If your vacuum-mop robot refuses to cross carpet during its first scan, try the manufacturer-approved mapping mode without active mopping. Some models restrict carpet access when their mop attachments are installed.
After mapping, check whether the app shows all accessible rooms. If it missed an area, open the route and run another mapping or full-clean cycle before rebuilding the entire map.
Review the layout again after major furniture changes. Models differ in whether they update saved maps automatically or need another mapping run.
Place the Dock for Better Coverage
The best dock location is a stable, accessible spot with enough space for the robot to enter and leave. A central position can reduce travel, but it is not required for every open floor plan.
Place the charging station against a wall on a level surface. Choose a location away from crowded furniture, loose cables, and frequently moved objects.
Dock clearance varies by brand and model. For example, Roborock’s docking guidance recommends at least 0.5 meter on each side and 1.5 meters in front for the models covered by its instructions.
Those measurements are not universal. Follow the clearance requirements in your robot’s manual rather than applying another brand’s spacing to your dock.
In an open kitchen-living area, an unobstructed wall along the main cleaning space may be a better choice than a central location crowded by furniture.
Also consider these practical requirements:
- Keep the dock connected to a reliable power outlet.
- Maintain a clear route between the dock and major cleaning areas.
- Choose an area with suitable Wi-Fi coverage for app-controlled features.
- Avoid placing virtual boundaries over the dock or its approach path.
- Leave enough room to access the dock for cleaning and maintenance.
Once the dock is positioned and the map is saved, try an automatic return-to-dock command. Watch whether the robot approaches and connects without repeated attempts.
If docking fails, check for obstacles, dirty charging contacts, or a blocked docking signal. Avoid relocating the station repeatedly, since its position may be part of the robot’s navigation reference.
Tame Cords, Clutter, and Loose Rugs
Loose cords, small objects, and unstable rugs are common causes of interrupted robot vacuum cleaning. Preparing these areas keeps travel paths open and reduces the risk of tangles or stalled cleaning cycles.
Focus on hazards the robot may not detect reliably. Even advanced obstacle avoidance does not remove the need for basic floor preparation.
Cord and Cable Control
Keep charging cables, extension cords, and power strips outside the robot’s cleaning path. Loose wires can wrap around brushes or wheels and stop a cleaning cycle.
Use cable clips or ties along baseboards and furniture legs. Cable management boxes can help contain power strips and excess wiring, provided they are used according to their safety instructions.
For areas that cannot be cleared, use no-go zones to stop the robot from entering. These are virtual boundaries saved on the floor map.
The iRobot Keep-Out Zones guide identifies pet bowls, clutter, and areas where the robot frequently gets stuck as suitable locations for restricted zones.
| Control | Result |
|---|---|
| Cable ties and clips | Keep wires away from brushes and wheels |
| No-go zones | Block access to problem areas |
| Low-profile rugs | Reduce the chance of catching raised edges |
| Clear pathways | Help the robot reach its assigned cleaning zones |
Make restricted areas large enough to cover the actual hazard. However, avoid creating so many no-go zones that the robot loses access to rooms you want cleaned.
Rug and Clutter Prep
Area rugs need special attention because loose corners and curled edges can catch the robot’s wheels or brushes. A secure, low-profile rug is generally easier for a robot vacuum to cross.
Use suitable non-slip backing to keep rugs in place. Check the backing’s compatibility with your floor finish before use.
Before scheduled cleaning:
- Pick up toys, socks, shoes, and small objects.
- Secure any loose cables that cross the floor.
- Flatten curled rug corners and secure unstable rugs.
- Move lightweight obstacles that frequently block cleaning paths.
- Use no-go zones for rugs or spaces that repeatedly trap the robot.
For vacuum-mop models, distinguish between a no-go zone and a no-mop zone. A no-go zone blocks all cleaning, while a no-mop zone prevents wet cleaning but may still allow vacuuming on supported devices.
If you want a rug vacuumed, do not automatically exclude it. First check whether the robot supports carpet detection, mop lifting, or vacuum-only cleaning.
Use Cleaning Schedules That Fit Your Day
The most useful cleaning schedule matches how you use each part of your open floor plan. High-traffic spaces usually need attention more often than quiet corners.
Start with a whole-floor routine, then add targeted cleaning for areas that collect debris quickly.
For example, a practical schedule could include:
- Kitchen: Clean after meal preparation or when crumbs accumulate.
- Dining area: Schedule cleaning after regular family meals.
- Entryway: Increase cleaning during periods of heavy foot traffic.
- Living area: Use a regular maintenance schedule that fits household activity.
- Quiet corners: Clean less often if they stay relatively free of debris.
Run the vacuum when floor traffic is low. This allows the robot to finish its route with fewer interruptions from people moving chairs or walking through its path.
If noise matters, use a quieter suction setting where suitable. Remember that self-emptying docks can produce a much louder sound than the robot during debris transfer.
Some mapping apps let you create targeted Clean Zones for areas such as the space under a dining table.
The iRobot Clean Zones instructions show how supported models can save specific cleaning areas separately from full rooms.
Adjust schedules when household activity changes. Holidays, visitors, seasonal shedding, and increased outdoor traffic may require more frequent cleaning.
Adjust Suction and Zone Settings
Use suction and zone controls to match each part of your open floor plan to its cleaning needs. Higher suction can help on carpets, while lower settings are often enough for routine hard-floor dust.
However, suction ratings should not be the only measure of cleaning ability.
Some premium robot vacuums advertise suction above 20,000 Pa. For example, ECOVACS reports a laboratory maximum of 22,000 Pa for the DEEBOT X12 OmniCyclone in its multi-floor robot vacuum guidance.
These are manufacturer-rated figures. Actual debris pickup also depends on brush design, floor contact, cleaning mode, and the type of dirt.
A practical approach is to use:
- Lower suction: For light daily dust on hard floors.
- Standard suction: For mixed debris across common living areas.
- Higher suction: For carpets, rugs, and heavier debris where the robot supports it.
- Zone cleaning: For targeted work around dining tables and entryways.
- Additional passes: For stubborn dry debris when the app supports repeat cleaning.
Higher suction generally uses more energy and produces more noise. In a large home, unnecessarily running maximum suction everywhere may increase the need for recharging.
After adjusting these settings, review the cleaning history. Look for incomplete zones, repeated battery interruptions, or areas that still contain visible debris.
If your home has multiple stories, use multi-floor mapping when supported. Save a separate layout for each level and apply its own cleaning settings.
Robots cannot climb stairs between floors. You must carry the unit to another level, and the need to move its dock depends on the model and cleaning task.
Not every mapping vacuum supports multiple saved floor plans. Check the device’s supported mapping features before relying on this option.
Maintain Brushes, Sensors, and Wheels
Regular maintenance keeps a robot vacuum cleaning efficiently across large open floors. Dirty brushes reduce pickup, while obstructed sensors or wheels can interfere with movement and navigation.
Pay attention to these components:
- Main brush: Remove wrapped hair, threads, and debris. Check the brush ends for buildup.
- Side brushes: Remove trapped material and replace brushes when their bristles become worn or damaged.
- Sensors: Clean accessible navigation and cliff sensors using the method recommended by the manufacturer.
- Wheels: Remove hair and grit that prevent smooth rotation.
- Dustbin and filter: Empty the bin as needed and maintain the filter according to its instructions.
- Charging contacts: Keep the robot’s contacts and the dock’s contact points clean.
For brush maintenance, iRobot recommends cleaning Roomba main brushes weekly, or twice weekly in homes with pets. Its general replacement guidance is every 6–12 months or as needed.
Maintenance intervals differ by model. Use your robot’s manual and app reminders for the correct schedule.
Do not spray cleaning liquid directly onto navigation sensors or electronic components. Follow the manufacturer’s cleaning instructions, including any requirements to power off the robot first.
Check the underside if the robot starts leaving debris behind, making unusual noises, or struggling to cross surfaces it previously handled easily.
Clean wheels help the vacuum move consistently. Damaged wheels or heavily worn brushes should be replaced with compatible parts.
With an established maintenance routine, the vacuum is less likely to lose cleaning efficiency during a long whole-floor cycle.
Fix Robot Vacuum Mapping Problems
Mapping problems usually appear as missed areas, repeated cleaning paths, incorrect room boundaries, or failed returns to the dock. Start with simple environmental checks before deleting the saved map.
A robot that suddenly misses part of an open floor may have encountered a new obstacle, lost its position, or selected the wrong map.
Common Mapping Errors
Different symptoms point to different causes. Identifying the pattern helps you choose the right fix without rebuilding the entire map.
Use this troubleshooting sequence:
- Check for blocked routes. Look for closed doors, relocated chairs, cords, and clutter around furniture.
- Inspect the cleaning history. Compare the covered area with the saved floor map to identify missed sections.
- Clean the sensors and wheels. Remove dust and trapped material following the manufacturer’s care instructions.
- Check the dock position. Confirm that the dock has not moved and its approach remains clear.
- Review lighting. Provide adequate lighting if the robot uses camera-based navigation.
- Inspect room boundaries. Correct misplaced dividers or zones using supported map-editing tools.
- Confirm the active floor map. Select the proper saved map if you use the robot on multiple levels.
- Check software updates. Install compatible app or firmware updates when recommended by the manufacturer.
If the robot misses only one section, try assigning that section as a separate cleaning zone.
For example, a dining table with many chair legs may cause the robot to avoid parts of the floor. Moving the chairs temporarily can reveal whether the obstacle layout is responsible.
If the robot keeps cleaning the same area, check whether the map shows overlapping rooms or duplicated boundaries.
Mirrors, glass, and reflective surfaces can also confuse some mapping sensors. For recurring problems near these surfaces, adjust the environment or use supported virtual boundaries.
Reset and Remap
If basic fixes fail, restoring an earlier map may solve the problem. A completely new map should be the next option when recovery is unavailable or unsuccessful.
Some robots can restore previous map information without deleting the current configuration immediately.
For example, Dreame’s map recovery guidance describes using a Restore Map function to correct overlapping or distorted maps on supported devices.
Warning: Deleting a saved map can remove room labels, custom boundaries, and cleaning zones. A factory reset may also erase other settings. Check for map recovery or backup options before deleting anything.
If you need to create a fresh map, follow these steps:
- Charge the robot fully. Make sure it has enough battery for the mapping process.
- Check connectivity. Confirm that the robot and its app are connected as required.
- Prepare the layout. Clear loose objects, open the intended rooms, and keep furniture in its normal position.
- Remove the faulty map. Use the model’s map management controls only after checking recovery options.
- Start a new mapping run. Let the robot explore without moving it or the dock.
- Verify the completed map. Confirm that the major rooms, walls, and travel paths appear correctly.
- Rebuild custom settings. Add room labels, cleaning zones, no-go zones, and schedules.
Run a normal cleaning cycle afterward. A successful result should show coverage across the intended open floor area and a reliable return to the charging station.
If the robot still creates distorted maps or cannot navigate a clear area, inspect its sensors and follow model-specific support procedures. Persistent errors may indicate a hardware fault that needs manufacturer service.
Key Takeaways
- LiDAR and camera-based mapping can both support open layouts, but camera navigation may need adequate lighting.
- Dock clearance depends on the model. A stable wall location with an open approach is more important than exact central placement.
- Use separate cleaning zones for kitchens, entryways, and dining spaces rather than applying maximum suction everywhere.
- Keep rugs secure and distinguish no-go zones from no-mop zones when using a vacuum-mop robot.
- Restore an earlier map when possible before deleting a faulty one and repeating the entire setup.
Frequently Asked Questions
Is It Okay to Use a Robot Vacuum Every Day?
Yes, you can generally use a robot vacuum every day on compatible floor surfaces. Daily cleaning is useful in busy homes or where pets shed frequently. Choose appropriate suction settings, keep the floor clear of hazards, and clean the brushes, filters, and sensors at the recommended intervals.
Can I Use a Robot Vacuum on Multiple Floors, and If So, How?
Yes, a robot vacuum can clean multiple floors, but you must carry it between levels. If your model supports multi-floor mapping, save a separate map for each level and select the correct layout before cleaning. Dock placement, cliff sensors, Wi-Fi coverage, and charging requirements vary by model.
Which Robot Vacuum Has the Best Mapping System?
There is no single robot vacuum mapping system that is best for every home. The Roborock Qrevo series is one option to consider, although navigation features differ between models. Compare map accuracy, obstacle detection, room editing, multi-floor support, and recovery tools rather than relying on brand reputation alone.
What Robot Vacuum Cleaners Can Map My House?
Mapping-capable robot vacuums are available from iRobot, Roborock, Ecovacs, and Dreame. Depending on the model, they use LiDAR, cameras, or other navigation sensors to build floor maps. Not every robot from these brands supports saved maps, virtual boundaries, individual room cleaning, or multiple floor plans.
Conclusion
A robot vacuum works best in an open floor plan when it has an accurate map, clear travel paths, and cleaning settings suited to each area. Start with the dock and first mapping run, then fine-tune zones and schedules based on the spaces that collect the most dirt.
Keep the brushes, wheels, and sensors in good condition. If coverage becomes inconsistent, check obstacles and map settings before attempting a full reset. These simple habits help your robot clean large, connected rooms with fewer interruptions.
Sources
- iRobot: Guide to Imprint Smart Maps: Mapping runs, lighting requirements, room customization, and saved floor maps.
- ECOVACS: First-Time Mapping Instructions: Preparing a home, Quick Mapping, and initial mapping procedures.
- Roborock: Robot Cannot Find Its Dock: Dock placement, clearance, and docking troubleshooting.
- iRobot: What Are Keep-Out Zones?: Virtual boundaries and restricted cleaning areas.
- iRobot: How to Set Up a Clean Zone: Creating targeted cleaning zones on supported maps.
- ECOVACS: How to Use a Robot Vacuum on Multiple Floors: Multi-floor operation and manufacturer-rated suction specifications.
- iRobot: Main Brush Care: Brush cleaning and replacement guidance.
- Dreame: Why Do Maps Overlap or Become Messy?: Causes of distorted maps and restoring saved layouts.