
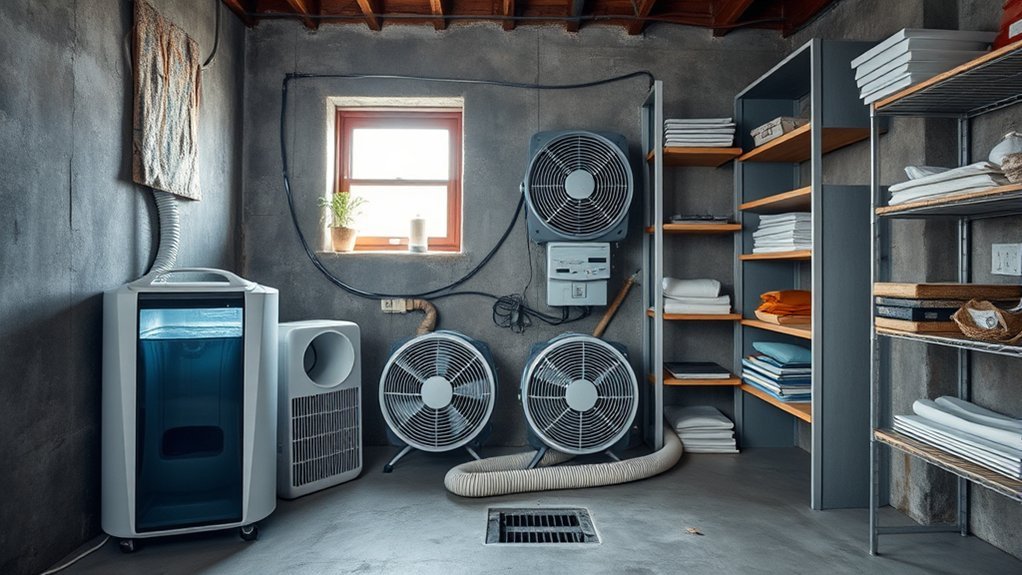
Learning how to dehumidify a basement takes more than plugging in a portable appliance and hoping the musty smell fades. Because below-grade walls sit against cool, damp soil year-round, lasting moisture control requires measuring your starting humidity, sealing out exterior water, and running a properly sized dehumidifier with steady airflow.
Quick Answer
To dehumidify a basement, measure relative humidity with a digital hygrometer, fix active leaks and exterior drainage problems, and run a properly sized dehumidifier set between 40% and 50% relative humidity. Route a continuous drain hose to a floor drain or sump pit, keep air moving with fans, and clear blocked walls so trapped dampness can dry.
At a Glance
| Time Required | 1 to 2 hours for setup and inspection; 24 to 72 hours to stabilize humidity |
| Difficulty | Easy to Moderate (DIY setup and minor sealing; pro needed for structural seepage) |
| Tools Needed | Digital hygrometer, dehumidifier, garden or drain hose, flashlight, aluminum foil, masonry sealant |
| Cost | $10 to $50 for a hygrometer; $180 to $350+ for a portable dehumidifier |
Quick Steps to Dehumidify a Basement
The EPA advises keeping indoor relative humidity (RH) below 60%, and ideally between 30% and 50%, to stop mold spores from growing. Most homeowners aim for 40% to 50% in a basement because that middle range prevents condensation and musty odors without overworking the machine.
- Measure baseline humidity: Place a digital hygrometer in several basement zones for 12 to 24 hours and record the readings.
- Fix bulk moisture sources: Check plumbing pipes, foundation cracks, dryer vents, gutters, and exterior soil grading before relying on an appliance.
- Select the right pint capacity: Match your dehumidifier’s 24-hour pint rating to both your basement’s square footage and its starting dampness level.
- Position the unit for open airflow: Set the dehumidifier in a central spot with at least 12 inches of clearance and set the humidistat to 45% to 50%.
- Set up continuous drainage: Attach a gravity drain hose to a floor drain or use a condensate pump so the unit never pauses for a full bucket.
- Verify steady readings: Track your hygrometer daily until RH holds below 50%, and continue monitoring through rainy seasons.
You will know the setup worked when your independent hygrometer holds steady between 40% and 50% for three consecutive days, cold water pipes stop sweating, and damp cardboard or concrete smells clean. Call a professional immediately for standing water, recurring wall seepage, mold covering more than 10 square feet, sewage backups, or bowing foundation walls.
How Humid Is Your Basement?
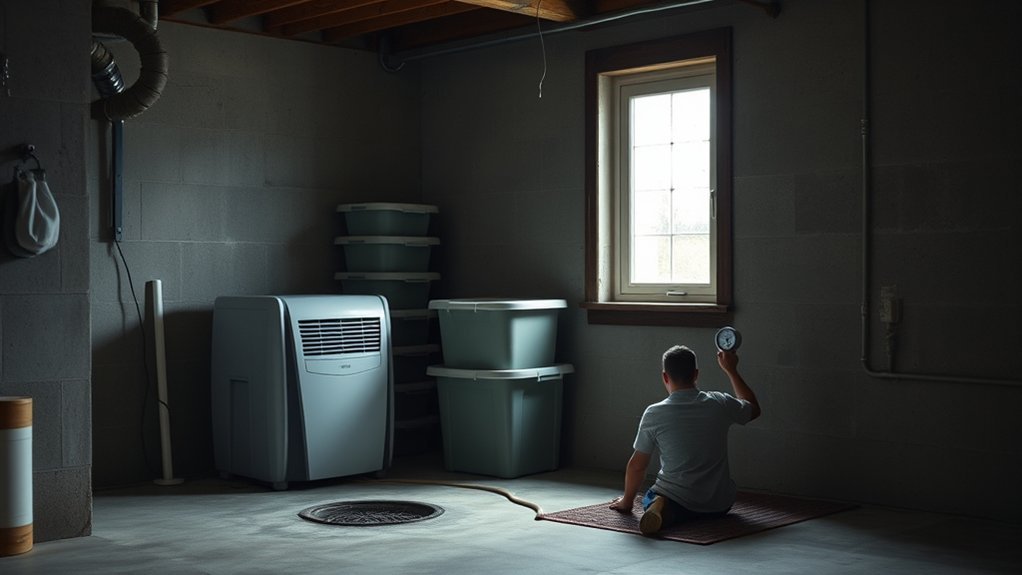
You cannot judge basement humidity accurately by feel alone because cool underground air masks high relative humidity. Place a digital hygrometer—an inexpensive $10 to $50 moisture meter available at hardware stores—in several locations: near the stairs, along exterior walls, beside stored boxes, and inside any room that smells musty. Leave each meter for several hours so the sensor stabilizes, then log the numbers.
| Humidity Reading | What It Means | What To Do |
|---|---|---|
| 30% to 40% | Usually dry enough; common in heated basements during winter | Monitor only and avoid over-drying wood framing |
| 40% to 50% | Ideal target range for year-round mold and odor prevention | Maintain with a humidistat-controlled dehumidifier and steady airflow |
| 50% to 60% | Watch zone; dust mites thrive and porous materials stay musty | Lower the humidistat setting, run a circulation fan, and inspect for air leaks |
| Above 60% | High risk for condensation on cool slabs and active mold growth | Stop water entry, improve exterior drainage, and dehumidify continuously |
Pair your meter readings with a visual inspection. Look for musty odors, surface mold, soft cardboard boxes, rust on tools or metal shelving, blistering paint, and efflorescence—powdery white mineral deposits left behind when water evaporates through concrete or block walls. When warm, humid air touches a cold concrete wall or uninsulated water pipe below the air’s dew point, liquid droplets condense on the surface, signaling that you need both lower humidity and better air circulation.
Find the Moisture Source Before You Dehumidify a Basement
A dehumidifier pulls water vapor from the air, but it will run nonstop if liquid water or damp soil vapor keeps entering the room. University of Minnesota Extension explains that basement moisture comes from rain and groundwater, indoor activities (showers, cooking, unvented clothes dryers, and humidifiers), and warm outdoor air condensing on cool concrete. In a newly built home, curing concrete alone holds roughly 0.2 gallons of water per square foot of wall and 0.1 gallons per square foot of floor, taking months to dry.
UMN Extension also warns that running a powerful dehumidifier in a basement with an active wall or slab leak can backfire. By aggressively drying the indoor air, the appliance increases the vapor pressure difference across the foundation, drawing groundwater through porous concrete faster and accelerating efflorescence and surface spalling.
- Check plumbing lines: Look under sinks, around water heaters, behind washing machines, at main shutoff valves, and along overhead supply and drain pipes.
- Inspect foundation walls and cold joints: Check where the floor slab meets the wall for dark damp rings caused by capillary suction, which can draw water 1 to 8 feet up through sand and 12 to 20 feet through silt or clay soils.
- Seal the sump pit: Warm air rising into the upper house creates a “stack effect” that puts the basement under negative pressure, sucking moist air out of open sump basins and uncovered hollow block cores. Fit an airtight cover over your sump pit.
- Watch after heavy rain: Recheck window wells, floor-wall joints, and low corners within a few hours of a storm.
- Review exterior drainage: Clear clogged gutters, extend downspouts, and check that soil slopes away from the foundation walls.
- Cut indoor moisture loads: Vent clothes dryers outside with rigid metal ducting, never hang wet laundry in a damp basement, and wrap cold water pipes in foam insulation to stop sweating.
Pro Tip: Not sure if wet walls are caused by humid indoor air or groundwater seeping through the concrete? Tape a 12-inch square of heavy-duty aluminum foil or clear plastic sheeting tightly to the dry wall or slab on all four edges. Wait 24 to 48 hours and peel it off. Moisture on the room-facing side means indoor condensation (a dehumidifier will fix it); moisture trapped behind the foil against the concrete means water is migrating through the wall from outside.
Timing gives away the culprit. If humidity spikes within hours of a rainstorm, fix exterior drainage first. If readings climb on hot summer afternoons or laundry days, focus on air sealing, appliance venting, and dehumidification. If you encounter standing water, sewage, electrical outlets near water, or recurring seepage, stop treating it as a routine humidity issue and call a licensed plumber, electrician, or waterproofing specialist.
Choose the Right Basement Dehumidifier
Selecting the right basement dehumidifier depends on four variables: total square footage, starting relative humidity, winter and summer basement temperatures, and how you plan to drain the collected water. A compact portable unit handles a mildly damp storage room, whereas a wet, 2,000-square-foot basement requires a high-capacity portable unit or a ducted whole-home system.
Recommended Products

【The Undisputed Champion — Industry‑Leading Dehumidifier Brand】When you choose AEOCKY, you get double market validation. In 2025, AEOCKY was an industry‑leading dehumidifier brand on Amazon US. This means you’re not just choosing a flagship from a market leader, but the top choice proven by millions of real users—representing the ultimate combination of performance, quality, and trust.

𝐄𝐍𝐄𝐑𝐆𝐘 𝐒𝐓𝐀𝐑 𝐌𝐨𝐬𝐭 𝐄𝐟𝐟𝐢𝐜𝐢𝐞𝐧𝐭 𝟐𝟎𝟐𝟓 𝐟𝐨𝐫 𝐋𝐨𝐰𝐞𝐫-𝐂𝐨𝐬𝐭 𝐃𝐚𝐢𝐥𝐲 𝐔𝐬𝐞:Designed for powerful moisture removal with energy-conscious performance, this Vellgoo ENERGY STAR Most Efficient 2025 dehumidifier helps control humidity while reducing unnecessary energy waste. Ideal for humid seasons and large spaces that require long-running moisture control.
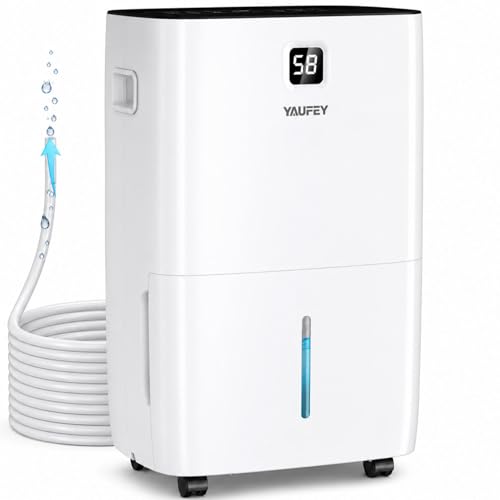
Dehumidifier for Basement: This dehumidifier for home removes up to 150 pints (95℉, 90% RH) of moisture per day and with a maximum dehumidification area of 8500 square feet. This dehumidifier with drain hose has a dehumidification range of 30% to 80%, increasing or decreasing by 5% at a time, which you can adjust to your preferred humidity level. In addition, this basement dehumidifier has 3 modes for you to choose from - Living Area (50% RH), Basement (45% RH) and Continuous (CO).
Size It Properly
Dehumidifier capacity is rated by how many pints of water the machine removes in 24 hours. The table below uses the official ENERGY STAR sizing guidelines, which emphasize that it is always better to oversize a dehumidifier than to undersize it. Unlike an air conditioner, an oversized dehumidifier will not short-cycle into comfort issues; it simply reaches the target RH faster and shuts off.
| How Damp the Basement Is | Under 2,000 sq. ft. | Over 2,000 sq. ft. |
|---|---|---|
| Slightly to moderately damp (50%–75% RH; intermittent musty odor) | 20–30 pints per day | 30+ pints per day |
| Very damp (75%–90% RH; constant damp feel and damp wall or floor spots) | 25–40 pints per day | 40+ pints per day |
| Wet (90%–100% RH; sweating walls or floors, seepage, or laundry drying) | 30–50 pints per day | 50+ pints per day (or whole-home unit) |
If you are replacing an older machine, keep in mind that current DOE dehumidifier testing standards measure portable units at a realistic basement temperature of 65°F rather than the pre-2019 standard of 80°F. Under this test procedure, a modern 20-pint unit equals an old 30-pint model, a 30-pint unit equals an old 50-pint model, and a 35- to 45-pint unit replaces an old 60- to 70-pint machine.
High ceilings, leaky rim joists, and open stairwells add to the moisture load. When humidity stays above 60% or the tank fills every few hours, choose a 50-pint unit with continuous drainage and address exterior water entry. For room-by-room dimensions, consult our basement dehumidifier size chart, or review 5 signs you need a dehumidifier in your basement if you are still evaluating your space.
Pick Useful Features
According to ENERGY STAR, certified dehumidifiers are 20% more efficient than non-certified models, measured by their Integrated Energy Factor (IEF) in liters of water removed per kilowatt-hour (L/kWh). Under current criteria, portable units removing up to 50 pints per day achieve an IEF of at least 1.70 to 2.01 L/kWh, while 50+ pint models reach 3.30 L/kWh or higher. Alongside ENERGY STAR certification, look for these features:
- Built-in adjustable humidistat: Cycles the compressor off automatically once the room hits your 45% to 50% target.
- Digital relative humidity display: Lets you cross-check the appliance sensor against your standalone hygrometer.
- Threaded garden hose connection: Allows continuous gravity drainage without emptying a plastic bucket.
- Built-in condensate pump: Pushes water upward into a utility sink, standpipe, or across the room when no floor drain is nearby.
- Auto-restart memory: Restores your exact humidity setting automatically after a storm power outage.
- Auto-defrost and anti-frost sensor: Shuts off the compressor temporarily when frost forms on coils in basements cooler than 65°F.
- Washable air filter: Protects the cold evaporator coils from dust buildup that restricts airflow.
Pro Tip: Standard refrigerant (compressor) dehumidifiers lose efficiency below 65°F and struggle when temperatures drop into the 50s. If your unheated basement regularly stays between 40°F and 55°F in spring, fall, or winter, choose either a specialty low-temperature compressor model rated down to 41°F or a desiccant dehumidifier, which absorbs moisture using a silica gel rotor without freezing coils.
Drain It Safely
A portable dehumidifier stops removing moisture the moment its internal bucket fills and trips the float switch. In a damp basement where a 35- to 50-pint unit can fill a 1- to 2-gallon tank twice a day, continuous drainage is essential. Connect a standard 3/4-inch garden hose or the manufacturer’s drain tube to a floor drain, sump pit, or condensate pump.
- Route gravity drain hoses on a continuous downward slope with no upward loops, kinks, or flat traps.
- Keep the discharge end of the hose above the high-water line in a sump pit or drain so dirty water cannot siphon backward.
- Flush the bucket, float switch, and drain line every month with warm water and mild detergent to stop slime and bio-film clogs.
- Plug the dehumidifier directly into a grounded, GFCI-protected wall outlet—never use an extension cord, which can overheat under continuous compressor draw.
Warning: Never operate or unplug a plug-in dehumidifier while standing in water. If floodwater or seepage reaches electrical outlets, extension cords, appliances, or your breaker panel, stay out of the basement and have an electrician or utility provider shut off power first.
Improve Airflow Around the Unit
Even a high-capacity dehumidifier cannot dry stagnant air trapped behind storage shelves, partitioned rooms, or furnace ductwork. Place your dehumidifier in a central, open area so dry discharge air mixes throughout the basement. Unless your model vents strictly out the top, leave at least 12 to 18 inches of clearance around all air intake and exhaust grilles.
| Action | How to Do It | Result |
|---|---|---|
| Center the dehumidifier | Place in the main open area or near the dampest zone with interior doors open | More even moisture removal across the floor plan |
| Maintain unit clearance | Keep intake and side vents at least 12 inches from walls, boxes, and furniture | Unobstructed airflow and lower compressor strain |
| Add a box or oscillating fan | Aim low across corners, utility rooms, and under-stair storage | Breaks up cold dead zones where condensation forms |
| Wash the intake filter | Rinse and dry the mesh screen every 2 to 4 weeks during peak runtime | Prevents frosted coils and keeps pint output steady |
Resist the urge to open basement windows on warm spring or summer days to “air out” a damp room. When warm, humid outdoor air enters a cool 60°F basement, its relative humidity spikes and condenses directly onto cool concrete walls and floors, making the space wetter. Keep basement windows shut during humid weather and rely on air conditioning and your dehumidifier instead.
Finally, reorganize your storage. Replace cardboard boxes with sealed plastic bins, raise shelves 2 to 4 inches off the concrete slab, and leave a 2-inch gap between stored items and exterior masonry walls so air can circulate behind them.
Seal Cracks and Stop Leaks
Stopping water and humid outdoor air before they pass through your foundation cuts your dehumidifier’s workload dramatically. Small gaps around rim joists, window frames, and utility pipes let muggy summer air leak inside, while foundation cracks and poor yard drainage push liquid water through the walls during storms.
Always start outside when dampness follows rain. UMN Extension recommends building up soil around your foundation so it slopes away at a minimum grade of 1 inch per foot for at least 6 feet. Install at least one downspout for every 50 linear feet of roof eave, keep gutters clear of leaves, and attach downspout extensions that discharge roof runoff at least 4 feet away from the foundation wall.
Recommended Products

Concrete patch filler seals cracks and holes in exterior or interior concrete and masonry surfaces

Drill-Free Injection: Repair basement wall cracks effortlessly without drilling, ensuring minimal disruption to your home's structure.

FIX FOUNDATION WALL CRACKS EASILY: Our Concrete Crack Repair Kit offers a reliable solution for foundation crack repair injection kit and concrete crack repair. Homeowners can address concrete cracks and cement crack filler issues efficiently, preventing water infiltration and protecting the basement from potential water damage. Whether you’re facing rainstorms or just trying to maintain your basement, it provides a hassle-free solution, saving you the cost and trouble of hiring professionals.
Finding Hidden Leak Paths
Walk the basement perimeter with a bright flashlight right after a heavy rainstorm. Focus on the cove joint (where the wall meets the floor slab), tie-rod holes, utility pipe penetrations, window wells, and corners hidden behind shelving.
- Check for dark wet streaks, fuzzy white efflorescence, flaking masonry paint, and rusted baseboard tracks.
- Run your hand along cold-water supply pipes and drain traps to separate plumbing drips from surface condensation.
- Pour water into the sump pit to confirm the float switch triggers the pump and the check valve prevents backflow.
- Fit sloped polycarbonate covers over exterior window wells so rainwater and melting snow cannot pool against basement glass.
- Watch exterior downspouts during a downpour to verify water flows away rather than pooling near stoops or walkways.
Mark any damp spot with chalk or painter’s tape and log the date of your repair. Inspect the exact same spot after the next two storms; if moisture reappears, the exterior water pressure still needs attention.
Sealing Cracks Effectively
For narrow, non-structural hairline cracks in poured concrete or mortar joints, wire-brush away loose grit and fill the gap with a polyurethane masonry sealant or hydraulic cement. Hydraulic cement expands as it sets, making it useful for plugging small active pinhole leaks, while flexible polyurethane caulk seals air and vapor gaps around pipes and windows.
Keep expectations realistic: UMN Extension notes that interior waterproof coatings and masonry paints are only a temporary patch if exterior water pressure remains. When hydrostatic pressure builds outside a wall, trapped water eventually blisters interior paint or finds a new crack. For cracks wider than 1/8 inch, stair-step cracks in concrete block, or walls that bow inward, hire a structural foundation or waterproofing contractor to evaluate exterior drain tile or interior perimeter drainage.
Keep Basement Humidity Steady
Once your basement reaches 40% to 50% relative humidity, shift from drying out the room to maintaining a stable equilibrium. Steady control prevents seasonal mold blooms and keeps your electricity bill predictable.
- Check your independent hygrometer daily for the first two weeks, then weekly once readings hold between 40% and 50%.
- Set the dehumidifier humidistat to 45% or 50% so the compressor cycles off automatically when the air is dry.
- Keep CDC mold prevention guidelines in mind: keep indoor humidity no higher than 50% all day long and avoid installing wall-to-wall carpet directly over damp-prone concrete basement slabs.
- Use continuous hose drainage during muggy summer months so the appliance never sits idle with a full bucket.
- Wash the air filter according to the owner’s manual—usually every 2 to 4 weeks during heavy summer use.
- Sniff-test closets, under-stair storage, and carpeted corners monthly to catch stagnant pockets early.
If your basement cannot drop below 60% RH after three to four days of continuous operation, do not simply leave the machine running forever. Check whether an unsealed window, an uncapped sump pit, a leaking pipe, or wet soil against the foundation is feeding moisture back into the room. To lower your baseline moisture load and trim power costs, read our guide on how to reduce basement humidity without a dehumidifier.
Troubleshoot Common Basement Dehumidifier Problems
When a dehumidifier runs constantly or fails to dry the room, the issue is usually a mismatch between unit capacity, room temperature, and ongoing moisture entry. Use the table below to diagnose and fix the most common basement dehumidifier problems.
| Problem | Likely Cause | Fix |
|---|---|---|
| Humidity will not drop below 60% | Unit is undersized, windows are open, airflow is blocked, or water is still entering | Close windows, give the unit 12+ inches of clearance, seal leaks, or upgrade to a 50-pint model |
| Bucket fills every few hours | High initial dampness or an active groundwater/plumbing leak | Attach a continuous drain hose and inspect foundation walls and plumbing for leaks |
| Ice or frost forms on coils | Basement air is below 65°F or a dirty filter is starving the coils of airflow | Wash the filter, raise clearance, or switch to a low-temp compressor or desiccant unit |
| Musty smell stays even at 45% RH | Mold or bacteria trapped in damp carpet, cardboard, drywall, or behind shelves | Discard damp cardboard and porous rugs, scrub hard surfaces with detergent, and run a fan |
| Unit short-cycles or shuts off early | Full tank, kinked drain hose, or built-in sensor reading dry air trapped in a tight corner | Clear the drain hose, move the unit into an open area, and verify RH with a separate hygrometer |
Recommended Products

【45-80 Pints for 4500 Sq.Ft Moisture Control】:This dehumidifier for basement and home features flexible 45–80 pints dehumidification output with an ultra-wide 4500 square feet coverage range, offering premium whole-space moisture control. No matter damp basement, humid bathroom, quiet bedroom for restful sleep, large living room, or compact RV traveling space, this multi-functional dehumidifier for home effortlessly sucks up excess moisture,, maintaining ideal humidity levels for all indoor environments.
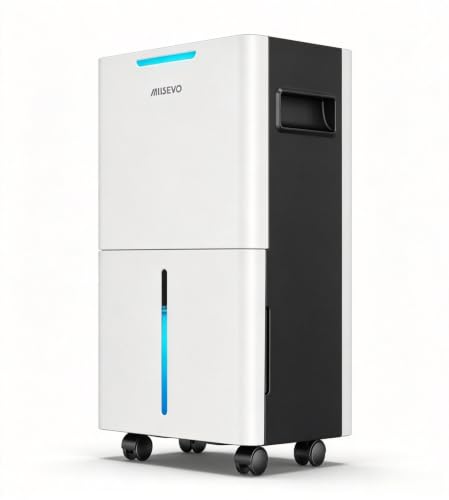
High Efficient Dehumidifier — Equipped with a high-performance compressor, Whether it’s your basement, bedroom, bathroom, living room, bathroom, crawlspace, or even an RV, this dehumidifier effectively keeps your environment dry, comfortable, and healthy.

【Reduce humidity - Enhance comfort】:Massive Capacity + Wide Coverage. This dehumidifier has dehumidification capacity ranging 45- 80 pints—outperforming standard units while covering 4,500 sq. ft. of living space. Great dehumidifier for basements, large house, garages, bedroom, bathroom and gyms where excess humidity triggers cause unpleasant odors and discomfort. The result? A noticeably drier, fresher, and more comfortable environment for your entire family.
Maintain Your Basement All Year
Keeping a basement dry is a year-round routine. Follow a simple seasonal checklist so minor gutter clogs or filter dust never turn into a flooded floor or mold outbreak.
- Monthly: Wash the dehumidifier air filter, flush the drain hose or condensate pump reservoir, and check your hygrometer log.
- After heavy rain or snowmelt: Inspect floor-wall joints, window wells, and the sump pump discharge line for seepage.
- Spring and fall: Clean leaves from roof gutters, verify downspout extensions carry water at least 4 feet away, and inspect exterior window well covers.
- Annually: Check exterior soil grading for settling (maintaining a 1-inch-per-foot slope for 6 feet), inspect exposed plumbing valves, and reseal any new masonry hairline cracks.
Whenever a leak or spill occurs, the EPA stresses drying wet building materials and furnishings within 24 to 48 hours to prevent mold growth. Scrub hard, non-porous surfaces with water and detergent and dry them completely; discard moldy porous items such as soaked carpet padding, ceiling tiles, or damp cardboard that cannot be thoroughly cleaned.
Note: According to EPA mold cleanup guidance, homeowners can usually handle surface mold patches smaller than about 10 square feet (roughly a 3-by-3-foot area) using detergent, water, and an N-95 respirator. Bring in a qualified remediation professional if mold covers more than 10 square feet, if floodwater or sewage is involved, or if mold may have entered your HVAC ductwork. Anyone with asthma, COPD, allergies, or immune suppression should consult a physician before attempting mold cleanup.
Key Takeaways
- Hold 40% to 50% RH: The EPA and CDC recommend keeping indoor humidity below 60%—and ideally no higher than 50%—to stop condensation and mold growth.
- Stop exterior water first: Grade soil 1 inch per foot for 6 feet, extend downspouts 4+ feet from foundation walls, and seal your sump pit lid so your dehumidifier does not pull moisture through the concrete faster.
- Size for current DOE ratings: Portable dehumidifiers are now tested at 65°F; choose 20 to 50+ pints per day based on square footage and dampness, and switch to a low-temp or desiccant model if your basement drops below 60°F.
- Automate drainage and airflow: Connect a continuous drain hose or condensate pump, keep basement windows closed on humid summer days, and use a fan to clear stagnant corners.
Frequently Asked Questions
How do you dehumidify a basement fast?
To dehumidify a basement fast, shut all basement windows, remove wet rugs or damp cardboard, and run a high-capacity (35- to 50-pint) dehumidifier on continuous mode with a drain hose attached. Aim one or two box fans into damp corners to keep air moving across the walls and slab, and mop or vacuum up any standing water immediately so the machine only has to dry the air.
How long does it take to dehumidify a basement?
A mildly damp basement usually drops into the 40% to 50% target range within 24 to 72 hours of running a properly sized dehumidifier. If concrete walls, floor slabs, or wooden joists are saturated from long-term dampness or a leak, pulling that deep moisture out of the materials can take one to two weeks of continuous operation.
Is it okay to run a basement dehumidifier only part of the day?
Yes, as long as relative humidity stays at or below 50% when the compressor cycles off. Instead of unplugging the machine or putting it on a wall timer, set its built-in humidistat to 45% or 50% so the dehumidifier automatically rests when the air is dry and kicks back on before humidity climbs past 60%.
What should I set my basement dehumidifier to?
Set your basement dehumidifier between 45% and 50% relative humidity for the best balance of mold prevention and energy efficiency. Always verify the room’s actual humidity with a separate digital hygrometer placed a few feet away from the unit, since built-in sensors often read 5% to 10% off.
Why does my basement still smell musty after using a dehumidifier?
A lingering musty odor means microbial growth or dampness is still trapped inside porous materials such as cardboard boxes, old carpet padding, fiberglass insulation, or drywall. Lowering air humidity stops new mold from spreading, but you must remove damp items, scrub hard surfaces with detergent and water, and circulate air behind storage shelves to clear the smell.
Why do today’s dehumidifiers have lower pint ratings than older models?
In 2019, the US Department of Energy lowered the test temperature for portable dehumidifiers from 80°F down to 65°F to reflect real basement conditions. Because cooler air holds less moisture, the exact same machine removes fewer pints per day during testing—meaning a modern 35-pint dehumidifier has roughly the same drying power as an older 60-pint model.
Should I open basement windows in the summer to reduce humidity?
No, opening basement windows on warm, muggy summer days makes a basement wetter, not drier. When warm, moisture-laden outdoor air hits cool underground concrete walls and floors, it cools past its dew point and condenses into liquid water on the surfaces. Only open windows when outdoor air is noticeably cooler and drier than the basement air.
Conclusion
Dehumidifying a basement for good combines two habits: stopping outside water before it seeps through the foundation and running an appropriately sized dehumidifier to hold relative humidity between 40% and 50%. Start today by placing a digital hygrometer in your dampest basement corner, checking your gutters and downspouts before the next rain, and setting up a continuous drain hose so your dehumidifier can keep the space dry automatically.
Related Guides
- Basement dehumidifier size chart
- Do you need a dehumidifier in your basement?
- How to dehumidify a room fast
- How to dehumidify a garage
- Dehumidify a room without a dehumidifier
Sources
- EPA: A Brief Guide to Mold, Moisture and Your Home: Supports keeping indoor relative humidity below 60% (ideally 30% to 50%), drying wet areas within 24 to 48 hours, and using a $10 to $50 humidity meter.
- EPA: Mold Cleanup in Your Home: Supports the 10-square-foot DIY mold cleanup threshold and safety precautions for contaminated water, HVAC systems, and health conditions.
- ENERGY STAR: Dehumidifiers: Supports dehumidifier pint-sizing tables, 20% energy efficiency savings, 65°F coil frost thresholds, and placement clearance.
- University of Minnesota Extension: Moisture in Basements: Supports capillary suction heights, stack-effect air leakage, curing concrete moisture volumes, exterior grading (1 inch per foot for 6 feet), and downspout spacing (one per 50 feet of eave with 4-foot extensions).
- ENERGY STAR: Dehumidifier Testing and Capacity: Supports the US Department of Energy capacity rating conversion between pre-2019 (80°F) and current (65°F) portable dehumidifier labels.
- CDC: Mold Prevention Guidelines: Supports maintaining indoor humidity no higher than 50% all day long and avoiding carpet on moisture-prone basement floors.



[…] How to dehumidify a basement: targets, sizing, and fixes […]
[…] sure you need a machine? Read do you need a dehumidifier in your basement, or see how to dehumidify a basement with targets and […]