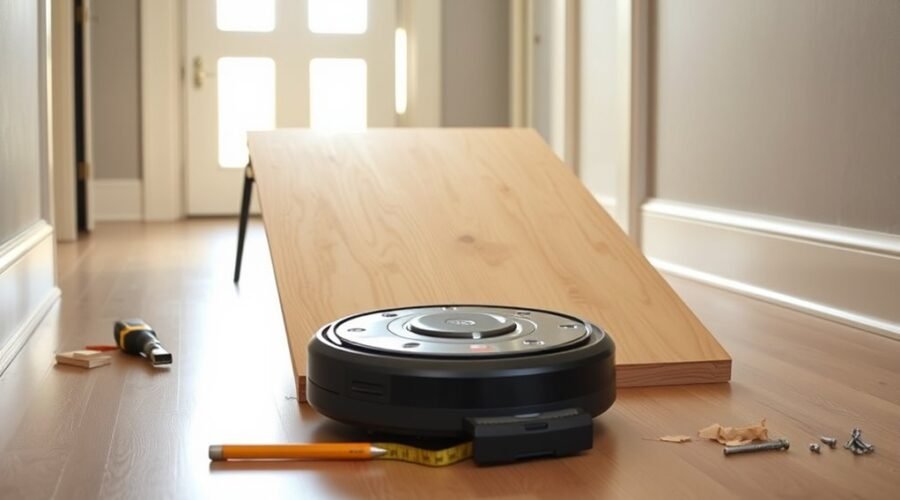
A robot vacuum can struggle with even a small threshold, but a simple ramp can solve the problem. The process begins with a careful measurement of the doorway, the vacuum’s clearance, and the rise that must be covered. From there, the right angle, material, and fit become important. Small details decide whether the ramp works smoothly or creates a new obstacle.
Measure the Threshold and Robot Clearance
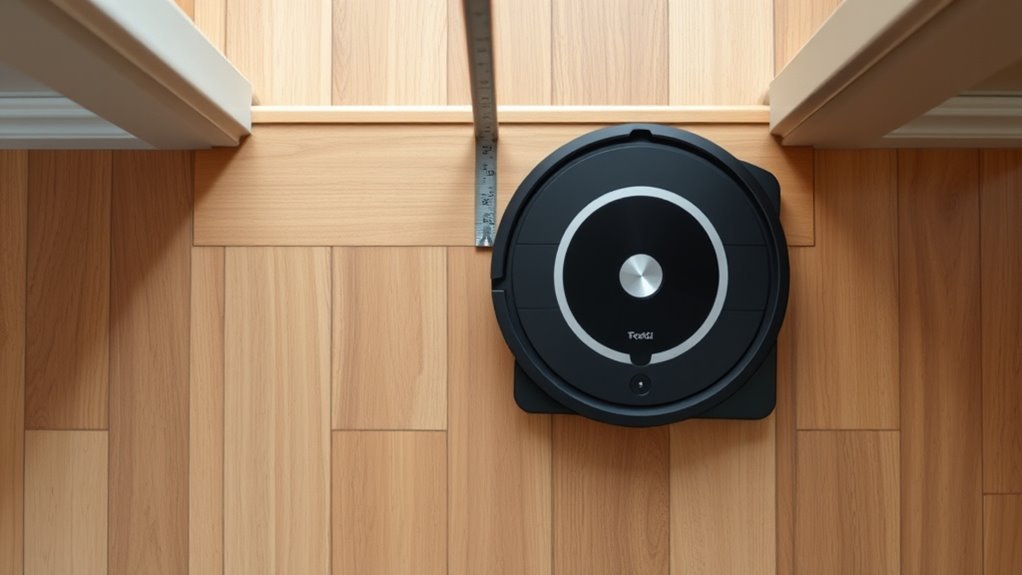
Before building the ramp, measure the threshold’s height from the floor to the top of the lip, then check its width with a ruler or measuring tape so the ramp fits properly. This step begins to measure the threshold with precision, because accurate numbers determine whether the robot vacuum can pass without struggle.
The height sets the ramp’s rise, while the width tells whether the structure will sit snugly or leave gaps that trap wheels. Clear records of both measurements should be kept for later cutting and assembly.
The height sets the ramp’s rise, while the width ensures a snug fit and keeps wheels clear.
The robot’s own clearance matters as well; its climbing limit should be noted before materials are chosen. Most models handle only modest rises, so the measurements must stay realistic.
Exact data supports a ramp that serves movement, reduces friction, and helps the machine cross freely. With careful measurement, the path from room to room becomes less obstructed and more accessible.
Choose the Right Robot Vacuum Ramp Angle
The threshold height should be measured first, since it determines how gradual the ramp must be.
The robot vacuum’s climbing ability, including wheel size, should then be matched to a gentle slope, ideally around 10–15 degrees.
A prototype can be tested at different angles to confirm a stable incline that the vacuum can climb without strain.
Measure Threshold Height
Accurately measuring the threshold height from the floor to the top of the lip is essential for setting the ramp’s height and angle. To measure threshold height, a ruler or tape measure should be placed at the base and read at the highest point of the obstacle. This value guides the ramp length, which should stay proportional to create a gentle slope.
A shallow angle, typically 10° to 15°, reduces climbing strain and improves traction, helping the robot move with ease and independence. A cardboard prototype can confirm whether the dimensions feel right before construction begins. Testing early allows small adjustments, preventing wasted material.
Precise measurement gives the ramp a clean fit and supports smooth, reliable movement across the threshold without unnecessary struggle.
Match Robot Climbing Ability
Choose a ramp angle that matches the robot vacuum’s climbing ability, typically around 10 to 15 degrees for smooth, reliable use. This threshold ramp angle supports easy movement and helps free the machine from unnecessary struggle.
A gentler slope lowers the chance of the vacuum getting stuck at the threshold and improves passage between rooms. For many models, a maximum climbing range of 20 to 30 degrees may be possible, but a lower angle usually gives more dependable results.
The ramp length should reflect the measured floor height difference, creating a gradual incline rather than a sharp rise. Matching the angle to the robot’s own capability gives the vacuum more independence and keeps daily cleaning moving without interruption, friction, or avoidable barriers.
Test Gentle Slope Angle
A gentle slope of about 10 to 15 degrees usually offers the best balance for robot vacuum ramps, letting the machine cross thresholds without overworking its motor. This gentle slope angle should be tested with a prototype ramp before final installation. Wheel size and weight matter: smaller wheels often need a milder incline for traction, while longer ramps reduce steepness and support freer movement. A non-slip surface helps prevent rollback and preserves control.
| Test point | Guideline |
|---|---|
| Angle | 10–15 degrees |
| Ramp length | Longer for easier climbing |
| Surface | Non-slip for grip |
If the vacuum hesitates, slides, or stalls, the slope should be adjusted until motion is smooth and independent.
Select Materials for a Robot Vacuum Ramp
Selecting durable materials is essential for a robot vacuum ramp, with plywood, MDF, or rubber offering the stability and support needed for regular use.
To select materials for a robot vacuum ramp, the builder should prioritize strength, smooth handling, and dependable wear resistance. Plywood is often the most practical choice, especially at a thickness of at least 4mm, because it can resist bending under the vacuum’s weight.
Marine-grade plywood is preferable in damp areas, since it better withstands moisture and lasts longer. MDF can work where dryness is consistent, while rubber adds grip and flexibility.
A longer ramp made from these materials helps create a gentler slope, improving climbing performance. The surface should also include traction, such as anti-slip tape or a textured finish, so the vacuum can move freely without slipping.
Cut the Ramp to Fit the Threshold
The threshold width should be measured first so the ramp can be cut to the correct size.
Accurate cut lines can then be marked with a straightedge to keep the slope smooth and the fit precise.
Before fixing it in place, the ramp should be test-fitted against the threshold and adjusted as needed.
Measure Threshold Width
To guarantee the ramp fits cleanly across the doorway, the threshold width should be measured first with a tape measure, then reduced by 2–3 mm to allow for wood expansion over time.
This small allowance helps the ramp sit properly against the door frame without binding on the thresholds. The measurement should be taken at the widest point, edge to edge, so the finished piece spans the opening with precision.
A clear width reading supports a snug fit that lets the robot vacuum move freely from room to room.
Once the size is known, the material can be prepared for cutting with confidence.
Accurate measuring protects the build from wasted material and gives the threshold ramp a clean, independent function.
Mark Accurate Cut Lines
With the threshold width already measured, the ramp material can now be marked for cutting. A straight edge should guide the cut line so the slope matches the threshold and allows a clean passage for the robot vacuum.
If the ramp will be sloped, a measuring tape and marking tape can trace a gradual incline suited to its climbing ability. Small allowances of 2 to 3 mm may be left for wood expansion, keeping the fit free and functional. The threshold height should also inform the angle, so the marked line reflects the full rise without abrupt edges.
Once the lines are clear, the material is ready for cutting with a jigsaw or circular saw, held steady for precise edges that support easy movement.
Test Fit Before Fixing
Once the ramp has been cut slightly longer than the measured threshold width, it should be test fitted against the doorway before any permanent fixing is done. This check confirms whether the ramp sits stable, aligns with the threshold, and gives the robot vacuum a smooth path forward.
If the fit is tight, trim 2–3 mm at a time, allowing for wood expansion and a snug result. A jigsaw can be used for any precise refinements, and the edges should remain smooth to prevent snags or damage.
During the test fit, the slope and length can be adjusted if the change feels uneven. Careful fitting protects movement, reduces friction, and supports a cleaner, freer home.
Add Grip and Secure the Ramp
Adding non-slip tape or a rubberized surface to the ramp improves traction for the robot vacuum as it travels up and down.
Anti-slip tape should cover the full width and length of the ramp, including the edges where the surface meets the floor, so wheels keep steady contact.
A firm attachment then matters. Mounting tape or a strong adhesive can hold the ramp in place and reduce shifting during regular use.
If extra stability is needed, a wider base or small weighted elements can help anchor the structure without restricting movement.
The goal is simple: create a secure path that lets the machine move freely without slipping or sliding.
After installation, the grip materials should be checked periodically for wear, peeling, or loss of texture.
Worn sections should be replaced promptly so the ramp remains safe, reliable, and effective over time.
Test the Robot Vacuum Ramp
After the ramp is secured and the surface has proper grip, it should be tested at the threshold to confirm a solid fit and smooth operation. The ramp should sit flush at the doorway and match the height difference, ideally no more than 10 cm, so the robot vacuum can move without strain.
Its incline should then be checked; a slope near 10 to 15 degrees suits most models. During the first run, the vacuum’s traction and path should be observed closely. If it slips, stalls, or fails to cross cleanly, the ramp may need adjustment.
Stability matters as well, since the ramp must not shift when the machine passes over it. Multiple tests on different floor surfaces help verify consistent performance and seamless adjustments.
When the ramp performs reliably, the setup supports freer cleaning and fewer interruptions for daily use, giving the vacuum clear passage.
Frequently Asked Questions
How to Make a Ramp Threshold?
Measure the threshold, then choose Ramp Materials like plywood or rubber. Cut a gentle 10–15 degree slope, add a non-slip surface, secure it with adhesive, and test the fit until the robot vacuum crosses freely.
What Is a Good Door Threshold Ramp for a Robot Vacuum Cleaner?
A good door threshold ramp for a robot vacuum cleaner is a gentle 10–15° slope, built from durable Threshold Materials like wood or rubber, with non-slip texture and a removable fit, until the barrier finally yields.
How Can I Make My Robot Vacuum Go Over a Threshold?
It can cross a threshold by using a low-slope ramp for obstacle navigation. Measure the height, choose non-slip plywood or rubber, secure it firmly, then test and adjust until the vacuum climbs freely and safely.
Do They Make Ramps for Robot Vacuums?
Yes—robot vacuum ramps exist. Many use 10–15° slopes, and some eufy models clear thresholds up to 4.2 cm. Ramps Accessibility improves when custom plywood or rubber ramps match exact measurements and provide traction.
Conclusion
To sum up, a well-made threshold ramp can help a robot vacuum move between rooms with ease, much like a trusty steed crossing a narrow bridge. By measuring carefully, choosing a gentle angle, using sturdy materials, and adding grip, the ramp becomes both safe and effective. Once installed, a few test runs can confirm smooth travel. Small adjustments may be needed, but with attention to detail, the finished ramp should improve cleaning performance reliably.