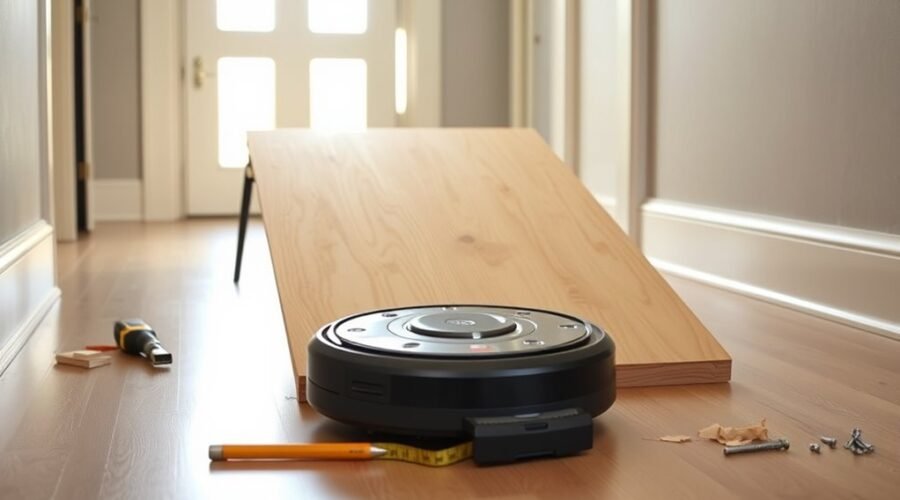
A robot vacuum threshold ramp helps your cleaner move between rooms without getting stuck on a raised doorway sill. You can build a custom ramp in under an hour from plywood, MDF, or heavy-duty rubber using basic DIY tools. The key is matching the wedge’s horizontal run and surface grip to your threshold height, doorway width, and robot’s ground clearance.
Quick Answer
To make a robot vacuum threshold ramp, measure the doorway width and vertical rise, then cut plywood, MDF, or rubber into a wedge with a 10–15° slope (about 5 cm of horizontal run for every 1 cm of rise). Top the ramp with light-colored non-slip tape, secure the base with double-sided mounting tape, and test crossings in both directions.
At a Glance
| Difficulty | Easy (basic DIY measuring, straight cutting, and fitting) |
| Tools Needed | Tape measure, ruler, straightedge, pencil, saw, sandpaper, and cardboard for prototyping |
Step 1: Measure the Threshold and Robot Clearance
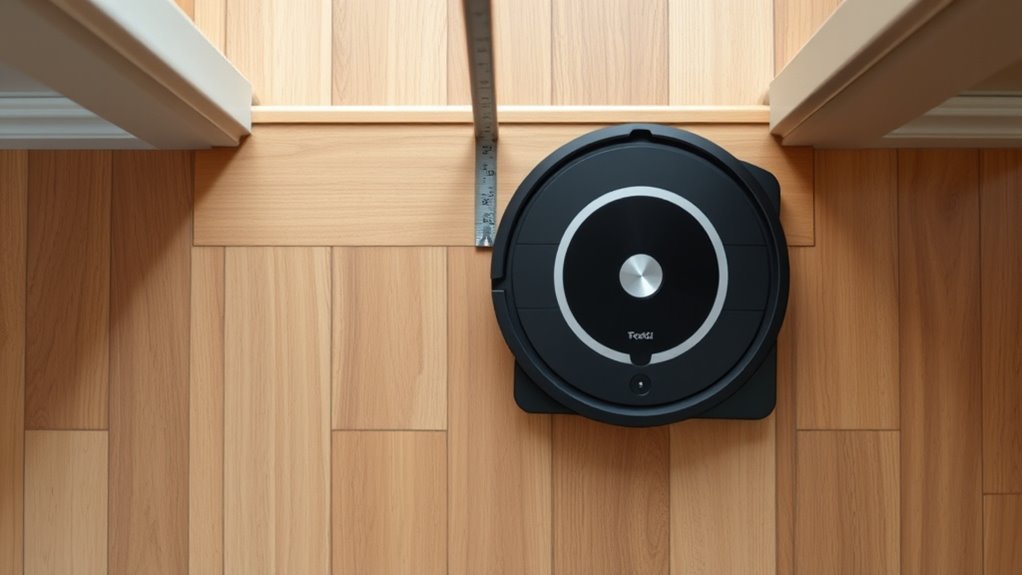
Start by measuring the vertical height of the threshold from the lower floor to its highest point, along with the interior doorway width. These two numbers determine how tall and wide your wedge needs to be so the ramp sits flush against the sill.
Always measure both sides of the doorway separately. When tile meets hardwood or carpet meets laminate, one room often sits higher than the other, meaning you may need two ramps with different rises.
Write down these five measurements before cutting any material:
- Threshold height (rise): The vertical distance from each floor surface to the top edge of the threshold.
- Doorway width: The clear space between the inner door frame jambs or stops where the ramp will sit.
- Available floor space (run): How far the ramp can extend into the room without creating a tripping hazard or blocking furniture.
- Robot ground clearance: The distance beneath the vacuum’s chassis, front bumper, side brushes, and mop plate.
- Door sweep clearance: The vertical gap beneath the door slab so it can swing open and closed without hitting the ramp.
Compare your doorway’s vertical rise against your vacuum’s factory obstacle rating. Standard models generally handle 1.5–2.0 cm transitions: iRobot’s published Roomba threshold clearance is 1.6 cm (5/8 in), while standard Roborock models have climbing limits of 2.0 cm (0.79 in), or 1.5 cm (0.59 in) on the Roborock S4.
Newer flagship vacuums with lifting chassis mechanisms can cross higher barriers without a ramp. For instance, the eufy Omni S2 is rated to climb 3.5 cm (1.38 in) single thresholds and 4.2 cm (1.65 in) double thresholds. Always check the manual for your specific model before deciding how much height your ramp needs to bridge.
The ramp needs enough width to support both drive wheels and enough horizontal length to turn an abrupt vertical step into a gradual incline.
Step 2: Choose the Right Robot Vacuum Ramp Angle
A slope between 10° and 15° gives most robot vacuums enough traction to climb without triggering their front bumper sensors or scraping the mop plate. Start with this 10–15° range for your cardboard prototype, then fine-tune the length based on how your vacuum performs.
For context, the U.S. Access Board ADA threshold guidelines cap standard doorway thresholds at 1.3 cm (1/2 in) and require a 1:2 bevel above 0.64 cm (1/4 in). A 1:2 bevel equals a 26.6° slope, which is why even code-compliant bevels often stop robot vacuums unless you lengthen the run to bring the angle down to 10–15°.
Recommended Products

Heavy-Duty & Precise Fit: 3/8" rise, 2" depth, 35.5" width with 2,500 lbs capacity. Designed as a low profile threshold ramp for doorways and interior door sills, ideal for wheelchairs, walkers, carts and robot vacuum transitions at home
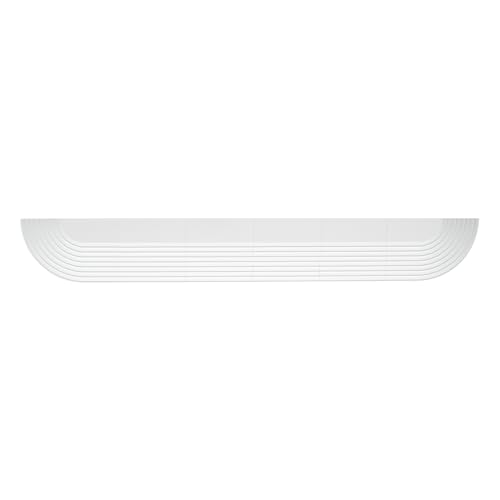
Compatible Model: Compatible with All roborock Robot Vacuums.

Heavy-Duty & Precise Fit: 3/4" rise, 6" depth, 35.5" width with 2,500 lbs capacity. Designed as a low profile threshold ramp for doorways and interior door sills, ideal for wheelchairs, walkers, carts and robot vacuum transitions at home
Calculate the Ramp Length From the Threshold Height
The taller your threshold, the farther the ramp must extend across the floor to maintain a gentle incline. You can calculate the exact slope angle using basic trigonometry:
Ramp angle = arctan(threshold rise ÷ horizontal run)
Here, the horizontal run is the flat floor distance from the ramp’s thin front edge to its thick back edge against the sill—not the diagonal length along the top slope. For example, a 2.0 cm threshold paired with a 10.0 cm horizontal run creates an 11.3° incline, which works reliably for most doorways.
| Threshold Rise | Run for 15° Slope (Steeper) | Run for 12° Slope (Balanced) | Run for 10° Slope (Gentler) |
|---|---|---|---|
| 1.5 cm (0.59 in) | 5.6 cm (2.2 in) | 7.1 cm (2.8 in) | 8.5 cm (3.3 in) |
| 2.0 cm (0.79 in) | 7.5 cm (3.0 in) | 9.4 cm (3.7 in) | 11.3 cm (4.4 in) |
| 2.5 cm (0.98 in) | 9.3 cm (3.7 in) | 11.8 cm (4.6 in) | 14.2 cm (5.6 in) |
| 3.0 cm (1.18 in) | 11.2 cm (4.4 in) | 14.1 cm (5.6 in) | 17.0 cm (6.7 in) |
| 4.0 cm (1.57 in) | 14.9 cm (5.9 in) | 18.8 cm (7.4 in) | 22.7 cm (8.9 in) |
Before cutting wood or rubber, tape together layers of corrugated cardboard using the dimensions from the table above to build a quick test prototype.
Match the Slope to Your Robot’s Climbing Ability
Your vacuum must transition onto the ramp without pressing its front collision bumper inward or lifting its drive wheels off the ground. Low-slung models with fixed mopping pads require a gentler 10–12° angle so the rear mop mount does not drag on the bottom edge or catch at the crest.
Inspect the spring travel on the drive wheels, the height of the front bumper skirt, and the clearance under the mop bracket. Many vacuums cross a 15° slope easily in vacuum-only mode but high-center when a wet mop pad is attached.
Keep in mind that vertical obstacle height and maximum ramp gradient measure two different things. A vacuum rated to hop a 2 cm vertical lip can still back away from a steep, tall ramp if the incline triggers its bumper or anti-drop sensors.
Test the Gentle Slope Before Cutting
Tape your cardboard prototype flush against the threshold and run the robot over it. Watch closely for wheelspin, bumper triggers, chassis scraping, or sudden reversals.
Use these three checks to refine your prototype before cutting permanent materials:
| Test point | Guideline |
|---|---|
| Angle | Start at 10–15° (about 1:5 to 1:4 rise-to-run ratio) and flatten if the bumper triggers. |
| Ramp length | Add 2–4 cm to the horizontal run whenever the drive wheels spin or slip. |
| Surface | Use a firm, textured, light-colored finish that provides traction without triggering cliff sensors. |
Pay special attention to the top transition where the ramp meets the sill. Even a 3 mm vertical lip at the crest can catch the belly of the robot as its front caster wheel rolls over the peak.
Step 3: Select Materials for a Robot Vacuum Ramp
Choose a dense, rigid material that will not flex under a 3–6 kg (7–13 lb) robot vacuum and can be tapered to a thin leading edge. Plywood, medium-density fiberboard (MDF), and solid rubber wedges are the easiest materials to work with indoors.
Official ECOVACS threshold guidance also highlights wooden, rubber, and aluminum transition ramps as effective ways to smooth out high doorway sills and sliding door tracks.
Compare the four most common DIY materials to match your room and tools:
- Birch or hardwood plywood: Easy to cut, sand, and stain to match wood flooring. Thin sheets (such as 4 mm plywood) require full-length support cleats underneath so the deck does not bow.
- Marine-grade plywood: Resists warping and delamination in damp doorways such as bathroom, laundry, or kitchen entrances.
- MDF: Cuts cleanly into a smooth solid wedge without grain tear-out, making it ideal for dry indoor bedrooms and hallways when sealed or painted.
- Solid rubber or TPE wedges: Provide built-in wheel traction and shock absorption, and can be trimmed to width with a sharp utility knife or fine-tooth hacksaw.
Whether you plane a solid block into a wedge or support an angled plywood deck on triangular ribs, never leave thin sheet material hollow across the center. A flexing ramp absorbs drive-wheel torque and causes the vacuum to stall.
If you build with wood or MDF, plan to add textured grip tape or sand-mixed paint on top. Bare varnished wood becomes slick as soon as fine floor dust settles on the incline.
Recommended Products
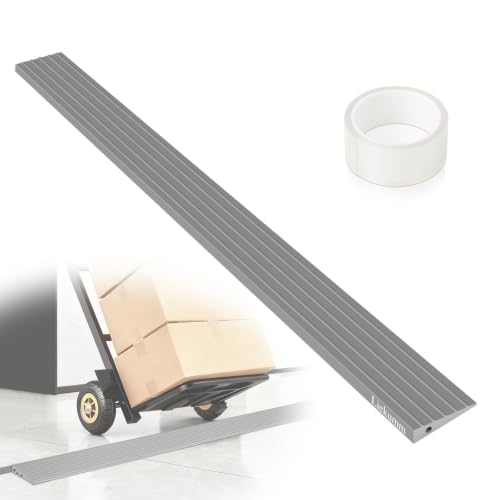
Strong Weight Capacity & Ideal Size: LIEKUMM threshold ramp measures 36" W x 2" L x 3/8" H and supports up to 2200 lbs. Perfect as a wheelchair ramp, it ensures safe access indoors or outdoors as threshold ramps for doorways

1-Inch Rise Threshold Ramp: Measures 1" H x 5.3" L x 35.5" W and supports up to 2000 lb. This 1 inch rubber threshold ramp for doorways provides a smooth transition for wheelchairs, power chairs, mobility scooters, carts, bicycles, and robot vacuums

Heavy-Duty & Precise Fit: 5/8" rise, 3.2" depth, 35.5" width with 2,500 lbs capacity. Designed as a low profile threshold ramp for doorways and interior door sills, ideal for wheelchairs, walkers, carts and robot vacuum transitions at home
Step 4: Cut the Ramp to Fit the Threshold
Transfer your prototype dimensions onto your wood or rubber stock and mark the taper lines before cutting. Aim for a feather edge of 2 mm or less at the bottom and an exact match to the threshold height at the top.
Clamp a metal straightedge along your pencil line to guide your saw or knife. If your door casing has curved molding at the base, trace your cardboard template directly onto the workpiece.
Warning: Clamp the workpiece firmly to a workbench and wear safety glasses and a dust mask before sawing or sanding wood and MDF. Never install a threshold ramp near an open staircase landing, and never tape over or disable your robot’s cliff sensors to force a crossing.
Measure the Width Before Cutting
Measure the clear opening between the inner door stops, including any quarter-round trim at floor level. Leave a 2–3 mm expansion gap on each end so a wooden ramp fits cleanly without pinching against the jambs when humidity changes.
Make sure the ramp covers the full width of the doorway—or at least 50–60 cm if centered in a wide opening. Robots frequently approach doorways at a slight diagonal, and a narrow ramp can drop one drive wheel off the side edge.
Mark and Cut the Ramp
Use your recorded threshold rise and calculated horizontal run to lay out the wedge profile on the material. The bottom edge must taper smoothly to the floor while the back face sits square against the vertical sill.
- Mark the total doorway width (minus your 2–3 mm clearance allowance) across the material using a pencil and straightedge.
- Draw the vertical rise on the back edge and measure out the planned horizontal run on the base.
- Connect the top of the rise to the front of the run on both ends to define the bevel angle.
- Clamp the material securely and cut along the width and bevel lines using a circular saw, jigsaw with a tilting shoe, table saw, or fine hand saw.
- Sand all cut faces and chamfer the bottom leading edge with 120-grit sandpaper until smooth and splinter-free.
If you are using a thin 4 mm plywood top sheet instead of a solid wedge, glue and brad-nail triangular support blocks every 15–20 cm underneath the deck. Full support prevents the surface from drumming or sagging over time.
Following eufy’s DIY ramp construction guide, thoroughly degrease the threshold floor area and sand away any sharp burrs on the ramp edges that could nick the robot’s rubber treads.
Test Fit Before Fixing
Set the cut ramp dry against the threshold before peeling any adhesive backing. Press down on all four corners to verify that it sits completely flat without rocking.
If the ends bind against the door jamb, plane or sand off 1–2 mm at a time until the piece drops into place smoothly. Check that both the bottom entry lip and the top sill joint feel flush under your fingers.
Finally, swing the door fully open and closed across the ramp. You should see at least 2–3 mm of air space between the bottom of the door sweep and the top of the ramp.
Step 5: Add Grip and Secure the Ramp
Apply non-slip traction tape, a ribbed rubber sheet, or textured paint across the top surface so the robot’s drive wheels never slip on the climb. Keep the covering flat and trim it flush so the edges do not curl upward.
Pro Tip: Avoid jet-black grip tape or pitch-black rubber ramps. As documented in iRobot Error 6 cliff sensor guidance, dark matte surfaces absorb infrared light from anti-drop sensors, tricking the robot into seeing the ramp as a staircase drop-off. Choose gray, beige, clear grit tape, or wood-toned finishes instead.
Once the top traction layer is applied, anchor the base so the vacuum’s pushing force cannot slide the ramp away from the sill:
- Double-sided carpet or mounting tape: Holds wood and rubber ramps firmly on clean, dry tile, vinyl, or sealed hardwood.
- Silicone non-slip underpad: Ideal for renters or delicate antique hardwood floors because it grips by friction and peels up cleanly without adhesive residue.
- Heavy-duty construction adhesive: Provides a permanent bond on concrete, stone, or utility-room thresholds where the ramp will never need removal.
- Hook-and-loop (Velcro) strips: Lets you lift the ramp out in seconds for deep mopping or doorway maintenance.
Wipe the floor with isopropyl alcohol or a mild degreaser and let it dry completely before pressing adhesive strips into place. Test the bond by pushing horizontally against the front lip with your foot; the ramp should not shift at all.
Recommended Products

Durable Weatherproof Adhesive - Our grip tape is designed with a highly durable water resistant strong adhesive layer to make sure your tape does not peel off after a few days of use. Our non slip tape for stairs was specifically designed to withstand heavy foot traffic and any weather conditions, including rain, snow, frost, sun, water, and heat. Anti skid tape creates an exceptional long term grip on all smooth surfaces for many years.

MADE FROM PET MATERIAL: LifeGrip General Anti-Slip Tapes are made from PET material, which offer superior durability and tensile strength. The higher tensile strength of PET allow our anti-slip tape to withstand heavy foot traffic, ensuring long-lasting performance. With its easy removal feature that leave no residue or surface damage, LifeGrip General Anti Slip Tapes are versatile and convenient for any application.

Durable Weatherproof Adhesive - Our grip tape is designed with a highly durable water resistant strong adhesive layer to make sure your tape does not peel off after a few days of use. Our non slip tape for stairs was specifically designed to withstand heavy foot traffic and any weather conditions, including rain, snow, frost, sun, water, and heat. Anti skid tape creates an exceptional long term grip on all smooth surfaces for many years.
Step 6: Test the Robot Vacuum Ramp
Start a cleaning cycle and watch your robot cross the installed ramp in both directions. A properly tuned ramp lets the vacuum climb onto the upper floor and descend back to the lower room without wheelspin, bumper rebounds, or stranded errors.
Never rely on a one-way test. Going up a ramp tests wheel torque and bumper angle, while going down tests cliff sensors and belly clearance at the crest.
- Start the robot about 1 meter away on the lower floor so it approaches the doorway at normal speed.
- Watch the front bumper and caster wheel as they meet the bottom edge of the ramp.
- Check underneath the chassis as the center of the robot crests the top threshold joint.
- Command the robot to cross back through the doorway from the opposite room.
- Press the “Home” or “Dock” button to confirm it can navigate the ramp autonomously to recharge.
Run this entire sequence with the mopping plate and wet pad attached if your vacuum mops. Mop brackets sit lower than the main chassis and are the first part to catch on a sharp crest.
If the robot hesitates or fails to cross, use this diagnostic table to pinpoint the fix:
| Problem | What to check |
|---|---|
| Wheels spin on the slope | Add gritty non-slip tape or lengthen the horizontal run to reduce the angle Toward 10°. |
| Robot gets stuck at the top | Raise the back edge so it sits flush with the sill and round off any sharp peak. |
| Robot reverses before climbing | Replace black tape with a lighter color for cliff sensors, or sand the front lip thinner so it does not trigger the bumper. |
| Ramp moves during crossing | Degrease the floor and secure the base with double-sided mounting tape or a silicone pad. |
| Robot crosses one way only | Measure the drop on the second side and add a matching return ramp if exceeds 1.5 cm. |
Many newer robot apps also include software aids for doorway transitions. For example, Dreame’s threshold troubleshooting guide notes that marking a “Passable Threshold” on the map (under Map Editing → Threshold) and enabling synchronous obstacle crossing helps the robot commit to the climb instead of treating the slope as a wall.
Inspect your ramp every few months for curling grip tape, dust buildup underneath, or loose mounting strips, and refresh worn tape before the wheels start slipping.
Frequently Asked Questions
How to Make a Ramp Threshold?
To make a threshold ramp, measure the doorway width and threshold height, then cut plywood, MDF, or solid rubber into a wedge with a 10–15° incline. Cover the top with light-colored non-slip tape, anchor the base with double-sided mounting tape or a silicone mat, and test your robot vacuum in both directions.
What Is a Good Door Threshold Ramp for a Robot Vacuum Cleaner?
A good robot vacuum threshold ramp combines a gradual 10–15° slope, rigid construction that will not flex under the vacuum’s weight, and a textured, non-slip surface. Custom-cut birch plywood, sealed MDF, and pre-molded rubber doorway wedges all work well when sized to leave a 2–3 mm gap inside the door frame.
How Can I Make My Robot Vacuum Go Over a Threshold?
Install a low-angle wedge ramp that rises flush to the top of the sill without leaving a vertical lip. Forevery 1 cm of threshold height, provide 4 to 5.5 cm of horizontal run, add traction tape for the drive wheels, and mark the doorway as a passable threshold in your robot’s companion app if supported.
Do They Make Ramps for Robot Vacuums?
Yes, ready-made robot vacuum threshold ramps are sold in cut-to-fit rubber, TPE plastic, wood, and modular interlocking tiles. Some newer robot vacuums also feature built-in climbing arms: for example, the eufy Omni S2 crosses single thresholds up to 3.5 cm and double thresholds up to 4.2 cm without a ramp.
Do I Need a Ramp on Both Sides of the Threshold?
You need a ramp on both sides whenever the threshold forms a raised saddle above both rooms and drops more than 1.5–2.0 cm on each side. Always measure both sides independently, because a robot that climbs over a doorway from a higher hallway can get stranded in the next room if the return drop is too steep.
Why Does My Robot Vacuum Still Get Stuck on the Ramp?
A robot vacuum gets stuck on a ramp when the angle exceeds 15°, the surface is too slick for the wheels, the leading edge triggers the front bumper, or a gap at the top high-centers the mop plate. Watch where the robot stops, then lengthen the horizontal run, sand the entry edge thinner, or add light-colored grip tape.
Why Does My Robot Vacuum Back Away From a Black Threshold Ramp?
Robot vacuums use downward-facing infrared cliff sensors that can misread matte black rubber or black grip tape as a staircase drop-off, causing the vacuum to reverse or report a cliff error. Cover black ramps with gray, beige, or wood-patterned non-slip tape so the sensors receive a normal infrared reflection.
Conclusion
A well-fitted robot vacuum threshold ramp turns frustrating doorway hang-ups into hands-free whole-home cleaning. Focus on a gentle 10–15° incline, a rigid base that stays put, and light-colored traction tape that works with your vacuum’s sensors. Start by taping together a quick cardboard prototype today to confirm the exact horizontal run your robot needs before cutting your final wood or rubber wedge.
Sources
- iRobot Support: Published Roomba threshold height clearance (1.6 cm / 5/8 in).
- Roborock Support: Obstacle-climbing specifications for standard models (1.5–2.0 cm).
- eufy S2 Product Specifications: Single-threshold (3.5 cm) and double-threshold (4.2 cm) climbing limits.
- U.S. Access Board ADA Guide: Doorway threshold height limits and 1:2 bevel slope standards (Section 404.2.5).
- ECOVACS: Threshold crossing factors and wood, rubber, and aluminum ramp materials.
- eufy Ramp Guide: DIY ramp dimensions, surface degreasing, sanding, and silicone mounting tips.
- iRobot Support (Error 6): Cliff sensor behavior on dark surfaces and doorway thresholds.
- Dreame Support: Threshold troubleshooting, ramp geometry, and app passable-threshold settings.