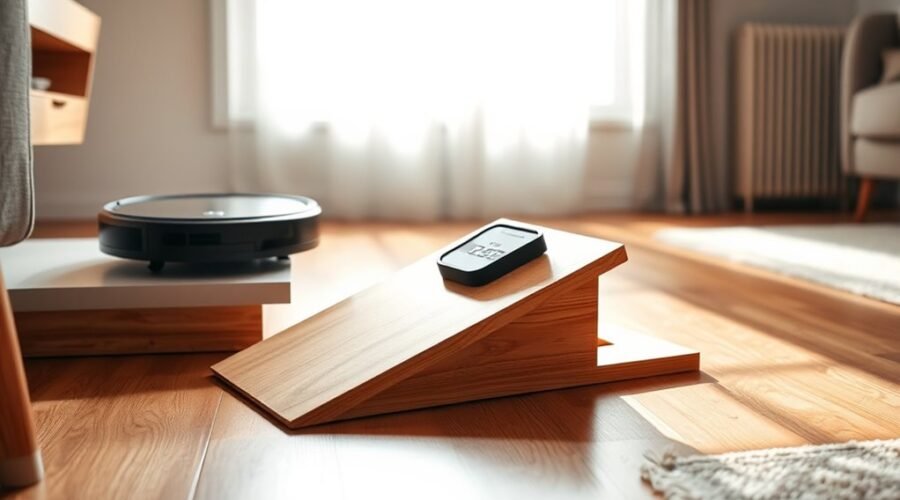
The right robot vacuum ramp slope helps your cleaner move between rooms without getting stuck at raised thresholds. But the angle alone does not decide whether a ramp will work. Wheel grip, ground clearance, ramp length, and edge alignment all affect the result. This guide shows you how to measure, calculate, build, and test a ramp for your robot vacuum.
Quick Answer
There is no universal safe robot vacuum ramp slope. Check the incline limit for your exact model, then choose a gentler angle. Some models support 15°, while others may handle steeper ramps. Measure the threshold height and calculate the horizontal ramp distance before building. A firm, non-slip surface and smooth edges are essential for reliable crossing.
At a Glance
| Difficulty | Basic measuring and calculation; woodworking skills for a custom ramp |
| Tools Needed | Ruler or measuring tape, calculator or inclinometer, and suitable cutting and sanding tools if building a wooden ramp |
What Angle Is Safe for a Robot Vacuum Ramp?
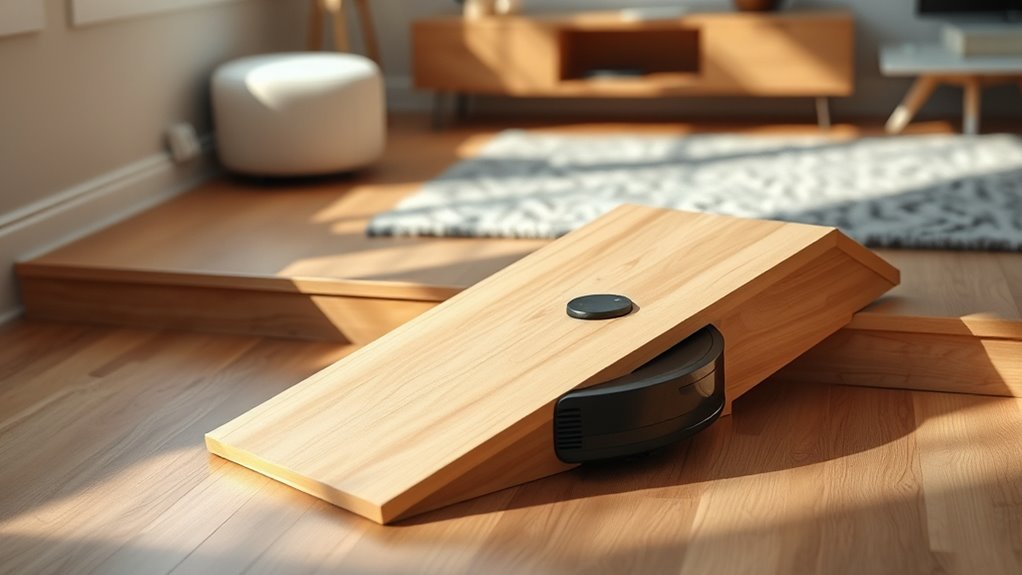
A safe robot vacuum ramp angle depends on the manufacturer’s specifications. Although 20° is often mentioned as a practical upper target, it is too steep for some models. A gentler ramp usually gives the wheels better grip and reduces the chance of the underside getting stuck.
For example, eufy’s Omni C30 Edge specifications state a maximum climbing slope of 15° and a threshold-crossing height of 20 mm. A 20° ramp would therefore exceed that model’s stated slope capability.
The exact limit changes with wheel design, ground clearance, motor performance, and surface friction. A ramp that works for one vacuum may cause another to slip or turn away.
Some informal testing with a Wyze Robot Vacuum showed successful climbing and descending at approximately 21.5°. The same robot slipped while attempting a 24.2° incline and refused to climb at 25.5°.
Those figures describe one user’s tests, not manufacturer-certified limits or a universal standard. They show why relying on a single recommended angle can be misleading.
For reliable operation, choose an angle below your model’s stated maximum whenever possible. Keep the ramp stable, provide enough space at both ends, and confirm that the robot can cross it repeatedly without assistance.
Measure Your Threshold
Measure the vertical height, usable doorway width, and any difference between the two ends of the threshold. These measurements determine the ramp’s slope, overall size, and fit.
Use millimeters for small thresholds. Keep the measuring tape straight and record the actual height rather than estimating it from the doorway trim.
Measure Threshold Height
Threshold height is the vertical distance from the lower finished floor to the top of the raised edge. Measure from the surface the robot actually travels on, including any fixed flooring that changes the starting level.
- Place a ruler or measuring tape against the lower floor.
- Measure vertically to the highest point of the threshold.
- Record the height in millimeters.
- Repeat the measurement at the opposite side.
- Compare the measurements with your vacuum’s published crossing ability.
Some robot vacuums can cross low thresholds without a ramp. For example, Roborock’s support guidance for older models lists 2 cm of climbing ability for several models, while the S4 is rated at 1.5 cm.
Similarly, iRobot’s threshold guidance lists a 5/8-inch (1.6 cm) crossing height for the Roomba models covered by that support article.
These examples are not specifications for every current robot vacuum. Use the limit published for your exact model.
Do not round the measured height downward when calculating the ramp. Even a small underestimate can leave a raised lip where the wheels or underside may catch.
Check Doorway Width
Measure the usable doorway width where the ramp will sit, not just the distance between the visible door frames. Floor trim, hinges, doorstops, and uneven edges can reduce the available space.
Check the opening at the lower floor and near the top of the threshold. Use the narrower measurement if the sides are not parallel.
An 18-inch-wide ramp, about 457 mm, may provide enough room for many robot vacuums. However, that width is a design example, not a requirement for every machine.
Your ramp should be wider than the robot’s body and wheel track, with extra room for minor steering errors. It must also fit inside the doorway without preventing the door from opening or closing.
If using plywood or MDF, leave a small fitting clearance rather than forcing the material tightly between fixed surfaces. A nominal 2 mm clearance may work for some installations, but the correct allowance depends on the material and doorway.
Note Left-Right Differences
A threshold may be slightly higher on one side than the other. Measure both ends so the completed ramp rests properly against the upper surface.
Record these details before cutting:
- Left-side height: The vertical rise at the left edge.
- Right-side height: The vertical rise at the right edge.
- Height difference: How much the two readings vary.
- Planned slope: The incline calculated from the rise and available floor space.
- Robot capability: The manufacturer’s threshold and slope limits.
If both sides match, a uniform ramp profile is usually suitable. If they differ, a custom-shaped ramp can follow the uneven threshold.
Check the ramp across its entire width. A twisted or poorly supported surface can make the robot tilt, lose wheel contact, or get stuck even if the average slope is acceptable.
Calculate Ramp Length
Calculate the horizontal ramp distance by dividing the vertical rise by the tangent of your chosen angle. This gives the amount of floor space the ramp needs, not the actual length of its sloped upper surface.
The basic formula is:
Horizontal run = Vertical rise ÷ tan(Ramp angle)
For the physical length of the sloping surface, use:
Sloped ramp length = Vertical rise ÷ sin(Ramp angle)
These formulas follow the standard right-triangle relationships explained in OpenStax’s right-triangle trigonometry guide.
For example, suppose you have a 20 mm threshold. The required horizontal distance changes considerably as you choose a different slope.
| Variable | Value |
|---|---|
| Threshold rise | 20 mm |
| 10° slope | About 113 mm horizontal run |
| 12° slope | About 94 mm horizontal run |
| 15° slope | About 75 mm horizontal run |
| 20° slope | About 55 mm horizontal run |
| Actual sloped length | Rise ÷ sin(Angle) |
These are geometric examples, not approved climbing angles for every model. The 20° row should only be considered if your vacuum is rated to handle that incline.
For another example, a 10 cm rise at 20° needs about 27.5 cm of horizontal distance. The sloped surface measures approximately 29.2 cm. At 12°, the same rise requires about 47.0 cm of horizontal distance.
Longer ramps take more floor space, but their gentler incline may improve traction and reduce abrupt changes in chassis position.
Remember that a real ramp also needs properly finished ends. Sharp lips, support blocks, and surface coverings can affect its final geometry.
Choose a Climbable Ramp Slope
Choose a ramp slope that stays within the robot vacuum’s rated climbing ability. A lower angle generally provides more room for differences in floor grip, wheel wear, and robot approach.
A 10° to 12° incline can be a practical starting point when you have enough floor space, but it is not a guaranteed safe range for every model.
The right choice depends on the threshold height and available ramp distance. For example, reducing the angle from 20° to 12° makes the ramp substantially longer for the same rise.
Use these checks before selecting the final angle:
- Confirm your vacuum’s maximum supported incline, if the manufacturer publishes one.
- Check its threshold clearance and underside height.
- Choose a gentler slope than the stated maximum when space allows.
- Allow room for the robot to approach the ramp in a straight line.
- Check that the top and bottom edges do not form new obstacles.
- Make sure the robot can descend as well as ascend.
Do not assume that a vacuum rated to cross a 20 mm vertical threshold can automatically climb any ramp leading to a much higher floor. Vertical obstacle clearance and continuous incline performance are different capabilities.
Also, a longer ramp cannot compensate for every physical limitation. Some robots may still become high-centered, meaning their underside rests on the ramp or its transition while the drive wheels lose effective contact.
How Ramp Material Affects Traction
Ramp material determines how effectively the wheels grip the incline. Smooth or slippery surfaces can cause spinning even when the slope is within the robot’s capabilities.
Particleboard, MDF, and plywood can form a rigid ramp, but their surface finishes affect traction. An unfinished or polished surface may not provide enough grip, especially on a steeper incline.
Rubber and textured coverings can improve wheel contact. However, the covering must remain firmly attached and should not create loose edges or raised seams.
The eufy guide to robot vacuum ramps identifies plywood, MDF, rubber, and 3D-printed materials as construction options. It also recommends a non-slip surface and testing the finished ramp.
Consider these common materials:
- Plywood: Rigid, easy to cut, and suitable for custom ramp shapes.
- MDF: Smooth and easy to shape, but it needs a suitable grip surface and protection from moisture.
- Particleboard: Can work as a ramp core, although edge durability and surface grip require attention.
- Rubber: Provides a grippy surface and can form a flexible or solid threshold wedge.
- Textured coating: Adds traction to a rigid base when applied evenly.
- 3D-printed material: Allows a custom profile, provided the finished structure is rigid and the surface offers enough grip.
Material alone does not prevent high-centering. A robot can get stuck on a well-textured ramp if the ends are too abrupt or the underside lacks clearance.
Keep the surface clean and dry. Dust, grease, loose fibers, and worn wheel treads can reduce grip during repeated cleaning cycles.
Build a Wide, Stable Robot Vacuum Ramp
A stable robot vacuum ramp needs enough width, a rigid base, a gradual incline, and smooth contact with both floor levels. An 18-inch width can be a useful starting size, but the finished ramp must suit your vacuum and doorway.
Plywood or MDF works well for a custom indoor build. Rubber wedges may be simpler for low thresholds, especially when the floor transition is straight and uniform.
Follow these steps to build the ramp:
- Mark the measurements. Transfer the threshold height, available floor run, and doorway width onto the ramp material.
- Choose the incline. Calculate an angle within your robot’s supported range, allowing a margin where possible.
- Cut the ramp profile. Form a consistent slope that reaches the upper floor without leaving an abrupt step.
- Support the structure. Make sure the ramp cannot flex, rock, or slide when the robot crosses it.
- Smooth the edges. Sand sharp corners and reduce raised lips at the beginning and end.
- Add traction. Apply a suitable non-slip covering without creating loose sections or sensor-confusing dark strips.
- Fit the ramp. Position it firmly against the threshold and confirm that the door can still move freely.
- Test the crossing. Observe the robot traveling in both directions before allowing unattended use.
For a raised threshold with a sloped approach needed on each side, separate ramp strips may be useful. eufy’s threshold troubleshooting guidance specifically recommends ramp strips on both sides for its Omni C30 Edge when needed.
Note: If the ramp affects a door’s closing mechanism, creates a walking hazard, or requires changes to the doorway structure, consult a qualified installer before making permanent alterations.
After installation, press gently along the ramp to check for movement. The surface should remain secure without wobbling, lifting, or shifting away from the threshold.
Test the Ramp at a Low Angle First
Test your ramp at a gentle incline before relying on it for daily cleaning. Start below your robot’s stated slope limit and watch its behavior during both ascent and descent.
A shallow starting angle, such as 11.2°, was used in an informal Wyze Robot Vacuum test. However, the robot still became high-centered after moving toward a ramp edge during descent.
This shows that low angles do not eliminate problems caused by narrow platforms, poor alignment, or unsupported edges.
Use this testing sequence:
- Secure the ramp. Confirm that it cannot move under the robot.
- Start with a gentle slope. Keep the initial angle comfortably below the manufacturer’s limit.
- Observe the ascent. Watch for spinning wheels, reduced speed, hesitation, or contact with the underside.
- Observe the descent. Check whether the robot remains centered and reaches the lower floor smoothly.
- Repeat the crossing. Test several passes from both directions.
- Adjust if needed. Reduce the angle, improve traction, or reshape the ends if problems appear.
If your vacuum uses room mapping, make sure it recognizes the area beyond the threshold. Some models may need their map updated after a physical layout change.
There is no general need to reset the entire map after every ramp test. Doing so may erase useful room information, depending on the model and app.
Do not increase the slope simply because one successful climb occurred. The goal is repeated, controlled crossing with no slipping or scraping.
Pro Tip: Watch the robot’s front wheels and underside as it reaches the top of the ramp. A brief hesitation at that point may reveal an edge-clearance problem rather than a lack of motor power.
Avoid Cliff Sensor Issues
Cliff sensors help prevent robot vacuums from falling over stairs or other drops. However, certain dark surfaces and abrupt floor transitions can trigger false warnings.
Many robots use downward-facing sensors to detect changes beneath the machine. A very dark strip may return too little reflected signal, causing the vacuum to treat an otherwise passable surface as a drop.
For example, iRobot’s Error 6 troubleshooting guide explains that some Roomba models can mistake dark flooring for a cliff. The manufacturer also recommends cleaning the cliff sensors with a dry cloth when necessary.
Avoid using black gaffer’s tape across the ramp where the sensors need to detect the surface. Informal testing has shown that this can make certain robots refuse to cross.
Warning: Never cover, disable, or bypass a robot vacuum’s cliff sensors to make it use a ramp. Doing so can prevent the robot from recognizing real drops and stairs. Keep the ramp away from unprotected edges where a navigation error could cause a fall.
If your vacuum avoids the ramp, check these possible causes:
- Dark material: A black or highly absorbent surface may affect downward sensor readings.
- Dirty sensors: Dust or debris may interfere with reliable detection.
- Abrupt edges: The robot may interpret a raised lip or sudden gap as an obstacle.
- Incorrect mapping: The ramp or nearby room may be marked as inaccessible.
- Poor alignment: The robot may approach from an angle that prevents a smooth climb.
Correct the physical cause first. If the robot still stops, follow the manufacturer’s sensor-cleaning and mapping instructions for your model.
Fine-Tune Ramp Edges and Alignment
Smooth ramp edges help the robot maintain wheel contact during floor transitions. Even a shallow incline can cause trouble if the entrance or exit has a sudden bump.
Check the lower edge first. It should meet the floor without leaving a raised lip that the front wheels must climb before reaching the main slope.
Next, examine the upper edge. A sharp transition between the ramp and the higher floor can cause the underside to scrape or the drive wheels to lose traction.
Fine-tune the installation by checking:
- Lower contact: The ramp rests against the floor without a large gap.
- Upper contact: The top meets the threshold without a raised ledge.
- Side alignment: The ramp sits squarely across the doorway.
- Surface condition: No loose coating, exposed fastener, or sharp corner obstructs movement.
- Stability: The structure remains level and secure during crossing.
Use sanding or careful reshaping to remove rough areas. Avoid removing so much material that the ramp becomes weak or develops a new gap.
If the robot frequently drifts sideways, a wider ramp or a better-aligned approach may help. However, avoid adding tall side barriers that could interfere with its bumper or navigation sensors.
Retest after each meaningful adjustment. A successful ramp allows the robot to move across the threshold smoothly, without stopping for manual assistance.
Use Ramps for Multi-Level Homes
Robot vacuum ramps are most useful for small height changes between rooms on the same floor. They can help with raised door thresholds, floor transitions, and certain low steps.
Many traditional robot vacuums have threshold limits around 0.8 inches, or approximately 20 mm, although newer designs may support higher obstacles. Always compare the actual height with your model’s specifications.
For homes with several small level changes, measure each transition separately. Different thresholds may require different ramp lengths, widths, or surface finishes.
Consider these steps when planning access between rooms:
- Record each threshold’s height and width.
- Calculate a ramp slope for each location.
- Check the available floor space on both sides.
- Keep doors, walking paths, and furniture access clear.
- Use secure, non-slip materials.
- Test each crossing before relying on scheduled cleaning.
Some models also provide software settings that help them recognize ramps. For example, ECOVACS threshold troubleshooting instructions describe adding a threshold ramp through the map settings on supported models.
This type of setting can help with navigation, but it does not increase the robot’s physical climbing ability.
A ramp is not a practical replacement for a staircase. Robot vacuums are not designed to climb ordinary stairs, and a steep connecting ramp can create serious fall and navigation hazards.
For separate floors, carry the vacuum to the other level and use its multi-floor mapping feature if supported.
Key Takeaways
- A manufacturer’s threshold-height rating does not automatically tell you the maximum continuous ramp angle.
- The formula rise ÷ tan(angle) calculates horizontal distance, while rise ÷ sin(angle) calculates the sloped surface length.
- An 18-inch width is a useful design example, but the correct width depends on your robot and doorway.
- Traction, underside clearance, and edge shape can cause failure even on a gentle ramp.
- Dark surfaces may confuse cliff sensors. Never defeat these safety devices to force a crossing.
- Use ramps for manageable floor transitions, not as substitutes for stairs between floors.
Frequently Asked Questions
How to Measure the Angle for a Ramp?
Measure the ramp angle with a digital inclinometer or a protractor placed against the sloping surface. You can also calculate it using arctan(vertical rise ÷ horizontal run). Measure both distances in the same units, and make sure your calculator is set to degrees. Compare the result with your robot’s supported incline.
Is 12 Degrees Too Steep for a Ramp?
A 12° ramp is within the climbing capability of many robot vacuums, but it is not safe for every model. For example, a ramp with a 12-inch horizontal run and a 2.5-inch rise has an angle of approximately 11.8°. Check your robot’s published limit and test both climbing and descending before regular use.
What Is a Good Door Threshold Ramp for a Robot Vacuum Cleaner?
A good door threshold ramp has a gentle, model-compatible slope, enough width for stable movement, and a secure non-slip surface. Plywood, MDF, and rubber are common options. An 18-inch-wide design may suit many vacuums, but measure your robot and doorway first. Smooth both ends to prevent wheel catching and underside scraping.
How Long Should a Ramp Be for a 30-Inch Rise?
A 30-inch rise requires approximately 6.9 feet of horizontal run at 20°, or 11.8 feet at 12°. These are mathematical measurements, not recommendations for robot vacuum use. A 30-inch height difference is far beyond an ordinary doorway threshold, and a robot vacuum ramp across such a drop could be unsafe. Move the robot between levels manually instead.
Conclusion
A reliable robot vacuum ramp starts with accurate measurements and a slope your model can handle. Choose a firm, non-slip material, calculate enough horizontal distance, and smooth the transitions between floor levels.
Before using the ramp for scheduled cleaning, test several crossings in both directions. If the robot slips, scrapes, or hesitates, adjust the ramp rather than forcing a steeper climb. The best design allows your vacuum to cross a threshold consistently without putting its wheels, sensors, or stability at risk.
Sources
- eufy Support: Omni C30 Edge: Confirms the model’s 15° maximum climbing slope and 20 mm threshold limit.
- Roborock Support: Maximum Threshold Height: Lists climbing-height specifications for several older Roborock models.
- iRobot Support: Roomba Threshold Clearance: Provides the manufacturer’s published 5/8-inch threshold crossing specification for the models covered.
- OpenStax: Right Triangle Trigonometry: Explains the tangent and sine relationships used to calculate ramp dimensions.
- eufy: Robot Vacuum Ramp Guide: Covers ramp construction, suitable materials, non-slip surfaces, and testing.
- eufy Support: Threshold Crossing Troubleshooting: Explains traction limitations and recommends ramp strips on both sides when appropriate.
- iRobot Support: Error 6 and Cliff Sensors: Explains false cliff detection on dark surfaces and sensor-cleaning guidance.
- ECOVACS Support: Threshold Ramp Mapping: Documents threshold-ramp map settings and related troubleshooting steps for supported models.