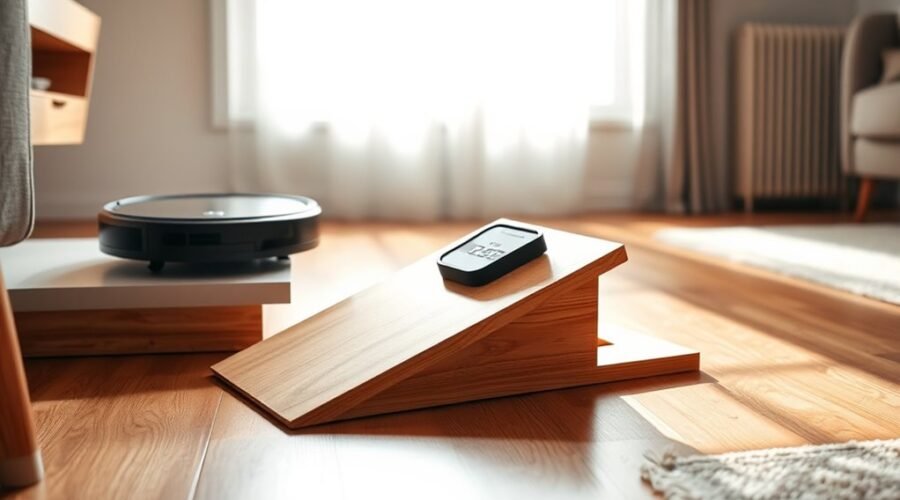
A safe robot vacuum ramp slope usually stays below 20°, with performance dropping as the angle approaches 24.2°. The first step is to measure the threshold height from the lower floor to the top edge in millimeters. From there, ramp length can be estimated using height divided by the tangent of the target angle. Material choice, edge alignment, and sensor response can then determine whether the design will actually work.
What Angle Is Safe for a Robot Vacuum Ramp?
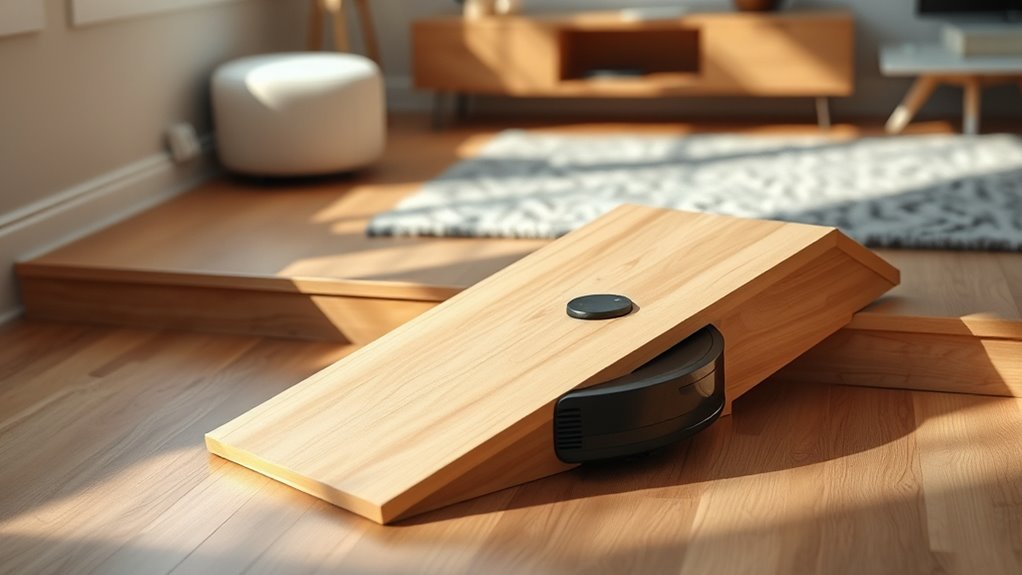
A robot vacuum ramp is generally considered safe when the slope is kept at 20° or less, as this range supports reliable climbing while reducing the risk of high-centering and loss of traction. This threshold reflects a practical boundary for consistent climbing performance across most units.
Experimental data indicate that some vacuums can ascend and descend a ramp near 21.5°, yet reliability declines as angles rise toward 24.2° and above, where failures become more likely. Ramps in the 21.5° to 25.5° band may still function, but they sit in a marginal zone where traction and clearance become uncertain.
A gradual incline improves approach geometry, helping the vacuum shift without abrupt load changes. For users seeking autonomy and less obstruction, precise slope calculation is essential. A gentler ramp enlarges the operational margin, limits sticking, and preserves access without imposing unnecessary mechanical strain.
Measure Your Threshold
The threshold height should be measured from the lower floor to the top edge using a ruler or tape measure, with results recorded in millimeters for precision.
The doorway width should also be checked to confirm that the planned ramp can fit without obstruction.
Both left and right sides of the threshold should be noted, since small height differences can affect ramp design and performance.
Measure Threshold Height
Using a ruler or tape measure, the vertical distance from the lower floor to the top edge of the threshold should be measured in millimeters at both the left and right sides to capture any height variation.
This threshold height defines whether the robot vacuum can cross unaided or requires ramp design support. To measure your threshold accurately, record each value separately, then compare the higher reading and the difference against the machine’s published climbing limit.
If the discrepancy is within specification, passage may be possible without added structure, preserving cleaner movement and user autonomy.
For ramp design, round the measured height down to the nearest millimeter to offset mounting tape or material thickness. Such precision supports reliable access and reduces avoidable obstruction.
Check Doorway Width
After threshold height is recorded, doorway width should be measured to confirm that the ramp can fit without interference. A measuring tape provides the most reliable result, especially around door thresholds where trim, casing, or other protrusions can reduce usable space.
Standard threshold ramp widths of 18 inches, or about 457 mm, are generally suitable for robot vacuums and support stable passage. The measurement should follow the actual frame geometry: inner sides are used when the frame extends to the lower floor, while outer sides apply if it extends to the upper floor.
The final ramp length should be set about 2 mm shorter than the measured width, allowing for wood expansion and preserving free movement. This precise measure supports accessible, self-directed transit.
Note Left-Right Differences
When measuring a threshold for ramp design, both the left and right sides should be checked to identify any height discrepancy that could affect fit and performance.
A measuring tape should record each side’s threshold-climbing height from the lower floor to the upper edge, excluding mounting tape. The resulting height difference indicates whether a level or slanted ramp is required.
Rounded down to the nearest millimeter, the values support precision and free movement. If both sides match, a uniform profile is suitable; if not, a slanted ramp can reconcile uneven elevations without compromising access.
- Left side height
- Right side height
- Measured height difference
- Resulting ramp angle
- Threshold-climbing height limit
Calculate Ramp Length
| Variable | Value |
|---|---|
| Height | Threshold difference |
| Angle | ≤ 20° |
| Formula | Height / tan(Angle) |
| Example | 10 cm → 28.6 cm |
| Adjustment | 2 mm shorter |
A 10 cm rise at 20° yields about 28.6 cm of ramp length. Increasing length lowers the slope angle and improves traction. Accurate configuration should remain 2 mm shorter than the measured height to offset wood expansion, keeping the path controlled, accessible, and materially liberatory for autonomous movement.
Choose a Climbable Ramp Slope
A ramp length calculation only becomes useful once the slope is selected to match the robot vacuum’s climbing capability. For most models, a ramp slope of 20° or less remains the preferred threshold, because it supports stable ascent and descent with minimal risk of hesitation.
Testing indicates that some units can climb near 21.5°, but performance degrades as angles approach 24.2° and above, where failure is more likely. An incline should thus be treated as a controlled parameter, not a guess.
Gradual shifts support clearer motion planning, reduce confusion at the edge, and improve passage across thresholds. Accurate height measurement, paired with slope selection, helps guarantee the ramp remains climbable for the specific robot vacuum model.
A longer ramp can also moderate angle perception, giving the machine a clearer path to freedom of movement.
- Keep the ramp slope at or below 20°
- Verify the vacuum’s climbing ability by model
- Test near 21.5° only with caution
- Avoid thresholds near 24.2° and above
- Use a longer ramp to soften shifts
How Ramp Material Affects Traction
Ramp material strongly influences traction, and smoother surfaces such as particleboard typically reduce wheel grip compared with textured finishes. For a robot vacuum, the ramp material determines whether traction is sufficient to convert motor force into upward motion or whether the wheels slip and stall.
Tests have shown that particleboard can trigger high-centering even at relatively low angles, making it a weak option for reliable ascent. By contrast, rubber and other textured finishes increase friction, improving adherence and reducing loss of control on slopes.
Particleboard can cause high-centering at low angles, while rubberized finishes improve traction and control on slopes.
This becomes especially important as incline rises, because the robot vacuum’s climbing capacity declines quickly beyond about 20°. A non-slip surface consequently supports more consistent performance, enabling the machine to move with less wasted effort and fewer failures.
From an analytical perspective, the safest design choice is a ramp material that maximizes traction while remaining stable under repeated passes and varying wheel loads.
Build a Wide, Stable Robot Vacuum Ramp
An 18-inch-wide ramp provides the lateral stability needed for a robot vacuum to maintain alignment and traction while crossing thresholds. A robot vacuum ramp should be built from plywood or MDF, since both materials offer sufficient rigidity under repeated load.
The angle should remain at 20° or less to preserve ascent efficiency and reduce wheel slip. A broader surface also supports liberated movement by limiting sideways drift and preserving control over narrow passages.
- Use a full 18-inch deck for stable tracking.
- Cut the ramp to a gradual incline matched to threshold height.
- Select plywood or MDF for structural durability.
- Apply rubber or textured coating to increase grip.
- Keep the angle shallow to avoid high-centering.
This configuration creates a precise interface between floor levels, allowing thresholds to be crossed with consistent traction and minimal resistance.
Test the Ramp at a Low Angle First
Testing should begin at a low angle, such as 11.2°, to reveal high-centering, traction loss, or alignment problems before steeper settings are attempted. At this threshold, the robot vacuum can climb only if wheel grip and chassis clearance remain stable under load.
The test should be repeated after each reset of the mapping system so that starting conditions remain comparable and the climbing ability can be assessed without prior path bias. If motion is smooth, the angle may be increased in small increments, typically toward 21.5°, where successful adaptations have been observed.
Each step should be monitored for reduced speed, slip, or stall. When performance degrades near 24.2°, the operator should reduce the angle and preserve the safest value.
Ramp material should also be matched to the surface texture, because traction changes alter results. This sequence provides a disciplined, emancipatory method for measuring slope tolerance.
Avoid Cliff Sensor Issues
Cliff sensor behavior becomes a limiting factor once a ramp angle has been selected, because these sensors are designed to detect sudden drops and can misread surface obstructions as hazards.
In practice, cliff sensors rely on fixed thresholds, so any material that disturbs the reflected signal may trigger avoidance or abort a climb. Black gaffer’s tape should not be used on ramps, since it can distort obstacle detection and make the vacuum reject the surface entirely.
After each trial, the map should be reset so prior routing data does not mask true readings. Appropriate materials and dimensions reduce misreads, preserving reliable passage.
- Use bare, uniform ramp surfaces.
- Avoid dark tape near sensing zones.
- Reset the map after every test.
- Verify sensor response at each angle.
- Confirm dimensions support stable obstacle detection.
Fine-Tune Ramp Edges and Alignment
Fine-tuning the ramp edges is essential for maintaining smooth, predictable shifts, since rough or uneven interfaces can interrupt wheel contact and increase the risk of high-centering. The ramp edges should be sanded to remove sharp shifts and preserve alignment across the full approach. A clean profile reduces resistance, allowing the robot vacuum to cross thresholds without hesitation or corrective wobble.
Ramp width near 18 inches can improve stability by distributing load more evenly during ascent and descent. The ramp must remain level, firmly seated, and free from materials such as black Gaffer’s tape that may interfere with cliff sensors or distort readings.
After installation, repeated testing is necessary to detect minor misalignment, verify traction, and refine the geometry. Each adjustment should be measured against observed movement, not assumption, so the vacuum retains independent access and predictable operation.
Precise finishing turns a simple incline into a controlled path.
Use Ramps for Multi-Level Homes
In multi-level homes, ramps are often necessary for robot vacuums to move between floor heights, especially when thresholds exceed 0.8 inches. Their purpose is to extend the navigation system across barriers without forcing manual lifting or limiting access to rooms.
A slope of 20° or less is technically preferable; steeper inclines increase wheel slip and may push the chassis into high-centering near thresholds. Wider ramps, ideally 18 inches, improve tracking stability and give the robot a clearer path. Construction should use a gradual incline to reduce climbing angle and preserve traction.
- Measure each threshold precisely.
- Keep the ramp angle below 20°.
- Use an 18-inch width when possible.
- Test traversal after installation.
- Adjust the surface if motion hesitates.
Properly tuned ramps support autonomous movement, helping the machine cross level changes with less intervention and more freedom.
Frequently Asked Questions
How to Measure the Angle for a Ramp?
Measure the ramp angle with a protractor, inclinometer, or arctan(height/distance). He assesses ramp materials, safety standards, and incline ratios to verify precision, then rounds dimensions conservatively for reliable performance and accessible freedom.
Is 12 Degrees Too Steep for a Ramp?
No; a 12-degree ramp is generally safe. For example, a 12-inch run rising 2.5 inches suits many devices. Ramp design considerations, robot vacuum capabilities, and slope safety guidelines indicate reliable traction and passage.
What Is a Good Door Threshold Ramp for a Robot Vacuum Cleaner?
A good door threshold ramp for a robot vacuum cleaner uses a 20° maximum slope, 18-inch width, durable ramp materials, and a non-slip surface; threshold design should match vacuum features and exact height differences.
How Long Should a Ramp Be for a 30 Inch Rise?
About 8.3 feet is required for a 30-inch rise; some may imagine a shorter span, but incline safety demands restraint. With appropriate ramp materials, vacuum compatibility improves, and a gentler slope extends to 17 feet.
Conclusion
A safe robot vacuum ramp rests on measured geometry, not guesswork. When the threshold height is paired with a slope at or below 20°, the incline remains smooth and climbable, like a narrow bridge rising steadily from floor to floor. At steeper angles, especially near 24.2°, performance weakens and traction falters. Careful measurement, proper material choice, and clean alignment turn a risky drop into a controlled, reliable passage.