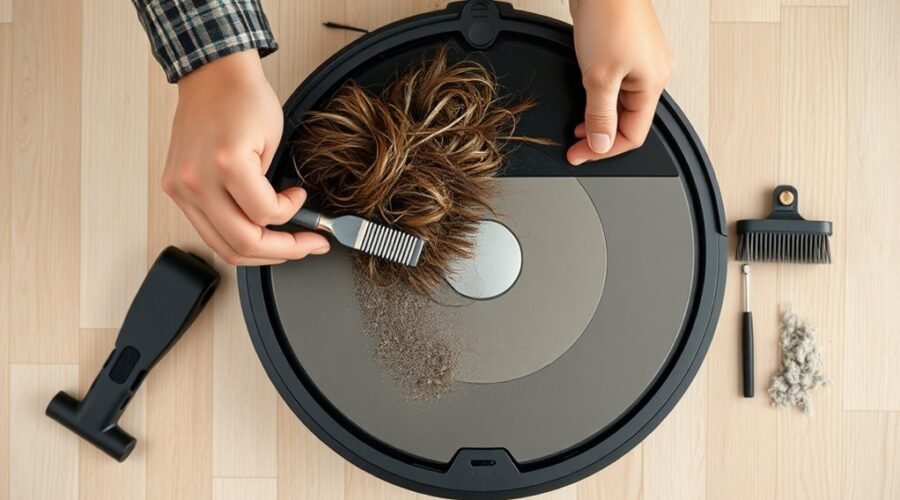
Keeping a robot vacuum’s main brush clean is not just routine maintenance; it directly affects suction, debris pickup, and motor strain. Hair, thread, and fine dust can bind the roll and reduce performance before the user notices a problem. The process is simple, but the wrong approach can damage bearings or warp components. The key steps begin with safe removal, and the details matter more than expected.
Why Main Brush Cleaning Matters
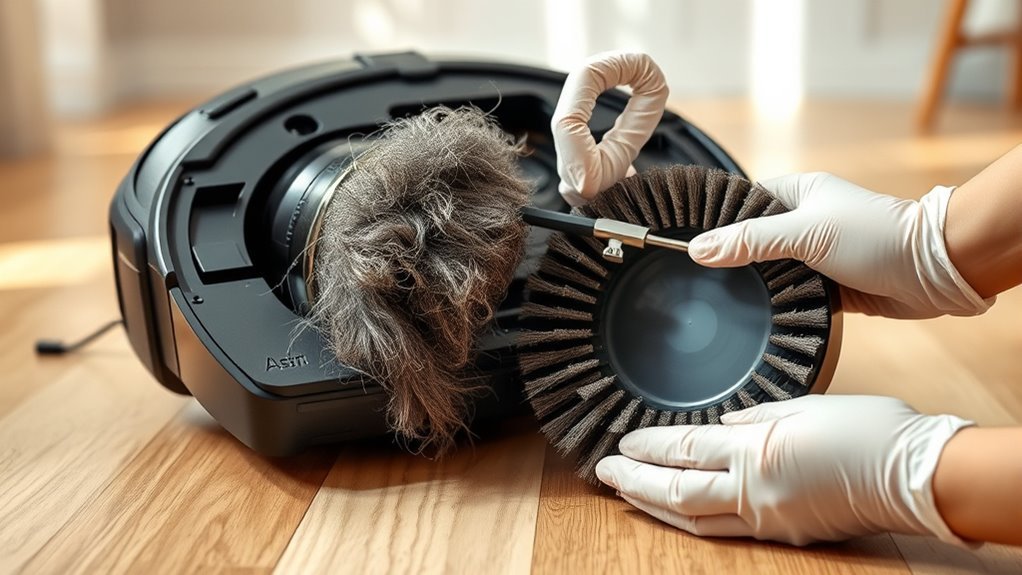
Regular cleaning of the main brush is essential because hair and debris can quickly tangle the bristles, limiting brush rotation and reducing cleaning performance.
The Main Brush must remain unobstructed so the vacuum can maintain consistent contact with flooring and preserve cleaning efficiency. When buildup is removed regularly, the motor faces less resistance, which lowers mechanical strain and supports longer service life.
Keep the Main Brush unobstructed to maintain floor contact, reduce motor strain, and preserve cleaning efficiency.
This maintenance also helps the machine capture dirt rather than redistribute it, a practical advantage in homes where liberated movement should not be constrained by repeated cleaning passes.
Timely attention to the Main Brush further reduces the likelihood of noise and excess heat during operation, both of which can interfere with dependable performance.
In pet-filled environments, the benefit is especially clear: frequent brush care keeps the system responsive, efficient, and capable of delivering steady floor coverage without unnecessary interruption.
Signs Your Main Brush Needs Cleaning
Visible buildup around the main brush is a clear indicator that cleaning is due, especially when clumps of hair or debris are wrapped tightly around the bristles.
When hair wrapped around the roller persists, airflow and agitation decline, reducing pickup efficiency. Unusual noises during operation, such as grinding or rattling, often indicate obstruction or damage in the brush assembly.
Streaks of dirt left on floors signal that soil is no longer being lifted effectively and that the brush needs immediate attention. Reduced mobility, hesitation, or erratic cleaning paths can also reflect resistance caused by packed debris.
Regular inspection helps detect these failures early, preventing wear and preserving performance. A disciplined maintenance routine supports operational independence: the machine works cleaner, longer, and with less intervention.
If suction seems compromised, clean the filter as part of a full diagnostic check, since clogged airflow can mask brush problems and reduce overall cleaning force.
How to Prep for Cleaning
Before any maintenance begins, the robot vacuum should be powered off to eliminate the risk of electric shock.
Necessary tools, such as scissors and a microfiber cloth, should be gathered in advance, and a clean workspace should be prepared to keep small parts organized.
Brush access should then be cleared by consulting the user manual or model-specific instructions for proper removal.
Power Off First
The robot vacuum should be powered off completely and removed from its charging dock before any brush cleaning begins, reducing the risk of accidental activation and injury.
This power off first step is essential for a robot vacuum cleaner because it isolates the device from stored energy and prevents unexpected motor movement.
After shutdown, a brief pause should be observed so residual charge can dissipate fully before the brush is touched.
Verification of the off state should be direct, not assumed.
A liberated maintenance routine depends on control: the unit must remain inactive, unplugged from the dock, and stable on a clean, dry surface.
Only then is the main brush ready for safe handling, without exposing the user to needless mechanical hazards.
Gather Cleaning Tools
With the robot vacuum fully powered off, the next step is to assemble the cleaning tools and workspace. A controlled setup reduces friction and supports independent maintenance.
To gather cleaning tools, place the unit on a clean, flat surface and prepare a small container to empty debris and hair as they are removed.
- Scissors: used to cut tightly wrapped strands.
- Microfiber cloth: removes fine dust from the brush area.
- Small container: collects debris for orderly disposal.
- Model guide: confirms the brush removal mechanism before handling components.
This preparation allows the user to work efficiently, avoid unnecessary interruptions, and maintain full control of the cleaning process.
Precision at this stage preserves the vacuum’s performance and simplifies the next operation.
Clear Brush Access
Power down and unplug the robot vacuum before any brush handling to eliminate electrical shock risk.
Next, clear brush access by locating the brush cover and opening it through the release button or sliding latch. This step creates direct access to the main brush and supports a clean, controlled workflow.
The brush roll should then be lifted from its housing carefully, without stressing adjacent parts or connectors. Scissors and a microfiber cloth should remain within reach for immediate use.
Small items such as screws, caps, or clips should be set aside in an organized position for later reassembly.
For users who want to Empty My Robot Vacuum of hidden debris and reclaim maintenance autonomy, disciplined preparation reduces errors and improves cleaning efficiency.
Remove the Main Brush Roll Safely
To remove the main brush roll safely, the robot vacuum should first be powered off to eliminate any risk of electric shock. The user then follows the manufacturers instructions for the specific model, opening the brush cover through the manual or the iRobot Home App.
Power off the robot vacuum first, then follow the model’s instructions to open the brush cover safely.
This disciplined sequence preserves control and reduces errors, allowing the operator to remove the main brush roll safely without unnecessary strain.
- Confirm the power is off.
- Open the brush cover as directed.
- Lift the roll straight from its compartment.
- Note its orientation for later reinstallation.
The brush should be handled with measured precision, avoiding force that could distort the housing or bearings.
Any visible obstruction may be addressed before full extraction, but only within the limits of the model guidance.
After removal, the brush should be placed in a clean, dry location to protect it from contamination and preserve readiness for the next cleaning stage.
Cut Away Tangled Hair
With the vacuum powered off, scissors should be used to cut along the main brush grooves, releasing tangled hair without damaging the bristles.
Sharp tools should be avoided because they can compromise the brush structure and reduce cleaning performance.
Once the hair is loosened, the brush grooves should be cleared of debris to restore smooth rotation and efficient operation.
Safe Hair Removal
Using sharp scissors, the tangled hair on the robot vacuum’s main brush should be carefully cut along the brush grooves to free the bristles without damage. This safe hair removal method preserves brush integrity and supports a cleaner, more liberated cleaning cycle.
Power off the robot before removal to eliminate shock risk.
- Inspect the brush regularly, especially in pet homes.
- Cut only along the grooves, not across the bristles.
- Lift away all loosened hair and debris from the brush and housing.
- Reinstall the brush securely and confirm smooth rotation.
Weekly attention is sufficient for homes without pets; higher frequency is required where pet hair accumulates. Consistent maintenance prevents clogs, reduces strain, and restores dependable performance.
Clean Brush Grooves
The robot vacuum should be powered off before cleaning the brush grooves.
Using scissors, the operator should carefully cut away tangled hair along the grooves of the main brush, with special attention to sections where strands are tightly wrapped.
To clean brush grooves effectively, clumps of pet hair must be inspected and removed on a regular basis, since buildup can restrict rotation and reduce cleaning efficiency.
After cutting, all loose debris should be cleared so the grooves remain open and unobstructed.
Weekly maintenance is recommended, especially in homes with pets, to prevent accumulation that may increase motor strain.
This disciplined routine preserves brush performance, supports independent operation, and keeps the vacuum ready for efficient, uninterrupted service.
Clean the End Caps and Bearings
Carefully wipe the end caps and bearings of the main brush with a microfiber cloth to remove trapped debris that can restrict rotation. A precise inspection should follow, confirming that hair and dirt are not binding the brush roll. This maintenance supports smoother movement and reduces wear, helping vacuum cleaners preserve performance over time.
For users consulting a cleaner buying guide, regular bearing care is a practical criterion for long-term freedom from avoidable repairs.
- Remove visible buildup from both end caps.
- Check each bearing for trapped fibers or grit.
- Verify both ends rotate without resistance.
- Ascertain every component is completely dry before reassembly.
Obstructions at either end can compromise cleaning efficiency, so both sides require equal attention. Clean bearings extend service life and keep the main brush operating with less friction, giving the machine unrestricted motion and more reliable floor coverage.
Rinse and Dry the Brush Roll
Rinse the main brush roll under lukewarm water to dislodge dirt and debris, making sure any remaining clogs are cleared from the bristles and core.
The process should remain controlled; the brush roll must not be soaked completely, because prolonged immersion can weaken adhesives and bearings.
After rinsing, a microfiber cloth should be used to remove surface moisture and loosened residue from the bristles, shaft, and ends.
This step supports a clean, efficient rinse and dry routine that preserves the brush’s structure.
The roll should then air dry in an open area for at least a few hours, with no heat source applied.
Complete drying is essential, since trapped moisture can encourage mold and corrosion.
Once fully dry, all components are ready for continued robot vacuum work, maintaining performance, reliability, and longevity.
Put the Main Brush Back Together
Once the brush roll is fully dry, reassembly can begin by aligning the main brush with the end caps and fitting it back into the housing. This step restores the main brush to service without compromising performance or cleanliness. The process should remain deliberate, precise, and free from haste.
- Confirm the brush is fully dry before reassembly to reduce mold and corrosion risk.
- Align the brush roll carefully with the end caps so rotation remains smooth.
- Seat the brush in the bearings, then check for proper fit and absence of drag.
- Secure the brush cover tightly, following manufacturer guidance to protect warranty coverage.
After reassembly, the main brush should turn without resistance or noise. Any misalignment can diminish suction efficiency and invite debris into the chamber.
A correct rebuild preserves reliable operation and supports the user’s freedom from avoidable maintenance failures.
How Often to Clean the Main Brush
For most homes, the main brush should be cleaned weekly to preserve suction efficiency and reduce wear from debris buildup. This baseline answers how often to clean for standard conditions and gives a simple maintenance rhythm.
Homes with pets, long hair, or heavy shedding need to clean the brush every few days, since tangles and compacted fibers can restrict rotation and strain the motor. Seasonal changes may require tighter intervals as dust, grass, and hair accumulate faster.
Each cleaning cycle should include a quick rotation check; resistance, wobble, or noise indicates an early need to clean. If debris repeatedly collects, inspect the side channels and brush caps as well.
Even with disciplined care, the roller should be replaced every 6 to 12 months to maintain consistent pickup. Regular attention keeps the vacuum free to move efficiently and reduces avoidable maintenance burdens.
Frequently Asked Questions
How Do I Clean the Main Brush on My Roborock?
Power off the Roborock, remove the brush cover, cut tangles from the main brush, wipe the compartment, and air-dry fully. Regular robot maintenance prevents wear; inspect for brush replacement if bristles or bearings degrade.
My Roomba Main Brush Is Stuck. What Can I Do to Fix It?
One in five brush failures stems from tangled hair. He should power off the Roomba, inspect obstructions, perform brush removal, cut debris, clean end caps, then follow maintenance tips; persistent sticking suggests motor inspection or support.
What Are the Most Common Problems With Robot Vacuums?
Common robot vacuum problems include brush tangling, suction loss, battery issues, navigation errors, software glitches, and charging problems. Each typically reduces performance, requires inspection, and benefits from routine maintenance to restore reliable autonomous cleaning.
How to Clean a Vacuum Brush Head?
Power off, remove, and inspect. Use scissors and a microfiber cloth for brush maintenance, cut trapped hair, wipe end caps, clean bearings, then air-dry completely before reassembly. Such cleaning tools preserve performance and restore autonomy.
Conclusion
In practice, a robot vacuum’s main brush performs best when maintained like a precision bearing: small accumulations can create large losses in efficiency. One technician noted that a brush packed with pet hair reduced suction noticeably after just a week, while a cleaned and dried roll restored normal pickup immediately. Regular inspection, careful removal, proper rinsing, and full drying preserve brush life, protect internal components, and keep cleaning performance consistent over time.