A robot vacuum’s LiDAR sensor needs careful cleaning to preserve navigation accuracy and prevent wear. The process starts with power removal and a close look at the sensor housing, where dust often collects in hidden edges. The right tools matter, and the wrong ones can cause scratches or residue. A few simple steps can restore performance, but some signs suggest the issue is more than surface dirt.
Why Clean Your Robot Vacuum LiDAR Sensor
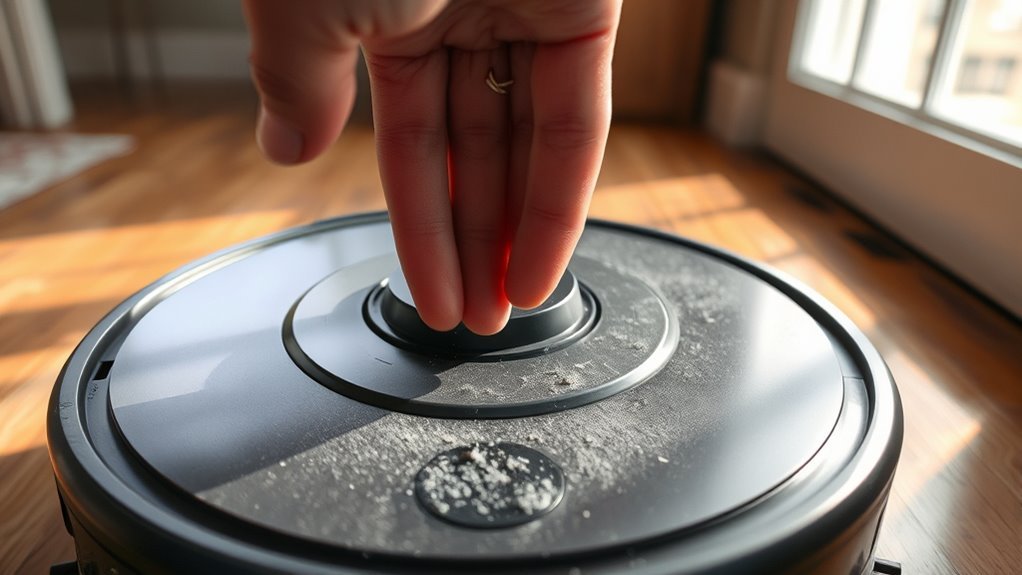
Keeping the LiDAR sensor clean is essential for maintaining a robot vacuum’s navigation accuracy and reliability. Dirt detection depends on an unobstructed LiDAR sensor, because even minor smudges can distort navigation and obstacle sensing.
When owners clean the robots on a regular maintenance schedule, they support peak performance and reduce the likelihood of missed zones, repeated passes, or collisions. A clean sensor also improves cleaning efficiency by preserving accurate route planning, allowing the machine to cover floors systematically and return to its dock without error.
Preventing mapping errors matters because contaminated optics can cause the vacuum to become lost, misread room boundaries, or interrupt its cycle prematurely. Over time, consistent upkeep lowers mechanical strain, helping extend the unit’s service life by limiting incorrect movement patterns.
Contaminated optics can cause mapping errors, making the vacuum lose direction, misread boundaries, and strain its system over time.
For users seeking reliable automation and practical freedom, maintaining the LiDAR sensor is a precise, low-effort measure that protects function, accuracy, and autonomy.
What Tools You Need for the Job
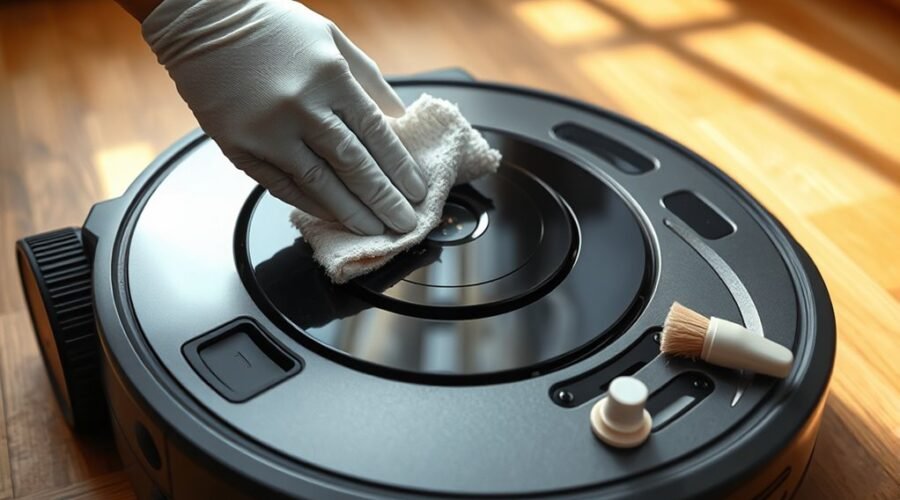
The required tools are minimal but specific: a dry microfiber or lint-free cloth, compressed air, and, if needed, a soft brush for dislodging stubborn dust.
These items support safe cleaning by limiting direct contact with the LiDAR lens and reducing the risk of scratching or contamination.
Water and liquid cleaners should be excluded, since moisture can compromise the sensor’s electronics and alignment.
Essential Cleaning Tools
A few basic, nonabrasive tools are sufficient for cleaning a robot vacuum’s LiDAR sensor safely and effectively. To clean the sensors, use a dry microfiber cloth on exposed lens surfaces; it removes grime without scratching and helps maintain clarity.
A soft brush can dislodge dust from surrounding edges, while a cotton swab reaches narrow crevices with controlled precision. Compressed air may clear loose particles from robot vacuum sensors, provided the canister stays upright.
Avoid alcohol-based cleaners and any liquid, since they can degrade coatings and reduce performance.
- Dry microfiber cloth: wipe the lens gently.
- Soft brush and cotton swab: clear dust from tight areas.
- Compressed air: remove loose debris carefully.
Used correctly, these tools help maintain your robot vacuum and preserve sensing accuracy.
Safe Handling Supplies
For safe LiDAR maintenance, only a few nonabrasive supplies are required: a dry microfiber cloth to remove dust without scratching or leaving lint, compressed air to clear loose debris from around the sensor, cotton swabs for tight crevices, and a flashlight to reveal hidden buildup during inspection.
A soft microfiber cloth should gently wipe the lens and housing, allowing the surface to clean efficiently without abrasion. Compressed air must be applied from a safe distance to dislodge particles while limiting moisture risk.
Cotton swabs extend reach into edges where sensor issues often begin. Liquids should be avoided entirely, since moisture can compromise function and create malfunction.
The flashlight supports precise inspection, helping identify residue before it becomes obstruction.
Where the LiDAR Sensor Is Located
The LiDAR sensor is typically mounted on the top of the robot vacuum, where it can maintain an unobstructed view of the surrounding area.
It is often enclosed in a protective dome or housing that shields the mechanism while preserving its scanning range. This placement supports accurate room mapping and reliable navigation.
LiDAR Position On Top
Perched on the top of the robot vacuum, the LiDAR sensor serves as the primary mapping component, scanning the surrounding space with laser beams that reflect off nearby surfaces to guide navigation.
This elevated placement preserves an unobstructed field for accurate mapping and efficient path planning. The LiDAR sensor is usually enclosed by a protective dome, which limits dust intrusion without compromising rotation or scan quality.
- Clean the dome with a dry, lint-free cloth to prevent scratches.
- Avoid liquids, abrasives, and forceful pressure during cleaning.
- Follow a regular cleaning frequency; every few weeks is typical, with tighter intervals in dust-prone areas.
Such maintenance supports peak performance, reduces mapping errors, and helps the system remain precise, responsive, and unobstructed.
Common Sensor Housing Locations
LiDAR sensor placement varies by model, but it is most commonly housed on the top of the robot vacuum within a protective enclosure that supports unobstructed scanning of the room.
In some designs, the LiDAR sensor sits at the front to improve mapping before contact with obstacles. The sensor housing may include a transparent plastic cover that shields internal components while preserving laser transmission.
Certain units use a rotating LiDAR assembly to deliver a 360-degree view and strengthen obstacle avoidance.
During a cleaning routine, regular cleaning should be paired with a brief inspect of the protective housing to verify alignment and remove dust or debris. This method preserves sensor integrity, supports reliable navigation, and maintains peak performance without unnecessary intervention.
How to Clean the LiDAR Sensor Safely
A clean, dry lint-free cloth should be used to gently wipe the LiDAR sensor, with no pressure applied that could scratch the surface. The LiDAR sensor must remain free from moisture, so no cleaners or liquids should be applied directly.
Regularly inspect for dust buildup, and clean every 1–2 weeks to maintain peak performance, especially in homes with pets. Use compressed air only when debris remains, and direct it without contact.
- Power off the robot vacuum before any cleaning.
- Wipe the sensor surface with a clean, dry cloth using light, controlled strokes.
- Check the manufacturer’s guidelines for model-specific limits and procedures.
This method preserves function while supporting independent, maintenance-aware use.
Careful routine cleaning prevents signal interference, reduces wear risk, and keeps the mapping system responsive. By following manufacturer’s guidelines, the user protects the sensor’s precision without unnecessary intervention.
How to Clean Around the LiDAR Housing
Before cleaning, the robot vacuum should be powered off and unplugged to prevent accidental activation or damage around the LiDAR housing. A controlled clean preserves sensor freedom and navigation accuracy.
| Area | Method |
|---|---|
| Exterior housing | Wipe gently with a soft, lint-free cloth. |
| Tight edges | Use a cotton swab or soft brush. |
| Distance | Keep hands and tools at least 0.5 meters from the LiDAR sensor. |
| Inspection | Check for dust, debris, and obstructions regularly. |
The cloth should move in short, deliberate passes, lifting dust without pressing on the LiDAR shell. Around seams and recesses, a soft brush or swab can remove debris with minimal force. Each motion should remain precise, avoiding contact that could scratch the housing. Regular inspection helps reveal buildup before it affects mapping or navigation. If the area appears obstructed, clean again methodically until the exterior is clear.
What Not to Use on LiDAR Sensors
Certain cleaning products and tools should be kept away from the LiDAR sensor to preserve its optical accuracy and housing integrity. The unit should be treated as a precision optical device, not scrubbed or sprayed. A soft cloth may be used to gently clean nearby surfaces, but not the sensing window itself with force.
Keep LiDAR sensors protected—avoid scrubbing, spraying, or harsh cleaners to preserve optical accuracy and housing integrity.
- Alcohol-based cleaners: These can degrade the lens coating and reduce navigation precision.
- Abrasive materials: Scrubbing pads, rough cloths, or gritty wipes can scratch the surface and impair distance measurement.
- Liquids, high-pressure air, and cleaning agents: Direct liquid exposure may enter the housing, while strong air blasts can dislodge internal parts; detergents and solvents can leave residues that disrupt performance.
Sensors regularly benefit from careful inspection, yet the method must remain restrained. The safest practice is to avoid aggressive contact entirely and let the sensor remain unobstructed, stable, and free to operate with liberated accuracy.
How Often to Clean the LiDAR Sensor
The LiDAR sensor should be cleaned every 1 to 2 weeks to maintain accurate navigation, particularly in homes with dust or pet hair. This interval supports peak performance by limiting dirt buildup on the optics and housing.
Regularly clean the LiDAR sensor if the robot vacuum operates daily, because airborne debris can reduce mapping efficiency and create missed spots. In lighter-use environments, a monthly clean may be sufficient, provided performance remains stable. However, inspection should remain routine, since visible lint or dust accumulation indicates the need for immediate attention.
A dry cloth is the correct tool for each clean, as it removes loose particles without introducing moisture or residue. Consistent maintenance preserves sensor clarity, protects navigation freedom, and reduces dependency on corrective behavior.
A disciplined schedule lets the machine move with precision, map space accurately, and support a more autonomous cleaning routine over time.
What to Do if LiDAR Errors Continue
If LiDAR errors continue after routine cleaning, the sensor should be checked for remaining obstructions, trapped debris, or anything that could interrupt its scan path.
The operator should then verify that LiDAR sensors are not affected by outdated software, since software updates often resolve navigation issues. In a controlled environment, the robot should be run under adequate lighting, because low light can distort sensing on some models.
- Confirm the unit is clear, then clean your robot again using careful cleaning tips around the turret and housing.
- Review manufacturer software updates and apply them before repeating troubleshooting steps.
- Inspect for physical damage, including cracks or misalignment, and note any irregular motion.
If the fault persists, customer support should be contacted for advanced troubleshooting steps and service guidance.
This method preserves autonomy while limiting avoidable disruption and helps identify whether the problem is environmental, software-related, or mechanical.
When the LiDAR Sensor Needs Repair
When a robot vacuum’s LiDAR sensor no longer detects obstacles accurately or produces a reliable cleaning map, calibration or repair may be required to restore normal operation.
During troubleshooting, the unit should be inspected for physical damage, cracked housings, or dirt accumulation around the LiDAR sensor, since any obstruction can compromise functionality.
Erratic navigation, repeated collisions, or failure to complete a cleaning cycle often indicate that the sensor is misreading distances or no longer recognizing the room layout. In such cases, cleaning alone may be insufficient.
Erratic navigation or repeated collisions may signal a LiDAR sensor that needs more than a simple cleaning.
The user manual should be consulted to confirm recommended diagnostics, warranty terms, and whether the issue can be corrected by calibration or requires replacement.
If the LiDAR sensor continues to fail after basic checks, professional repair or servicing is the most methodical course. This preserves reliable operation, reduces waste, and supports a more autonomous cleaning system.
Frequently Asked Questions
How Do You Clean the Lidar Sensor?
He cleans the LiDAR sensor by using dry, lint-free cleaning tools, then compressed air for debris impact, preserving LiDAR technology and sensor maintenance. This method improves robot efficiency, vacuum performance, sensor calibration, with troubleshooting tips.
How to Clean a Robot Vacuum Sensor?
First, power off; then dust falls like surrender. Follow robot maintenance tips, sensor protection advice, and a cleaning supplies guide: dry cloth, soft brush, cotton swab. These vacuum troubleshooting steps improve LiDAR technology overview, robot vacuum benefits, home cleaning hacks, sensor performance enhancement.
How Do I Clean the Lidar Sensors on My Roborock Vacuum?
Clean Roborock LiDAR sensors with a dry microfiber cloth, powered off, then use compressed air lightly. LiDAR maintenance tips, Sensor cleaning techniques, Roborock troubleshooting guide, Vacuum optimization methods, Preventative care strategies, avoiding Common cleaning mistakes and Sensor performance issues, preserve Robotic vacuum features.
Can I Use Isopropyl Alcohol to Clean My Camera Sensor?
No, isopropyl alcohol is not recommended for camera sensor care. For camera maintenance, use safe methods: dry microfiber, minimal water if needed. Alcohol use may harm sensor types, coatings, and equipment protection; follow maintenance frequency guidance.
Conclusion
In the end, a clean LiDAR sensor often restores navigation just when the vacuum begins to drift, pause, or miss rooms. That small coincidence can feel almost intentional, yet it usually reflects nothing more than careful maintenance done at the right time. By powering off the unit, using dry tools, and avoiding liquids, the sensor remains protected. When errors persist despite cleaning, inspection or repair becomes the next logical, methodical step.