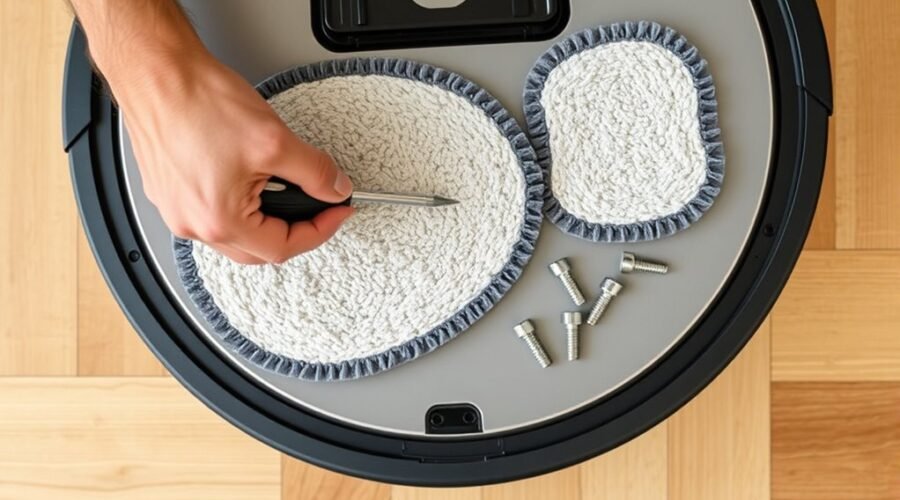
A robot vacuum mop pad holder that keeps falling off, wobbling, or showing a detection error can interrupt every mopping session. Common causes include a loose connection, trapped debris, worn attachment surfaces, or incorrect installation. The right fix depends on whether your robot uses a sliding lock, magnetic mount, or automatic mop attachment system.
Quick Answer
To fix a loose robot vacuum mop pad holder, remove trapped debris, inspect the mounting points, and reinstall the holder using your model’s locking method. Some Dreame models require power-on installation for magnetic attachment, while certain Roborock models use sliding latches. If the holder still slips or is not detected, restart the robot and check for damaged parts.
At a Glance
| Difficulty | Easy for basic cleaning and reinstallation |
| Tools Needed | Soft lint-free cloth, soft brush, and cotton swab |
Check That the Mop Pad Holder Locks In
)
A properly installed mop pad holder should sit evenly against the robot without unwanted movement. If it feels loose, first identify how your specific model secures the holder. Not every robot vacuum uses the same locking mechanism.
- Identify the connection: Look for sliding guides, locking clips, mounting holes, or a magnetic attachment point.
- Check the position: Make sure the holder is straight and no mop fabric is trapped between the mounting surfaces.
- Secure the holder: Slide or press it into place according to the manufacturer’s instructions. A clicking sound is expected only on models with a click-lock mechanism.
- Check for movement: Gently test whether the holder stays centered and securely attached.
For example, the Roborock S7 installation manual instructs users to slide the VibraRise mop cloth mount beneath the water tank until it clicks. Its mechanical latch should not be treated like a magnetic holder.
If the holder will not lock, inspect its clips, edges, and mounting slots. Cracked plastic, bent guides, or worn locking surfaces can prevent a secure fit.
A holder that repeatedly comes loose despite correct alignment may need replacement rather than stronger installation pressure.
Clean the Mop Disc and Contact Points
Dirt, hair, and dried cleaning residue can keep a mop disc from sitting flat. Cleaning the attachment surfaces removes obstructions that may cause wobbling or interfere with detection.
Work gently to avoid damaging the mount or nearby components.
Warning: Stop the cleaning cycle and switch off the robot before cleaning or inspecting its underside. Unplug the dock before cleaning dock components. Never pour water into mounting holes, electrical contacts, or internal openings.
- Remove the mop pad holder using the release method recommended for your model.
- Wipe the removable mop disc with a slightly damp cloth, if its manufacturer allows damp cleaning.
- Use a soft brush to remove dust or hair trapped around the attachment slots.
- Clean accessible contact surfaces with a dry, lint-free cloth or cotton swab.
- Inspect the holder for cracks, deformation, loose magnets, or worn attachment material.
- Let any damp-cleaned components dry completely before reinstalling them.
Drying protects the attachment surfaces from trapped moisture and residue. Moisture does not automatically weaken a magnet, but dirt, corrosion, or damaged mounting components can interfere with a reliable connection.
Keep the mop cloth attachment area clean as well. For example, the Roborock Qrevo-series manual identifies hook-and-loop pads on the mop cloth mount and instructs users to attach the cloth flat.
If the hook-and-loop material no longer grips the cloth, cleaning alone may not restore its holding strength. Replace the worn mop cloth or holder as appropriate.
Reinstall the Mop Pad Holder Correctly
Correct reinstallation depends on the robot’s mounting design. Some holders slide into guides, while others connect to a powered magnetic system.
Before reinstalling, make sure the mounting surfaces are clean and the holder is compatible with the robot model. Do not force a part that does not line up.
Check Holder Alignment
Place the holder directly against its designated mounting position. The edges should line up evenly, and the mop pad should lie flat without folding underneath the disc.
For rotating mop systems, check that each holder meets the correct mounting point. For sliding systems, follow the guide rails until the locking mechanism engages.
Use this checklist to identify installation problems.
| Check | Action | Result |
|---|---|---|
| Slots | Align holder edges with mounting guides | Even fit without gaps |
| Magnet | Attach manually on compatible models | Firm, centered hold |
| Wear | Inspect clips, disc, and attachment material | No cracks or deformation |
If the holder tilts or one mop sits higher than the other, remove it and check the mounting surface again. Hair, a folded cloth, or a misplaced disc can create an uneven fit.
A correctly seated holder should remain stable without excessive pressure or repeated adjustment.
Clean Attachment Points
Attachment points must be clear before the holder can seat properly. Even a small piece of trapped debris may prevent the mount from reaching its normal position.
Use a dry cloth to clean the mounting surfaces, then remove particles from accessible slots with a soft brush. Avoid sharp tools that could scratch the housing or damage a magnet.
Inspect any exposed metal surfaces for corrosion and check that the holder’s clips or attachment pads remain intact.
For detection problems, this cleaning step matters. Dreame’s Roller-series troubleshooting guide identifies dirt around the holder’s installation position as a possible cause of a “Mop Pad not Installed” alert.
Once the surfaces are clean, reinstall the holder according to its mounting design.
Reinstall After Restart
If the holder will not attach normally, restart the robot before trying again. This is particularly useful for models whose mop attachment mechanism depends on the powered state.
Some Dreame models require the robot to be on before the mop disc can attach. The Dreame X60 Pro Ultra Matrix troubleshooting guide explains that its mounting axle sleeve extends after the robot powers on.
- Remove the mop holder if it can be detached safely.
- Restart the robot using its normal power controls.
- Allow the robot to finish starting up.
- Reinstall the holder using the correct locking method.
- Check whether the app or robot recognizes the mop assembly.
Do not expect every model to produce a clicking sound. Magnetic holders may attach without a mechanical click.
If installation succeeds, run a short mopping test on a clear, level floor. Watch for unusual movement, detachment, or repeated detection alerts.
Confirm the Magnetic Attachment
On robot vacuums with magnetic mop holders, the connection should keep the disc centered and secure during normal operation. A holder that slips off under gentle handling may have a mounting or hardware problem.
First, confirm that your model actually uses magnetic retention. A sliding latch should be checked mechanically instead.
For compatible magnetic systems, check these points:
- Magnetic hold: With the robot in the required installation state, attach the holder and check whether it remains firmly seated.
- Holder position: Make sure the disc is level and properly centered against the mount.
- Surface condition: Look for corrosion, cracks, bent components, or trapped debris.
- Mop pad grip: Check whether the fabric remains attached to the holder through its hook-and-loop surface.
The Dreame X50 Ultra Complete troubleshooting instructions recommend checking installation while the robot is powered on, inspecting the hook-and-loop attachment, and restarting the unit if needed.
A gentle pull can help reveal an obviously loose connection, but avoid pulling hard enough to damage the mounting mechanism.
Also check how the holder behaves on different floor surfaces. If it stays attached on a smooth floor but falls off at carpets or thresholds, the problem may be floor clearance rather than magnetic strength.
If the connection is consistently weak or the disc is visibly damaged, replace the compatible component or contact the manufacturer.
Restart the Robot Vacuum and Test Again
A normal restart may clear a temporary software error that prevents the robot from recognizing the mop holder. It also gives the robot another chance to initialize its attachment mechanism.
Use the regular restart procedure for your model rather than immediately restoring factory settings.
- Stop any active cleaning task.
- Remove the holder if your model’s instructions require it.
- Switch the robot off using its normal controls.
- Wait briefly, then switch it back on.
- Reattach the holder and check the app or robot status.
- Start a short mopping cycle to confirm normal operation.
If the holder now works, the issue may have been temporary. Continue watching for repeated errors during normal cleaning.
If the same alert returns, record its exact wording or error code. The message can help distinguish a detection problem from a loose physical attachment.
For example, Dreame’s L60 Ultra reset guidance explains that resetting the system can clear stored settings, including scheduled cleaning and Wi-Fi configuration.
Warning: A factory reset is not the same as a normal restart. Depending on the model, it can erase saved settings and require another setup. Use it only after basic troubleshooting and follow the exact procedure in your manufacturer’s manual.
Set Mopping No-Go Zones
Mopping no-go zones help prevent the robot from entering areas where its mop holder could catch on flooring or obstacles. Carpets, raised thresholds, small steps, and loose cords are common trouble spots.
This setting is especially useful when the holder falls off during cleaning but remains secure during manual inspection.
- Open the robot vacuum’s companion app.
- View the saved map of your home.
- Find the no-mop zone or restricted-area feature supported by your model.
- Mark carpeted areas, troublesome thresholds, or other locations where the holder repeatedly catches.
- Save the changes and run a test cleaning cycle.
Keep the mapped boundaries clear of areas you still want to mop. Review them whenever furniture, rugs, or room layouts change.
Remove loose cables and small floor obstacles before starting. Digital boundaries cannot prevent every physical obstruction.
Dreame’s X40 Ultra Complete holder troubleshooting guide recommends no-mop zones to reduce detachment when the robot crosses carpets, thresholds, or small steps.
For robots with automatic mop removal, also confirm that the selected cleaning mode matches your intended task. Some models deliberately detach their mop holders at the dock before vacuuming carpets.
Fix Persistent Mop Detection Issues
If the robot still reports that the mop holder is missing, separate physical attachment problems from detection failures. A holder may fit securely but still trigger an error.
Start by checking the installation and the exact alert. Then test the software and mounting hardware before deciding whether professional service is needed.
Check Mop Installation
A mop detection error can occur when the holder is not fully seated or the robot cannot recognize the installed assembly. Incorrect parts and damaged mounting surfaces can also cause installation problems.
Check the following:
- Remove any dust or hair blocking the mounting surface.
- Confirm that the holder and mop pad are compatible with the exact robot model.
- Make sure the mop fabric is attached evenly and has not folded beneath the disc.
- Inspect the holder for damaged clips, warped edges, or missing attachment material.
- Reinstall the assembly and check whether the detection alert disappears.
If the machine uses automatic installation, allow it to complete the normal attachment process before manually adjusting the holder.
A mop that is attached but uneven may need repositioning or replacement. Do not continue mopping with a holder that repeatedly detaches.
Reset The Robot
Resetting can help when the mop holder is physically secure but the robot continues displaying a detection error. However, a factory reset should come after cleaning, reinstallation, and a normal restart.
Before resetting, check the robot’s app for active error messages and confirm that the problem is not caused by its selected cleaning mode.
If your manufacturer’s troubleshooting guide specifically recommends a factory reset, follow that model’s instructions. Avoid using button combinations intended for another robot.
After the reset, complete any required setup, reinstall the mop holder, and test detection again.
If the same error returns immediately, repeated resets are unlikely to repair a damaged magnetic mount, sensor, or electrical component.
Inspect Magnetic Contact
If basic troubleshooting fails, inspect the magnetic mounting interface on models that use it. Weak retention, corrosion, or a damaged attachment point may prevent the holder from remaining in place.
Check the holder and robot for these signs:
- Cracks, warped plastic, or worn mounting edges.
- Corrosion or contamination around exposed magnetic attachment surfaces.
- A holder that will not stay centered when fitted correctly.
- One mop holder fitting differently from the other, where the model uses two discs.
- Detachment during cleaning despite clear floors and correct installation.
On models with automatic mop removal, remember that a holder left in the dock is not always a failure. Roborock’s automatic mop mount detachment documentation explains that supported robots can remove the mop before cleaning carpets.
If your model is supposed to keep the mop attached but cannot do so, avoid forcing the assembly into place.
Contact manufacturer support when the holder remains loose, will not register, or repeatedly falls off after the recommended checks.
Provide the robot’s model number, exact error message, and a photo or short video showing the problem. This helps support determine whether you need a replacement holder, mop disc, or hardware service.
Key Takeaways
- A loose mop cloth is not the same problem as a loose mop pad holder. Check both connections separately.
- Some powered magnetic mounts cannot attach normally until the robot has switched on.
- Carpets, raised thresholds, and loose cables can pull off an otherwise secure holder.
- A detection error may persist even when the holder appears physically attached.
- Factory resets should come after basic checks because saved settings may be lost.
Frequently Asked Questions
My Roborock Mop Pad Keeps Falling Off. What Can I Do to Fix This?
Check whether the mop cloth is coming off its holder or the entire holder is detaching. Reattach the cloth evenly and inspect the mounting clips, slots, and attachment surfaces. Clean away debris and replace damaged parts. Follow your model’s instructions because Roborock mop attachment systems vary.
What Are the Most Common Problems With Robot Vacuums?
Common robot vacuum problems include poor navigation, dirty sensors, weak suction, clogged brushes, battery issues, and app connection errors. Mopping models can also experience water flow problems, loose mop pads, or holder detection failures. Regular cleaning and timely replacement of worn components help prevent many of these issues.
My Dreame Mop Pads Keep Falling Off. How Can I Fix This?
Check that the mop pads and holders are installed correctly and that the attachment surfaces are clean. On supported magnetic models, install the holders while the robot is powered on. Keep the robot away from troublesome thresholds and carpets during mopping. Replace worn attachment parts if the connection remains loose.
How to Install Roborock Mop Pad?
Attach the mop cloth flat against its holder, then install the holder using the mounting method specified for your Roborock model. For example, the S7 VibraRise mount slides into place until it clicks. Other models use different attachments. Make sure the cloth is secure and the holder sits evenly before mopping.
Conclusion
A loose or undetected robot vacuum mop pad holder often comes down to misalignment, trapped debris, worn attachment surfaces, or an installation method that does not match the model.
Start with cleaning and correct reinstallation. Then check the magnetic connection where applicable, restart the robot, and test it on a clear floor.
In one case, a holder that wobbled like a loose hinge was restored after cleaning and reinstallation. A final restart and test run confirmed the fix, with no further mop-detection errors appearing. If your holder still slips or fails detection after these checks, seek manufacturer support rather than forcing the assembly.
Sources
- Roborock S7 User Manual: VibraRise mop cloth installation, sliding mount, and locking mechanism.
- Roborock QV/QR/Qrevo Series User Manual: Mop cloth mounts, hook-and-loop pads, and cleaning guidance.
- Dreame X50 Ultra Complete Mop Pad Holder Troubleshooting: Magnetic installation, hook-and-loop attachment, and restart checks.
- Dreame X40 Ultra Complete Mop Pad Holder Issues: Uneven installation, dock detachment, and restricted mopping areas.
- Dreame Roller Series Mop Pad Holder Detection: Cleaning mounting surfaces and resolving detection errors.
- Dreame X60 Pro Ultra Matrix Troubleshooting: Powered mounting mechanism, mop attachment, and floor obstacles.
- Roborock Automatic Mop Mount Detachment: Automatic mop removal before carpet cleaning.
- Dreame L60 Ultra Operation and Maintenance Guide: System reset behavior and possible loss of saved settings.